
Your brass chandelier is more than just a light fixture—it’s a stunning centerpiece that adds charm and warmth to your space. But over time, dust and tarnish can dull its shine, making it look tired and neglected.
You might think cleaning it is complicated or risky, but it doesn’t have to be. In this guide, you’ll discover simple, effective steps to restore your brass chandelier’s sparkle safely and quickly. Keep reading, and you’ll learn how to bring back that brilliant glow without any hassle.
Gathering Supplies
Before you start cleaning your brass chandelier, gathering the right supplies sets the stage for a smooth and effective process. Having everything within reach saves time and prevents interruptions. Plus, using proper materials protects your fixture from damage and helps you achieve a brilliant shine.
Essential Cleaning Materials
Choose gentle yet effective cleaning agents specifically designed for brass. Harsh chemicals can strip the finish, so look for mild soap or a brass cleaner labeled safe for delicate surfaces.
- Soft microfiber cloths to avoid scratches
- Mild dish soap or a commercial brass cleaner
- Warm water in a bucket or bowl
- Old toothbrush or soft-bristle brush for detailed areas
- Lint-free towels for drying
Do you have old cloths that you can dedicate to this task? It’s best to keep cleaning materials separate from everyday ones to avoid cross-contamination or damage.
Safety Gear To Use
Protecting yourself while cleaning is just as important as caring for your chandelier. Brass cleaners and dust can irritate your skin and eyes, so take precautions.
- Rubber gloves to shield your hands from chemicals
- Safety goggles to prevent splashes in your eyes
- Mask to avoid inhaling dust and fumes
Have you ever underestimated the importance of gloves during a cleaning task? Wearing them not only safeguards your skin but also improves your grip on slippery parts.
Preparing The Chandelier
Preparing your brass chandelier properly is the key to a safe and effective cleaning session. Taking the right steps before you start ensures you protect both yourself and the fixture. It also makes the actual cleaning much easier and more thorough.
Switching Off Power
First, make sure the power to the chandelier is completely turned off. This is a safety must—no shortcuts. You can do this by switching off the circuit breaker or removing the fuse that controls the chandelier’s electricity.
Double-check that the chandelier’s lights do not turn on when you flip the switch. This simple precaution prevents electric shocks and allows you to clean without worry.
Removing Dust And Debris
Once the power is off, gently remove any loose dust and debris. Use a soft, dry microfiber cloth or a feather duster to avoid scratching the brass surface. You want to clear away the surface dirt before introducing any moisture or cleaning solutions.
For hard-to-reach places, a soft brush or a can of compressed air can work wonders. Have you ever noticed how much dust hides inside intricate designs? Taking the time here pays off when you see the chandelier shine afterward.
Cleaning Methods
Use a soft cloth and mild soap to gently clean the brass chandelier. Avoid harsh chemicals to protect its shine and detail. Dry carefully to prevent water spots and keep it looking bright.
Cleaning a brass chandelier can seem daunting. But with the right methods, it’s manageable. Regular cleaning maintains its shine and elegance. Explore different ways to clean effectively.Using A Mild Soap Solution
A mild soap solution is gentle on brass. Mix warm water with a few drops of dish soap. Use a soft cloth to wipe each part. Ensure the cloth is damp, not soaking. Rinse with another cloth dampened in clean water. Dry thoroughly with a soft towel. This prevents water spots and tarnish.Polishing With Brass Cleaner
Choose a brass cleaner suitable for your chandelier. Read instructions on the product carefully. Apply a small amount to a soft cloth. Gently rub the surface in circular motions. Focus on any tarnished areas. Buff with a clean, dry cloth. This brings out the chandelier’s original shine.Natural Cleaning Alternatives
Natural alternatives are eco-friendly. Create a paste with baking soda and lemon juice. Apply it to the brass with a soft cloth. Let it sit for a few minutes. Rinse with warm water and dry with a towel. Vinegar and flour can also be used. Mix them into a paste for effective cleaning.
Credit: lustria.com
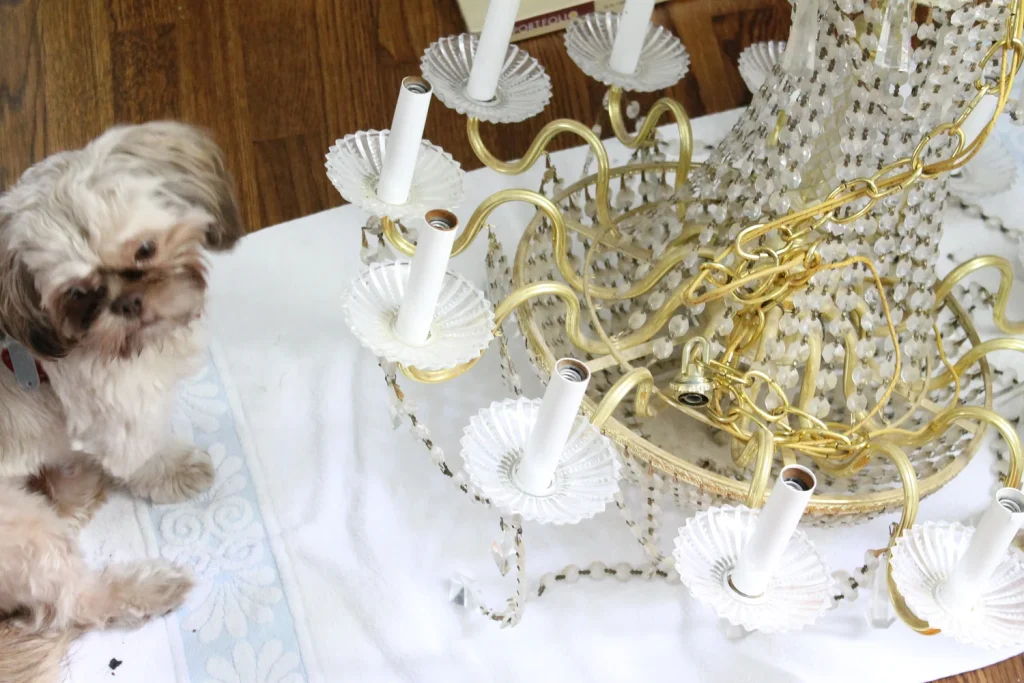
Detailed Cleaning Steps
Cleaning a brass chandelier requires care and attention to detail. Each part needs special handling to keep the shine bright. Follow these detailed steps to clean your chandelier safely and effectively.
Cleaning Each Part Separately
Start by turning off the power and removing the chandelier’s parts carefully. Take down glass shades, bulbs, and any detachable brass pieces. Clean glass parts with warm soapy water and a soft cloth. For brass components, use a mild soap solution and a soft brush to remove dust and dirt. Avoid soaking brass parts for too long to prevent damage. Rinse with clean water and set each piece aside to dry.
Dealing With Stubborn Tarnish
Tarnish can dull the brass surface. Mix equal parts of lemon juice and baking soda into a paste. Apply the paste gently with a soft cloth on tarnished areas. Let it sit for a few minutes but do not let it dry completely. Rub the tarnish away using circular motions. Rinse with warm water and dry immediately to stop further tarnishing. For deep tarnish, repeat the process carefully.
Drying And Buffing
Dry each piece thoroughly with a clean, soft towel. Avoid air drying, which can leave water spots. Once dry, buff the brass parts using a dry microfiber cloth. Use small, circular strokes to bring out the natural shine. For extra brightness, apply a small amount of brass polish and buff again. Reassemble the chandelier only after all parts are completely dry and polished.
Reassembling And Final Touches
Once your brass chandelier is clean and gleaming, it’s time to put everything back together and give it those final touches. This stage requires patience and care to avoid damaging delicate parts and to ensure the fixture looks flawless. Taking your time here will pay off with a stunning result that lights up your room beautifully.
Reattaching Parts Safely
Start by organizing all the pieces you removed earlier. Lay them out in the order they will go back on the chandelier. This simple step helps prevent confusion and lost parts.
Use a soft cloth to handle each piece to avoid leaving fingerprints. When reattaching crystals or glass components, check the hooks and fasteners for any wear or damage. Replacing a worn hook now can save you from a costly fall later.
Secure all screws and nuts firmly but avoid overtightening; brass can be soft and may strip easily. If you’re unsure about any connections, take a photo before final tightening to compare and ensure everything matches the original setup.
Restoring Shine
After reassembling, step back and see if the brass looks evenly polished. Sometimes cleaning can leave spots that need a quick touch-up. Use a small amount of brass polish on a microfiber cloth and gently buff these areas.
Did you know that a tiny drop of olive oil on a cloth can enhance the brass’s natural glow? It’s a trick I’ve used to bring out a warm, rich shine without harsh chemicals.
Finish by wiping the entire chandelier with a clean, dry cloth to remove any leftover residue. This final step ensures your chandelier sparkles under the light, ready to impress every guest who enters your home.

Credit: lustria.com
Maintenance Tips
Maintaining a brass chandelier keeps it shining and beautiful for years. Regular care prevents dullness and damage. Follow simple steps to protect your investment and enjoy its warm glow daily.
Regular Dusting
Dust settles quickly on brass surfaces. Use a soft cloth or feather duster to remove dust gently. Dust your chandelier weekly to avoid buildup. Avoid rough materials that can scratch the brass. Light, frequent dusting keeps the chandelier bright.
Avoiding Common Damage
Brass is sensitive to harsh chemicals and moisture. Do not use abrasive cleaners or strong chemicals. Avoid water sitting on the surface to prevent tarnish. Handle the chandelier carefully to prevent bending or breaking parts. Keep it away from areas with high humidity or smoke.
Scheduling Deep Cleanings
Deep cleaning removes grime and restores shine. Plan a thorough cleaning every six months or as needed. Use a mild soap and warm water solution with a soft cloth. Dry each part completely before reassembling. Consider professional cleaning for very delicate or large chandeliers.

Credit: butlerlightingusa.com
Frequently Asked Questions
How Do I Safely Clean A Brass Chandelier?
Turn off power before cleaning. Use a soft cloth with mild soap and water. Avoid harsh chemicals to prevent damage. Dry thoroughly to prevent water spots and tarnish.
What Household Items Clean Brass Chandeliers Best?
Lemon juice, vinegar, and baking soda work well. Mix lemon juice and baking soda to form a paste. Apply gently with a cloth, then rinse and dry.
How Often Should I Clean My Brass Chandelier?
Clean your brass chandelier every 3 to 6 months. Frequent dusting helps maintain shine. Deep cleaning depends on dust and tarnish buildup.
Can I Use Commercial Brass Cleaner On Chandeliers?
Yes, but choose a non-abrasive brass cleaner. Test on a small area first. Follow product instructions carefully to avoid damage or discoloration.
Conclusion
Cleaning a brass chandelier keeps it bright and beautiful. Use gentle cleaners and soft cloths for best results. Regular care stops dust and grime build-up. Take your time and be careful with each part. A clean chandelier adds charm to any room.
Small efforts bring lasting shine and elegance. Enjoy the warm glow from your refreshed fixture. Keep this routine to protect your chandelier’s beauty. Simple steps can make a big difference.


