
Are you ready to transform your walls with stunning 3D panels but worried about cutting them perfectly at home? You don’t need fancy tools or professional help to get crisp, clean cuts that fit your space just right.
With the right technique and a home saw, you can achieve professional-looking results that will make your room stand out. In this guide, you’ll discover simple, step-by-step tips that make cutting 3D wall panels easy and stress-free. Keep reading to unlock the secrets that will save you time, money, and frustration on your next home project.

Credit: www.coowinwpc.com
Choosing The Right Saw
Choosing the right saw is crucial for cutting 3D wall panels accurately and safely. The texture and thickness of these panels demand a tool that can handle intricate cuts without damaging the material. Picking the wrong saw can lead to rough edges or even ruin your panel, which wastes both time and money.
Types Of Saws For 3d Panels
Not every saw is built for the unique challenge of 3D wall panels. Here are some common types you should consider:
- Jigsaw:Great for curved and detailed cuts. It’s easy to control and perfect for beginners.
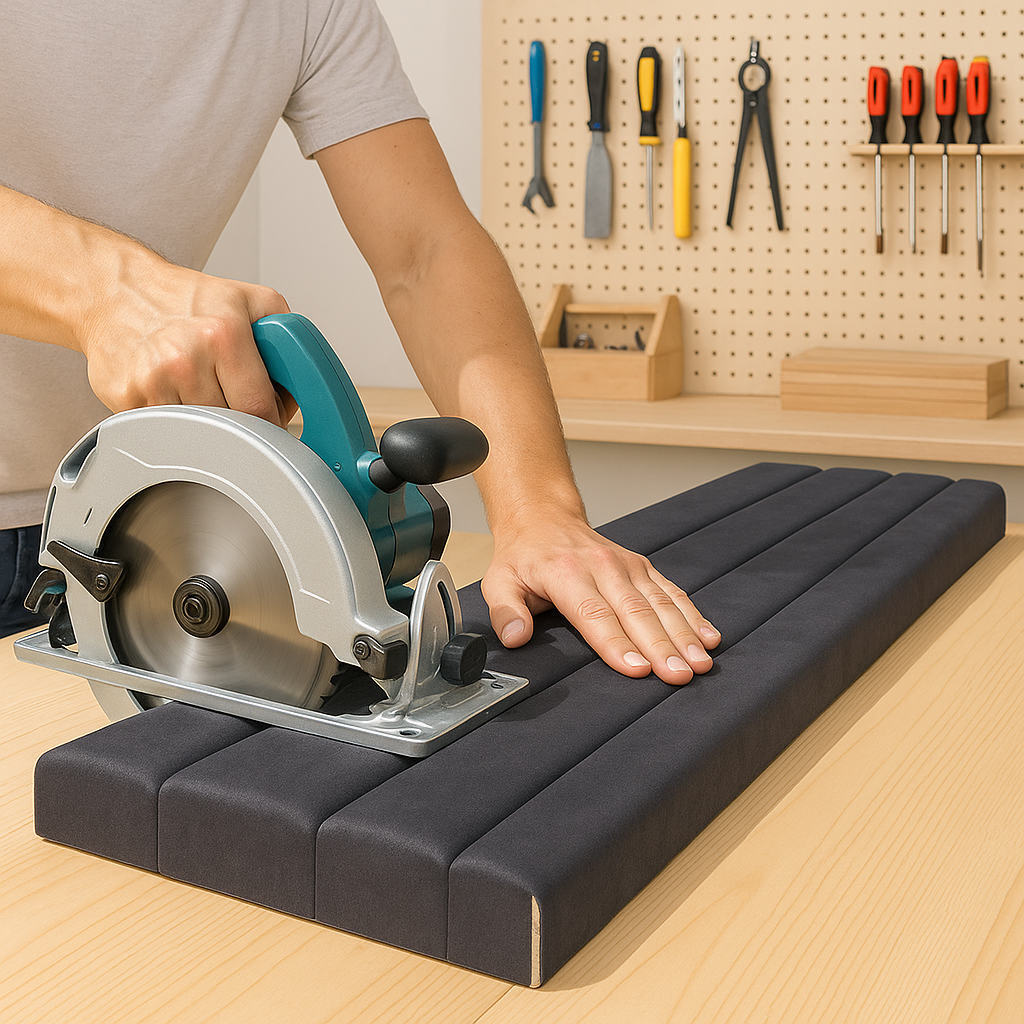
- Circular Saw:Best for straight cuts on thicker panels. It offers speed but requires steady hands.
- Utility Knife:Suitable for thinner foam-based panels. It’s simple but demands patience to get clean cuts.
- Table Saw:Ideal if you’re working with multiple panels and need precise, repeatable cuts.
Think about the complexity of your design and the thickness of your panels before choosing your saw. Could a jigsaw’s flexibility make your job easier? Or would a circular saw’s power save you time?
Blade Selection Tips
The blade you pick can make or break your project. A blade that’s not suited for your panel material will cause chipping or uneven cuts.
Here’s what to keep in mind when selecting a blade:
- Tooth Count:Higher tooth count blades create smoother edges. Use blades with at least 60 teeth for delicate panels.
- Blade Material:Carbide-tipped blades last longer and cut cleaner through dense materials.
- Blade Type:Choose fine-toothed blades for foam or composite panels and standard blades for wood-based panels.
Have you ever struggled with rough edges despite using the right saw? Often, switching to a blade with more teeth or a different material can solve that problem quickly.
Preparing The Workspace
Preparing the workspace is crucial before cutting 3D wall panels with a home saw. A clean and organized area helps you work safely and efficiently. It also prevents mistakes and accidents during the cutting process.
Safety Gear Essentials
Always wear proper safety gear to protect yourself. Use safety goggles to shield your eyes from dust and debris. Wear a dust mask to avoid inhaling particles. Gloves protect your hands from sharp edges and splinters. Ear protection helps reduce noise from the saw. Dress in close-fitting clothes to prevent catching on the saw blade.
Setting Up A Stable Cutting Area
Choose a flat and sturdy surface for cutting. Use a workbench or a strong table. Secure the panel firmly with clamps to stop it from moving. Keep the saw and tools within easy reach. Ensure good lighting to see the cutting lines clearly. Clear the area of any clutter or obstacles. This setup reduces errors and keeps you safe while working.
Measuring And Marking Panels
Measuring and marking your 3D wall panels accurately is crucial for a perfect fit and an aesthetically pleasing finish. Missteps here can lead to wasted materials and unsightly gaps. By honing your skills in precise measurement and marking, you set the stage for a seamless installation that will showcase your DIY prowess.
Accurate Measurement Techniques
Start with a reliable tape measure. Ensure it’s taut and straight to avoid any slack that might skew your results. Use a spirit level to check for any uneven surfaces, as these can impact your measurements.
Always measure twice. This age-old advice prevents costly errors. Record your measurements immediately to avoid mixing up numbers later on.
If you’re working with multiple panels, consider using a laser measure for increased precision. It offers quick, accurate readings and is especially useful in larger spaces.
Marking Guidelines For Precision
For marking, a pencil is your best friend. It allows for easy erasure of any mistakes. Keep your marks light and precise, directly on the panel where cuts will be made.
Use a straightedge or a ruler to ensure your lines are perfectly straight. This is vital for clean cuts and professional-looking edges.
Consider color-coded markers if you’re working with various panel sizes or designs. This visual aid can help you quickly identify which panels go where, keeping your project organized and efficient.
Have you ever overlooked a crucial measurement or mark? Share your experiences and tips in the comments to help others avoid similar pitfalls!
Cutting Techniques
Cutting 3D wall panels at home requires specific techniques to achieve clean and precise results. Understanding the right cutting methods helps reduce waste and ensures panels fit perfectly. The type of cut depends on the design and placement of the panels. Using the correct tools and approach makes the process smoother and safer.
Straight Cut Methods
Straight cuts are the most common and simplest type of cuts for 3D wall panels. Use a fine-toothed hand saw or a utility knife for thinner panels. Measure and mark the panel carefully before cutting. Always cut on a stable surface to avoid mistakes. For thicker panels, a power saw with a fine blade works best. Move the saw slowly and steadily for a clean edge. Sand the cut edges lightly to smooth any roughness.
Curved And Intricate Cuts
Curved or detailed cuts need more precision and control. A jigsaw with a fine blade is ideal for curved shapes. Mark the design on the panel using a pencil or template. Cut slowly, following the lines closely to keep accuracy. For very small or delicate details, use a craft knife with multiple light passes. Avoid forcing the blade to prevent damage. Practice on a scrap panel to gain confidence before cutting the final piece.
Handling And Finishing Edges
Handling and finishing the edges of 3D wall panels after cutting with a home saw is crucial to achieving a polished, professional look. Rough or jagged edges can ruin the visual impact of your panels and may even cause installation issues. Paying close attention to how you smooth and protect the edges ensures your work stands out for all the right reasons.
Sanding And Smoothing Cut Edges
After cutting, you’ll notice the edges might feel rough or uneven. Use fine-grit sandpaper to gently smooth these areas. Move the sandpaper in one direction rather than back and forth to avoid damaging the panel’s surface.
For best results, try sanding with a sanding block or a small hand sander for better control. This helps maintain a consistent finish and prevents accidental gouges. Have you ever tried sanding without a block? It’s easy to create uneven spots that catch the eye.
If your cut edges still feel too sharp or uneven, lightly tap them with a small file. This step can help shape the edges before the final sanding, making the process quicker and more effective. Always clean dust off with a soft cloth before moving on to painting or sealing.
Dealing With Panel Delicacy
3D wall panels can be surprisingly delicate, especially around the edges where cuts are made. Handle them gently after cutting to avoid cracking or chipping. Holding the panel by its center rather than the edges reduces stress on fragile areas.
Consider applying a clear sealant or edge protector to prevent damage during installation. This extra layer shields the edges and adds durability without altering the panel’s appearance. Have you thought about how much rough handling could affect your panels before they’re even up on the wall?
When transporting cut panels, use padded surfaces or wrap edges with soft cloth. Even small knocks can cause imperfections that are hard to fix later. Taking these precautions saves time and money, and helps keep your walls looking flawless.

Credit: dundeedeco.com
Common Mistakes To Avoid
Cutting 3D wall panels with a home saw can be tricky. Many beginners make common mistakes that affect the final look and safety. Avoiding these errors ensures smooth, clean cuts and protects you from harm. Focus on precision and safety at every step.
Cutting Errors
One common error is rushing the cut. Moving the saw too fast causes rough edges and uneven lines. Always cut slowly and steadily for smooth results.
Not measuring twice is another mistake. Incorrect measurements lead to wasted panels and poor fit. Use a tape measure and mark clearly before cutting.
Using the wrong blade damages the panel surface. Choose a fine-toothed blade designed for soft materials. This prevents cracking and splintering during cutting.
Failing to secure the panel can cause slipping. Clamp the panel firmly to the workbench before cutting. Loose panels cause inaccurate cuts and increase risk of injury.
Safety Oversights
Ignoring safety gear is dangerous. Always wear safety glasses and a dust mask. Panels create dust that irritates eyes and lungs.
Using a dull blade forces more pressure. This can cause kickback or loss of control. Replace blades regularly for safer cutting.
Not unplugging the saw when changing blades or adjusting settings risks accidents. Always disconnect power first.
Cutting in a cluttered workspace leads to trips and falls. Keep the area clean and well-lit to avoid accidents.
Maintenance Tips For Your Saw
Proper maintenance keeps your home saw working smoothly and safely. Regular care saves money and time. It also extends the tool’s life. Here are key tips to maintain your saw for cutting 3D wall panels.
Blade Care
Keep the blade clean and sharp for precise cuts. Remove any resin or dust buildup after each use. Use a soft brush or cloth for cleaning. Avoid harsh chemicals that can damage the blade.
Check the blade for dullness or damage regularly. Replace it if you notice any cracks or missing teeth. A sharp blade cuts cleaner and reduces the risk of accidents.
Tool Storage
Store your saw in a dry, safe place to prevent rust and damage. Use a protective case or cover to keep dust off the tool. Avoid placing heavy objects on top of the saw.
Keep the saw away from children and pets. Organize your workspace to reduce clutter and protect your tools. Proper storage helps your saw stay ready for the next project.

Credit: dundeedeco.com
Frequently Asked Questions
How Do You Safely Cut 3d Wall Panels At Home?
Use a fine-tooth saw or electric saw with a blade suitable for the panel material. Wear safety goggles and gloves. Measure and mark the cut line accurately before cutting slowly to avoid chipping or damaging the panel surface.
What Type Of Saw Works Best For Cutting 3d Wall Panels?
A fine-tooth hand saw or a jigsaw with a fine blade works best. These saws provide clean cuts on delicate 3D panels without causing cracks or rough edges. Avoid using rough blades that can damage the panel texture.
How To Measure 3d Wall Panels For Accurate Cutting?
Measure the wall space carefully using a tape measure. Mark the panel with a pencil along the cutting line. Double-check measurements to ensure a perfect fit and avoid wasting material or creating uneven edges during cutting.
Can I Use A Home Saw To Cut Thick 3d Wall Panels?
Yes, most home saws can cut thick panels if they have the right blade. Use a saw with a strong motor and a blade designed for dense materials. Cut slowly to maintain panel integrity and prevent damage.
Conclusion
Cutting 3D wall panels at home saw is simple with the right steps. Always measure twice to avoid mistakes. Use sharp blades for clean, smooth cuts. Keep safety gear on to protect yourself. Take your time and work carefully. This way, your walls will look neat and stylish.
Enjoy creating a fresh look in your space.


