
Are you tired of clutter taking over your space? Putting up shelves on your wall can be the perfect solution to organize your things and add style to any room.
But if you’ve never done it before, the process might seem tricky or overwhelming. Don’t worry—this guide will walk you through every step, making it simple and stress-free. By the end, you’ll know exactly how to hang shelves that are sturdy, level, and look great.
Ready to transform your wall and your space? Let’s get started!

Credit: www.youtube.com
Choosing The Right Shelves
Choosing the right shelves is key to a successful wall installation. The right choice depends on your needs and room style. Shelves should hold your items safely and look good in the space.
Consider the type, material, and weight capacity of shelves before buying. These factors affect how shelves perform and how long they last. This section helps you pick shelves that fit your home and use.
Types Of Shelves
- Floating shelves: No visible brackets, sleek and modern look.
- Bracket shelves: Supported by metal or wood brackets, very strong.
- Corner shelves: Fit into corners, great for small spaces.
- Built-in shelves: Fixed into the wall, custom and sturdy.
- Adjustable shelves: Can change height, flexible for different items.
Materials And Finishes
- Wood: Classic and warm, available in many finishes.
- Metal: Strong and industrial, good for heavy items.
- Glass: Light and elegant, best for decoration.
- Plastic: Lightweight and affordable, suited for light use.
- Painted or stained finishes: Protect shelves and match room colors.
Weight Capacity Considerations
Check the maximum weight each shelf can hold. Heavy items need strong shelves and secure mounting.
Wall type affects weight capacity. Drywall holds less weight than studs or concrete.
- Use wall anchors or studs for heavy shelves.
- Spread weight evenly across the shelf.
- Consider shelf thickness and bracket strength.
Gathering Tools And Materials
Before you start putting up shelves on your wall, gathering the right tools and materials is key to a smooth project. Having everything on hand saves time and reduces frustration. It also helps you avoid multiple trips to the hardware store once you’re mid-way through the task.
Essential Tools List
Start by collecting the basic tools that every shelf installation needs. A cordless drill or screwdriver will be your best friend for making holes and securing screws quickly.
- Drill or screwdriver:Choose the one you’re most comfortable with.
- Level:To ensure your shelf sits straight and looks professional.
- Measuring tape:Accurate measurements prevent crooked shelves and wasted materials.
- Stud finder:This tool helps you locate the wall studs for stronger support.
- Pencil:For marking where you’ll drill or place brackets.
- Screws and wall anchors:Select according to your wall type and shelf weight.
Have you ever started a project only to realize you’re missing a crucial tool? Avoid that by checking this list twice.
Safety Gear
Safety often gets overlooked but should never be ignored. Protect your eyes and hands to avoid injury from flying debris or sharp edges.
- Safety goggles:Shield your eyes while drilling or hammering.
- Work gloves:Protect your hands from splinters and sharp screws.
- Dust mask:Useful when drilling into drywall to avoid inhaling dust.
Wearing safety gear might seem like a hassle, but it keeps you safe and confident during the project. Isn’t your well-being worth those few extra seconds of preparation?
Optional Accessories
While not mandatory, some accessories can make the process easier and the results better. Consider adding these items to your toolkit if you want a polished finish or extra convenience.
- Painter’s tape:Helps mark measurements cleanly and protects walls from pencil marks or paint.
- Stud finder with deep scanning:Ideal for thicker walls or uneven surfaces.
- Magnetic screwdriver bit:Keeps screws steady and reduces drops.
- Carpenter’s square:Ensures your shelf brackets are perfectly aligned.
Think about how these tools could reduce mistakes or speed up your work. Sometimes a small extra tool saves a lot of hassle.
Preparing The Wall
Clear the wall surface and remove any nails or screws. Check for studs using a stud finder to ensure strong support. Wipe the area clean and let it dry before drilling.
Putting up shelves on a wall can transform a room by adding functionality and style. However, before you start drilling holes and mounting brackets, it’s crucial to prepare the wall properly. This preparation ensures that your shelves are secure and look professional. Let’s dive into the essential steps of preparing your wall for shelving.Locating Studs
Before you pick up your drill, find the studs in your wall. Studs provide the best support for your shelves, especially if you plan to store heavy items. Use a stud finder to locate these wooden beams behind the drywall. If you don’t have a stud finder, gently tap the wall and listen for a solid sound, indicating a stud. Mark these spots, as they will be your primary anchor points.Checking For Obstructions
Before drilling, ensure there are no hidden obstructions in the wall. This includes electrical wires and plumbing pipes. Accidentally hitting a wire or pipe can lead to costly repairs. Consider using a wire and pipe detector, which can alert you to potential hazards. This step is crucial, especially in kitchens and bathrooms where plumbing is prevalent.Marking Shelf Positions
Decide on the height and positioning of your shelves. Use a pencil and a level to mark where the brackets will go. Accurate marking prevents crooked shelves and ensures a balanced look. Take into account the items you plan to store. For instance, if you’re displaying books, ensure there’s enough space between shelves for different book sizes. This foresight saves you from having to redo the work later.Installing Shelf Brackets
Installing shelf brackets is key to a strong, steady shelf. Proper bracket installation supports weight and keeps shelves level. Follow these steps carefully to secure your brackets well.
Measuring And Leveling
Start by choosing the height for your shelf. Use a tape measure to mark bracket spots on the wall. Check distance between marks matches the bracket length.
Use a level to draw a straight line connecting the marks. This line ensures your brackets sit perfectly horizontal. Double-check measurements before drilling.
Drilling Pilot Holes
Use a drill bit smaller than the screws to make pilot holes. Drill holes at the marked points on the wall. This prevents the wall from cracking and makes screwing easier.
Make sure holes go deep enough for the wall anchors or screws. Use a stud finder to drill into studs for better support if possible.
Securing Brackets
- Place the bracket over the pilot holes.
- Insert screws through bracket holes into the wall.
- Tighten screws firmly with a screwdriver or drill.
- Check bracket for stability by gently shaking it.
Repeat for the second bracket. Use the level again to confirm both brackets are even. Now your brackets are ready for the shelf board.
Mounting The Shelves
Mounting the shelves is the most exciting part of the project. This step transforms your wall into a functional space. Careful placement and secure fixing ensure the shelves hold weight safely. Follow each step to achieve a sturdy and neat finish.
Placing Shelves On Brackets
Start by aligning the shelf with the brackets on the wall. Gently place the shelf so it rests evenly on all bracket arms. Check that the shelf sits straight and does not tilt forward or backward. Make sure the brackets are fully supporting the shelf’s length.
Securing Shelves In Place
Use screws to fix the shelf onto the brackets. Most brackets have holes for screws underneath the shelf. Insert screws through these holes and tighten them with a screwdriver. This prevents the shelf from slipping or moving under weight. Double-check all screws are tight but avoid over-tightening, which can damage the shelf.
Final Adjustments
Look at the shelf from different angles to ensure it is level. Use a spirit level for accuracy if available. Adjust screws slightly if the shelf tilts or feels unstable. Clean the shelf surface and the wall area around it. Your shelves are now ready to hold your items safely and stylishly.

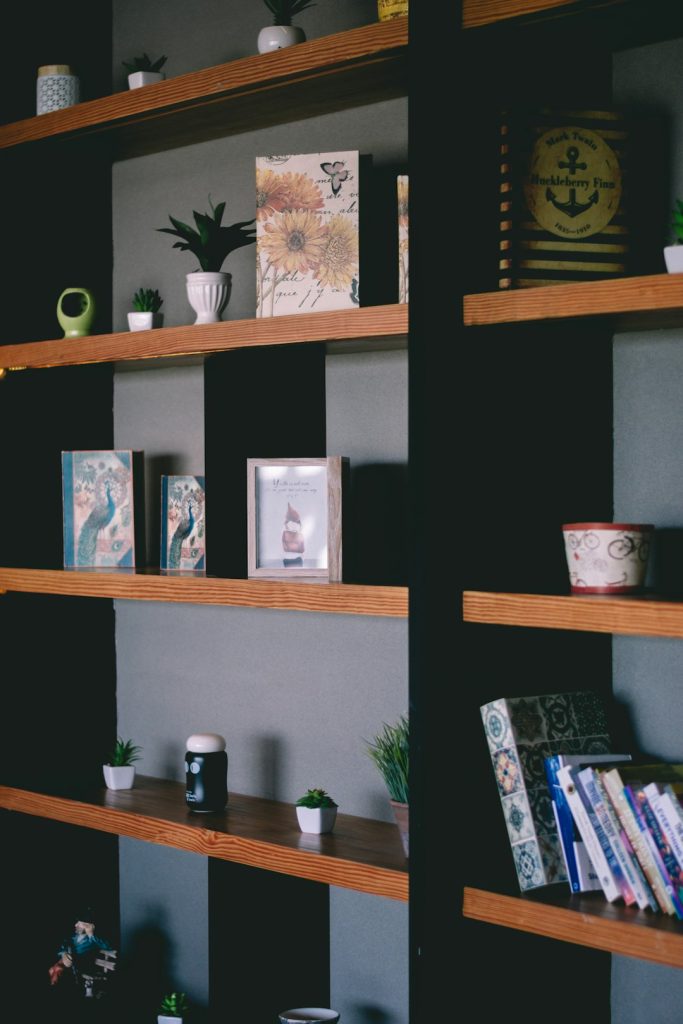
Credit: shelfology.com
Tips For Long-lasting Shelves
Ensuring your shelves last for years requires more than just good installation. Paying attention to how you use and care for them can make a huge difference. Let’s dive into some practical tips that keep your shelves sturdy and looking great over time.
Avoiding Overloading
It’s tempting to fill shelves with every item you own, but weight limits matter. Shelves can only support so much before they risk bending or falling.
Think about the type of wall and brackets you used. Are they designed for heavy books, or just light décor? Spreading weight evenly and sticking to recommended load limits protects your shelves from damage.
Have you ever seen a sagging shelf? That usually happens from overloading. Keep your shelves safe by rotating heavier items to stronger storage solutions.
Regular Maintenance
Checking your shelves regularly prevents small problems from becoming big ones. Tighten screws and brackets whenever you spot a wobble or looseness.
Dusting and cleaning help too. Dirt buildup can hide wear and tear, so keeping shelves clean makes spotting issues easier.
Ask yourself: When was the last time you inspected your shelves? A quick monthly check can save you from unexpected collapses.
Enhancing Aesthetics
Long-lasting shelves don’t have to look boring. Adding a fresh coat of paint or a protective finish can shield the wood from moisture and scratches.
Consider lining shelves with decorative paper or mats. This not only protects surfaces but adds personality to your space.
What’s one small change you could make today to keep your shelves both functional and visually appealing? Sometimes, a simple update keeps your shelves feeling new and cared for.

Credit: chill-house.co.uk
Frequently Asked Questions
How Do I Find Studs For Wall Shelves?
Use a stud finder to locate studs behind drywall. Mark their positions with a pencil. Shelves anchored to studs hold more weight safely.
What Tools Are Essential For Putting Up Shelves?
You need a drill, level, measuring tape, screwdriver, and wall anchors. These tools ensure shelves are straight and securely mounted.
Can I Install Shelves On Drywall Without Studs?
Yes, use heavy-duty wall anchors or toggle bolts. They provide strong support where studs are unavailable.
How High Should I Place Wall Shelves?
Place shelves at eye level or slightly higher for easy access. Consider the items you plan to store or display.
Conclusion
Putting up shelves on a wall can be simple and quick. Follow the steps carefully to ensure shelves hold well. Use the right tools and check for studs first. Measure twice, drill once. Secure shelves tightly to avoid accidents. Enjoy extra space for your books, decor, or storage.
Small projects like this boost your home’s look and function. Try it yourself and see the difference. Easy, useful, and satisfying.


