
Are you looking to add a touch of magic to your walls without much effort? Decorating your space with butterfly stickers is a simple and beautiful way to transform any room.
Imagine vibrant butterflies fluttering across your walls, bringing life and color instantly. You’ll discover easy tips and creative ideas to make your butterfly wall decoration stand out. Keep reading, and you’ll learn how to turn your walls into a stunning, personalized masterpiece that reflects your style perfectly.

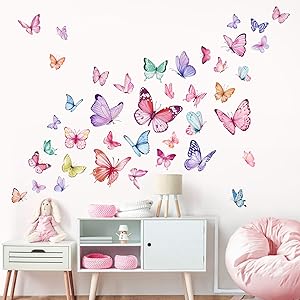
Credit: www.amazon.in
Choosing The Right Butterfly Stickers
Choosing the right butterfly stickers is essential to create a wall design that truly stands out. It’s not just about picking pretty butterflies; the material, color, and size all affect how the stickers look and last on your wall. Think about your room’s style and what mood you want to set before making your choice.
Material And Finish Options
Butterfly stickers come in different materials like vinyl, paper, and fabric. Vinyl stickers are durable and easy to clean, making them perfect for high-traffic areas or kids’ rooms. Paper stickers might be less durable but offer a matte finish that feels more natural.
Finish matters too. Glossy finishes add a shiny look that catches light, while matte finishes reduce glare for a softer effect. Have you ever noticed how a glossy sticker can look almost like a tiny piece of art on your wall? That shine can be a real eye-catcher.
Color Schemes And Patterns
Colors set the tone for your wall. Bright, vivid butterfly stickers bring energy and playfulness, ideal for a lively space like a playroom. Softer pastels create a calming atmosphere, perfect for bedrooms or reading nooks.
Patterns also add personality. Some butterflies have realistic details, while others are abstract or geometric. Mixing patterned butterflies with solid colors can create a dynamic look that keeps your eyes moving across the wall. What colors in your room could you highlight or complement with butterfly stickers?
Sizes And Shapes
Butterfly stickers aren’t one-size-fits-all. They come in tiny, delicate shapes and large, dramatic ones. Smaller butterflies work well for clustered designs or borders, while larger butterflies can serve as focal points.
Consider the wall size and furniture placement. Large stickers on a small wall may overwhelm the space, but on a bigger wall, they can create a stunning impact. How would you balance different sizes to create depth and interest on your wall?

Credit: www.walmart.ca
Preparing Your Wall Surface
Preparing your wall surface is essential before decorating with butterfly stickers. A clean and smooth wall helps the stickers stick well and last longer. Taking time to prepare the wall also ensures the colors and shapes of the stickers look their best.
Cleaning And Smoothing
Start by removing dust and dirt from the wall. Use a soft cloth or sponge with mild soap and water. Avoid harsh cleaners that can damage the paint. After cleaning, let the wall dry completely.
Check the wall for bumps or rough spots. Lightly sand these areas with fine sandpaper to create a smooth surface. Wipe away dust after sanding to keep the wall clean.
Priming For Better Adhesion
Priming the wall helps the stickers stick better and prevents peeling. Use a primer suited for your wall type, such as latex or oil-based primer. Apply a thin, even coat with a brush or roller.
Allow the primer to dry fully before placing the stickers. This step creates a perfect base for the butterfly stickers, improving their durability and appearance.
Creative Layout Ideas
Create a lively wall by arranging butterfly stickers in a swirling pattern. Grouping them in clusters adds depth and a natural look. Experiment with sizes and colors for a charming and playful effect.
Decorating walls with butterfly stickers can transform any space. Their vibrant colors and delicate forms add charm and personality. Creative layout ideas can enhance the beauty of these stickers. Various patterns offer unique visual appeal. Here are some engaging ideas for arranging butterfly stickers on your walls.Symmetrical Patterns
Symmetrical patterns create balance and harmony. Align butterflies on either side of a central line. This method works well above headboards or sofas. Use identical butterfly sizes for a cohesive look. Choose colors that complement your room’s decor.Random Scattered Designs
Random scattered designs offer a lively and dynamic feel. Place butterflies at different angles for a natural look. This style mimics butterflies in nature. It suits casual spaces like bedrooms or playrooms. Use various sizes and colors for added interest.Butterfly Trails And Swarms
Butterfly trails create a sense of movement. Start with a few butterflies and gradually increase the number. Trails work well along staircases or hallways. Swarms create a dramatic effect. Cluster many butterflies in one area for impact. This style adds excitement to living rooms or entrances.Combining Stickers With Wall Art
Combining butterfly stickers with wall art can transform any plain wall into a captivating scene full of life and color. This approach lets you add depth and personality to your space without overwhelming it. By mixing different artistic elements, you can create a balanced and unique look that reflects your style.
Mixing With Paint And Murals
Pairing butterfly stickers with painted designs or murals creates a seamless blend of real and imagined beauty. You might paint soft clouds or floral patterns around the stickers to make them feel part of a larger picture. Have you tried painting tree branches extending from your stickers? It can make the butterflies appear to flutter naturally in your room.
Using subtle paint shades behind your stickers helps them stand out without clashing. You could also paint a gradient or ombre background to add a dreamy effect. This technique lets your wall tell a story that feels both artistic and personal.
Adding 3d Elements
Adding 3D elements near your butterfly stickers boosts the tactile and visual appeal of your wall. Small shelves with miniature plants or decorative butterflies made of paper or metal add dimension and interest. How about attaching lightweight fabric wings that gently move with air currents? It brings a surprising and delightful twist to your decor.
Consider using textured wallpaper or layering materials like wood or cork to complement the stickers. This approach invites you to interact with your wall, turning it into a conversation piece. It also adds depth without requiring a big investment or professional help.
Incorporating Nature Themes
Butterflies naturally connect to nature, so combining them with other nature-inspired wall art enhances their charm. You can add leaf or flower decals alongside your butterfly stickers to create a garden-like atmosphere. What if you include bird or insect stickers as well? It builds a lively ecosystem right on your wall.
Natural materials like woven baskets, wooden frames, or pressed flowers complement the theme beautifully. Using earthy tones and organic shapes in your wall art makes the butterflies feel right at home. This setup can make your room feel fresher and more inviting every day.
Tools And Techniques For Application
Applying butterfly stickers to your wall needs the right tools and careful techniques. These help the stickers stick well and look great. Using the right methods also avoids damage to your wall or the sticker itself. Here are some key tips to make your decoration process smooth and perfect.
Using Transfer Paper
Transfer paper helps move butterfly stickers without damage. Place the sticker on the transfer paper first. This keeps the sticker in place and makes it easier to position on the wall. Slowly peel the backing off the sticker. Press the transfer paper with the sticker against the wall. Then, gently remove the transfer paper. This leaves the sticker perfectly stuck on the wall.
Smoothing And Positioning Tips
Use a soft cloth or a plastic card to smooth the sticker. Start from the center and move outwards. This pushes out any air and helps the sticker stick flat. Position the sticker carefully before pressing down hard. Lightly tap the edges to avoid lifting. Adjust the sticker gently if needed before full adhesion.
Avoiding Air Bubbles
Air bubbles spoil the look of butterfly stickers. To avoid bubbles, apply stickers slowly. Press firmly while applying from one side to the other. Use a flat tool to push out bubbles as you go. If bubbles appear, gently lift the sticker and smooth it again. Small bubbles can be pushed out by pricking with a pin and pressing flat.

Credit: www.amazon.in
Decorating Different Room Styles
Decorating with butterfly stickers can transform any room, but the way you place them depends on the style and function of the space. Each room has its own vibe and purpose, so the stickers should enhance that atmosphere without overwhelming it. How can you use butterfly stickers to bring out the best in your rooms?
Kids’ Rooms And Play Areas
Butterfly stickers add a playful and colorful touch to kids’ rooms. Use bright, multicolored butterflies to spark imagination and joy. Arrange them in a fluttering pattern around the bed or above a reading nook to create a lively focal point.
Consider mixing sizes—larger butterflies can go on the main wall, while smaller ones decorate corners or shelves. This layering keeps the space dynamic and fun without cluttering it. Would your child enjoy helping you place the butterflies? It can be a fun activity that personalizes their space.
Living Room Accents
In the living room, butterfly stickers should complement the existing decor and color scheme. Choose stickers with softer or metallic tones to add elegance without distraction. Place them near framed photos or mirrors to create a subtle, artistic accent.
Try clustering butterflies near a light source so their shapes cast interesting shadows. This adds depth and a touch of sophistication. Have you thought about using the stickers to highlight architectural features like shelves or molding?
Bedroom Serenity
Butterflies can contribute to a calm, serene bedroom atmosphere when used thoughtfully. Opt for pastel or monochrome stickers to keep the mood restful. Position them around the headboard or along the ceiling corners to evoke a gentle, floating effect.
Balance is key—too many butterflies might feel busy and disrupt relaxation. Would you prefer a few large butterflies spaced out evenly or a subtle trail of small ones leading across the wall? Both approaches can create a peaceful vibe tailored to your taste.
Seasonal And Event Decorations
Seasonal and event decorations bring life and personality to your walls, especially when using butterfly stickers. These delicate designs can match the mood of any time of year or special occasion. Decorating your space with seasonal butterfly themes invites a fresh vibe and sparks joy every day you look at them.
Spring And Summer Themes
Spring and summer are perfect seasons for bright and colorful butterfly stickers. Choose stickers in shades of yellow, orange, and pink to mimic blooming flowers and sunny days.
Arrange butterflies to look like they’re fluttering around wall plants or window frames. Adding a few green leaf stickers can create a mini garden scene that feels alive and uplifting.
Have you tried placing butterflies in a spiral or wave pattern? This simple twist can make your wall art more dynamic and natural, as if butterflies are dancing in a breeze.
Party And Celebration Ideas
Butterfly stickers add a whimsical touch to parties and celebrations. Use them as part of a backdrop for birthdays, baby showers, or even weddings.
Mix butterfly stickers with balloons and banners for a cohesive look. Try creating a “butterfly shower” effect by clustering smaller stickers above a party table or gift area.
Consider using metallic or glittery butterfly stickers to catch the light and add sparkle. How might this subtle shine change the atmosphere of your celebration?
Holiday Adaptations
Butterfly stickers can work surprisingly well with holiday decorations. For Easter, place pastel-colored butterflies around egg decals or bunny figures to enhance the festive spirit.
During Halloween, opt for darker or orange butterfly stickers to complement pumpkins and spooky themes. Position them near candles or lanterns for an eerie yet beautiful effect.
For Christmas, combine butterfly stickers with holly leaves or snowflakes to create a unique winter scene. Using red and green butterflies can tie the look together without feeling overdone.
Maintaining And Removing Stickers
Keeping butterfly stickers fresh and intact on your wall takes some care. Dirt and dust can dull their colors. Removing stickers without damage preserves your wall and the sticker itself. Proper maintenance helps your decor stay beautiful for longer.
Cleaning Tips
Use a soft, dry cloth to gently wipe the stickers. Avoid water or cleaning sprays that can loosen the adhesive. For dust in corners, try a soft brush or a cotton swab. Clean the wall area around the stickers carefully to keep the surface smooth.
Safe Removal Methods
Slowly peel stickers from one edge. Pull gently to avoid tearing or leaving residue. If the sticker is stubborn, warm it slightly with a hairdryer. Heat softens the glue and eases removal. Use a plastic card to lift edges without damaging the paint.
Reusing Stickers
Stickers may be reused if removed carefully. Keep the sticky side clean by pressing it on clean parchment paper. Store them flat in a cool, dry place. Avoid folding or bending to keep their shape and stickiness. Reuse adds fun and saves money.
Frequently Asked Questions
How Do I Choose The Best Butterfly Stickers For Walls?
Select butterfly stickers based on wall color and room theme. Opt for vibrant or pastel shades to match decor. Consider sizes that fit your wall space. High-quality vinyl stickers ensure durability and easy removal.
What Is The Ideal Wall Surface For Butterfly Stickers?
Smooth, clean, and dry walls are perfect for butterfly stickers. Avoid textured or rough surfaces as they reduce sticker adhesion. Painted walls work best, but ensure paint is fully cured before application.
How Can I Create A 3d Effect With Butterfly Wall Stickers?
Layer smaller stickers over larger ones at different angles. Slightly lift sticker edges to add dimension. Mix sizes and colors for a dynamic, 3D appearance. Use shadow lighting to enhance the effect.
Can Butterfly Stickers Be Removed Without Damaging Walls?
Yes, high-quality vinyl butterfly stickers peel off easily. Gently lift a corner and pull slowly to prevent damage. Use heat from a hairdryer to soften adhesive if needed. Clean residue with mild soap and water.
Conclusion
Butterfly stickers add charm and life to any wall space. Place them thoughtfully to create a natural, flowing look. Mix sizes and colors to keep the design interesting. Use simple tools and take your time for best results. Enjoy the fresh, bright feel these stickers bring to your room.
Small changes can make a big difference in home decor. Try different patterns until you find one you love. Decorating with butterfly stickers is fun and easy for everyone. Give your walls a soft, beautiful touch today.


