
Are you ready to transform your space with a stylish pendant light but unsure how to hang it with a cord? You’re in the right place.
Hanging a pendant light might seem tricky at first, but with the right steps, you can do it yourself and add a stunning touch to your room. Imagine the warm glow and modern vibe you’ll create once it’s up. Keep reading, and you’ll discover simple, clear instructions that make the whole process easy—no need to call an electrician or spend hours figuring it out.
Let’s get started on lighting up your home the way you’ve always wanted.
Choosing The Right Pendant Light
Choosing the right pendant light is key to enhancing your room’s look. The perfect fixture balances style, size, and function. It should suit your space and lighting needs. Take time to pick a pendant light that fits well and adds charm to your home.
Selecting The Style And Size
Pick a style that matches your room’s decor. Modern, vintage, or industrial designs create different moods. Size matters too. Large pendants suit big rooms, while small ones fit cozy spaces. Check the light’s width and height before buying. Avoid oversized lights in small rooms to keep balance.
Considering The Room And Ceiling Height
The room’s purpose affects your choice. Kitchens need bright, focused light. Living rooms benefit from soft, warm glow. Ceiling height matters a lot. High ceilings allow longer cords and bigger fixtures. Low ceilings need shorter cords and smaller lights to avoid blocking views. Measure ceiling height before choosing your pendant.
Picking The Appropriate Cord Length
Cord length controls light placement and style. Too long, the light hangs too low and blocks space. Too short, it won’t light the area well. Measure from ceiling to desired light height. Most pendant lights come with adjustable cords. Choose one that fits your room’s needs perfectly. Cord length affects both look and function.
Gathering Tools And Materials
Gathering the right tools and materials is the first step to hang a pendant light with cord. Proper preparation helps the job go smoothly and safely. This section lists all essentials you will need before starting.
Essential Tools Checklist
- Drill with screwdriver bits
- Wire stripper
- Voltage tester
- Measuring tape
- Level
- Pliers
- Step ladder
- Electrical tape
- Wire nuts
Safety Gear To Use
- Insulated gloves
- Safety goggles
- Dust mask
- Closed-toe shoes
Materials Needed For Installation
- Pendant light fixture with cord
- Mounting bracket or ceiling hook
- Electrical box
- Light bulb compatible with fixture
- Wire connectors
- Ceiling anchors (if needed)
Preparing The Installation Area
Preparing the Installation Area Clear the workspace by removing obstacles and ensuring adequate lighting. Turn off the power at the breaker. Use a sturdy ladder to reach the installation spot safely. Gather necessary tools like a screwdriver and wire stripper.
Ensure the ceiling can support the pendant light’s weight.
Preparing the installation area for your pendant light with a cord is crucial for a smooth and successful setup. This step ensures that everything is in place and ready for a seamless installation. By taking a few preliminary actions, you’ll safeguard your home and enhance your installation experience.Turning Off Power Safely
Before you even think about reaching for your toolbox, prioritize safety. Turn off the power to the room where you’ll be working. This is as simple as flipping the circuit breaker switch to the off position. Verify the power is off by testing the light switch or using a voltage tester. This simple action can prevent accidents and keep you safe. Do you have a safety ritual before starting a project?Locating The Ceiling Joist
Finding the ceiling joist is essential for providing sturdy support for your pendant light. Use a stud finder to locate the joists in your ceiling. Move the stud finder along the ceiling until it indicates a joist beneath the surface. Mark the joist location lightly with a pencil. This ensures your light is securely anchored, preventing future mishaps. Ever wondered how many times a misplaced light has caused unnecessary repairs?Marking The Hanging Spot
Once you’ve located the joist, it’s time to mark the exact spot where your pendant light will hang. Consider the design and layout of your room to choose an optimal position. Use a tape measure to find the center point or desired location, ensuring it aligns with your room’s aesthetics. Mark the spot with a pencil, ensuring precision for a balanced and appealing installation. A well-placed pendant light can transform a space dramatically. Where will yours make the most impact?
Credit: 100things2do.ca
Installing The Ceiling Hook Or Mount
Installing the ceiling hook or mount is a crucial step when hanging a pendant light with a cord. This part determines how secure and stable your light fixture will be. Getting it right ensures safety and a polished look, so it’s worth taking your time to do it properly.
Choosing The Right Hook Type
Not all hooks are created equal. You need a hook that can support the weight of your pendant light and fit the ceiling material.
- Ceiling hooks:Ideal for drywall or plaster ceilings, usually come with anchors.
- Toggle bolts:Great for heavier fixtures or if you’re unsure about the ceiling’s strength.
- Mounting brackets:Often included with pendant lights, these provide a solid base for the hook.
Think about your ceiling type and the pendant’s weight before choosing. Have you checked the packaging or instructions for specific hook recommendations?
Securing The Hook Properly
Simply screwing in a hook isn’t enough. You want to ensure it’s anchored firmly to avoid accidents.
Start by locating a ceiling joist using a stud finder. If you can’t find one, use wall anchors designed for your ceiling material. Drill a pilot hole before inserting the hook to prevent cracking or damage.
Remember, a loose hook can cause your pendant light to fall. Does the hook feel sturdy when you give it a gentle tug?
Ensuring Stability And Support
After installing the hook, check the overall stability. The hook must hold not just the light’s weight but also any movement from adjusting the cord.
Hang the pendant light temporarily and gently shake it to test the support. If it wobbles or feels weak, reinforce the mount with additional anchors or a stronger hook.
Would you trust your light fixture to hang there safely for years? Taking this extra step can save you from costly repairs or replacements later.
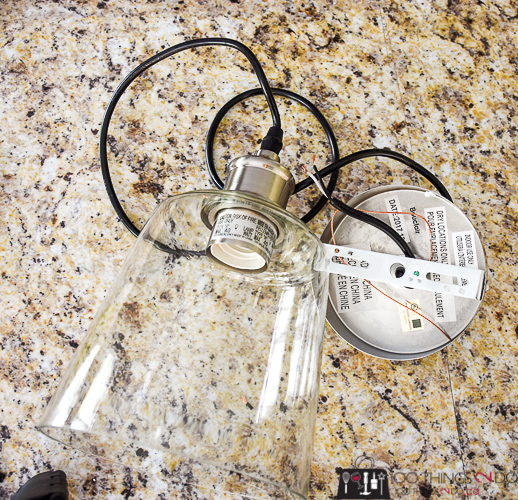
Wiring The Pendant Light
Wiring the pendant light is a crucial part of the installation process. It ensures that your new fixture will function safely and correctly. If you pay close attention here, you’ll avoid common electrical issues and enjoy your pendant’s glow without worry.
Connecting The Electrical Wires
First, turn off the power to the circuit you’ll be working on. This is vital for your safety. Locate the wires in your ceiling—usually, you’ll find a black (hot), white (neutral), and green or bare copper (ground) wire.
Match the wires from your pendant light to the corresponding wires in the ceiling. Typically, black connects to black, white to white, and green or bare copper to the ground wire. Twist the ends of matching wires together to ensure a solid connection.
Using Wire Nuts And Electrical Tape
Secure each twisted wire pair with a wire nut by twisting it clockwise until tight. This prevents wires from loosening or short-circuiting. After that, wrap electrical tape around the wire nuts and the wires for extra safety.
Wire nuts come in different sizes—make sure you use the right size for your wire gauge to avoid loose connections. If you’ve ever experienced flickering lights, it might have been due to loose wire nuts, so take your time here.
Testing The Connection
Before you finalize the installation, turn the power back on and test your pendant light. Flip the switch and observe if the light turns on steadily without flickering. If it doesn’t work, immediately switch the power off and recheck your wire connections.
Have you ever skipped double-checking and faced a frustrating trip to the circuit breaker? Testing now saves you time and headaches later. A reliable connection means your pendant light will shine bright and stay safe.
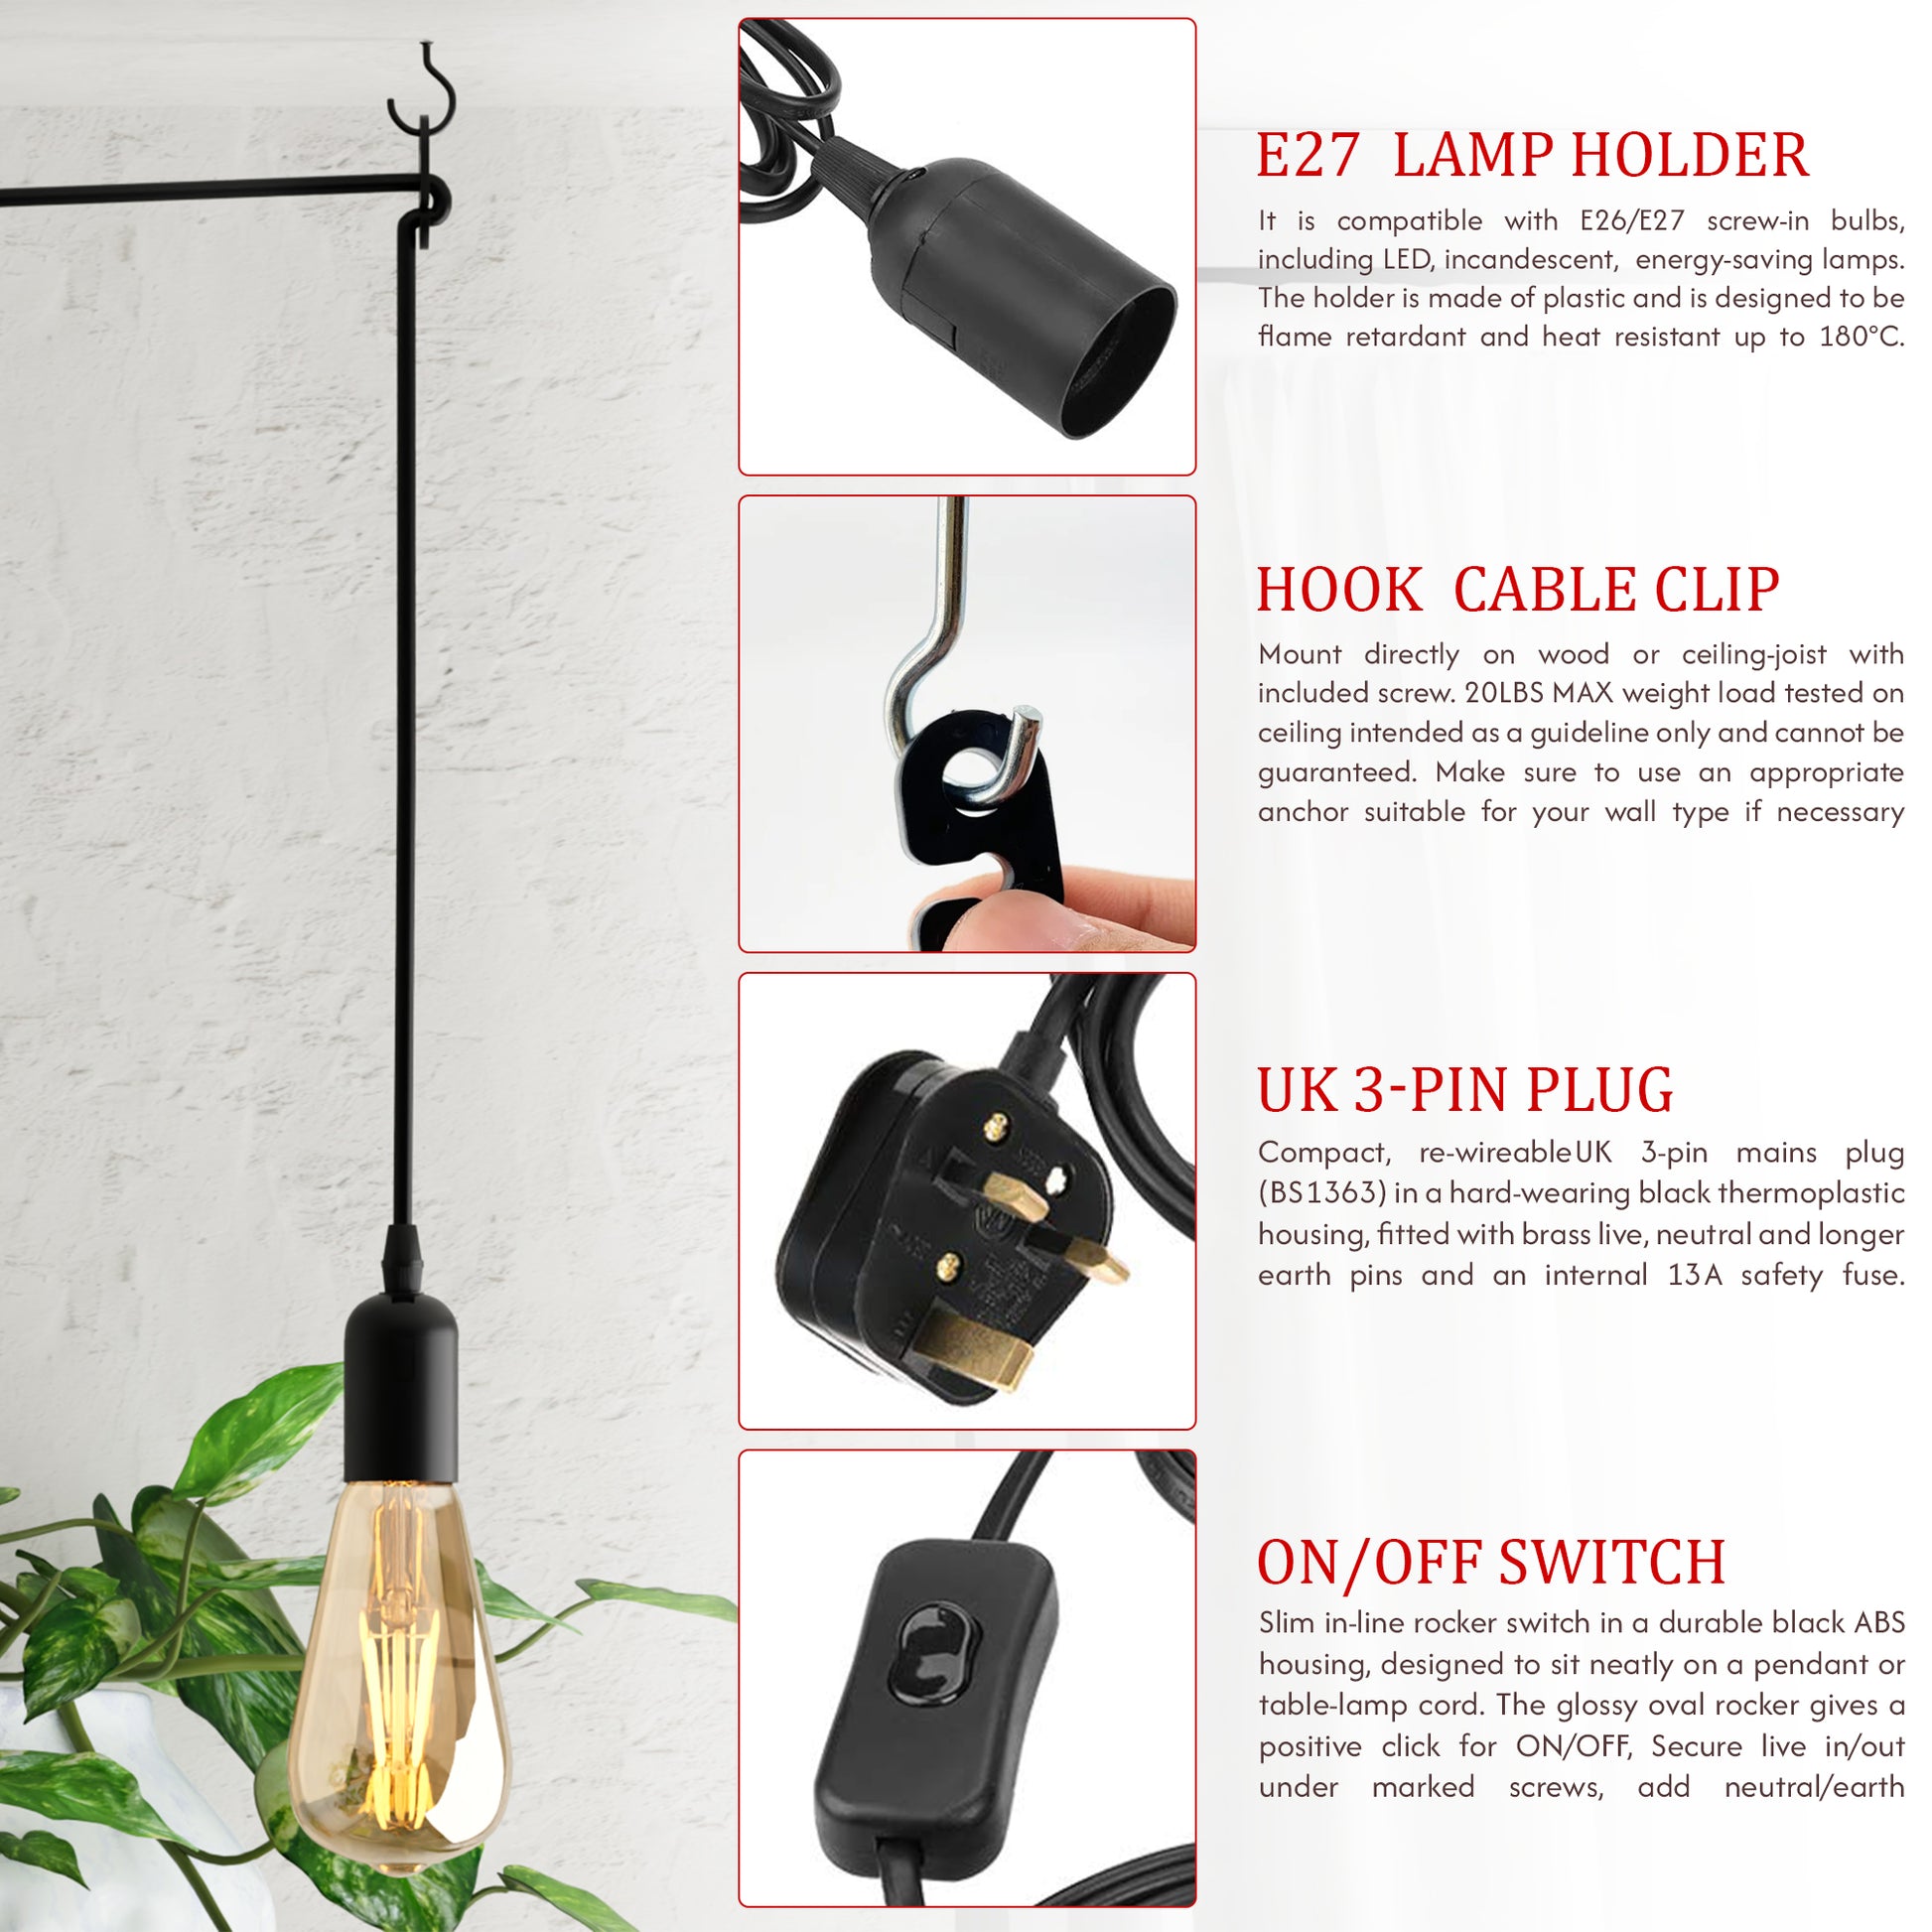
Credit: ledsone.co.uk
Adjusting The Cord Length
Adjusting the cord length is a crucial step to ensure your pendant light hangs perfectly in your space. Too long or too short can affect both the look and function of the light. Getting this just right means your room will feel balanced and the light will serve its purpose effectively.
Measuring The Desired Drop
First, decide how low you want your pendant light to hang. The ideal drop depends on the room and what’s beneath the light. For example, over a dining table, the bottom of the pendant should be about 30-36 inches above the surface.
Use a tape measure to mark the height on the cord while the fixture is temporarily hung. Don’t forget to consider any furniture or head clearance to avoid a cramped feel. Asking yourself, “Will this length allow enough light and space?” helps avoid common mistakes.
Shortening Or Lengthening The Cord
If the cord is too long, you’ll need to shorten it carefully. Unplug the light first, then loosen the canopy to access the cord. Cut the excess cord, leaving a little extra length for wiring, and strip the wires to reconnect them securely.
Lengthening the cord is trickier but possible if you have extra wire or an extension kit. Make sure to match wire gauges and secure all connections with wire nuts or connectors. Remember, safety comes first—never guess on electrical work.
Securing Excess Cord
Once the length is set, manage any leftover cord inside the ceiling canopy or nearby. Coil excess cord neatly and secure it with twist ties or cable clips to prevent tangling. This keeps the installation clean and avoids strain on the connections.
Have you ever noticed how a sloppy cord can ruin a room’s look? Taking a few extra minutes to tidy up the wiring makes a big difference. A smooth, neat cord arrangement not only looks better but also lasts longer.
Hanging The Pendant Light
Hanging a pendant light with a cord can transform your space instantly, but it requires attention to detail to get it just right. The process is more than just hooking the light up; it’s about ensuring stability, alignment, and safety. Let’s look closely at how you can hang your pendant light confidently and correctly.
Attaching The Light To The Hook
Start by securely attaching the pendant light’s cord to the ceiling hook. Make sure the hook is properly anchored into a ceiling joist or a sturdy anchor point to hold the light’s weight. If your hook has a screw or clasp, double-check it’s tightened firmly to prevent any slipping.
When I first hung a pendant light, I underestimated the importance of a strong hook. The light swung unexpectedly until I reinforced the attachment. This taught me that skipping this step risks both damage and injury.
Ensuring Proper Alignment
Once the light is hanging, step back and check its alignment. The pendant should hang straight down without tilting or twisting. Adjust the cord length if needed to achieve the perfect height and balance.
Try to position the light so it complements the surrounding furniture or focal points. Ask yourself: does the light draw attention where you want it to? Small shifts can make a big difference in how the light enhances your room.
Final Safety Checks
Before calling the job done, run through a quick safety checklist. Ensure the electrical connections are secure and insulated. Tug gently on the light to confirm the hook and cord can handle the weight without moving.
Remember, safety isn’t just about avoiding shocks—it’s about preventing accidents from a falling fixture. Are all wires tucked away neatly? Is the cord free from any damage or frays? Taking these final steps protects both your home and your peace of mind.

Credit: www.decor8blog.com
Troubleshooting Common Issues
Installing a pendant light with a cord is simple but may cause some issues. Troubleshooting helps fix common problems quickly. It keeps your light safe and working well. Below are common problems and easy solutions.
Fixing Flickering Lights
Flickering lights often mean a loose connection. Check the bulb first. Tighten it gently but firmly. Inspect the socket for dirt or corrosion. Clean with a dry cloth if needed. Make sure the wiring is secure inside the ceiling box. Loose wires can cause flicker or sparks. Use a voltage tester to check power flow. Replace the bulb if flickering continues.
Dealing With Uneven Hanging
Uneven hanging makes the light look unbalanced. Measure the cord length from the ceiling to the bulb. Adjust the cord by pulling or loosening it in the canopy. Use a level to check the bulb’s position. If the fixture has a swivel, adjust it for balance. Make sure the ceiling hook or bracket is firmly fixed. Replace or reposition the hook if it moves.
Handling Cord Damage
Damaged cords are dangerous and need quick attention. Turn off power before handling the cord. Inspect the entire cord for cuts or frays. Minor damage may be fixed with electrical tape. For serious damage, replace the cord completely. Avoid using sharp tools near the cord. Always use cords rated for your light’s wattage. Consult a professional electrician if unsure.
Enhancing Your Lighting Setup
Enhancing your lighting setup makes your space more inviting and functional. A well-thought-out pendant light arrangement sets the mood and highlights key areas. Small changes can greatly improve the look and feel of your room. Consider features that allow control and style to work together.
Adding Dimmer Switches
Dimmer switches offer flexible lighting control. Adjust brightness to match activities or time of day. Use dimmers to create cozy atmospheres or bright task lighting. Installing a dimmer is simple and adds great value. Choose dimmers compatible with your pendant light and bulb type.
Choosing The Right Bulbs
Select bulbs that suit your room’s purpose and style. Soft white bulbs create warmth and comfort. Bright white bulbs provide clarity and focus. LED bulbs save energy and last longer. Check bulb size and base to fit your pendant light fixture.
Combining Pendant Lights For Effect
Group pendant lights to enhance visual impact. Hang multiple pendants in a row over kitchen islands or dining tables. Vary heights for a dynamic look. Match bulb color and intensity for a balanced glow. Clusters of pendant lights bring style and better illumination.
Frequently Asked Questions
How Do I Hang A Pendant Light With A Cord?
First, turn off the power. Attach the mounting bracket to the ceiling. Connect the wires, secure the canopy, and adjust the cord length.
What Tools Do I Need To Install A Pendant Light?
You need a screwdriver, wire strippers, voltage tester, drill, and ladder. These tools ensure a safe, accurate pendant light installation.
Can I Adjust The Cord Length After Installation?
Yes, most pendant lights allow cord length adjustment. Simply loosen the canopy, pull the cord to desired length, and tighten the canopy.
Is It Safe To Hang A Pendant Light Myself?
Yes, if you follow safety steps. Always turn off power, use a voltage tester, and follow installation instructions carefully.
Conclusion
Hanging a pendant light with a cord is simple and practical. Follow the steps carefully for a safe setup. Choose the right spot and tools before you start. Measure the cord length to fit your space well. Secure the light firmly to avoid accidents.
Enjoy the warm, stylish glow it adds to your room. This small project can change your room’s look easily. Try it yourself and see the difference it makes.


