
Are you ready to transform your tree into a dazzling holiday centerpiece? Stringing Christmas lights on a tree might seem tricky, but with the right tips, you can create a magical glow that everyone will admire.
Imagine your tree sparkling with perfectly placed lights, making your home feel warm and festive. In this guide, you’ll discover simple, step-by-step advice to make your decorating easy and fun. Keep reading, and you’ll learn how to light up your tree like a pro this holiday season!
Credit: www.wayfair.com
Choosing The Right Lights
Choosing the right lights can make or break the look of your Christmas tree. It’s not just about picking something that glows; you want lights that fit your style, space, and safety needs. Think about the atmosphere you want to create and the practical details that will make decorating easier and more enjoyable.
Types Of Christmas Lights
There are several types of Christmas lights to consider, each with its own charm and function. Traditional incandescent bulbs give a warm, nostalgic glow but use more energy and can get hot. LED lights are cooler to the touch, last longer, and come in a variety of colors and effects.
Don’t overlook mini lights, globe lights, and fairy lights. Mini lights are great for wrapping branches tightly, while globe lights offer a bold, modern look. Fairy lights add a delicate sparkle and work well for a subtle, magical effect.
Selecting The Perfect Length
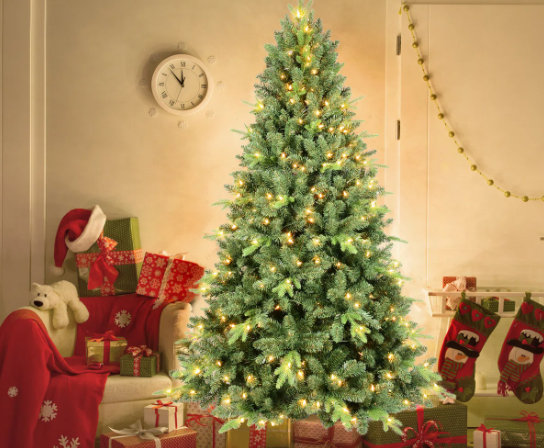
Measure your tree before buying lights to avoid surprises. A good rule is 100 lights per vertical foot of tree for a dense, bright look. If your tree is 6 feet tall, aim for about 600 lights.
Think about how you want to place the lights—tightly wound around branches or loosely draped. It’s better to have a bit extra than to run short during decorating. You can always save leftovers for wreaths or garlands.
Energy Efficiency And Safety
Energy efficiency matters more than you might think, especially if your lights stay on for hours. LED lights use up to 80% less electricity than incandescent bulbs, saving you money and reducing heat risk. Lower heat means less chance of fire or damaging your tree.
Check for UL certification on the packaging to ensure safety standards. Also, inspect lights for frayed wires or broken sockets before use. Remember, a beautiful tree is only worth it if it’s safe for your home and loved ones.

Credit: www.youtube.com
Preparing The Tree
Preparing your tree before stringing Christmas lights sets the foundation for a dazzling display. Taking the time to get your tree ready not only makes the process smoother but also helps your lights shine brighter and last longer. Let’s break down the key steps to prepare your tree effectively.
Clearing Branches
Start by gently moving branches aside to create space for the lights. Remove any dead or broken twigs that could block the light or cause damage to the cords. This step also helps you visualize the path your lights will follow, making it easier to avoid bunching or gaps.
Have you ever struggled to fit lights around dense branches? Clearing branches first prevents frustration and ensures even coverage throughout your tree.
Testing Lights Before Hanging
Before you climb up or wrap lights around branches, plug them in to check for any burnt-out bulbs or broken wires. It’s frustrating to hang lights only to find they don’t work later. Test each strand individually, and keep spare bulbs handy just in case.
Think about the last time a strand failed mid-decoration—testing beforehand saves you time and effort, letting you focus on creating a perfect glow.
Gathering Tools And Supplies
Having the right tools within reach makes decorating safer and faster. Gather essentials like a sturdy ladder, extension cords, light clips, and gloves to protect your hands from scratches. Don’t forget a timer to control your lights efficiently and reduce electricity use.
Ask yourself: do you have everything ready before you start? Preparing tools and supplies beforehand means fewer interruptions and a more enjoyable decorating experience.
Wrapping Techniques
Stringing Christmas lights on a tree can be a joyful task. Wrapping techniques can make the difference between a dazzling display and a tangled mess. Proper technique ensures your lights shine brightly and evenly.
Starting Point And Direction
Choose a starting point near the base of the tree. This ensures easy access to the power source. Work your way from the trunk outward. Wrap the lights around each branch. Move in a consistent direction. Clockwise or counterclockwise is up to you. This keeps the lights uniform and neat.
Spacing Lights Evenly
Even spacing is key to a balanced look. Space the lights evenly on each branch. Avoid clustering too many lights in one spot. This creates balance and symmetry. Use your hand as a guide. This helps maintain consistent spacing throughout the tree.
Securing Lights To Branches
Secure the lights gently to avoid damage. Use light clips or twist ties. This keeps the lights in place. Ensure they are not too tight. Allow room for movement and adjustment. This prevents breakage and maintains the tree’s natural shape.
Enhancing The Display
Enhancing your Christmas tree light display transforms a simple decoration into a captivating centerpiece. It’s about adding layers of interest that catch the eye and create a festive atmosphere. Small changes can make a big difference, inviting warmth and cheer into your space.
Adding Color And Patterns
Mix different colored lights to create striking effects that suit your style. You could try alternating colors or grouping lights by hue to highlight certain tree sections. Experiment with patterns like spirals or zigzags to add movement and rhythm to your setup.
Have you ever thought about using lights that change colors or twinkle? These can add a dynamic feel without much extra effort. Think about your room’s lighting too—warmer tones might make your space feel cozier, while bright colors energize the mood.
Incorporating Other Decorations
Don’t stop with lights—adding ornaments, ribbons, or garlands can enrich your display. Place shiny ornaments near lights to reflect and amplify the glow. Try layering different textures like matte and glossy finishes for a balanced look.
Consider natural elements like pinecones or berries for a fresh touch. These contrast beautifully with the electric shine of lights and bring an organic warmth. How could you mix personal keepsakes with festive decor to tell your holiday story?
Using Timers And Controllers
Timers take the hassle out of remembering when to turn your lights on and off. Set them to light up at dusk and turn off at bedtime automatically. This not only saves energy but also keeps your display consistent and worry-free.
Controllers let you customize light patterns and colors with ease. You can sync lights to music or choose specific modes for different occasions. Have you tried using a smartphone app to manage your lights remotely? It’s a game changer for convenience.
Safety Tips
Safety is very important when stringing Christmas lights on a tree. Taking simple steps can stop accidents and keep your home safe. These safety tips help you enjoy beautiful lights without worry.
Avoiding Overloads
Do not plug too many lights into one outlet. Overloading causes wires to heat up and can start fires. Check the packaging for the maximum number of sets you can connect. Use power strips with built-in circuit breakers. Spread the load across several outlets if needed.
Weatherproofing Lights
Use lights made for outdoor use only. These lights resist rain, snow, and cold temperatures. Cover plugs and connections with plastic or waterproof tape. Keep electrical connections off the ground to avoid water contact. Always unplug lights before heavy storms or snow.
Regular Inspection And Maintenance
Check lights before use each year. Look for broken bulbs, frayed wires, or loose connections. Replace damaged parts or entire strings to avoid shocks and shorts. During the season, inspect lights regularly. Turn off lights when not needed to extend their life and reduce risks.
Removing And Storing Lights
Taking down your Christmas lights carefully and storing them properly can save you a lot of frustration next year. Lights that are tangled or damaged are harder to put up and might not work at all. Treating your lights with care during removal and storage ensures they stay bright and ready for many holiday seasons.
Careful Removal Techniques
Start by unplugging the lights and gently unwinding them from the tree. Avoid yanking or pulling hard, as this can break bulbs or damage wiring. If you notice any bulbs that are loose or burnt out, mark them for replacement before packing.
Work slowly and keep the lights organized as you go. Wrapping them around a piece of cardboard or a spool keeps them neat and prevents tangling. Have you ever spent hours untangling lights in the past? Taking your time now can save you that hassle.
Proper Storage Methods
Choose a sturdy container that protects the lights from moisture and dust. Plastic bins with lids work well and stack easily in storage spaces. Avoid stuffing lights into boxes or bags where they can get crushed or tangled.
- Wrap lights in soft cloth or bubble wrap for extra protection.
- Label containers clearly, so you know exactly what’s inside.
- Keep spare bulbs and repair kits together with your lights.
Proper storage helps maintain the life of your lights and makes decorating quicker next year.
Preparing For Next Year
Before you put your lights away, test each strand to ensure all bulbs work. Fix any issues now so you don’t face surprises next December. Also, consider creating a simple checklist of where each set of lights was used on your tree.
This little extra effort lets you plan your decorating more efficiently next year. Imagine how much smoother your holiday prep will be when you already know which lights fit where and that they all function perfectly.

Credit: www.marksandspencer.com
Frequently Asked Questions
How Do I Prepare A Tree For Christmas Lights?
Start by trimming dead branches and clearing debris. Choose a sturdy ladder and test lights for damage. Plan your lighting pattern for even coverage before hanging the strands.
What Type Of Lights Are Best For Trees?
LED string lights are energy-efficient and long-lasting. Choose weatherproof lights designed for outdoor use. Warm white or multicolor options create festive ambiance and enhance tree appearance.
How Many Lights Do I Need Per Tree?
Use about 100 lights per vertical foot of tree height. Larger trees may require more strands for full coverage. Adjust based on desired brightness and tree density.
Can I Safely String Lights On A Tall Tree?
Yes, use a stable ladder and have a helper nearby. Avoid overreaching and secure lights tightly to prevent slipping. Use outdoor-rated extension cords and timers for safety.
Conclusion
Stringing Christmas lights on a tree brings warmth and joy to any space. Start with a clear plan and use quality lights for safety. Wrap lights evenly around branches to create a bright, festive look. Take your time and enjoy the process.
A well-lit tree adds magic to holiday celebrations. Keep these tips in mind for a beautiful display every year. Brighten your home and spread holiday cheer with simple steps.


