

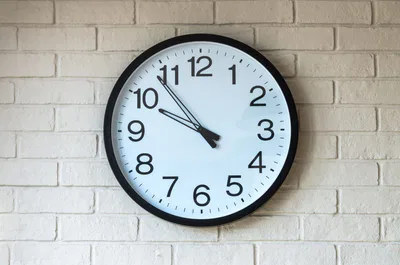
Are you ready to add a stylish and functional touch to your space? Hanging a wall clock might seem simple, but doing it right can make all the difference.
Imagine your clock perfectly centered, easy to read, and securely mounted—no slipping or crooked angles. In this guide, you’ll discover step-by-step how to hang your wall clock with confidence and ease. By the end, you’ll know exactly where to place it and how to make sure it stays put.
Let’s get started and transform your wall into a focal point that keeps you on time every day!
Credit: tictocclockrepairs.co.uk
Choosing The Right Clock
Choosing the right clock sets the foundation for a perfect wall display. It affects both the look and function of your space. Selecting a clock that fits well with your room enhances the overall decor. The clock should match your style and meet practical needs. Consider size and weight to ensure easy hanging and lasting support.
Clock Size And Style
The size of the clock must suit the wall space available. A large clock works well on empty walls or above furniture. Small clocks fit best in cozy or tight spaces. Think about style too. Modern clocks blend well with minimalist rooms. Vintage clocks add charm to traditional settings.
Choose a clock face that is easy to read. Clear numbers and hands help tell time quickly. Color contrast between the hands and face improves visibility. Match the clock frame with your room’s colors for a unified look.
Weight Considerations
Weight matters for safe and secure hanging. Light clocks hang easily on basic hooks or nails. Heavy clocks need stronger anchors or wall studs. Check the clock’s weight before buying hardware. Use wall anchors for drywall to avoid damage.
Consider materials too. Metal and wood clocks tend to be heavier. Plastic clocks are usually lighter and easier to mount. Ensure the hanging hardware can hold the clock’s weight safely. This prevents falls and keeps your wall looking good.
Selecting The Ideal Wall Spot
Selecting the ideal wall spot is crucial for hanging a wall clock effectively. The right place enhances room decor and ensures easy time reading. Consider factors like visibility and the type of wall material before mounting the clock. This helps avoid damage and keeps the clock secure.
Visibility And Accessibility
Choose a spot where everyone can see the clock clearly. Common areas include the living room, kitchen, or hallway. Avoid placing the clock too high or too low on the wall.
Make sure the clock is easy to reach. This helps when adjusting time or changing batteries. Also, avoid spots with strong sunlight. Direct light can fade the clock face or make it hard to read.
Wall Material Types
Identify the wall material before hanging the clock. Different materials need different tools and anchors.
- Drywall:Use plastic anchors or screws designed for drywall to hold the clock securely.
- Plaster:Use wall plugs or anchors made for plaster walls to prevent cracks.
- Brick or Concrete:Use a drill with a masonry bit and heavy-duty anchors for a strong hold.
- Wood:Screws can be used directly in wooden walls without anchors.
Choosing the right hardware protects your walls and keeps the clock steady.
Gathering Necessary Tools
Gather all tools needed like a drill, screws, a level, and a pencil before starting. Having everything ready makes hanging your wall clock easier and faster.
Gathering the right tools is a crucial step in hanging a wall clock efficiently. Having everything you need on hand can save time and reduce frustration. Let’s dive into the essentials that will help you hang your clock with ease and precision.Basic Tools Checklist
Start with the basics to ensure you’re prepared:- Hammer:Essential for driving nails into the wall to support your clock.
- Nails or Screws:Choose based on your wall type; drywall anchors might be necessary for heavier clocks.
- Level:A must-have to keep your clock perfectly horizontal.
- Measuring Tape:Helps in finding the ideal height and center position on the wall.
- Pencil:Use it to mark where the nail or screw will go without damaging the wall.
Optional Tools For Accuracy
While the basics will get you far, consider these optional tools for added precision:- Stud Finder:Identifies the best spots in the wall to support heavier clocks, reducing the risk of damage.
- Laser Level:Offers hands-free leveling and can save you from balancing acts with traditional levels.
- Drill:Makes the process smoother, especially on harder surfaces where a nail might not suffice.

Credit: medium.com
Marking The Placement
Marking the placement of your wall clock is a key step to ensure it looks great and hangs securely. This process helps avoid crooked or uneven positioning. Take your time to measure and mark carefully. The right placement balances the room and makes the clock easy to see.
Measuring Height And Centering
Start by deciding the perfect height for your clock. A common rule is to hang it at eye level. Measure about 57 to 60 inches from the floor for most rooms. Use a tape measure to mark this height on the wall.
Next, find the center point where the clock will hang. This could be the middle of a wall or above a piece of furniture. Measure the width of the wall or furniture. Divide that number by two to find the center. Mark this spot lightly with a pencil.
Using A Level For Precision
Place a level on the marked center point to ensure the clock will hang straight. Hold the level horizontally and adjust your marks until the bubble is centered. This step prevents the clock from tilting sideways.
If you don’t have a level, a smartphone app can work well. Align the clock’s hanging point with the level mark. Double-check the position before drilling or hammering nails.
Installing The Hanging Hardware
Installing the hanging hardware is an important part of hanging a wall clock. The right hardware keeps the clock secure and level. This process protects your wall and ensures the clock does not fall. Choosing the correct hooks or anchors and installing them properly guarantees a safe and neat finish.
Choosing The Right Hooks Or Anchors
Different walls require different hooks or anchors. Drywall, plaster, and brick all need specific hardware. Lightweight clocks can hang on simple nails or hooks. Heavier clocks need stronger anchors for support.
- Plastic anchors:Good for medium-weight clocks on drywall.
- Molly bolts:Provide strong hold in drywall and plaster.
- Toggle bolts:Best for very heavy clocks on drywall.
- Concrete screws:Suitable for brick or concrete walls.
Check the clock’s weight before selecting hooks or anchors. Always pick hardware rated above your clock’s weight for safety.
Step-by-step Installation
Prepare your tools: a drill, screwdriver, level, pencil, and measuring tape. Follow these steps for secure installation.
- Mark the spot on the wall where the clock will hang. Use a pencil and level to ensure accuracy.
- Choose the correct drill bit size for your chosen anchor or hook.
- Drill a hole in the marked spot carefully. Avoid making the hole too large.
- Insert the anchor into the hole. Tap it gently if needed to fit snugly.
- Screw the hook or screw into the anchor. Leave enough of the hook exposed to hang the clock.
- Check the hook is secure by gently pulling on it.
- Hang the clock and use the level to adjust if needed.
Correct installation keeps the clock steady and prevents damage. Take your time for precise results.

Credit: tictocclockrepairs.co.uk
Mounting The Clock
Mounting the clock properly ensures it stays secure and looks great. This step requires careful attention to avoid damage and keep the clock stable. Follow clear instructions to place your wall clock safely and neatly.
Securing The Clock On The Wall
Start by choosing the right spot on the wall. Check for studs or use wall anchors for extra support. Use a pencil to mark where the screws or hooks will go. Drill holes carefully, matching the size of your anchors or screws.
Insert wall anchors if the wall is drywall or plaster. Screw in hooks or screws, leaving a small gap to hang the clock. Hang the clock by its mounting hook or keyhole slot.
Checking Stability
After hanging the clock, gently push it to test stability. It should not move or tilt easily. If it shifts, adjust the screws or add stronger anchors. Use a level tool to check if the clock is straight. A balanced clock looks better and runs smoothly.
Final Adjustments
After hanging your wall clock, the final adjustments are crucial for perfect placement and operation. These small tweaks ensure the clock looks great and keeps accurate time. Take your time to check the details carefully.
Aligning The Clock Face
Check the clock face alignment by standing back and viewing it from different angles. The clock should hang straight, with the 12 at the top and the 6 at the bottom. Use a level tool or a smartphone app to confirm it is perfectly horizontal.
If the clock tilts, gently adjust the hanger or nails until it sits evenly. A well-aligned clock improves room aesthetics and makes reading time easier.
Ensuring Proper Function
Start the clock and observe the hands to ensure smooth movement. Listen for any unusual ticking sounds or pauses. If the hands stick or the clock stops, check the battery and replace it if needed.
Make sure the clock is away from direct sunlight, moisture, and vibrations. These factors can affect time accuracy and clock lifespan. Adjust the clock’s position slightly to avoid these issues.
Tips For Maintenance
Keeping your wall clock in top shape means more than just hanging it correctly. Regular maintenance ensures your clock stays accurate and looks great over time. Let’s look at some practical tips that will help you care for your clock without much hassle.
Battery Replacement
Don’t wait until your clock stops ticking to check the battery. A weak battery can cause the clock to lose time or stop intermittently, which can be frustrating. Try replacing the battery every 6 to 12 months, even if the clock still seems to work fine.
Use high-quality batteries to avoid leaks that could damage the clock’s mechanism. When changing the battery, gently remove the old one and check the battery compartment for corrosion or dirt. Have you noticed how a fresh battery often makes your clock run smoother? That’s because it provides consistent power to the movement.
Cleaning And Care
Dust and grime can quickly dull the appearance of your wall clock and even affect its performance. Use a soft, dry cloth to wipe the surface regularly. Avoid spray cleaners directly on the clock, as moisture can seep inside and damage the internal parts.
For glass faces, a slightly damp cloth with a bit of mild soap works well, but dry it immediately. If your clock has intricate details or a wooden frame, consider using a soft brush to remove dust from crevices. Have you ever taken a moment to really clean your clock and noticed how much brighter and fresher it looks afterward?
Frequently Asked Questions
How Do I Choose The Right Wall Clock For My Room?
Select a clock size that fits your wall space. Match the clock style to your room decor. Consider visibility and ease of reading the clock face.
What Tools Do I Need To Hang A Wall Clock?
You need a drill or hammer, screws or nails, and a level. A measuring tape helps place the clock accurately. Anchors are useful for drywall.
Where Is The Best Height To Hang A Wall Clock?
Hang the clock at eye level, typically 57-60 inches from the floor. This ensures easy viewing from most room areas. Adjust based on furniture placement.
How Do I Ensure My Wall Clock Is Securely Mounted?
Use appropriate anchors for your wall type to prevent slipping. Ensure screws or nails fit the clock’s hanging hardware. Double-check stability before releasing.
Conclusion
Hanging a wall clock is simple with the right steps. Choose a good spot and mark where it will go. Use the right tools to make sure it stays safe. Take your time and check the clock’s level. A well-placed clock adds style and function to any room.
Try it yourself and enjoy seeing time in a new way. Small effort, big difference.


