
Imagine transforming your room into a cozy, magical space with just a few simple steps. Hanging fairy lights from your ceiling can instantly change the mood and make your space feel warm and inviting.
But you might be wondering how to do it without damaging your walls or making a mess. Don’t worry—you’re about to discover easy, practical tips that anyone can follow. Keep reading, and you’ll learn how to hang your fairy lights safely and stylishly, creating the perfect atmosphere for relaxing or entertaining.
Your room makeover starts here!

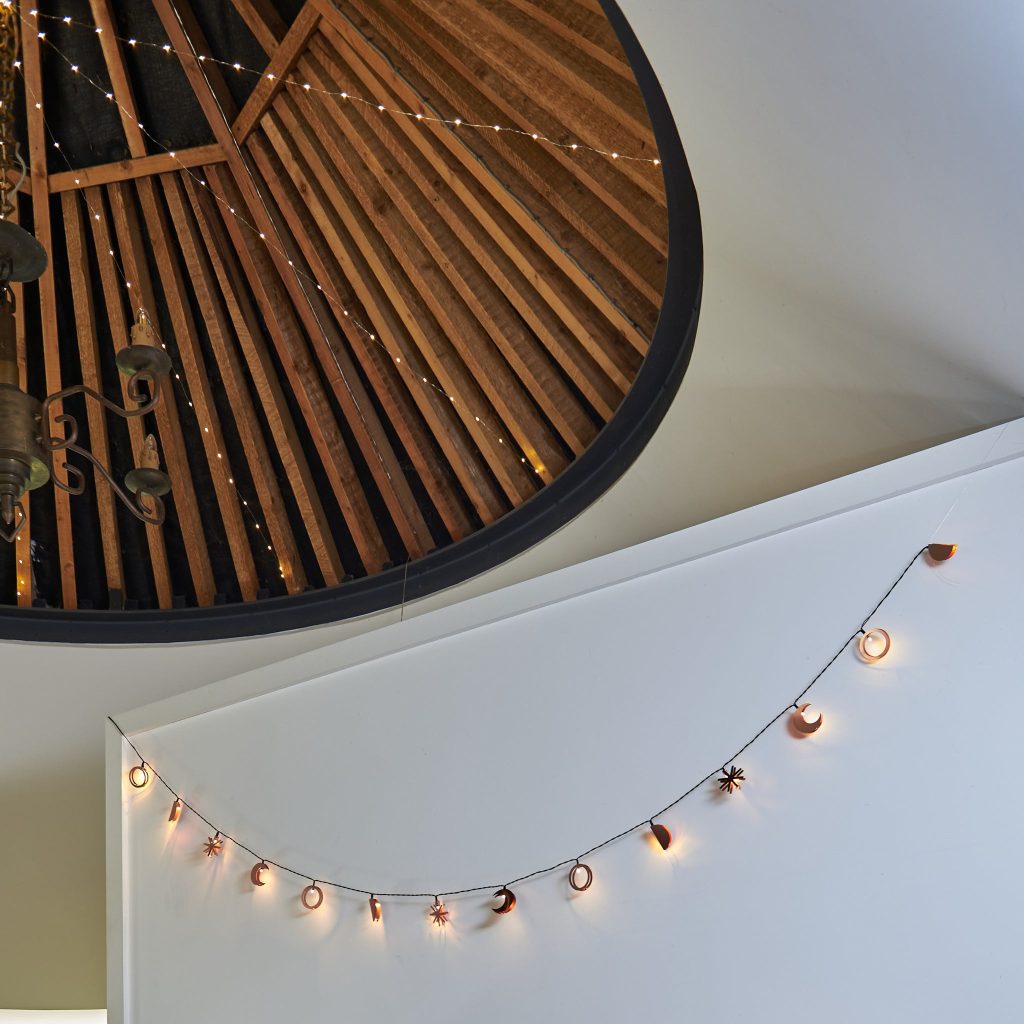
Credit: sparkle.lighting
Choosing The Right Fairy Lights
Choosing the right fairy lights can make all the difference in setting the perfect mood for your space. It’s not just about picking lights that look pretty; you want ones that suit your room’s size, style, and how you plan to use them. Understanding the different types, lengths, and color options will help you create a magical ceiling display that fits your needs perfectly.
Types Of Fairy Lights
There are several types of fairy lights to choose from, each with its own unique charm and functionality.
- String Lights:Classic and versatile, great for draping across ceilings or walls.
- LED Curtain Lights:Ideal for creating a waterfall effect, perfect if you want a dramatic backdrop.
- Battery-Operated Lights:Offer flexibility without worrying about outlets, but check battery life.
- Solar-Powered Lights:Best for eco-friendly setups, though they require good sunlight exposure.
Think about your space and where you want to hang the lights. Will you need to plug them in, or do you want the freedom to move them around?
Length And Power Source
The length of your fairy lights determines how far and wide you can spread them across your ceiling. Measure your space before purchasing to avoid buying too short or excessively long strings that create clutter.
Power source matters a lot for convenience and safety:
- Plug-in lightsprovide continuous power but require nearby sockets.
- Battery-powered optionsoffer portability but may need frequent battery changes.
- USB-powered lightscan be handy if you have USB ports available, especially near your bed or desk.
Have you checked if your chosen lights come with a remote or timer? These features can make controlling your ambiance effortless.
Color And Brightness Options
Fairy lights come in a spectrum of colors and brightness levels. The color you choose impacts the atmosphere you create.
- Warm white lightsbring a cozy, inviting glow.
- Cool white or blue tonesadd a modern, crisp look.
- Multicolor lightscan energize a party vibe or create playful spaces.
Brightness varies from soft twinkles to strong illumination. If you want subtle mood lighting, opt for lower lumens. For more practical lighting, pick brighter options.
Have you thought about whether you want your lights to flicker, stay steady, or even change colors? These effects can add a dynamic touch to your room.
Credit: www.digsdigs.com
Preparing Your Ceiling Space
Preparing your ceiling space is a crucial first step before hanging fairy lights. Taking the time to get this right ensures your lights look great and stay secure. It also helps prevent any damage to your ceiling or frustration later on.
Cleaning The Surface
Start by cleaning the area where you want to hang the lights. Dust, dirt, or grease can stop hooks or adhesive strips from sticking properly. Use a damp cloth with mild soap, then dry thoroughly to create a clean, smooth surface.
Have you ever had lights fall because the surface wasn’t clean enough? A quick wipe can save you from that hassle.
Measuring And Planning Layout
Measure your ceiling space carefully. Use a tape measure to note the length and width where the lights will go. Sketch a simple layout showing where you want the lights to hang—straight lines, zigzags, or a grid.
Plan how many strings of lights you’ll need and where each will start and end. This step helps avoid buying too few or too many lights and saves time during installation.
Identifying Power Outlets
Locate the nearest power outlets before hanging your lights. This ensures your fairy lights can plug in without stretching cords across the room, which could be unsafe. If outlets are far, consider using extension cords rated for indoor use.
Think about the plug’s position relative to your design. Can you hide cords neatly? Will the switch be easy to reach? Answering these questions makes your setup both attractive and practical.
Tools And Materials Needed
Fairy lights, hooks or adhesive clips, and a ladder make hanging easy and safe. A measuring tape helps space lights evenly across the ceiling.
When hanging fairy lights from the ceiling, having the right tools and materials ensures a seamless process. Each component plays a crucial role in achieving a beautiful display. Below are the key tools and materials you will need for this task.Hooks, Clips, And Adhesives
Hooks provide strong support for fairy lights. Use adhesive hooks for smooth surfaces. Clips are ideal for attaching lights without damaging walls. Choose removable adhesives to avoid leaving marks.Extension Cords And Timers
Extension cords extend your lights’ reach. Ensure they match your lights’ power requirements. Timers automate the lighting schedule. They save energy and add convenience.Ladder And Safety Gear
A ladder is essential for reaching high ceilings safely. Ensure it’s stable before use. Safety gear like gloves protects your hands. Wear non-slip shoes for added safety.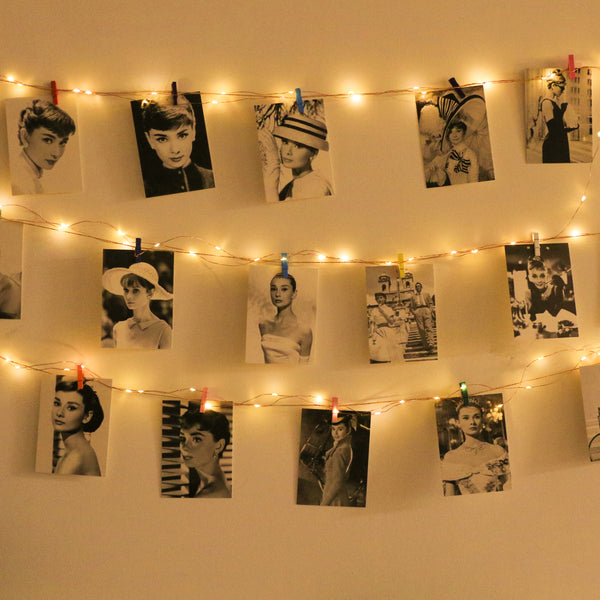
Credit: www.koopower.com
Step-by-step Hanging Process
Hanging fairy lights from the ceiling transforms any space into a cozy and magical environment. The process may seem tricky at first, but breaking it down into clear steps makes it manageable. You’ll find that with a bit of planning and patience, your ceiling can look stunning in no time.
Marking Attachment Points
Start by deciding the pattern you want your lights to follow. Do you prefer straight lines, a zigzag, or a draped canopy effect? Visualizing the layout helps you pick where to place your hooks or clips.
Use a pencil to lightly mark the spots on the ceiling where you’ll attach the lights. Make sure the points are evenly spaced—usually around 12 to 18 inches apart. This spacing keeps the lights secure without sagging.
Think about obstacles like ceiling fans or vents that might interfere. Marking these in advance saves you from having to redo the setup later.
Installing Hooks Or Clips
Choose hooks or clips designed for ceiling use—adhesive hooks work well for drywall, while screw-in hooks offer extra support on wood. Consider the weight of your fairy lights when selecting hardware.
Clean the ceiling surface before applying adhesive hooks to ensure they stick properly. Press them firmly and let them set for at least an hour before hanging the lights.
If you’re using screw-in hooks, use a drill or screwdriver to install them at the marked points. Always check for wiring or pipes behind the ceiling before drilling.
Stringing And Securing Lights
Carefully unroll your fairy lights and test them to make sure all bulbs work before hanging. Start stringing from one end, securing the lights onto each hook or clip as you go.
Keep the string taut but avoid pulling too hard—it could damage the wires. Use twist ties or small zip ties for extra security if needed, especially in high-traffic areas.
Have you ever noticed how a simple adjustment in tension changes the entire look? Experiment with slight drapes or tighter stretches to find the style that suits your space best.
Creative Hanging Patterns
Creative hanging patterns transform ordinary fairy lights into stunning decor. The right pattern can set a mood or highlight a space. Experiment with shapes and styles to create a unique look. These ideas help you hang lights with flair and ease.
Straight Lines And Grids
Straight lines offer a clean and simple look. Hang fairy lights parallel across the ceiling for a neat effect. Grids create a structured and modern feel. Use thumbtacks or hooks to form square or rectangular shapes. This pattern works well for large rooms or parties. It spreads light evenly and brightens the whole area.
Draped And Swag Styles
Draped lights add softness and charm. Let strings hang in gentle curves between hooks or beams. Swags form loops that create a flowing, relaxed vibe. This style suits cozy corners or intimate spaces. The curves cast subtle shadows that feel warm and inviting. Adjust the height for a playful or elegant look.
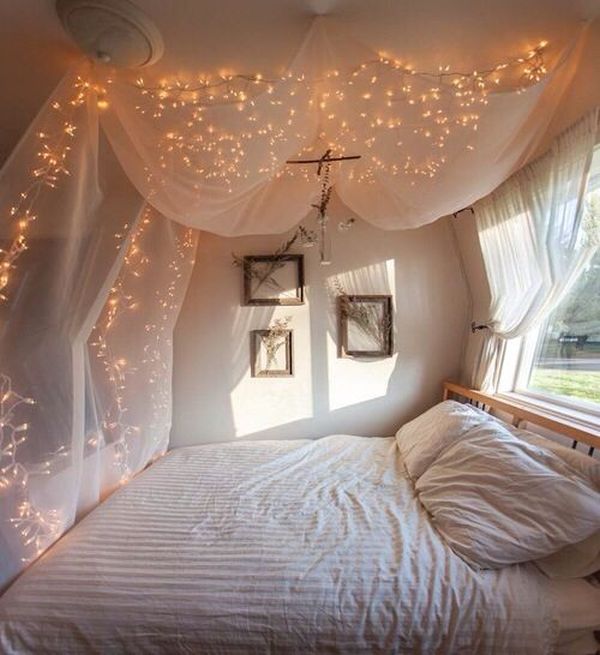
Canopy And Starburst Designs
Canopy patterns cover the ceiling like a tent of light. Attach one end of each string to a central point. Spread the other ends outward to the walls or corners. Starburst designs also start from a center point but radiate like sun rays. These patterns create a dramatic and festive atmosphere. Perfect for special events or bedrooms.
Safety Tips And Precautions
Hanging fairy lights from the ceiling creates a magical atmosphere. Safety must come first to enjoy them without risks. Follow these safety tips and precautions to keep your space secure and bright.
Avoiding Fire Hazards
Choose LED fairy lights over traditional bulbs. They stay cooler and use less energy. Keep lights away from flammable materials like curtains and paper. Never leave the lights on when you leave the room or go to sleep. Use lights that have passed safety tests and certifications.
Handling Electrical Components
Check the power source before plugging in your lights. Avoid overloading outlets or extension cords. Use lights with insulated wires to prevent shocks. Unplug lights before adjusting or moving them. Do not use damaged or frayed cords to avoid electric hazards.
Regular Maintenance Checks
Inspect fairy lights regularly for broken bulbs or damaged wires. Replace any faulty parts immediately to prevent accidents. Clean the lights gently to avoid dust buildup that may cause overheating. Test the lights before each use to ensure they work properly and safely.
Enhancing Decor With Accessories
Adding accessories to your fairy light setup can transform a simple ceiling display into a stunning focal point. Accessories bring texture, color, and personality to the space, making the lights feel more intentional and artistic. Have you ever noticed how a little extra detail can completely change the mood of a room? Let’s look at some easy ways to enhance your fairy lights with decor that anyone can try.
Using Sheer Fabrics
Sheer fabrics like tulle or chiffon add a soft, dreamy effect when draped alongside fairy lights. You can create gentle waves or flowing curtains that diffuse the light beautifully. Try attaching the fabric loosely with clips or hooks so it moves slightly with air currents, adding a sense of life to your display.
Think about colors that match your room’s theme—pastels for a calming vibe or bold shades for energy. Hanging fabric behind or around your lights makes the glow warmer and more inviting. Have you tried layering different fabric textures to see how they change the light’s appearance?
Incorporating Greenery And Flowers
Greenery and flowers bring freshness and natural charm to your ceiling lights. You can weave small branches, vines, or faux leaves through the light strands for an organic look. Adding flowers, real or artificial, creates focal points that catch the eye and soften the atmosphere.
- Use eucalyptus or ivy for a simple, elegant touch.
- Bright blooms like roses or daisies add pops of color.
- Mix textures by combining leafy greens with delicate blossoms.
Consider seasonal plants to keep your decor feeling current. Have you ever experimented with scented flowers to engage more than just the visual senses?
Adding Hanging Ornaments
Hanging small ornaments among your fairy lights introduces personality and dimension. Think about lightweight items like paper lanterns, crystals, or small glass baubles that catch and reflect light. These ornaments add sparkle and movement, making your ceiling lights more dynamic.
You can also personalize this by using themed decorations—stars for a celestial look, mini pom-poms for a playful touch, or tiny photo frames for a sentimental vibe. What kind of story do you want your ceiling to tell through these little details?
Troubleshooting Common Issues
Hanging fairy lights from the ceiling can instantly transform your space, but sometimes small issues pop up that can dim your glow. Troubleshooting these common problems quickly gets your lights shining perfectly again. Understanding what causes flickering, damaged bulbs, or loose attachments can save you time and frustration.
Fixing Flickering Lights
Flickering is often caused by loose connections or a weak power source. First, check if the plug is firmly inserted into the outlet. If you use an extension cord, try plugging the lights directly into a wall socket to see if that stabilizes the current.
Sometimes flickering happens because the bulbs aren’t screwed in tightly. Gently twist each bulb to ensure a secure fit, but be careful not to break the glass. Have you noticed flickering only when you plug in other devices? That could mean your outlet is overloaded and needs a break.
Replacing Damaged Bulbs
Damaged bulbs dim or don’t light up at all, affecting the overall look. Before replacing, unplug the lights to avoid any shocks. Identify the faulty bulbs by comparing them with the working ones; the broken bulbs often look dark or cracked.
Keep spare bulbs handy, as they’re usually sold in small packs with your fairy lights. When replacing, align the new bulb’s base with the socket and press gently until it clicks. Have you ever tried swapping bulbs only to find the problem persists? That’s a sign to inspect wiring next.
Dealing With Loose Attachments
Loose attachments can cause lights to droop or fall, which ruins your design and can be hazardous. Check clips, hooks, or adhesive strips holding the lights in place. If they feel weak or have lost stickiness, replace or reinforce them with clear tape or command strips designed for ceiling use.
Sometimes ceilings are textured or dusty, making it hard for attachments to stick. Clean the surface first with a dry cloth for better grip. Have you tried using push pins or twist ties instead? They can offer stronger support without damaging your ceiling.
Frequently Asked Questions
How Do I Hang Fairy Lights On A Ceiling Safely?
Use adhesive hooks or ceiling clips designed for lights. Avoid nails or staples to prevent damage. Ensure the lights are rated for indoor use and check the weight limits of your hanging tools for safety.
What Materials Do I Need To Hang Fairy Lights?
You need fairy lights, adhesive hooks or clips, a measuring tape, and a ladder. Optional items include command strips or fishing wire for extra support. Choose materials that won’t damage your ceiling or walls.
Can Fairy Lights Be Hung On Textured Ceilings?
Yes, use strong adhesive hooks or wire that can grip the texture. Avoid heavy lights that may fall. Test a small area first to ensure the hooks stick properly without damaging the ceiling.
How Do I Hide Wires When Hanging Fairy Lights?
Use clear adhesive clips or run wires along the ceiling edges. Paint wires the same color as the ceiling for better camouflage. Tuck excess wire neatly to avoid clutter and improve aesthetics.
Conclusion
Hanging fairy lights from your ceiling adds warmth and charm. You can create a cozy space with simple steps. Choose the right lights and secure them carefully. Small hooks or adhesive strips work well for support. Arrange the lights evenly for a neat look.
Turn them on and enjoy the soft glow. This easy project brightens any room quickly. Try different patterns to match your style. Have fun decorating and making your space shine.


