
Want to transform your room into a cozy, magical space? Hanging string lights from your ceiling is one of the easiest and most affordable ways to do it.
But maybe you’re wondering how to get those lights up safely and looking just right. Don’t worry—you’re in the right place. In this guide, you’ll discover simple steps and clever tips to hang your string lights like a pro. By the end, you’ll have a warm, inviting glow that will make your space feel completely new.
Ready to brighten up your room? Let’s get started!

Credit: swyfthome.com
Choosing The Right String Lights
Choosing the right string lights sets the tone for your space. It affects the brightness, style, and safety of your setup. Picking the correct type makes hanging easier and results better. Understanding different string lights helps you find the perfect fit for your ceiling.
Types Of String Lights
String lights come in many styles. Some have small LED bulbs, others use larger globe bulbs. Fairy lights offer a delicate and soft glow. Edison bulbs give a vintage and warm feel. Rope lights are flexible and good for outlining edges. Each type creates a unique atmosphere.
Length And Power Considerations
Measure your ceiling area to know the length needed. Too short means gaps, too long causes clutter. Check the power source location to avoid long extension cords. LED lights use less electricity and run cooler. Make sure your power supply can handle the total wattage of the lights.
Indoor Vs Outdoor Use
Indoor lights are not made for moisture or wind. Outdoor lights have special coating to resist weather. Using indoor lights outside risks damage and fire. Outdoor string lights often have thicker wires and sealed bulbs. Choose lights labeled for outdoor use if you hang them in open or damp areas.

Credit: teachernyla.com
Preparing Your Space
Preparing your space is a crucial step before hanging string lights from the ceiling. It sets the foundation for a smooth, safe, and visually appealing installation. Taking time to measure, locate power sources, and clear your ceiling surface will save you frustration and help avoid common mistakes.
Measuring The Ceiling Area
Start by measuring the length and width of the ceiling area where you want to hang your string lights. Use a tape measure to get accurate dimensions. This helps you determine how many light strands you need and where to place them for even coverage.
Don’t forget to account for any obstacles like beams or ceiling fans that might interrupt the light path. It’s better to measure twice than to find out your lights are too short or too long after you’ve started hanging them.
Locating Power Sources
Identify where your power outlets are in relation to the ceiling area. This will influence how you route your string lights and whether you need extension cords. Make sure the outlet is easily accessible and can handle the electrical load of your lights.
Have you ever tried to stretch a cord too far and ended up with a trip hazard or overloaded sockets? Planning your power source location ahead of time prevents these risks and keeps your setup safe and tidy.
Clearing The Ceiling Surface
Check your ceiling for dust, cobwebs, or any loose objects that could interfere with the installation. Cleaning the surface ensures the hooks or adhesive strips will stick properly and hold the weight of the lights.
If your ceiling has textured paint or uneven spots, test a small area first to see if your hanging method will work. A clean, smooth surface will keep your lights securely in place and avoid unexpected falls.
Selecting Hanging Tools
Choose hooks or adhesive clips that suit your ceiling type for hanging string lights safely. Ensure tools are strong enough to hold the weight without damage. Simple tools make the setup easy and keep lights secure.
Selecting the right tools for hanging string lights from your ceiling can make all the difference in transforming your space into a cozy, inviting haven. The wrong choice could lead to frustration, with lights refusing to stay in place or, worse, falling down. By understanding the variety of options available, you can ensure your lights are not only secure but also stylishly displayed.Adhesive Hooks And Clips
Adhesive hooks and clips offer a mess-free solution. These are ideal for renters or anyone hesitant to drill holes in their ceiling. Ensure the surface is clean and dry before applying. Some adhesive products are strong enough to hold up even in humid environments, making them versatile for indoor and outdoor use. Always check the weight limit of the adhesive to prevent any mishaps.Ceiling Hooks And Anchors
Ceiling hooks and anchors provide a robust solution for heavier string lights. These are perfect if you’re aiming for a long-term installation. Drill a small hole, insert the anchor, and twist in the hook. It’s straightforward, but ensure you use the right drill bit size to avoid damaging your ceiling. This method offers a secure hold that can handle heavier light strands, giving you peace of mind.Alternative Hanging Methods
Sometimes, creativity is your best tool. Consider using tension rods or curtain rods for a no-drill option. Simply run the string lights along the rod, and you’re set. This method is fantastic for creating a curtain-like effect with your lights. You can also use existing ceiling features, like beams or fixtures, to wrap or drape your lights. Always think outside the box—what unconventional spots could serve as perfect anchor points for your lights? Selecting the right tools is crucial for a successful installation. What unique ideas do you have to hang your string lights?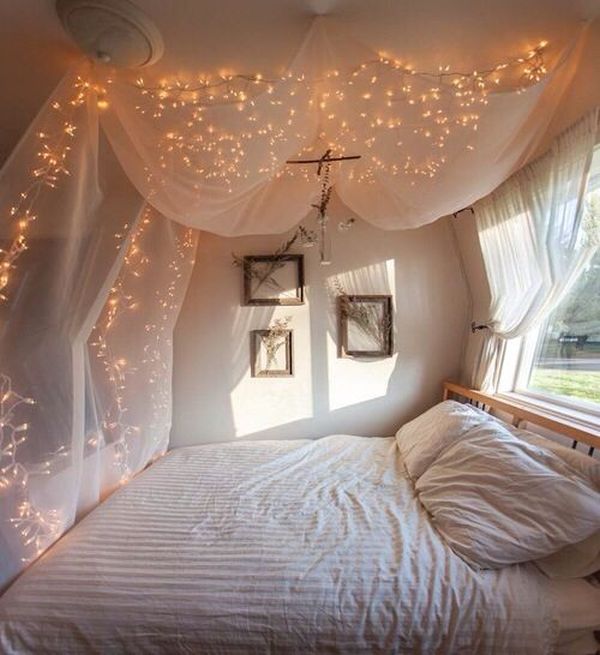
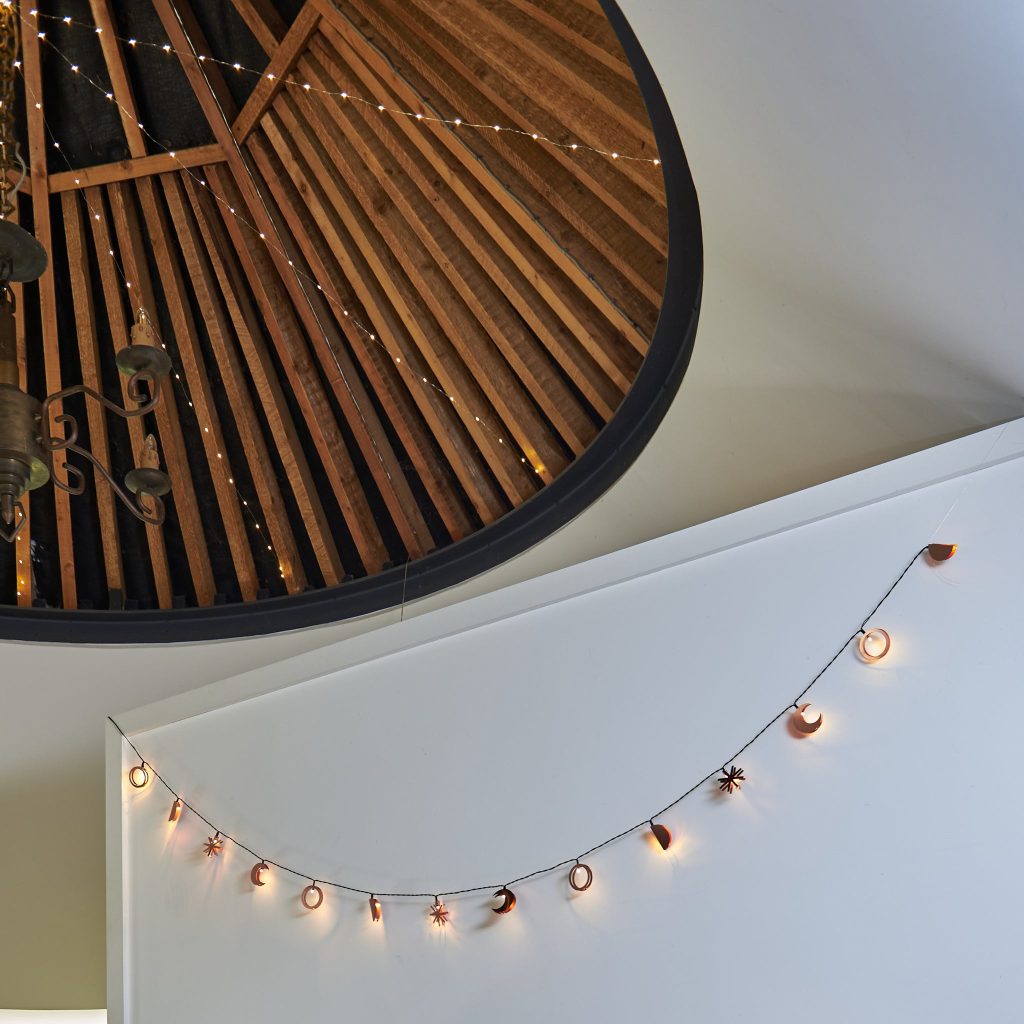
Credit: www.digsdigs.com
Step-by-step Hanging Process
Hanging string lights from your ceiling can transform any space into a cozy, inviting area. The process might seem tricky at first, but breaking it down into clear steps makes it manageable and even fun. Let’s walk through each part carefully to ensure your lights look perfect and stay secure.
Marking The Hanging Points
Start by deciding where you want your lights to go. Walk around the room and imagine the path of the string lights. Use a pencil or painter’s tape to mark the spots on the ceiling where hooks or clips will go.
Keep the spacing even—usually about 2 to 3 feet apart works well. Think about any obstacles like ceiling fans or vents that might interrupt your string. Would you want the lights to hang straight or drape in a gentle curve?
Installing Hooks Or Clips
Choose hooks or clips that fit your ceiling type—adhesive clips work great for drywall, while screw-in hooks offer more durability on wood. Clean the surface before attaching adhesive clips to ensure they stick firmly. If you’re using screws, pre-drill small pilot holes to avoid damaging your ceiling.
Press or screw in each hook firmly, then gently tug to test its hold. It’s better to install a few extra hooks than to risk sagging lights later. Have you checked if your hooks can support the weight of your chosen lights?
Stringing The Lights
Unroll your string lights completely to avoid tangles. Begin attaching the string to the first hook, then work your way along the marked points. Keep the lights taut but don’t stretch them too tight—this prevents damage and allows for natural movement.
If you want a draped look, let the string dip slightly between hooks. Plug in your lights before securing the final segment to make sure all bulbs work. How will you arrange the cord to keep it neat and out of the way?
Safety Tips And Precautions
Hanging string lights from your ceiling creates a warm and inviting atmosphere. However, ensuring safety while doing so is crucial to avoid accidents and damage. Paying attention to key precautions can protect your home and keep your lights shining bright without worry.
Avoiding Overloading Circuits
Overloading electrical circuits can cause breakers to trip or even start a fire. Check the power rating on your string lights and add up the total wattage you plan to use. Never plug too many strands into a single outlet or extension cord.
Use multiple outlets if needed and consider using a power strip with built-in surge protection. Have you ever experienced flickering lights or a sudden blackout? That might be your circuit warning you to reduce the load.
Securing Loose Wires
Loose or dangling wires create tripping hazards and can damage the light strings. Use adhesive hooks, clips, or cable ties to fasten wires neatly along the ceiling or walls. Make sure the wires are taut but not stretched tight enough to snap.
Double-check any areas where wires cross doorways or walkways. Have you noticed how a small snag can pull down an entire string? Securing wires prevents accidents and prolongs the life of your lights.
Using Weather-resistant Materials
If your string lights are near windows, doors, or outdoor-facing ceilings, weather resistance matters. Choose lights rated for damp or wet locations to avoid electrical shorts. Even indoor setups can benefit from moisture-resistant materials in humid rooms like kitchens or bathrooms.
Inspect your lights for any frayed wires or cracked bulbs before installation. Would you risk a short circuit for a few extra twinkling lights? Investing in quality, weatherproof products keeps your setup safe and reliable.
Creative Lighting Arrangements
Creative lighting arrangements can transform any space, making your string lights more than just a source of illumination. How you hang them sets the mood and defines the room’s character. Experimenting with different patterns can turn a simple ceiling into an eye-catching design feature.
Zigzag Patterns
Zigzag patterns create a dynamic flow across your ceiling, adding energy and movement to the space. You can stretch the lights back and forth between two walls or ceiling hooks, creating a visually interesting rhythm.
This arrangement works well in long rooms or narrow spaces where you want to draw the eye along the length. Think about spacing the lines evenly to keep it balanced, or try varying the gaps for a playful touch.
Canopy Style
The canopy style is like draping a soft light ceiling over your room. Attach the string lights from a central point, then stretch them outwards to the walls or corners, forming a starburst or tent-like effect.
This setup creates a cozy, intimate vibe perfect for bedrooms or outdoor patios. It’s also a great way to highlight a particular area, like over a dining table or a seating nook.
Framing The Room
Framing the room with string lights means outlining the edges of your ceiling or walls. This simple technique adds definition and a subtle glow, making the space feel polished and inviting.
You can run the lights along crown molding, around beams, or even create a grid for a modern look. Have you tried mixing warm and cool bulbs to add depth to this framing effect?
Maintaining Your String Lights
Maintaining your string lights keeps them bright and safe. Proper care extends their life and ensures a warm, inviting glow. Regular checks help spot problems early. Simple upkeep tasks prevent bigger issues later.
Regular Cleaning
Dust and dirt can dull string lights. Clean them gently with a soft cloth. Avoid using water on electrical parts. Wipe bulbs and wires carefully to remove grime. Clean lights shine brighter and last longer.
Checking For Damage
Inspect wires and bulbs often. Look for cracks, frays, or loose connections. Damaged wires can cause shorts or fires. Replace any worn parts right away. Safe lights protect your home and family.
Replacing Bulbs
Burned-out bulbs dim the whole string. Keep spare bulbs handy for quick swaps. Turn off lights before changing bulbs. Match the size and type to the original. Fresh bulbs keep your lights glowing evenly.
Frequently Asked Questions
How Do I Hang String Lights On A Ceiling Safely?
Use ceiling hooks or adhesive clips designed for lights. Avoid nails or screws that can damage wiring. Ensure lights are rated for indoor use. Keep cords away from heat sources. Always unplug before installation to prevent electric shocks.
What Tools Do I Need To Hang Ceiling String Lights?
You’ll need a ladder, measuring tape, ceiling hooks or adhesive clips, and a pencil. Optional tools include a drill for installing hooks and zip ties to secure wires neatly. Having the right tools ensures a smooth and safe installation.
Can I Hang String Lights On A Textured Ceiling?
Yes, use adhesive hooks or ceiling clips suitable for textured surfaces. Avoid heavy hooks that might damage the texture. Clean the surface before applying adhesive for better grip. Test a small area first to ensure it holds well.
How Far Apart Should Ceiling Hooks Be Spaced?
Hooks should be spaced about 2 to 3 feet apart. This supports the weight of the lights evenly. Closer spacing prevents sagging and ensures a neat appearance. Adjust spacing based on your light string length and ceiling layout.
Conclusion
Hanging string lights from the ceiling adds warmth and charm to any room. Follow simple steps to ensure a safe and sturdy setup. Choose the right hooks and plan your layout before starting. Take your time and work carefully for the best results.
Enjoy the cozy glow that brightens your space. This easy project can change the mood in minutes. Now, your ceiling looks inviting and beautiful. Give your home a fresh, glowing touch today.


