
Are you ready to transform your space with a stylish pendant light but unsure how to hang it with a cord? You’re in the right place.
Hanging a pendant light may seem tricky, but with the right steps, you can do it yourself quickly and safely. Imagine the warm glow filling your room, adding charm and personality exactly where you want it. Keep reading, and you’ll discover simple tips and clear instructions that make the whole process easy—even if you’ve never done this before.
Let’s get started and bring your lighting vision to life!

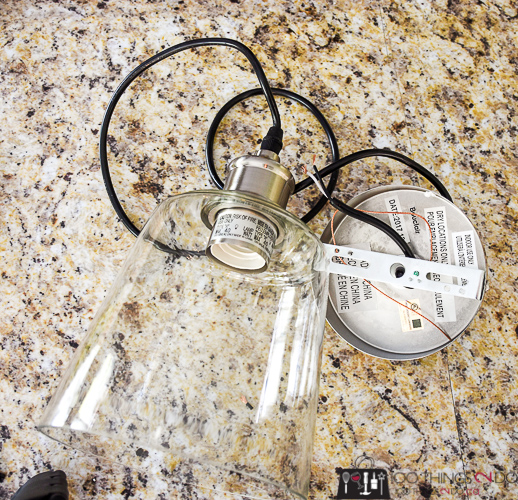
Credit: 100things2do.ca
Choosing The Right Pendant Light
Choosing the right pendant light is key to setting the mood and functionality of any room. Your choice impacts not only the brightness but also the overall style and feel of your space. Let’s look at what you need to consider before hanging that pendant light with a cord.
Types Of Pendant Lights
Pendant lights come in a variety of shapes and functions. You can find globe pendants, lantern-style, drum shades, or even industrial cage designs. Each type casts light differently—some focus it downward for task lighting, while others spread it out for ambient glow.
Think about the purpose of your lighting. Do you want a soft, diffused light for relaxing, or a bright spotlight for reading? Your choice here will guide you toward the right type.
Selecting The Perfect Size
The size of your pendant light should match the space it’s in. A small pendant in a large room will get lost, while an oversized light can overwhelm a compact area. Measure your room and consider the height where the light will hang.
As a quick rule, the diameter of the pendant should be about one-third the width of the surface it’s above. For example, a dining table that’s 36 inches wide calls for a pendant light roughly 12 inches in diameter. This keeps the balance visually pleasing and practical.
Matching Your Decor Style
Your pendant light should blend well with your existing decor. If your style is modern and minimal, go for sleek designs with clean lines. For rustic or farmhouse vibes, consider pendant lights with warm finishes like bronze or wood accents.
What’s your room’s personality? Matching the light to your style adds cohesion and elevates the overall look. Don’t be afraid to mix materials—glass, metal, and fabric can work well together if chosen thoughtfully.
Tools And Materials Needed
Gathering the right tools and materials is key for a smooth pendant light installation. Having everything ready saves time and avoids frustration. This section lists all essentials for hanging a pendant light with cord.
Essential Tools
- Screwdriver (flathead and Phillips)
- Wire stripper
- Drill with bits
- Voltage tester
- Measuring tape
- Level
- Pencil
- Wire nuts
- Step ladder
Materials Checklist
- Pendant light fixture with cord
- Mounting bracket or canopy
- Electrical box (if not already installed)
- Light bulbs (check correct wattage)
- Electrical tape
- Anchor screws or ceiling hooks (if needed)
Safety Gear
- Insulated gloves
- Safety goggles
- Dust mask (for drilling)
- Non-slip shoes
Preparing The Installation Area
Before you start the exciting process of hanging your pendant light, it’s crucial to prepare the installation area. This step ensures not only a seamless fit but also your safety. Taking the time to get it right can save you from potential hazards and costly mistakes. Let’s dive into the essential steps to prepare your installation area effectively.
Turning Off Power
Your safety is paramount. Begin by turning off the power to the area where you plan to install the pendant light. Head to your circuit breaker and switch off the correct breaker. A simple way to confirm the power is off is by using a voltage tester on the wires. This step, although seemingly basic, is one you shouldn’t skip. Have you ever experienced an unexpected shock? It’s not something you want to risk.
Measuring Ceiling Height
Accurate measurements are key. Grab a tape measure and note the height from the ceiling to the floor. This measurement will help determine how low your pendant light should hang. Consider the space’s purpose. In a dining room, for example, the light should be lower to create ambiance, while in a kitchen, a higher hang may be more practical. What atmosphere are you aiming to create?
Locating Ceiling Joists
Support is essential. Use a stud finder to locate ceiling joists, which will provide a sturdy anchor point for your light. Mark the position of the joists with a pencil. If a joist doesn’t align with your desired light placement, consider using a ceiling medallion to adjust the position. This ensures your light is both secure and aesthetically pleasing. Have you considered the balance between function and style?
Installing The Ceiling Hook Or Mount
Installing the ceiling hook or mount is a key step to hang your pendant light safely. This part holds the entire fixture in place. It must be done carefully to ensure stability and proper alignment. Follow these clear steps to set up the ceiling hook or mount correctly.
Marking The Spot
Start by choosing where the pendant light will hang. Use a pencil to mark the exact spot on the ceiling. Check the location aligns with the room’s layout and power source. This mark guides the drilling and mounting process.
Drilling And Anchoring
Drill a hole at the marked spot. Pick a drill bit size that matches the anchor size. Insert a wall anchor or toggle bolt to secure strong support. Anchors prevent the hook from pulling out under the light’s weight.
Securing The Hook
Screw the ceiling hook into the anchored hole. Tighten it firmly but avoid over-tightening to stop damage. Test the hook by gently pulling down. It should hold steady without any movement.
Wiring The Pendant Light
Wiring your pendant light correctly is essential for safety and performance. It might seem complicated, but with clear steps and attention to detail, you can handle it confidently. Let’s break down the key parts to get your new light up and running without a hitch.
Connecting Wires Safely
First, always turn off the power at your circuit breaker before touching any wires. This simple step can prevent serious shocks.
Identify the wires from your pendant light and the ceiling: usually, you’ll find a black (hot), white (neutral), and green or bare copper (ground) wire. Match each color from the fixture to the corresponding wire in your ceiling.
Twist the ends of the matching wires together clockwise to ensure a secure connection. Loose connections can cause flickering or even electrical fires, so make sure the wires are tight.
Using Wire Nuts And Tape
After twisting the wires, cover the exposed connection with a wire nut. Wire nuts come in different sizes, so choose one that fits snugly without forcing.
Once the wire nut is on, wrap a small piece of electrical tape around the base of the nut and wires. This adds extra security and prevents the nut from loosening over time.
Don’t skip this step, even if the wire nut feels tight. The tape acts as a backup and gives you peace of mind.
Testing Electrical Connections
Before finalizing the installation, restore power at the breaker and test your pendant light. Turn the switch on and off a few times to check for any flickering or unusual behavior.
If the light doesn’t work or flickers, turn off the power and double-check your connections. Sometimes a wire nut might not be fully tight, or wires could be mismatched.
It’s better to troubleshoot now than to discover issues after you’ve mounted the fixture fully. Have a voltage tester handy—it’s a simple tool that can confirm if your wiring is live and safe.
Adjusting The Cord Length
Adjusting the cord length of your pendant light is key to achieving the perfect look and functionality in your space. Too long, and the light could become an obstruction; too short, and it might not illuminate the area effectively. Taking the time to get this just right ensures your room feels balanced and well-lit.
Measuring Desired Drop
Start by deciding how low you want the pendant light to hang. A good rule is to keep it about 28 to 34 inches above a table or countertop. In open areas, aim for at least 7 feet from the floor to avoid bumping into the fixture.
Use a tape measure or even a piece of string to mark the exact length before making any cuts. This simple step helps prevent mistakes and saves you from having to adjust the cord repeatedly.
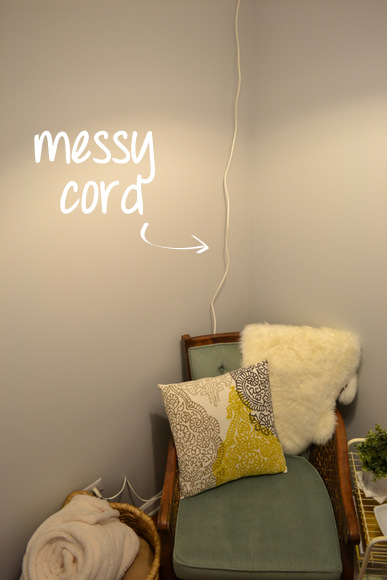
Securing Excess Cord
Once you’ve measured and cut the cord, it’s important to secure any extra length to avoid tangling or an untidy look. You can coil the extra cord neatly inside the ceiling canopy or use cord clips if the excess must run along the ceiling or wall.
Consider using twist ties or Velcro straps to keep the cord tidy inside the canopy. This not only looks cleaner but also protects the wiring from wear and tear.
Creating A Neat Appearance
A neat installation makes a big difference in how your pendant light complements the room. Make sure the cord hangs straight without twists or kinks. If your cord is fabric-covered, smoothing it out enhances the overall look.
Think about color coordination too. Matching the cord color to your ceiling or wall can make it blend in, while a contrasting cord can add a bold design statement. What vibe do you want your pendant light to create in your space?
Final Assembly And Testing
After securely mounting your pendant light and adjusting the cord length, the final assembly and testing phase ensures everything works perfectly. This part is crucial because even a small mistake can affect the light’s functionality or safety. Let’s dive into the final steps that bring your pendant light to life.
Attaching The Light Fixture
Start by carefully attaching the light fixture to the ceiling mount. Align the fixture’s base with the mounting bracket and use the screws provided to secure it tightly.
Make sure all wires are neatly tucked inside the canopy to avoid any pinching or exposure. Double-check that the fixture feels stable and doesn’t wobble when gently pushed.
Installing The Bulb
Choose the correct bulb type and wattage recommended by the manufacturer. Screw the bulb in gently but firmly, avoiding overtightening which can damage the socket.
Have you ever struggled with a bulb that flickers or doesn’t fit? Taking a moment to verify compatibility saves time and frustration later.
Turning Power Back On
Before flipping the switch, ensure all tools are cleared from the area and your hands are dry. Turn the circuit breaker or fuse back on to restore power to your pendant light.
Test the light by turning it on with the wall switch. If it doesn’t illuminate, double-check your wiring connections and bulb installation.
What’s the feeling when your new light flickers on for the first time? It’s a simple moment that makes all the effort worthwhile.

Credit: www.amazon.ca
Troubleshooting Common Issues
Hanging a pendant light with a cord can sometimes lead to common problems. These issues often stop the light from working or cause the fixture to hang unevenly. Understanding how to fix these problems helps keep your space well-lit and safe.
Light Not Turning On
Check if the bulb is properly screwed in. A loose bulb can prevent the light from working. Test the bulb in another socket to see if it is faulty. Inspect the power source and switch to ensure they work correctly. Look for any visible damage to the cord or connections. Replace the bulb or repair wiring if needed.
Cord Hanging Problems
Uneven or twisted cords affect the light’s appearance and safety. Make sure the cord is straight and not tangled. Adjust the length by sliding the cord through the ceiling canopy. Use a cord grip or clip to hold the cord steady. Avoid pulling the cord too tight, as it can cause stress or damage.
Loose Fixtures
Loose fixtures create wobbling and risk falling. Tighten all screws and mounting hardware securely. Check the ceiling box to ensure it supports the fixture’s weight. If needed, use stronger anchors or brackets. Confirm that the fixture is flush with the ceiling for stability.
Maintenance Tips For Pendant Lights
Proper care keeps pendant lights bright and lasting longer. Regular maintenance prevents damage and ensures safety. Simple habits protect your fixture and preserve its look.
Cleaning The Fixture
Turn off power before cleaning to avoid shocks. Use a soft cloth or feather duster for dust. For stubborn dirt, lightly dampen the cloth with water. Avoid harsh chemicals that can damage finishes. Clean glass shades gently to keep them clear.
Replacing Bulbs Safely
Switch off the light and wait for bulbs to cool. Use the right bulb type and wattage for your fixture. Handle bulbs with a cloth or gloves to avoid oils from your skin. Insert bulbs firmly but do not force. Check the fixture’s manual for specific bulb instructions.
Checking For Wear And Tear
Inspect cords and connections regularly for frays or cracks. Look for loose parts or screws and tighten them. Watch for discoloration or burn marks near the socket. Replace damaged cords or parts immediately. Safety first to prevent electrical hazards.
Credit: thediyplaybook.com
Frequently Asked Questions
How Do I Hang A Pendant Light With A Cord?
To hang a pendant light with a cord, first switch off the power. Attach the mounting bracket to the ceiling. Connect the wires: live, neutral, and ground. Secure the pendant light canopy, adjust the cord length, and restore power.
What Tools Are Needed To Install Pendant Light Cords?
You need a screwdriver, wire stripper, voltage tester, drill, and ladder. These tools help ensure a safe and secure installation. Always double-check power is off before starting.
How To Adjust The Length Of A Pendant Light Cord?
To adjust the cord length, loosen the canopy screws. Pull or push the cord to desired length. Tighten screws to secure the cord in place. Always ensure the cord is not too tight or loose.
Can I Install A Pendant Light Without Professional Help?
Yes, if you have basic electrical knowledge and tools. Always turn off the power before installation. Follow safety guidelines and local electrical codes for best results.
Conclusion
Hanging a pendant light with a cord can brighten any space. Follow the steps carefully for a safe setup. Measure the height and secure the cord tightly. Choose the right tools and take your time. The right placement adds style and good lighting.
Enjoy the cozy feel that a pendant light brings. Simple changes can make your room look fresh. Try it yourself and see the difference.


