
Are you looking to transform your walls with stunning 3D panels but worried about the mess and hassle of glue? You’re not alone.
Many people want a sleek, modern look without the sticky, time-consuming process that traditional installation demands. What if you could achieve that amazing textured wall without any glue at all? In this guide, you’ll discover simple, effective ways to install 3D wall panels quickly and cleanly—no glue required.
Keep reading, and you’ll learn insider tips that make your DIY project easy, damage-free, and totally stress-free. Your walls are about to get a fresh new look, hassle-free!
Choosing The Right 3d Wall Panels
Choosing the right 3D wall panels is key to achieving a stunning look without the hassle of glue. The right choice depends on your room’s style, wall surface, and the panel’s size and thickness. Picking wisely can save you time and effort during installation.
Materials And Styles
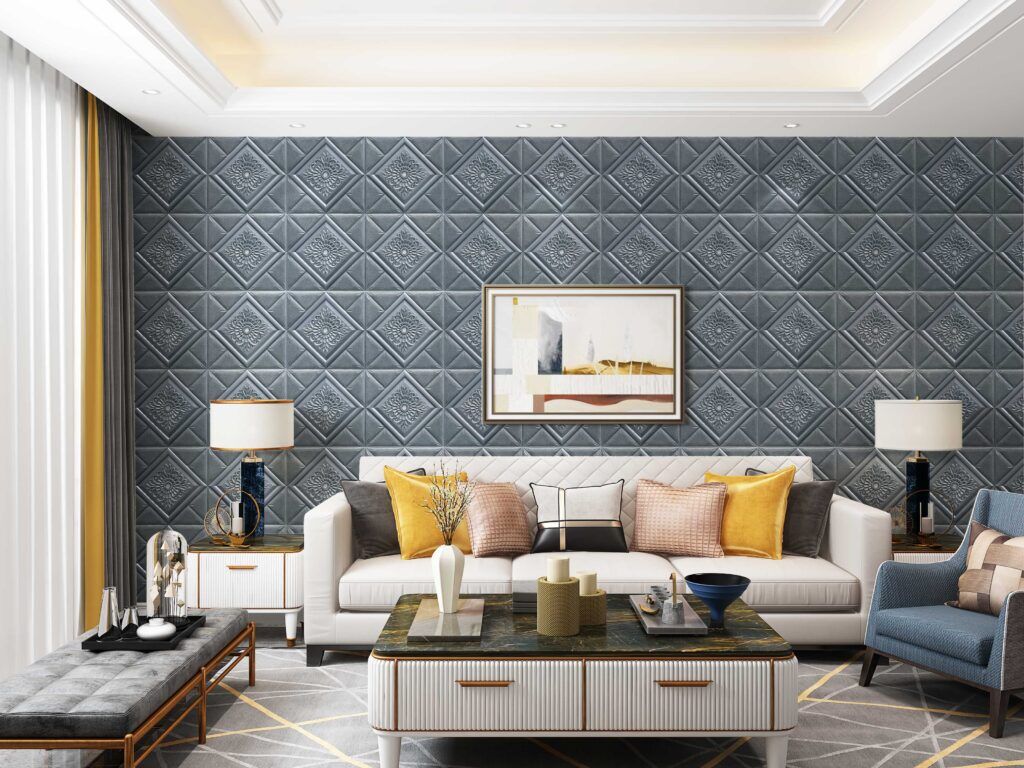
3D wall panels come in different materials like PVC, MDF, gypsum, and plant fibers. Each material offers unique benefits: PVC panels are waterproof and easy to clean, while MDF provides a smooth surface for painting. Think about the style you want—modern geometric patterns, natural wood textures, or classic floral designs—to match your room’s vibe.
I once chose lightweight PVC panels for a kitchen backsplash because they resisted moisture well and were simple to snap into place. What style will fit your space and lifestyle?
Panel Sizes And Thickness
The size and thickness of your panels affect both the look and installation process. Larger panels cover more space quickly but can be harder to handle, especially without glue. Thicker panels create deeper shadows and texture but might add weight to your walls.
- Small panels work well for intricate designs and tight spaces.
- Medium-sized panels offer a balance of ease and visual impact.
- Thicker panels (around 0.5 to 1 inch) provide pronounced 3D effects.
Consider the weight your wall can hold and how much texture you want. Have you checked your wall’s strength before buying heavy panels?
Surface Compatibility
Not all surfaces are ideal for 3D panel installation without glue. Smooth, clean, and dry walls like painted drywall or plywood are the best options. Surfaces like rough brick or textured plaster may require additional preparation or alternative mounting methods.
When I installed panels in a rental, I chose lightweight PVC on smooth drywall to avoid damage and simplify removal. Do you know your wall’s surface type and how it will hold the panels?
Matching the panel type to your wall surface ensures a secure fit and a flawless finish without glue. Are you ready to pick panels that fit your walls perfectly?
Preparing The Wall Surface
Preparing the wall surface is essential before installing 3D wall panels without glue. A clean and smooth wall ensures the panels stick properly and look great. Taking time to prepare helps avoid future problems and keeps the installation strong.
Cleaning And Smoothing
Start by removing dust, dirt, and grease from the wall. Use a damp cloth or sponge with mild soap and water. Let the wall dry completely before moving on. Smooth the surface by sanding rough spots or bumps gently. This step helps the panels fit flush and prevents uneven surfaces.
Repairing Wall Imperfections
Check the wall for cracks, holes, or dents. Fill small holes and cracks with spackle or wall filler. Use a putty knife to apply the filler evenly. Let it dry, then sand it smooth. Large imperfections might need extra repair or patching. A flat wall surface is key to a neat panel installation.
Tools And Materials Needed
Installing 3D wall panels without using glue is not just a practical choice—it can be an exciting DIY project that transforms your space. To get started, you need the right tools and materials to ensure a seamless installation. Understanding what you’ll need can save you time and frustration, ensuring your project runs smoothly.
Essential Tools
Before diving into your installation, gather these essential tools to make the process easier and more efficient:
- Measuring Tape:Ensure accurate measurements for a perfect fit of the panels.
- Level:Keep your panels straight and aligned for a professional look.
- Pencil:Mark the wall where you need to place each panel.
- Utility Knife:Trim panels to fit around outlets or edges.
- Drill or Screwdriver:Secure panels in place, especially if you’re using screws or other fixtures.
Having these tools on hand can help you handle unexpected challenges that might arise. A level, for instance, can be a game-changer in avoiding a crooked installation.
Alternative Fixing Materials
While glue is the traditional choice for installing wall panels, there are several alternatives you might consider:
- Velcro Strips:Easily removable and repositionable, making them perfect for renters.
- Screws and Anchors:Provide a secure hold, especially on drywall or plaster.
- Double-Sided Tape:A quick and easy solution for lightweight panels.
- Command Strips:Designed to hold weight without damaging walls upon removal.
Choosing the right fixing material depends on the weight of your panels and the type of wall surface. Have you considered how removable you want the panels to be? This can greatly influence your choice of materials.

Credit: dundeedeco.com
Installation Methods Without Glue
Installing 3D wall panels without glue can save you from the mess and permanence that adhesive brings. You might want to change your decor more often or avoid damaging your walls. Fortunately, there are simple and effective alternatives that hold panels securely without sticky residues.
Using Double-sided Tape
Double-sided tape offers a quick and clean way to attach 3D wall panels. Choose heavy-duty tape designed for mounting, as it provides strong adhesion without damaging the surface. Press the panel firmly against the wall to ensure it sticks well.
One tip is to clean the wall surface thoroughly before application. This removes dust and oils, improving the tape’s grip. Have you considered how easy it would be to swap panels when you want a fresh look?
Applying Velcro Strips
Velcro strips give you flexibility and easy removal options. Attach one side of the strip to your panel and the other to the wall. This method is perfect if you plan to reposition your panels or take them down without hassle.
Velcro also supports medium-weight panels well, but make sure to use industrial-strength strips for better hold. Think about how often you might want to rearrange your space—Velcro lets you do that without fuss.
Employing Mounting Strips
Mounting strips, like those from popular brands, are designed to hold items firmly and remove cleanly. They work well on smooth wall surfaces and come in different weight capacities. Press the strips onto the panel edges and then onto the wall for a secure fit.
This method avoids holes and sticky buildup, keeping your walls intact. Wondering if your panels are heavy? Check the strip’s weight rating to match your panels for safe installation.
Using Nails Or Screws With Care
Nails or screws provide a very secure hold but require careful handling to avoid wall damage. Use small finishing nails or screws, and consider installing them in the panel’s grooves or edges to hide them. Pre-drill holes if necessary to prevent cracking the panels.
If you’re renting, confirm with your landlord before making holes. This method is ideal for heavier panels or when you want a permanent installation without glue. Could this be the solution if you need maximum stability?
Step-by-step Installation Process
Installing 3D wall panels without glue is easier than it seems. This process saves time and avoids messy adhesives. Follow clear steps to secure your panels firmly and neatly. Proper measuring, attaching, and aligning are key for a flawless finish.
Measuring And Marking
Start by measuring the wall space carefully. Use a tape measure to check height and width. Mark the positions lightly with a pencil. Mark where each panel will go to avoid gaps. Double-check all marks before starting the installation.
Attaching Panels Securely
Choose a strong mounting method like nails or screws. Use a drill or hammer depending on your wall type. Attach panels firmly to studs or solid surfaces. Avoid pressing too hard to prevent damaging panels. Make sure panels stay flush against the wall.
Aligning And Adjusting Panels
Place each panel next to the previous one carefully. Check for even spacing and level alignment. Adjust panels by tapping gently with a rubber mallet. Keep patterns consistent for a smooth look. Inspect the wall after all panels are installed to fix any small gaps or shifts.

Credit: dundeedeco.com
Tips For Damage-free Removal
Removing 3D wall panels without causing damage is essential for preserving your walls. Proper removal keeps the surface intact and ready for future use. Follow these tips to make the process smooth and safe.
Loosening Panels Safely
Start by gently prying the edges of the panels using a flat tool. Use a plastic putty knife or a thin spatula to avoid scratching the wall. Work slowly and carefully to loosen the panel without bending or breaking it. Avoid pulling the panel too hard to prevent wall damage.
Avoiding Wall Marks
Protect your walls by placing painter’s tape around the panel edges before removal. This helps prevent paint from peeling off. Remove panels in a controlled way to avoid gouging or chipping the wall surface. Keep the area clean and free of dust to spot any marks early.
Cleaning Residue Effectively
Use warm, soapy water and a soft cloth to wipe off any leftover adhesive residue. For tougher spots, try a mixture of vinegar and water. Avoid harsh chemicals that can damage paint or drywall. Always test cleaning solutions on a small area first.
Maintenance And Care
Maintaining and caring for 3D wall panels without glue helps keep them looking fresh. Proper care extends their life and preserves the texture. Regular checks and simple cleaning avoid buildup and damage. Small issues can be fixed quickly to prevent bigger problems.
Cleaning 3d Panels
Dust panels regularly using a soft cloth or duster. Use a vacuum cleaner with a brush attachment for deep cleaning. Avoid harsh chemicals; water with mild soap works best. Gently wipe the surface to keep the texture intact. Dry with a clean cloth to prevent moisture damage.
Repairing Minor Damages
Inspect panels often for cracks or dents. Use a lightweight filler suitable for the panel material. Apply filler carefully and smooth it out with a putty knife. Let it dry completely before sanding lightly for a smooth finish. Repaint or touch up color to match the original panel.

Credit: dundeedeco.com
Frequently Asked Questions
How Can I Install 3d Wall Panels Without Glue?
You can use adhesive strips, double-sided tape, or mounting clips. These options hold panels firmly without glue, making installation cleaner and easier.
What Tools Do I Need To Install Panels Without Glue?
You need a measuring tape, level, adhesive strips or mounting clips, and a utility knife. These tools ensure precise and secure panel placement.
Are 3d Wall Panels Easy To Remove Without Glue?
Yes, panels installed with adhesive strips or clips can be removed easily without damaging walls. This method is perfect for renters or temporary decor.
Can I Install 3d Wall Panels On Uneven Surfaces?
Yes, panels can be installed on slightly uneven surfaces using adjustable mounting clips or flexible adhesive strips that accommodate surface irregularities.
Conclusion
Installing 3D wall panels without glue saves time and avoids mess. Using nails, screws, or clips keeps panels secure and easy to remove. This method protects your walls and lets you change designs anytime. Just measure carefully and follow the steps for a neat finish.
Your room gets a fresh, modern look without hassle. Try this simple way to update walls quickly and cleanly.


