
Are you looking to brighten up your space with a stylish pendant light but don’t know where to start? Installing a pendant light might seem tricky, but with the right steps, you can do it yourself and save time and money.
Imagine transforming your room with just one simple change—giving it a fresh, modern look that catches everyone’s eye. In this guide, you’ll learn exactly how to install a pendant light safely and easily, even if you’ve never handled electrical work before.
Keep reading, and by the end, you’ll have the confidence to light up your home like a pro.

Credit: 100things2do.ca
Choosing The Right Pendant Light
Choosing the right pendant light shapes the look and feel of your room. It affects brightness, style, and the overall mood. Focus on style, size, lighting needs, and electrical compatibility. Each factor ensures your pendant light fits perfectly and works safely.
Selecting The Style And Size
Pick a pendant light style that matches your room decor. Modern, rustic, or classic designs offer many options. Size matters to avoid overpowering or underwhelming the space. Measure the area and ceiling height before buying. Small pendants suit tight spaces; large ones fit open rooms.
Considering Room Lighting Needs
Think about how much light the room requires. Pendant lights can provide ambient, task, or accent lighting. Choose bulbs with the right brightness and color temperature. Use dimmable lights for flexible brightness control. Proper lighting improves room comfort and functionality.
Checking Electrical Compatibility
Check your home’s electrical setup before installation. Ensure the pendant light matches your voltage and wiring. Look for fixtures that work with your switch type. Confirm the weight of the light is safe for your ceiling mount. Proper compatibility keeps your home safe and avoids extra costs.

Credit: designingvibes.com
Gathering Tools And Materials
Before you begin installing your pendant light, gathering the right tools and materials is crucial. Having everything ready saves time and prevents frustrating interruptions. It also helps you avoid unnecessary trips to the hardware store, keeping your project on track.
Essential Tools For Installation
Make sure you have these tools on hand to make the installation smooth and efficient:
- Voltage tester:To check if the power is off and avoid electrical shocks.
- Screwdrivers:Both flathead and Phillips for removing and securing screws.
- Wire strippers:To strip the insulation off the electrical wires cleanly.
- Drill with bits:Useful for making new holes or securing mounting brackets.
- Pliers:For twisting wires together safely.
- Measuring tape:To measure drop length and positioning accurately.
- Ladder or step stool:To reach your ceiling comfortably and safely.
Do you already have some of these tools? If so, inspect them to ensure they are in good condition before starting.
Safety Gear To Use
Safety must be your priority. Protect yourself by wearing proper gear during installation.
- Safety goggles:To shield your eyes from dust, debris, or sparks.
- Insulated gloves:These reduce the risk of electrical shocks.
- Dust mask:Helpful if you’re drilling into drywall or plaster.
- Non-slip shoes:Prevent slips while standing on ladders or stools.
Have you experienced any close calls during DIY projects? Taking these safety steps can make a big difference.
Preparing Your Workspace
Clear your work area thoroughly before you start. Remove furniture or cover it with drop cloths to avoid dust and damage.
Good lighting is essential. Use portable lamps if your workspace is dim to see all wiring clearly.
Turn off the power at the circuit breaker to the room where you’ll install the pendant light. Double-check with your voltage tester to confirm no electricity is flowing.
Does your workspace feel cramped or cluttered? Taking time to organize it will help you work faster and safer.
Turning Off Power Safely
Installing a pendant light can transform the ambiance of any room, but ensuring safety during installation is crucial. The first step in this process is turning off the power safely. Understanding how to effectively and securely cut off electricity will protect you and your home from potential hazards.
Locating The Circuit Breaker
To begin, you need to locate your circuit breaker panel. Typically, this panel is situated in basements, garages, or utility rooms. If you’re unsure, ask a family member who might know or refer to your home’s blueprint.
Once found, open the panel and identify the switch corresponding to the room where you’ll install the pendant light. Each switch should be labeled clearly, but sometimes labels wear off, so you may need to switch them off one by one to find the right one. This can be tedious, but ensuring the correct circuit is off is vital for your safety.
Testing For Power
After flipping the breaker, don’t assume the power is off. Use a voltage tester to confirm no electricity is flowing to the light fixture. Simply touch the tester to the wires or the socket to see if there’s still power.
A personal tip: I once skipped this step, only to get a mild shock. It was a wake-up call about the importance of verifying power status. Never underestimate this step; it’s a simple and effective safety check.
Using Safety Precautions
Before diving into the installation, ensure you have the right safety gear. Wear insulated gloves and use tools with rubber handles to prevent electrical shocks. Also, have a dry, stable ladder ready if your fixture is out of reach.
These precautions might seem excessive, but imagine the hassle of handling an unexpected accident. Wouldn’t you rather spend a few extra minutes preparing than dealing with a preventable injury? Prioritize your safety to enjoy a successful installation.

Credit: 100things2do.ca
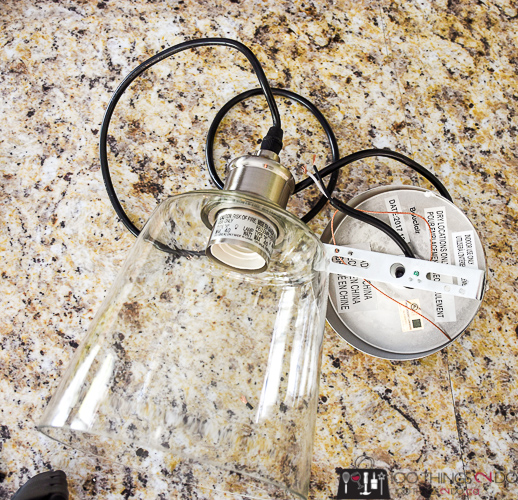
Removing The Old Fixture
Removing the old fixture is the first crucial step before installing your new pendant light. This process requires patience and attention to detail to avoid damaging the ceiling or electrical components. Taking the time to do this properly will save you headaches later and ensure a safe installation.
Detaching The Existing Light
Start by turning off the power at the circuit breaker to eliminate any risk of electric shock. Use a voltage tester to double-check that the wires are not live. Then, carefully unscrew the fixture’s canopy or cover plate to expose the wiring and mounting bracket.
Some fixtures might have small screws or clips holding them in place—keep track of these so you don’t lose them. Gently lower the fixture while supporting its weight to avoid sudden drops. Have a helper if the fixture is heavy or awkward to handle.
Handling Wiring Carefully
Once the fixture is loose, take note of how the wires are connected. Usually, you’ll find a black (hot), white (neutral), and green or bare copper (ground) wire. Before disconnecting, snap a photo or label the wires to guide you during installation.
Loosen the wire nuts and separate the fixture wires from the house wiring slowly to avoid pulling on the wires themselves. If you encounter any damaged or frayed wires, now is the time to address those issues before moving on. Never rush this part; a safe connection is key.
Preparing The Mounting Area
After removing the old fixture and disconnecting the wires, inspect the mounting bracket and the electrical box. Ensure the box is securely attached to the ceiling joist and is rated to support the weight of your new pendant light.
Clean the area by removing dust, debris, or old paint that might interfere with a flush fit. If the mounting bracket is worn or incompatible with your new fixture, replace it now. This small effort prevents instability and future repairs.
Installing The Pendant Light
Installing a pendant light can brighten any room with style and function. This process involves careful steps to ensure safety and a perfect fit. Following clear instructions helps avoid common mistakes and makes the job easier. Here is how to install your pendant light confidently.
Assembling The Fixture
Start by unpacking all parts of the pendant light. Check the package for screws, canopy, and any decorative elements. Attach the shade or glass cover to the light fixture. Use the screws provided to secure all pieces firmly. Make sure the fixture looks balanced and tight before moving on.
Connecting The Wiring
Turn off the power at the circuit breaker to prevent shocks. Remove the old fixture if needed and expose the wiring. Match the wires by color: usually black to black, white to white, and green or copper to ground. Use wire nuts to connect the wires securely. Wrap each connection with electrical tape for extra safety.
Securing The Pendant To The Ceiling
Attach the mounting bracket to the ceiling box with screws. Lift the pendant light and connect the fixture wires to the house wiring as explained. Tuck the wires neatly into the ceiling box. Position the canopy to cover the box and fasten it with screws. Adjust the chain or rod length to the desired height before tightening all parts.
Adjusting Height And Position
Adjusting the height and position of your pendant light is key to creating the right ambiance and functionality in your space. It’s not just about hanging the fixture—it’s about tailoring it to your room’s unique needs. Small tweaks here can make a big difference in both style and lighting effectiveness.
Setting The Desired Length
Start by deciding how low you want the pendant light to hang. Consider the room’s ceiling height and what activities happen underneath. For example, in a dining area, the light should be low enough to illuminate the table without obstructing views.
Most pendant lights come with adjustable cords or rods. You can usually shorten or lengthen these by twisting or cutting excess cord—just be sure to follow safety guidelines. Don’t rush this step; measure carefully and test the height before finalizing.
Leveling The Fixture
A crooked pendant light can throw off the entire look of your room. Use a small level tool to check if the fixture is straight once hung. If it’s off, adjust the canopy or the cord until the light hangs evenly.
Some fixtures have adjustable components specifically for leveling. If yours doesn’t, try gently shifting the fixture’s weight. Getting it perfectly level helps your space look polished and your lighting work as intended.
Ensuring Proper Alignment
Think about where the pendant light sits relative to furniture and room layout. It should be centered over key areas like kitchen islands or dining tables. Misalignment can make your setup feel awkward and unbalanced.
To check alignment, stand back and view the fixture from different angles. Ask yourself if it draws the eye naturally or distracts from the room’s flow. Adjust as needed to create a harmonious feel that enhances your space.
Testing And Final Touches
After installing your pendant light, the final phase involves careful testing and adding the finishing touches. This step ensures your fixture works perfectly and looks stunning, enhancing your space just as you imagined.
Restoring Power And Testing
Before flipping the switch, double-check that all wiring connections are secure and insulated properly. Once you feel confident, restore power at the circuit breaker and turn on your new pendant light.
Does the light turn on immediately? If yes, observe the brightness and whether the fixture is stable. Flickering or dim lighting could signal a loose connection or a bulb issue. Testing early saves you the hassle of taking the fixture down again.
Troubleshooting Common Issues
If the light doesn’t come on, start by confirming the breaker is fully on. Sometimes it can feel like it’s switched on when it’s only partially reset.
Next, check the bulb. Try replacing it with a new one to rule out a faulty bulb. If the problem persists, inspect your wiring connections again. Loose wires or incorrect hookups are often the culprits.
Still no luck? Consider whether your fixture requires a compatible dimmer switch or specific bulb type. These small details can cause unexpected problems.
Cleaning And Enhancing Appearance
Dust and fingerprints can dull your pendant light’s shine after installation. Use a soft, dry cloth to gently wipe the fixture and glass shades.
If your fixture has metal parts, a mild cleaner or polish can restore their sparkle—just avoid abrasive materials that might scratch surfaces. Also, check that all screws and mounting brackets are tight for a polished, secure look.
Want to add a personal touch? Consider swapping bulbs for warm or cool tones to match your room’s mood. Small changes like this can make your new pendant light truly reflect your style.
Safety Tips For Pendant Lighting
Installing a pendant light adds style and functionality to your space, but safety should always come first. Ignoring safety tips can lead to accidents or damage. Paying attention to simple precautions helps you enjoy your new lighting without worry.
Regular Maintenance
Check your pendant light regularly to make sure everything stays secure. Loose fittings or worn wires can cause sparks or even fires. I once skipped a quick inspection and found a frayed wire—fixing it saved me from a costly repair later.
Clean the fixture gently to prevent dust buildup, which can overheat the bulb. Look for signs of damage or corrosion on the wiring and mounting parts. Keeping your light well-maintained extends its life and keeps your home safe.
Avoiding Overloading Circuits
Many people forget that adding new lights can strain your electrical system. Overloaded circuits trip breakers or cause overheating, risking fire hazards. Think about how many devices are already on the same circuit before installing your pendant light.
- Use a circuit tester to check current load
- Distribute electrical load across different circuits
- Consult an electrician if unsure about your home’s wiring capacity
Would you risk your home’s safety just to save a few dollars on installation? Taking time to assess circuit capacity prevents costly repairs and keeps your family safe.
Using Appropriate Bulbs
Choosing the right bulb wattage is crucial for your pendant light’s safety. Using bulbs with higher wattage than recommended can cause overheating and damage the fixture. I once swapped a 60W bulb for a 100W one, only to find the fixture getting dangerously hot.
Check the manufacturer’s label for maximum wattage and stick to it. Consider energy-efficient LED bulbs—they produce less heat and last longer. Proper bulb selection protects your light and reduces energy bills.
Frequently Asked Questions
What Tools Are Needed To Install A Pendant Light?
You need a screwdriver, wire stripper, voltage tester, and a ladder. These tools ensure safe and efficient installation. Having all tools ready speeds up the process and prevents mistakes.
How Do I Safely Turn Off Power Before Installation?
Turn off the power at the circuit breaker to avoid electric shock. Use a voltage tester to confirm the power is off before starting work. Safety is the top priority when handling electrical fixtures.
Can I Install A Pendant Light Without An Electrician?
Yes, if you have basic electrical knowledge and follow safety guidelines. Carefully read the installation manual and switch off power before starting. For complex wiring, consult a professional to avoid hazards.
How High Should A Pendant Light Hang?
Hang the pendant light 28-34 inches above the table or counter surface. For open areas, maintain 7 feet clearance from the floor. Proper height ensures optimal lighting and aesthetics.
Conclusion
Installing a pendant light can change your room’s feel quickly. Follow each step carefully for safety and best results. Take your time to connect wires correctly and secure the fixture. Double-check everything before turning the power back on. A well-installed pendant light adds style and brightens your space.
Now, enjoy the new look you created yourself. Simple tools and patience make the job easy. Keep these tips for future lighting projects around your home.


