
Looking to add a stylish touch to your home? Hanging pendant lights are a simple way to transform any room with charm and warmth.
But how do you install them safely and easily? This guide will walk you through every step, so you can brighten your space without stress. By the end, you’ll have the confidence to hang your new lights perfectly—making your home look amazing and feel inviting.
Ready to get started? Let’s dive in!
Choosing Pendant Lights
Choosing the right pendant lights sets the tone for your space. The perfect light blends style, size, and room decor. It brightens the area and adds charm. Consider each factor carefully to create a balanced look.
Selecting The Right Style
Pick a pendant style that fits your room’s mood. Modern, rustic, or industrial designs change the atmosphere. Simple shapes offer elegance. Bold designs make a statement. Match the light to your personality and space function.
Considering Size And Scale
Size matters for pendant lights. Too big, and the light overwhelms the room. Too small, and it loses impact. Measure the area before buying. Use multiple small pendants for large spaces. Single, larger lights work well over tables or counters.
Matching With Room Decor
Pendant lights should blend with your existing decor. Match colors and materials for harmony. Wood, metal, or glass can coordinate with furniture. Consider the room’s theme—classic, minimalist, or eclectic. Choose lights that feel part of the whole design.

Credit: glarefusion.com
Gathering Tools And Materials
Before installing hanging pendant lights, gather all necessary tools and materials. Preparation saves time and prevents interruptions. Having everything ready makes the installation smooth and safe.
Essential Tools Needed
- Screwdriver (flathead and Phillips)
- Wire stripper
- Voltage tester
- Drill with bits
- Measuring tape
- Wire nuts
- Step ladder
- Pliers
Materials Checklist
- Hanging pendant light fixture
- Mounting bracket (usually included)
- Electrical box
- Light bulbs compatible with the fixture
- Electrical tape
- Extension cords (if needed)
Safety Gear
- Insulated gloves
- Safety goggles
- Dust mask
- Non-slip shoes
Preparing The Installation Site
Clear the area around the ceiling and switch off the power supply. Check the ceiling box for stability and proper wiring before installation.
Preparing the installation site for your new hanging pendant lights is a crucial step that ensures both safety and functionality. Before you dive into the exciting part of seeing your lights beautifully suspended, it’s essential to lay a strong foundation. This preparation not only makes the installation process smoother but also helps you avoid any unnecessary hiccups down the road.Turning Off Power
Safety first! Always ensure that the power is off before starting any electrical work. Find your electrical panel and switch off the circuit breaker that controls the room where you’ll be installing the pendant lights. It might sound basic, but double-checking this step can prevent electrical shocks. Do you remember that time when you thought the power was off, but it wasn’t? Don’t take chances. Use a voltage tester to confirm that the power is completely off. This small device can be a lifesaver.Measuring And Marking
Accurate measurements are key to achieving that perfect look. Determine the ideal height for your pendant lights based on the room and furniture arrangement. Generally, pendant lights should hang 28 to 34 inches above a table or countertop. Use a measuring tape and mark the spot on the ceiling where you plan to install the light. A pencil mark is enough to guide you, but make sure it’s visible. Ever find yourself wishing you’d marked the right spot the first time? Take your time with this step.Checking Ceiling Support
Assessing your ceiling’s ability to support the weight of the pendant lights is crucial. Older homes may have weaker ceiling structures, which can lead to potential hazards. Check if there’s a ceiling joist or beam where you’ve marked your installation point. If the ceiling doesn’t have adequate support, consider using a ceiling brace or similar hardware. This ensures your lights stay securely in place, giving you peace of mind. Skipping this step might lead to an unexpected crash of your lights—definitely not the kind of surprise you want!Wiring The Pendant Light
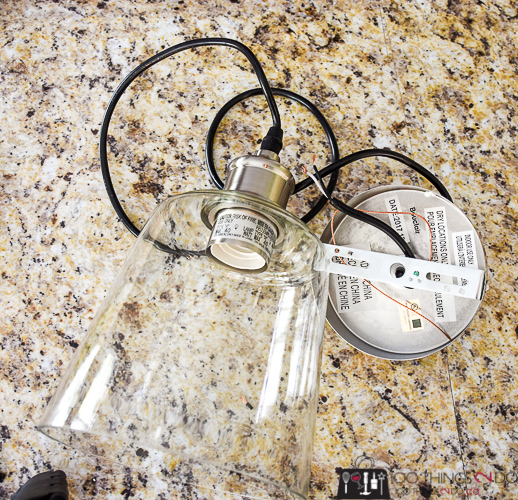
Wiring the pendant light is a key part of installation. It ensures the light works safely and correctly. Taking care during wiring helps avoid electrical problems. Follow simple steps to connect wires properly and secure them well.
Identifying Wires
Start by locating the wires in your ceiling box and pendant light. Typically, you will find three wires:
- Black or red wire:This is the live or hot wire.
- White wire:This is the neutral wire.
- Green or bare copper wire:This is the ground wire.
Confirm the colors with your pendant light’s manual. Turn off power at the breaker before touching any wires.
Connecting Wires Safely
Match wires by color for safe connection. Connect the black wire from the ceiling to the black wire from the pendant. Connect the white wire from the ceiling to the white wire from the pendant. Connect the green or bare copper ground wire to the green wire or grounding screw.
Hold wires firmly together. Make sure no copper is exposed outside the connection.
Securing Wire Nuts
Twist a wire nut clockwise onto the connected wires. The wire nut should cover all exposed copper. Tug gently on wires to test if they are secure.
Use electrical tape around wire nuts for extra safety. Tuck wires neatly into the ceiling box to avoid damage.
Mounting The Fixture
Mounting the fixture is a crucial part of installing hanging pendant lights. This step ensures your light is secure and positioned perfectly to brighten your space. Paying attention to details here will save you from future adjustments and potential safety issues.
Attaching The Mounting Bracket
Start by locating the electrical box in your ceiling. Attach the mounting bracket firmly to this box using the screws provided with your pendant light. Make sure the bracket is level and tight; a loose bracket can cause the fixture to wobble or fall.
Check the weight rating of the bracket compared to your pendant light. If your fixture is heavy, you might need additional support like a ceiling joist or a brace. Have you ever felt a light fixture slightly move after installation? That usually means the bracket wasn’t secured properly.
Hanging The Pendant Light
Once the bracket is secure, you can hang the pendant light. Connect the fixture’s wires to the house wiring—typically black to black, white to white, and green or copper to the ground wire. Use wire nuts to secure these connections and wrap them with electrical tape for extra safety.
Next, carefully lift the pendant and align it with the mounting bracket. Most fixtures have a canopy that covers the bracket and wires, giving a clean finish. Don’t rush this step; improper alignment can cause the fixture to hang crookedly, which is both unattractive and unsafe.
Adjusting Height And Position
The height of your pendant light affects the room’s ambiance and functionality. Adjust the cord or chain length to your desired height before fully tightening all screws. For dining areas, hanging the light about 30 to 36 inches above the table surface works well.
Experiment with slight position tweaks before finalizing the setup. Is the light centered over your workspace or dining table? Small adjustments can significantly improve both the look and feel of the room. Remember, once the fixture is mounted, it’s harder to make changes, so take your time.
Final Touches And Testing
After hanging your pendant lights, the final touches and testing phase is crucial to ensure everything works perfectly and looks stunning. This step is your chance to check that all components are secure and functional. Taking time here can save you from future hassles and give you confidence in your work.
Installing Bulbs
Choose the right bulbs for your pendant lights—consider brightness, color temperature, and style. Screw them in gently to avoid damaging the fixture or bulb. If your pendant supports dimmable bulbs, make sure you select compatible ones to enjoy full control over your lighting.
Restoring Power
Before turning the power back on, double-check that all wiring is properly connected and secured. Flip the circuit breaker or switch to restore electricity to your fixture. Be ready to act quickly if you notice any sparks, flickering, or unusual sounds—these signs mean you should turn off the power immediately and inspect the installation again.
Testing The Light
Turn on your pendant light and observe how it illuminates the space. Does the brightness meet your needs? Are there any flickers or dim spots? Test the switch several times to ensure smooth operation. If you installed a dimmer, try adjusting it to find the perfect ambiance. Remember, your lighting should enhance the room’s mood and function, so don’t hesitate to make small adjustments.
Troubleshooting Common Issues
Hanging pendant lights can transform any room, but sometimes issues pop up after installation. Troubleshooting these common problems can save you time and frustration. Let’s look at how to fix flickering lights, loose fixtures, and wiring problems with simple, practical tips.
Fixing Flickering Lights
Flickering lights are one of the most annoying issues you might face. Before calling an electrician, check if the bulb is screwed in tightly—loose bulbs often cause flickering.
If the bulb is secure, try swapping it with another one. Sometimes, the bulb itself is faulty or incompatible with your fixture. Using dimmable bulbs on non-dimmable switches can also cause flickering—have you checked if your bulb matches your switch type?
Lastly, flickering can result from voltage fluctuations in your home. If this happens frequently, consider consulting a professional to inspect your electrical system.
Addressing Loose Fixtures
A pendant light that wobbles or hangs unevenly not only looks bad but can be unsafe. Check the mounting bracket to ensure it’s fastened tightly to the ceiling box.
Sometimes, the fixture’s chain or rod isn’t secured properly. Tighten any screws or hooks holding your pendant in place. Have you noticed if the fixture sways more when you touch it or when there’s a breeze? This could indicate a loose connection.
If the ceiling box itself feels loose, you might need to reinforce it or replace it with a sturdier one designed for hanging lights.
Dealing With Wiring Problems
Wiring issues can be intimidating, but many common problems have straightforward solutions. Start by turning off the power at the breaker before inspecting any wiring.
Look for loose wire connections inside the ceiling box. Wires should be twisted together securely with wire nuts. If you see exposed copper wire or frayed insulation, that’s a red flag to fix immediately.
Sometimes, the problem lies with the switch. Swap it with a known working switch to see if that resolves the issue. Are you confident in handling electrical components? If not, don’t hesitate to call a licensed electrician to avoid hazards.
.jpg)
Credit: www.jimselectrical.com.au

Credit: www.thisoldhouse.com
Frequently Asked Questions
How Do I Safely Install Hanging Pendant Lights?
Turn off power before starting installation. Use a voltage tester to confirm. Follow manufacturer instructions. Securely mount the bracket to the ceiling. Connect wires correctly: black to black, white to white, and ground wire. Attach the pendant and restore power.
What Tools Are Needed For Pendant Light Installation?
You will need a voltage tester, screwdriver, wire stripper, drill, and ladder. These tools help ensure safe and efficient installation. Having them ready makes the process smoother and faster.
How High Should Pendant Lights Hang Above Surfaces?
Pendant lights should hang 28 to 34 inches above tables or countertops. This height provides optimal lighting without obstructing views. Adjust based on ceiling height and room size for best results.
Can I Install Pendant Lights Without Professional Help?
Yes, if you have basic electrical skills and follow safety guidelines. Always turn off power and use proper tools. If unsure, consult a licensed electrician to avoid hazards.
Conclusion
Installing hanging pendant lights can brighten any room quickly. Follow each step carefully for safe setup. Double-check all connections to avoid any issues. Choose the right height to match your space well. Enjoy the new look and cozy lighting effect.
Simple tools and clear instructions make the job easy. Take your time and work with care. Soon, you will have stylish lights that fit perfectly. A small change can add big style to your home.


