
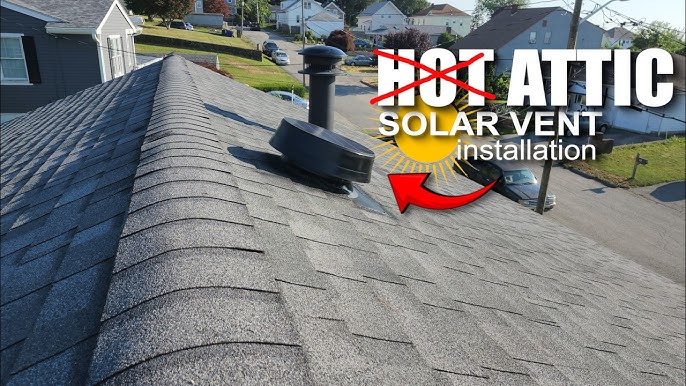
Are you tired of dealing with a stuffy, overheated attic? Installing a roof ventilator could be the simple fix you need to keep your home cooler and prevent moisture problems.
But how exactly do you install one yourself? In this guide, you’ll discover easy, step-by-step instructions that anyone can follow—no special skills required. By the time you finish reading, you’ll have the confidence to improve your home’s airflow and protect your roof for years to come.
Let’s get started!
Credit: www.owenscorning.com
Choosing The Right Roof Ventilator
Choosing the right roof ventilator is key for effective airflow and temperature control. A good ventilator prevents moisture buildup and keeps your roof in good shape. Picking the right type depends on your roof style, climate, and ventilation needs.
Types Of Roof Ventilators
Several types of roof ventilators exist, each with unique features:
- Ridge Vents:Installed along the roof peak, allowing hot air to escape.
- Gable Vents:Placed on the gable ends to promote cross-ventilation.
- Static Vents:Fixed vents that rely on wind and natural airflow.
- Whirlybirds (Turbine Vents):Spin with the wind to pull air out.
- Powered Vents:Use electric fans for active air movement.
Factors To Consider
Evaluate these factors before choosing a ventilator:
- Roof Type:Some vents suit certain roof shapes better.
- Climate:Hot or humid climates need stronger ventilation.
- Energy Efficiency:Ventilators can help reduce cooling costs.
- Noise Level:Powered vents may produce some noise.
- Installation Ease:Some vents are easier to install than others.
Sizing Your Ventilator
Correct sizing ensures proper airflow. Too small leads to poor ventilation. Too large wastes energy and may cause leaks.
Calculate based on attic size and ventilation needs. Use the guideline of 1 square foot of vent per 150 square feet of attic floor space. Split between intake and exhaust vents for balanced airflow.
Tools And Materials Needed
Installing a roof ventilator requires specific tools and materials to do the job safely and correctly. Preparing all items before starting makes the process smoother. Using the right tools helps avoid mistakes and saves time. This section lists all essential tools and materials needed for a successful installation.
Essential Tools
- Measuring tape – for accurate dimensions
- Power drill with drill bits – to make holes
- Hammer – for nails and general use
- Screwdriver set – to tighten screws
- Utility knife – for cutting roofing material
- Caulking gun – to apply sealant
- Chalk line – to mark straight lines
- Safety gloves – to protect your hands
- Safety goggles – to protect your eyes
- Ladder – to reach the roof safely
Materials Checklist
- Roof ventilator unit – the main component
- Flashing kit – to seal around the ventilator
- Roofing nails or screws – to secure the ventilator
- Roof sealant or caulk – to prevent leaks
- Roofing shingles – in case some need replacement
- Roofing cement – for extra waterproofing
Preparing The Roof
Preparing your roof for installing a roof ventilator is a crucial step that sets the foundation for a successful installation. It involves more than just picking a spot; you need to ensure safety, find the best location for ventilation, and precisely mark the area. Taking your time at this stage can save you from costly mistakes later on.
Safety Precautions
Before you climb onto your roof, make sure you have the right safety gear. Wear non-slip shoes, a helmet, and use a sturdy ladder with someone to assist you if possible. Never rush—working on a roof can be dangerous, and one wrong move can cause serious injury.
Check the weather forecast too. Avoid windy or rainy days as slippery surfaces increase the risk of accidents. Secure your tools and materials to prevent them from falling or causing hazards.
Locating The Installation Spot
Finding the right spot for your roof ventilator is more than just placing it anywhere. The goal is to maximize airflow, so look for a location near the roof’s peak where hot air naturally rises. Avoid placing it near obstacles like chimneys or vents that could block airflow.
Think about the direction of prevailing winds in your area. Positioning the ventilator to catch these winds can boost its efficiency. If you’re unsure, try observing your roof at different times of the day to see where the heat accumulates most.
Marking The Area
Once you’ve found the perfect spot, it’s time to mark the area for cutting. Use a pencil or chalk to outline the exact dimensions of the ventilator base. Double-check these measurements against the product instructions to avoid any surprises.
Consider using a level to ensure your markings are straight. This will help the ventilator sit flush on the roof, preventing leaks and improving overall performance. Taking a few extra minutes here can make a big difference in the final result.

Credit: www.youtube.com
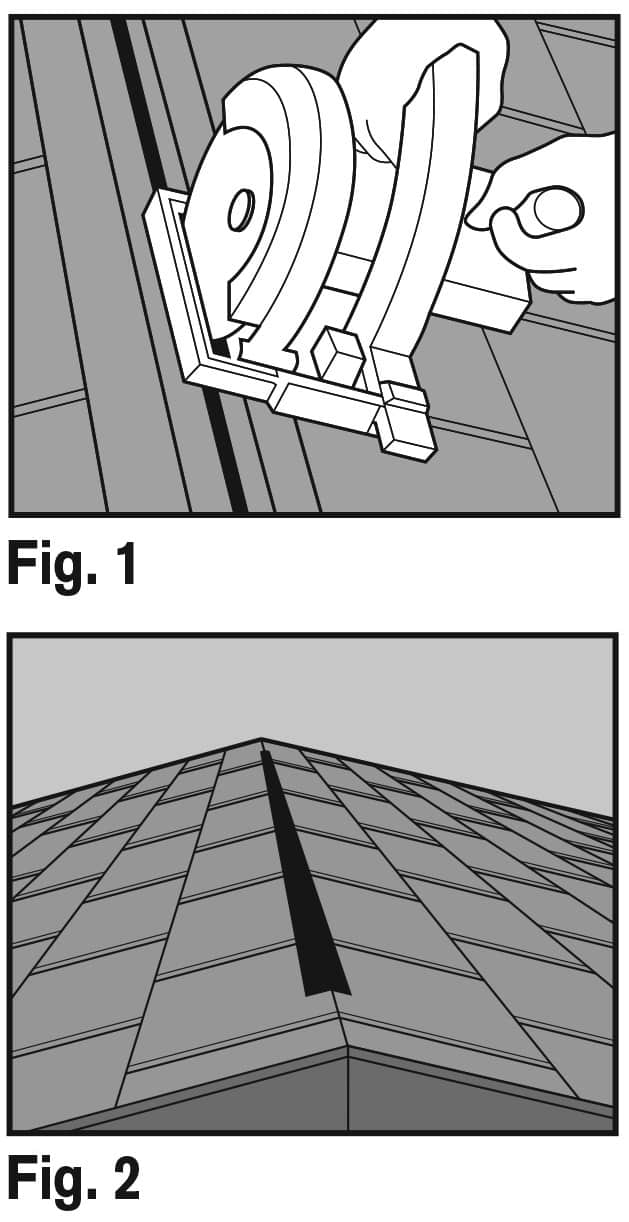
Cutting The Roof Opening
Cutting the roof opening is a crucial part of installing a roof ventilator. This step requires precision and care to ensure the ventilator fits perfectly without damaging the roof structure. Let’s break down how to do this effectively.
Measuring The Cutout
Start by carefully measuring the size of the ventilator base. Use a tape measure to mark the exact dimensions on the roof surface. Double-check your measurements to avoid cutting too large or too small an opening.
Mark the cutout clearly with a pencil or chalk. It’s better to mark the inside edge of the ventilator’s flange to ensure a snug fit. Have you ever seen a vent that wobbles because the hole was too big? Avoid that by being precise.
Using The Right Tools
Choosing the right tools makes cutting easier and safer. A jigsaw or reciprocating saw works well for cutting through shingles and roofing material. Make sure your blades are sharp to get clean cuts without tearing the roof.
Don’t forget to wear safety gear like goggles and gloves. Cutting on a roof can be tricky and dangerous if you rush or use dull tools. Have you prepared your workspace to prevent accidents?
Cleaning The Edges
Once the cutout is done, remove any loose debris and sharp edges. Use a utility knife or sandpaper to smooth the edges carefully. This step helps the ventilator sit flush and prevents damage to its sealing components.
Cleaning the edges also reduces the chance of leaks later on. Take your time here—rushing this part can cost you more in repairs. How confident are you in the cleanliness of your cutout edges?
Installing The Roof Ventilator
Installing the roof ventilator is a key task to improve airflow in your attic. Proper installation ensures efficient ventilation and protects your roof from moisture. Follow the steps carefully for a secure and lasting fit.
Positioning The Ventilator
Choose a spot near the roof ridge for best airflow. Avoid areas blocked by chimneys or vents. Mark the outline of the ventilator base on the roof surface. Double-check measurements before cutting any material.
Securing With Fasteners
Use corrosion-resistant screws or nails to hold the ventilator firmly. Attach the base evenly on all sides to prevent gaps. Tighten fasteners without damaging the roof or the ventilator. Check that the unit does not move after securing.
Sealing The Edges
Apply roofing sealant around the edges to stop water leaks. Spread the sealant evenly with a putty knife or your finger. Press down any flashing or metal parts into the sealant for a tight fit. Inspect the seal after it dries to ensure no cracks.
Testing The Ventilation
Testing the ventilation is a crucial step after installing your roof ventilator. It ensures that the system works efficiently and protects your home from moisture and heat buildup. Skipping this step could leave you with poor airflow or leaks that damage your roof over time.
Checking Airflow
Start by feeling the air movement near the ventilator outlet. You want to notice a steady flow of air pushing out, not just a weak breeze. If the airflow feels sluggish, double-check that the fan is powered correctly and that nothing blocks the vent.
You can also use a smoke test. Light a stick of incense or a smoke pen near the intake vents inside your attic. Watch how the smoke travels toward the ventilator—smooth and continuous movement means good airflow. If the smoke lingers or moves erratically, there might be an obstruction or an issue with the vent placement.
Inspecting For Leaks
Leaks around the ventilator can cause water damage and reduce ventilation effectiveness. After a rain or by using a hose, carefully check the area around the vent for any signs of water seeping inside. Even small drips can lead to bigger problems over time.
Examine the flashing and seals around the ventilator. Make sure all screws are tight and that the sealant is applied evenly without gaps. If you find any cracks or holes, apply roofing cement or caulk to seal them immediately.
Have you ever ignored a small leak only to face costly roof repairs later? Catching leaks early saves you time and money while keeping your home dry and comfortable.
Maintaining Your Roof Ventilator
Installing a roof ventilator ensures proper airflow and reduces moisture buildup. Follow the manufacturer’s instructions carefully. Secure the ventilator with screws and seal any gaps to prevent leaks. Regular checks keep it functioning efficiently.
Maintaining your roof ventilator ensures it functions effectively and extends its lifespan. A well-maintained ventilator promotes proper airflow and reduces energy costs. Regular maintenance prevents potential issues, keeping your home comfortable and safe.Regular Cleaning
Dust and debris can clog the ventilator blades. This reduces efficiency. Clean the ventilator every few months using a soft brush. Remove any leaves or dirt from around the vent. Ensure the fan blades spin freely.Seasonal Inspections
Inspect the ventilator at the change of each season. Check for any visible damage or wear. Look for rust, loose screws, or cracked parts. Ensure the ventilator is secure on the roof. Tighten any loose fittings to prevent leaks.Troubleshooting Common Issues
Sometimes, the ventilator might make unusual noises. This could indicate a loose part or debris. Check for obstructions that may cause the noise. If the ventilator doesn’t spin, the motor may need repair. Consult a professional if the problem persists. Regular maintenance helps avoid these issues.
Credit: www.carlsonprojectsinc.com
Frequently Asked Questions
What Tools Are Needed To Install A Roof Ventilator?
You need a drill, screwdriver, measuring tape, ladder, sealant, and safety gloves. These tools ensure a safe and precise installation.
How Do I Choose The Right Roof Ventilator Size?
Measure your roof area and check the ventilator’s airflow capacity. Proper sizing ensures effective ventilation and prevents moisture buildup.
Can I Install A Roof Ventilator Myself?
Yes, with basic DIY skills and safety precautions, you can install it. Follow manufacturer instructions carefully to ensure proper fitting and function.
How Long Does Roof Ventilator Installation Take?
Installation typically takes 2 to 4 hours, depending on roof type and complexity. Proper planning and tools speed up the process.
Conclusion
Installing a roof ventilator helps keep your home cool and dry. Proper ventilation stops moisture and heat build-up in the attic. Follow the steps carefully to avoid mistakes and ensure safety. Choose the right tools and materials for the job.
Regular checks help keep the ventilator working well. Good ventilation improves air quality and extends roof life. A well-installed roof ventilator adds comfort to your living space. Take your time and do it right for best results.


