
Are you tired of clutter taking over your space? Installing shelves on your wall can be the perfect solution to organize and showcase your favorite items.
But if you’ve never done it before, the task might seem tricky or overwhelming. Don’t worry—this guide will walk you through every step, making the process simple and stress-free. By the end, you’ll have sturdy, beautiful shelves that add both style and function to your room.
Ready to transform your space? Let’s get started!

Credit: www.youtube.com
Choosing The Right Shelves
Choosing the right shelves is important for both function and style. The shelves must fit your space and hold your items safely. The right choice also makes your room look better. Consider the types, materials, and size before buying or installing shelves.
Types Of Shelves
Shelves come in many styles. Floating shelves have no visible supports and look clean. Bracket shelves use metal or wood brackets for support. Corner shelves fit into room corners and save space. Built-in shelves are fixed into walls and are very sturdy. Choose a type that suits your room’s style and needs.
Material Options
Shelves are made from different materials. Wood is warm and classic but can be heavy. Metal shelves are strong and modern but can feel cold. Glass shelves look light and stylish but need careful handling. MDF is affordable and smooth but less durable. Pick a material that matches your room and holds your items well.
Size And Weight Considerations
Measure the wall space before choosing shelf size. Small shelves fit tight spaces but hold less. Large shelves hold more but need strong support. Check the weight of items you want to place on shelves. Heavy items need strong shelves and secure mounting. Balance size and strength for safety and appearance.

Credit: www.youtube.com
Gathering Tools And Materials
Before you start drilling into your walls, gathering the right tools and materials is crucial. Having everything ready keeps your project smooth and avoids frustrating interruptions. Plus, the right equipment makes your shelves sturdy and safe.
Essential Tools
Start with a reliable drill—cordless ones offer great flexibility. You’ll also need a level to ensure your shelves are perfectly straight. A tape measure is essential for precise spacing, and a pencil will help mark drill points accurately.
A stud finder is often overlooked but vital. It helps you locate the best spots to anchor your shelves securely into the wall studs. Don’t forget a screwdriver set; some screws require specific heads.
Required Hardware
Choose brackets designed for the weight you plan to hold. Heavy-duty brackets work best for books or kitchenware. For lighter items, simple L-shaped brackets are usually enough.
Use screws and wall anchors that match your wall type. Drywall anchors provide extra support where studs aren’t available. If you have brick or concrete walls, masonry anchors are necessary.
Safety Equipment
Protect your eyes with safety goggles, especially when drilling into hard surfaces. Dust masks help keep you safe from inhaling particles. Gloves can protect your hands from sharp edges and screws.
Working on a ladder? Make sure it’s stable and positioned on a flat surface. Your safety matters just as much as the shelf’s stability.
Preparing The Wall
Clear the wall surface and check for any damage or holes. Use a stud finder to locate studs for stronger support. Mark spots carefully to ensure shelf brackets align properly.
Preparing the Wall Before you dive into installing shelves, ensuring your wall is ready is crucial. Proper preparation can save you from unnecessary mistakes and ensure your shelves are securely mounted. This part of the process is all about planning and precision.Locating Studs
Finding the studs in your wall is essential for a sturdy shelf installation. Use a stud finder to locate these hidden supports within the wall. If you don’t have one, gently knock on the wall; a hollow sound means no stud, while a solid sound indicates one. Mounting shelves on studs will provide the best support for heavy items. If you’ve ever had a shelf collapse, you know the importance of this step. Taking the time to find the studs might feel tedious, but it’s worth every minute.Marking Placement
Decide where you want your shelves to go and mark the spots. Use a pencil and a level to ensure your lines are straight. This step will guide you in drilling the holes accurately. Consider what you will be placing on the shelves. Are you displaying books, plants, or decorative items? The purpose will help determine the height and spacing between shelves.Checking For Obstacles
Before drilling, make sure there are no hidden obstacles behind the wall. Check for electrical wires, plumbing pipes, and any other potential hazards. A wire detector can help you avoid costly mistakes. Think about past projects where you might have overlooked such details. Learn from those experiences and take the extra time now to prevent any mishaps. Are you ready to transform your space with perfectly hung shelves? Let’s make sure your wall is as prepared as you are!Installing The Brackets
Installing the brackets is a key part of mounting shelves securely on your wall. If the brackets aren’t aligned or fixed properly, the shelves won’t hold weight safely. Taking your time during this step ensures your shelves stay sturdy and look professional.
Aligning Brackets
Start by deciding the exact spots where you want your brackets. Use a level to make sure they are perfectly horizontal—uneven brackets will cause your shelf to tilt or wobble. Mark the positions with a pencil so you can drill accurately.
Think about the weight your shelf will carry. Placing brackets too far apart might seem easier, but can risk sagging. Closer brackets provide better support and peace of mind.
Drilling Pilot Holes
Drilling small pilot holes before inserting screws helps prevent the wall or bracket from cracking. Choose a drill bit slightly smaller than your screws for a tight fit. This step also makes screwing in easier and more precise.
If you’re drilling into drywall, check if you need wall anchors to support the weight. Have you ever tried hanging heavy items without anchors? The shelf probably didn’t last long.
Securing Brackets
Once the pilot holes are ready, use screws to secure the brackets firmly to the wall. Screw them in tightly but avoid over-tightening, which can strip the hole or damage the bracket. If you’re using anchors, make sure they click or lock into place before adding screws.
After securing the brackets, give them a gentle shake. If they feel loose, double-check your screws and anchors. You want your shelf to stay put, not wobble every time you place something on it.
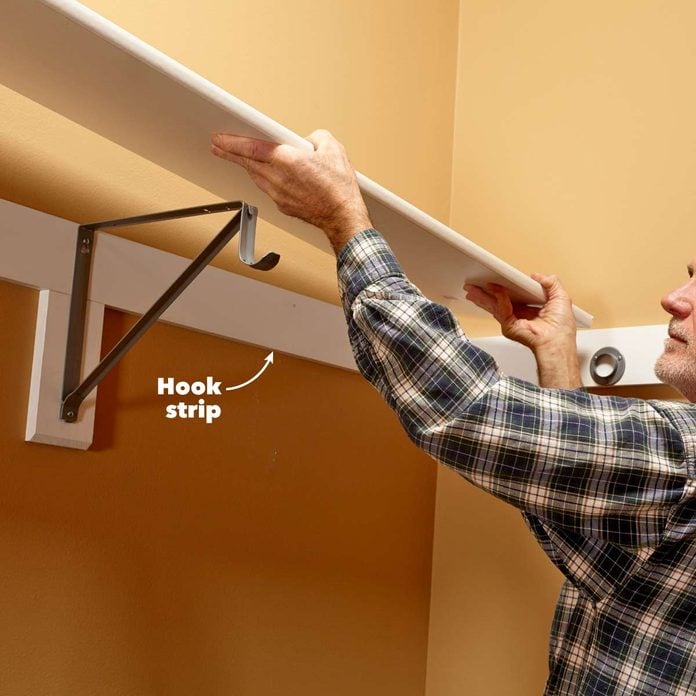
Mounting The Shelves
Mounting the shelves on the wall is a crucial part of the installation process. Proper mounting ensures the shelves are secure and can hold weight safely. It also helps your shelves look neat and professional.
Positioning Shelves
Begin by deciding where the shelves will go. Mark the wall with a pencil at the desired height. Use a stud finder to locate wall studs for stronger support. Avoid placing shelves only on drywall without anchors. Measure the distance between brackets to match your shelf size.
Attaching To Brackets
Place the brackets on the wall marks. Drill pilot holes for screws to avoid wall damage. Use screws suited for your wall type, such as wood screws for studs or anchors for drywall. Tighten screws firmly to secure the brackets. Check that brackets do not wobble or move.
Leveling And Adjustments
Place the shelf on the brackets carefully. Use a spirit level to check if the shelf is straight. Adjust the brackets or shelf position as needed. Tighten any loose screws after leveling. Ensure the shelf sits flat and stable before placing any items.
Credit: www.familyhandyman.com
Finishing Touches
After securely installing your shelves, the finishing touches can make all the difference between a basic setup and a stunning display. These final steps help your shelves blend seamlessly with your room’s style while ensuring they stay functional and attractive for a long time. Paying attention to details now saves you from headaches later.
Cleaning Up
Dust and debris from drilling can make your shelves look messy right after installation. Use a vacuum or a damp cloth to wipe away sawdust, dirt, and fingerprints. Don’t forget to clean around the brackets and behind the shelves, where dust tends to settle unnoticed.
Check for any stray nails or screws left on the floor to avoid accidents. Cleaning up immediately also helps you spot any small installation issues, like loose screws or uneven shelves, that you might want to fix before moving on.
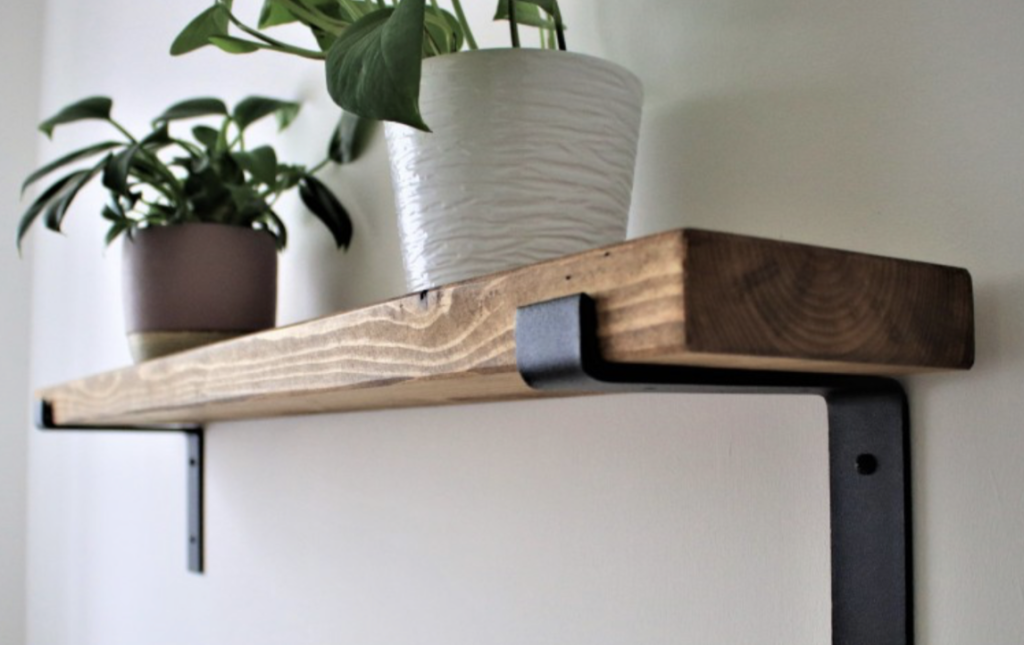
Adding Decorative Elements
Once your shelves are clean, think about what items will go on them. Adding personal touches like plants, books, or framed photos can make your space feel more inviting. Try mixing different heights and textures to create visual interest.
- Use small pots with succulents or air plants for a pop of green.
- Arrange books vertically and horizontally for variation.
- Include a few decorative objects, like candles or sculptures, to break monotony.
How will you balance function with decoration? Consider leaving some space free for everyday items you need easy access to, so your shelves don’t become cluttered.
Maintenance Tips
Keeping your shelves in good shape is easier than you think. Regular dusting prevents buildup that can dull the look of your items and shelf surface. A microfiber cloth works best for gentle, effective cleaning.
Periodically check the screws and brackets to ensure everything stays tight and secure. If you notice any wobbling or sagging, tighten the hardware immediately to avoid damage.
Have you thought about the weight limits of your shelves? Avoid overloading them to keep your walls and shelves safe, especially if you plan to display heavier items.
Frequently Asked Questions
What Tools Do I Need To Install Shelves On The Wall?
You need a drill, level, tape measure, screws, anchors, and a screwdriver. These tools help ensure proper shelf placement and secure mounting.
How Do I Find Studs For Shelf Installation?
Use a stud finder or tap the wall to locate studs. Mark stud positions to securely attach shelves and support weight.
What Wall Anchors Work Best For Shelves?
Toggle bolts and heavy-duty plastic anchors are ideal. Choose anchors based on wall type and shelf weight for strong support.
How High Should Shelves Be Installed On Walls?
Install shelves between 48 to 60 inches from the floor. Adjust height based on shelf use and room layout for convenience.
Conclusion
Installing shelves on the wall is simple with the right steps. Start by choosing the right tools and materials. Measure carefully to keep shelves level and secure. Use wall anchors for extra support on drywall. Follow safety tips to avoid damage or injury.
Shelves add space and style to any room. Enjoy organizing your items neatly and easily. With practice, shelf installation becomes quick and stress-free. Try it yourself and see the difference shelves make.


