
Looking to boost your home security with a reliable motion sensor? Installing your SimpliSafe Motion Sensor doesn’t have to be complicated or time-consuming.
In fact, with just a few simple steps, you can have it up and running to protect your space right away. This guide will walk you through everything you need to know, making the process easy and stress-free. Keep reading, and you’ll discover how to set up your sensor quickly, so you can enjoy peace of mind knowing your home is safer than ever.

Credit: www.youtube.com
Choosing The Right Location
Choosing the right location for your SimpliSafe motion sensor is crucial to ensure it works effectively. The sensor’s placement impacts its ability to detect movement accurately without false alarms. Paying attention to where and how you install it can save you from unnecessary troubleshooting later.
Ideal Height And Angle
Place the motion sensor at about 7 to 8 feet high on a wall. This height maximizes its field of view and reduces blind spots. Angling the sensor slightly downward helps it detect movement across the room rather than just directly in front of it.
Think about your room’s layout—are there areas where people typically walk? Position the sensor to cover these paths effectively. Avoid placing it too low or too high, as this can limit its detection range.
Avoiding Obstacles
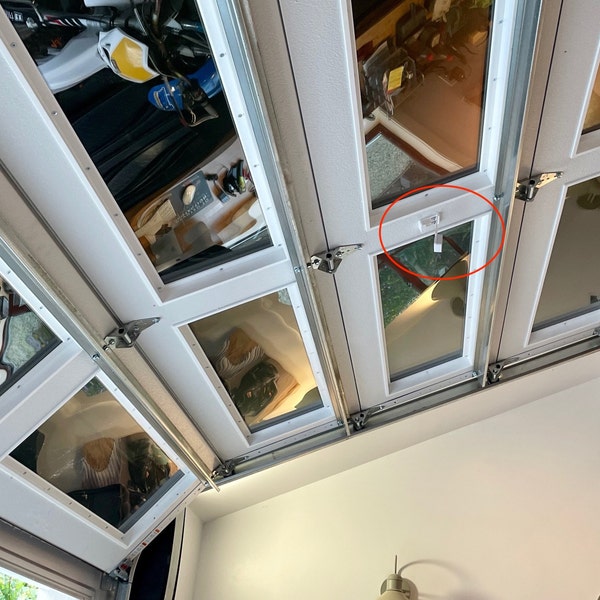
Make sure nothing blocks the sensor’s line of sight. Furniture, curtains, or large plants can interfere with its ability to detect motion. Even glass surfaces can cause reflection issues, so avoid placing the sensor directly facing windows or mirrors.
Have you noticed false alarms triggered by pets or moving curtains? Positioning the sensor away from heat sources like vents or direct sunlight also helps prevent false triggers. Clear and open sightlines improve the sensor’s reliability.
Coverage Area Tips
SimpliSafe motion sensors typically cover up to 30 feet with a 90-degree field of view. To maximize coverage, place the sensor in a corner or near entry points where intruders are most likely to pass. This strategic placement helps catch movement early.
Consider overlapping coverage if you’re using multiple sensors. This way, you minimize blind spots and ensure continuous protection. How much area do you really need to monitor? Mapping out the key zones before installation can guide your sensor placement perfectly.
Credit: www.etsy.com
Gathering Necessary Tools
Before installing the SimpliSafe motion sensor, prepare all tools and parts. This saves time and avoids interruptions during setup. Knowing what tools are needed helps you work safely and efficiently. It also ensures the sensor works correctly from the start.
Tools Required For Installation
- Small Phillips screwdriver
- Double-sided mounting tape (included with SimpliSafe kit)
- Isopropyl alcohol wipes or cleaning cloth
- Measuring tape or ruler
- Step stool or ladder (if mounting high)
Keep these tools close by before starting the installation. The screwdriver is for opening the sensor casing. The mounting tape helps attach the sensor without drilling. Cleaning cloths prepare the surface for better adhesion. A ruler helps position the sensor accurately. Use a step stool if the sensor goes on a high wall.
Checking Battery And Sensor
Check the motion sensor’s battery before installation. Open the casing carefully using the screwdriver. Remove the battery and inspect for any damage or corrosion. Install a fresh battery if needed. Ensure the battery is correctly placed, following polarity markings.
Test the sensor by pressing its test button. It should emit a light or sound. If there is no response, replace the battery or contact support. Confirm the sensor lens is clean and free of dust. This ensures accurate motion detection once installed.
Preparing The Mounting Surface
Clean the surface thoroughly to remove dust and dirt for better sensor adhesion. Choose a flat, dry spot away from direct sunlight or heat sources. Ensure the area is within your SimpliSafe system’s wireless range.
Preparing the mounting surface is essential for effective Simplisafe Motion Sensor installation. A clean, well-prepared surface ensures the sensor stays securely in place. This step also helps the sensor function correctly, avoiding false alarms. Follow the steps below for optimal preparation.Cleaning The Area
Begin by removing dust and debris from the mounting surface. Use a soft, damp cloth to wipe the area gently. This removes dirt and grime that could affect adhesion. Avoid using harsh chemicals. They might damage the surface or interfere with the sensor.Marking Drill Points
After cleaning, it’s time to mark drill points. Hold the mounting bracket against the surface. Ensure it’s level. Use a pencil to mark the points where screws will go. This step prevents misalignment during drilling. Double-check the alignment before proceeding. Proper markings help ensure a secure fit for your motion sensor.Mounting The Sensor
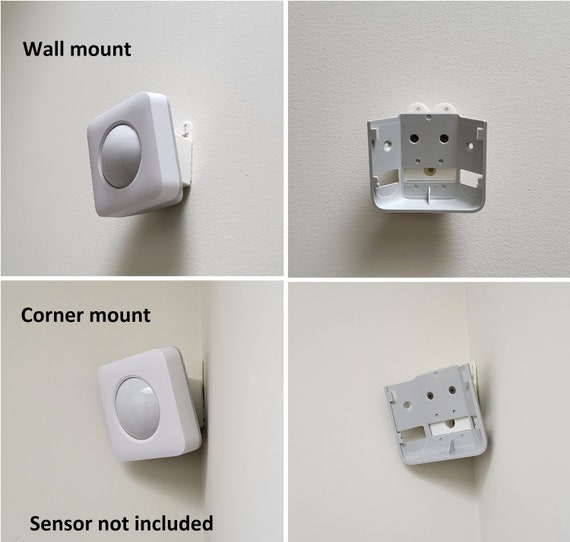
Mounting your SimpliSafe motion sensor correctly is key to making sure it detects movement efficiently and keeps your home secure. Where and how you place the sensor can affect its performance dramatically. Let’s look at two popular ways to mount the sensor that fit different needs and preferences.
Using Adhesive Mount
Adhesive mounts offer a quick and hassle-free way to install your motion sensor without drilling holes. The adhesive strips are strong enough to hold the sensor firmly on most surfaces like walls or corners.
Before sticking the sensor, clean the surface with rubbing alcohol to remove dust and oils. This step ensures the adhesive sticks well and lasts longer.
Think about the sensor’s angle and coverage area before sticking it on. You want to avoid spots blocked by furniture or doors that could limit detection.
Installing With Screws
If you prefer a more permanent setup, using screws gives your motion sensor extra stability. It’s ideal for places where adhesive might not hold well, such as textured walls or outdoor areas.
Use the mounting bracket included with your SimpliSafe sensor. Mark screw holes on the wall, drill pilot holes, and then secure the bracket with screws. This makes it easy to remove or adjust the sensor later.
Have you thought about sensor height? Mount it about 7 to 8 feet above the floor to optimize its motion detection range. This height helps cover a wide area without triggering false alarms from pets.
Connecting To Simplisafe System
Connecting the SimpliSafe motion sensor to your security system is essential for effective monitoring. This process ensures the sensor communicates properly with the base station. Proper connection helps in quick detection of movement and alerts you instantly.
The connection involves syncing the sensor with the system and then testing its functionality. Both steps are simple and fast, making your home safer in no time.
Syncing The Sensor
First, place the motion sensor near the SimpliSafe base station. This helps a smooth connection. Open the SimpliSafe app or keypad to start adding a new device.
- Choose “Add Device” and select “Motion Sensor.”
- Press the sync button on the sensor until it flashes.
- Wait for the system to recognize the sensor.
- Confirm the sensor appears in your device list.
Once synced, the sensor will be linked to your system and ready to use.
Testing Sensor Functionality
After syncing, test the motion sensor to ensure it works correctly. Walk in front of the sensor while monitoring alerts on your app or keypad.
- Move slowly to see if the sensor detects motion.
- Check for an alert or notification from the system.
- Adjust sensor position if it misses any movement.
- Repeat testing until the sensor detects motion reliably.
Proper testing guarantees your sensor protects your home effectively.
Troubleshooting Common Issues
Troubleshooting common issues with your SimpliSafe motion sensor helps keep your home secure. Sensors might fail to detect motion or face connectivity problems. Knowing how to address these issues saves time and frustration.
Sensor Not Detecting Motion
Check the sensor’s position. It should face the area you want to monitor. Avoid placing it behind large objects or glass.
Clean the sensor lens gently. Dust or dirt can block the sensor’s view.
Make sure the sensor is powered on. Replace batteries if needed. Low battery can cause detection failure.
Test the sensor by walking in front of it. Watch for the system’s response to confirm detection.
Adjust the sensor’s sensitivity in the SimpliSafe app for better performance.
Connectivity Problems
Verify the sensor is within range of the base station. Walls and furniture can weaken signals.
Restart your base station to refresh connections. This often resolves minor glitches.
Ensure your Wi-Fi network is stable. Unstable Wi-Fi can disrupt sensor communication.
Check for interference from other wireless devices. Move the sensor or router if needed.
Update the SimpliSafe system firmware. Updates improve device compatibility and security.
Maintaining Your Motion Sensor
Keeping your SimpliSafe motion sensor in top shape is key to reliable home security. Regular maintenance helps the sensor respond quickly and accurately to movement, avoiding false alarms or missed detections. Small efforts like replacing batteries and cleaning the device can extend its lifespan and keep your system running smoothly.
Battery Replacement
Have you noticed your sensor’s LED blinking or your system alerting you about low battery? That’s your cue to swap out the batteries. SimpliSafe motion sensors typically use AA or AAA batteries, which you can easily find at any store.
Keep a pack of fresh batteries handy. This way, you won’t delay replacing them and risk losing protection. To change the batteries, open the sensor’s back panel, remove the old batteries, and insert new ones following the correct polarity. After replacement, test the sensor to ensure it’s fully functional.
Think about setting a reminder every six months to check your batteries. This simple habit prevents unexpected downtime and keeps your system alert.
Cleaning And Care Tips
Dust and dirt can block the sensor’s lens, reducing its effectiveness. Cleaning your motion sensor regularly helps it detect movement without issues. Use a soft, dry cloth to wipe the surface gently—avoid harsh chemicals or water, which could damage the electronics.
Pay attention to the sensor’s position too. Make sure nothing is obstructing its view, like furniture or decor that may have shifted over time. If you have pets, consider mounting the sensor higher to avoid false triggers caused by their movement.
Have you ever noticed your sensor acting strangely after a deep clean or rearrangement? That’s a good reminder to test it after any maintenance. Trigger it yourself and watch for alerts on your control panel to confirm it’s working right.
Credit: norcalcarculture.com
Frequently Asked Questions
How Do I Install A Simplisafe Motion Sensor?
To install, mount the sensor on a wall corner 6-8 feet high. Use the included screws or adhesive tape. Then, sync it with your SimpliSafe base station through the app for activation.
Where Should I Place Simplisafe Motion Sensors?
Place sensors in entryways, hallways, or large rooms for best coverage. Avoid direct sunlight and heat sources to prevent false alarms. Position them 6-8 feet above the floor.
How Do I Test If My Simplisafe Sensor Works?
Use the SimpliSafe app to test sensor status. Walk in front of the sensor to trigger motion detection. Check the app for real-time alerts and sensor response.
Can I Install Simplisafe Motion Sensors Myself?
Yes, SimpliSafe sensors are designed for easy DIY installation. Follow the step-by-step instructions in the manual or app. No professional help is needed for setup.
Conclusion
Installing the SimpliSafe motion sensor is simple and quick. Follow each step carefully to ensure proper setup. Place the sensor where it can best detect movement. Test the sensor to confirm it works well. Regular checks keep your system reliable and safe.
Enjoy peace of mind with your new security device. Stay safe and protect your home easily.


