
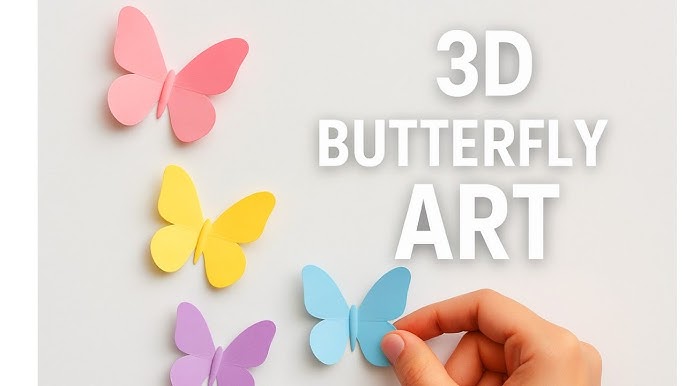
Are you looking to add a touch of magic and creativity to your walls? Making 3D butterfly wall stickers is easier than you think, and it can completely transform any room.
Imagine butterflies that seem to flutter right off your walls, bringing life and color to your space. In this guide, you’ll discover simple steps to create stunning, eye-catching decorations that reflect your personal style. Ready to turn your walls into a beautiful, dynamic art display?
Let’s dive in and make your space truly unforgettable.

Credit: m.youtube.com
Materials Needed
Gathering the right materials is essential before you begin making your 3D butterfly wall stickers. The quality and type of supplies you choose will impact how realistic and durable your butterflies look. Let’s break down what you’ll need to create beautiful, eye-catching designs that truly stand out.
Types Of Paper And Cardstock
Choosing the right paper or cardstock is crucial for achieving the 3D effect. Lightweight paper, like printer paper, is easy to fold but may not hold its shape well.
Thicker cardstock, such as 200-300gsm, provides sturdiness and allows your butterflies to pop off the wall. Glossy cardstock adds a subtle shine, making your butterflies more vibrant.
Have you ever noticed how texture changes the feel of a craft? Try mixing matte and glossy papers to add visual interest.
Essential Tools
Some tools are non-negotiable for clean cuts and precise folds. A sharp pair of scissors or a craft knife will help you cut intricate wing shapes smoothly.
A cutting mat protects your workspace and improves safety when using blades. You’ll also want a ruler for straight edges and a scoring tool or bone folder to create crisp folds.
Don’t overlook the power of tweezers—they can help position tiny pieces without smudging glue or bending paper unintentionally.
Optional Decorative Supplies
Adding extra details can take your butterflies from simple to stunning. Consider using markers or watercolor paints to add gradients or patterns on the wings.
Glitter, rhinestones, or small beads bring sparkle and texture that catch the light beautifully. Double-sided tape or foam dots add depth by lifting parts of the butterfly off the wall.
Would you like your butterflies to shimmer subtly or dazzle brightly? Choosing these extras lets you customize the final look to fit your style perfectly.
Choosing Butterfly Designs
Choosing the right butterfly designs is key to making beautiful 3D wall stickers. The design sets the mood and style of your decor. It is important to pick patterns that fit your room and personal taste.
Butterfly designs range from simple outlines to detailed shapes. Each type offers a different look and level of crafting skill. Understanding your options helps you create stickers that look great and are fun to make.
Simple Vs. Detailed Patterns
Simple butterfly patterns use basic shapes and few lines. They are easy to cut and assemble, perfect for beginners. These patterns create a clean, modern look on your wall.
Detailed patterns have intricate wings and body parts. They need more time and patience but look very realistic. These designs add elegance and depth to your wall space.
Choose simple patterns for a quick project or kids’ crafts. Pick detailed patterns to impress guests or for a special room feature.
Sources For Templates
Finding good templates helps you start your project fast. Many websites offer free and paid butterfly patterns. Craft blogs and Pinterest have great ideas and printables.
Books and magazines on paper crafts provide quality designs. Local craft stores sometimes sell pattern packs for wall stickers. Using ready templates saves time and guides your cutting.
Customizing Your Designs
Customizing butterfly designs adds a personal touch to your stickers. Change the size to fit your wall space perfectly. Adjust wing shapes to create unique looks.
Mix different butterfly styles for a lively arrangement. Add colors or patterns with markers or paint before cutting. Personal touches make your 3D butterflies stand out and feel special.
Cutting And Shaping Butterflies
Cutting and shaping butterflies requires careful trimming along the edges for a clean look. Gently fold wings to create a 3D effect that adds depth and charm to wall stickers.
Cutting and shaping butterflies is a key step in making 3D butterfly wall stickers. This process breathes life into your creations, turning simple paper into delicate art. Each cut and fold transforms flat sheets into fluttering wonders, ready to adorn your walls.Techniques For Precise Cutting
Precision is crucial when cutting butterfly shapes. Use a sharp pair of scissors or a craft knife. Trace butterfly templates onto colored paper or cardstock. Cut slowly along the lines for accurate shapes. Consider using a cutting mat for safety and stability. Experiment with different sizes for variety.Creating 3d Effects With Folding
Folding adds depth to your butterflies. Gently fold the wings along the body line. This creates a natural lift, giving a 3D effect. You can also curl the edges slightly for added realism. Try different folding techniques to see what looks best.Adding Texture And Dimension
Texture enhances the visual appeal of your butterflies. Use embossing tools to add patterns to the wings. A simple tool like a ballpoint pen can work wonders. Press lightly to create lines or dots. Layer different papers to add dimension. Use double-sided tape to secure layers without flattening them.Assembling The Wall Stickers
Assembling 3D butterfly wall stickers brings your project to life. It requires patience and careful handling. Each piece fits together to create a stunning, layered effect. The right assembly ensures the butterflies look natural and vibrant on your wall.
Layering Butterfly Pieces
Start by sorting all butterfly parts by size and shape. Layer smaller pieces over larger ones to add depth. Slightly bend wings upward for a 3D effect. Use tweezers for better control and precision. Avoid pressing too hard to keep the layers intact.
Using Adhesives Safely
Choose adhesives suitable for delicate paper or vinyl. Test glue on a small piece to check for damage. Use glue sparingly to avoid messy edges. Apply adhesive with a fine brush or toothpick for accuracy. Work in a well-ventilated area to avoid inhaling fumes.
Attaching To Wall Surfaces
Clean the wall surface before attaching stickers for better grip. Use a level to align butterflies evenly. Press gently to avoid tearing or warping. Leave space between butterflies for a natural appearance. Choose walls free of dust, grease, or moisture for best results.
Creative Display Ideas
Creative display ideas make 3D butterfly wall stickers stand out beautifully. They add life and charm to any space. Thoughtful arrangements and color choices can transform plain walls into lively art. Combining butterflies with other decorations creates a unique, eye-catching look.
Arranging Butterflies In Patterns
Arrange butterflies in shapes or lines for a striking effect. Create clusters that mimic natural groups of butterflies. Spread them out evenly for a balanced design. Use curved or spiral patterns to add flow and movement. Patterns bring order and harmony to the wall art.
Incorporating Colors And Gradients
Mix colors to create a vibrant or soft gradient effect. Start with dark shades and move to lighter ones for depth. Use contrasting colors to make butterflies pop against the wall. Select colors that match the room’s theme for a cohesive look. Color gradients add dimension and attract attention.
Combining With Other Wall Art
Pair butterfly stickers with framed pictures or mirrors. Use wall decals of flowers or leaves to complement the butterflies. Add shelves with small plants or decorative items nearby. Combining art types adds texture and interest to the space. This approach creates a fuller, more dynamic wall display.

Credit: www.youtube.com
Maintenance And Longevity
Keeping your 3D butterfly wall stickers looking fresh and vibrant takes a bit of care. Proper maintenance extends their life and keeps your space feeling lively. Let’s look at some easy ways to clean, protect, and refresh your butterfly decor.
Cleaning Tips
Dust can dull the colors of your butterflies quickly. Use a soft, dry cloth or a feather duster to gently remove dust weekly.
If you spot smudges, dampen a microfiber cloth slightly with water. Avoid harsh chemicals—they can damage the sticker’s surface and adhesive.
Try to clean around the edges carefully to prevent peeling. Have you noticed how a little dust can change the whole look of your wall art?
Preventing Damage
Keep your butterflies away from direct sunlight to avoid fading. Heat and UV rays can weaken the adhesive, causing stickers to peel off.
Make sure the wall surface is smooth and clean before applying the stickers. Rough or dirty surfaces reduce how well they stick and shorten their lifespan.
Do you have pets or kids who might touch the stickers? Teaching them to admire without touching can save you from frequent repairs.
Refreshing Your Decor Over Time
Over time, you might want to rearrange or add more butterflies. Carefully peel off a sticker and use a mild adhesive if it doesn’t stick well anymore.
Mixing different sizes or colors of butterflies can breathe new life into your wall. Small changes can make your space feel brand new without much effort.
Have you tried combining your 3D butterflies with other wall art? This can create a unique, personalized look that evolves with your style.

Credit: www.amazon.co.uk
Frequently Asked Questions
What Materials Do I Need For 3d Butterfly Wall Stickers?
You need colored paper, scissors, glue, butterfly templates, and double-sided tape. These materials help create vibrant, durable 3D butterfly stickers easily.
How Do I Make 3d Butterfly Wall Stickers Step-by-step?
Cut butterfly shapes from paper, fold wings slightly, apply glue, and stick them to walls. Layer multiple pieces for a 3D effect.
Can I Customize Colors And Sizes Of The Butterflies?
Yes, you can use any color paper and adjust sizes. Customizing adds a personal touch to your wall decor.
How Do I Ensure 3d Butterfly Stickers Stick Well On Walls?
Use clean, dry surfaces and double-sided tape or removable adhesive. This ensures stickers stay securely without damaging walls.
Conclusion
Creating 3D butterfly wall stickers brings charm to any room. You only need a few simple materials and steps. These stickers add color and life to plain walls. Making them yourself saves money and feels rewarding. Try different sizes and colors to match your style.
Small changes can brighten up your space quickly. Enjoy the process and show your creativity. Now, your walls can tell a beautiful story with butterflies. Give it a try and see the difference.


