
Looking to add a unique touch to your workspace? Making a desk lamp from wood is easier than you think, and it gives you a stylish, personal piece that brightens your room and sparks creativity.
Imagine the satisfaction of lighting up your desk with something you built yourself. In this guide, you’ll find simple steps and tips that anyone can follow, even if you’ve never worked with wood before. Ready to transform your space and impress your friends?
Let’s get started!

Credit: m.youtube.com
Choosing The Right Wood
Choosing the right wood is key to making a beautiful desk lamp. The wood type affects the lamp’s look, strength, and ease of work. Picking good wood helps the lamp last longer and shine brighter in your space.
Wood varies in color, grain, and hardness. Each type fits different styles and skills. Think about the wood’s durability and how easy it is to shape before buying.
Types Of Wood
Hardwoods and softwoods are the two main types. Hardwoods come from trees that lose leaves in winter. They are usually strong and dense. Examples:
- Oak – strong and has a coarse grain
- Maple – smooth texture and light color
- Cherry – rich color and fine grain
Softwoods come from evergreen trees. They are lighter and easier to cut. Common softwoods:
- Pine – affordable and light yellow
- Cedar – resistant to insects and smells nice
- Fir – straight grain and strong
Hardwoods suit elegant lamps with detailed shapes. Softwoods work well for simple, rustic styles.
Wood Quality And Thickness
Choose wood without cracks or knots. Flaws can weaken your lamp or spoil its look. Smooth surfaces make sanding easier.
Thickness matters for stability and weight. Thin wood bends or breaks easily. Thick wood can be hard to carve but holds the lamp well.
Common thickness for desk lamps is ¾ inch (about 2 cm). This size balances strength and workability. You can glue layers if more thickness is needed.
Essential Tools And Materials
Before you start crafting your wooden desk lamp, gathering the right tools and materials is crucial. Having everything on hand not only saves time but also makes the process smoother and more enjoyable. Let’s break down what you’ll need to bring your lamp idea to life.
Basic Tools
Woodworking requires a few essential tools that help you shape and assemble your lamp’s body. Start with a handsaw or a jigsaw for cutting the wood pieces to size. Sandpaper or an electric sander is important to smooth edges and surfaces, giving your lamp a polished look.
A drill with various drill bits will help you create holes for wiring and screws. Don’t forget a screwdriver set for assembling parts securely. Clamps can hold your pieces steady while you work, ensuring precision and safety.
Electrical Components
Electrical parts turn your wooden structure into a functional lamp. You’ll need a lamp socket compatible with your bulb choice, along with a power cord that includes an inline switch for easy control. Choose LED bulbs for energy efficiency and a long lifespan.
Wire connectors and electrical tape help secure your wiring connections safely. If you want a more customizable design, consider a dimmer switch or a flexible lamp arm. These components are widely available and often come with clear instructions.
Safety Gear
Safety should always be your priority when working with tools and electricity. Wear safety goggles to protect your eyes from wood dust and flying debris. A dust mask prevents inhaling fine particles while sanding or cutting.
Gloves provide extra grip and protect your hands from splinters and minor cuts. When handling electrical components, make sure your hands are dry and consider using insulated tools to reduce the risk of electric shock. Do you have all your safety gear ready?
Designing Your Desk Lamp
Create a unique desk lamp using wood for a personal touch in your workspace. Use basic woodworking skills to craft a functional and stylish piece. Experiment with different wood types and finishes to achieve your desired look.
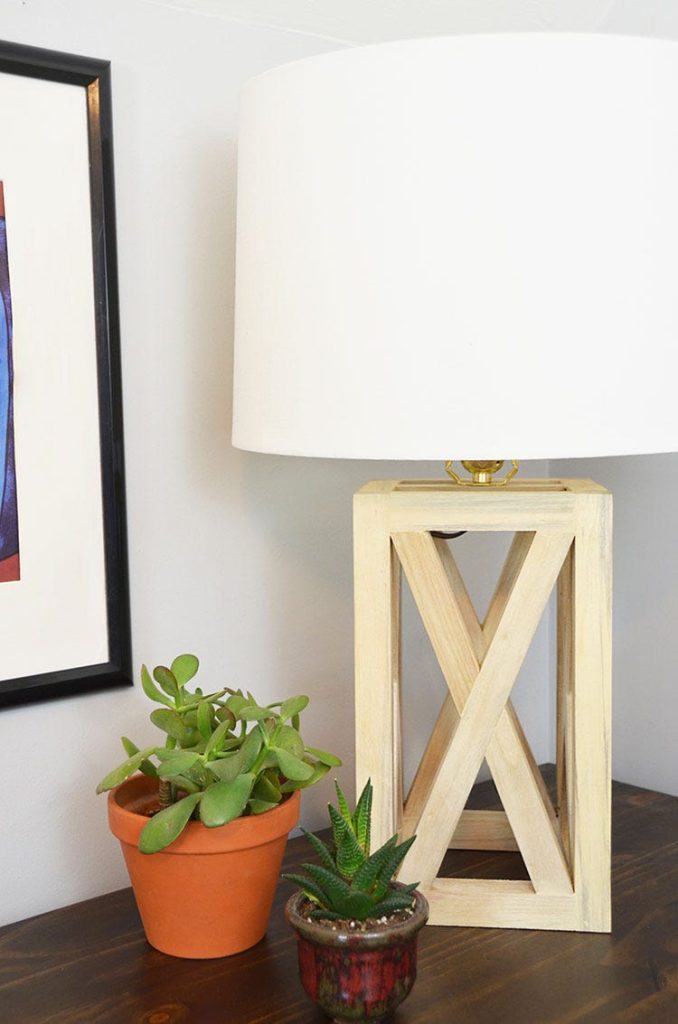
Designing your desk lamp is a fun and creative process. It allows you to express your personal style. Before starting, think about where the lamp will be used. Consider the size and style that fit your space. A well-designed lamp enhances both function and aesthetics.Simple Lamp Designs
Start with a basic design for your desk lamp. Simple designs are easier to build. They often use straight lines and basic shapes. Think about a classic wooden stand with a simple shade. This design suits most spaces and is timeless. You can also experiment with a minimalist approach. Use slender wooden rods for a modern look.Measuring And Sketching
Accurate measurements are crucial for your lamp’s success. Measure the space where you will place the lamp. This helps you decide on the lamp’s height and width. Use these dimensions to create a rough sketch. Sketching helps visualize your design. It guides the building process too. Remember to include details like the base and shade size. Keep your sketch clear and simple.Cutting And Shaping The Wood
Cutting and shaping wood is a key part of making a desk lamp. This step gives the lamp its form and character. Proper handling of wood ensures a clean, sturdy build that looks great on any desk. Careful marking, cutting, and smoothing create a professional finish and make assembly easier.
Marking The Wood
Begin by measuring the wood pieces carefully. Use a pencil to mark the exact lines where you will cut. Double-check your measurements for accuracy. Clear and precise markings guide your cuts and reduce mistakes. Mark all parts needed for the lamp base, arm, and shade holder.
Safe Cutting Techniques
Use the right saw for your wood type and thickness. Keep hands away from the blade at all times. Secure the wood on a stable surface to avoid slipping. Cut slowly and steadily along the marked lines. Wear safety goggles and gloves to protect yourself from dust and splinters.
Sanding And Smoothing
After cutting, sand the edges to remove rough spots. Start with coarse sandpaper to shape the wood. Follow with fine sandpaper for a smooth finish. Sand all surfaces that will be visible or touched. Clean off dust to prepare the wood for finishing or painting.
Assembling The Lamp Base
Assembling the lamp base is an important step in making a desk lamp from wood. It gives the lamp a strong and steady foundation. This part will explain how to join the wood pieces and secure them firmly. Follow the instructions carefully to create a base that lasts long and looks great.
Joining Wood Pieces
Start by arranging the wood pieces for the lamp base. Check that each piece fits well with the others. Use clamps to hold the pieces tightly in place. This keeps the wood steady while you work.
Make sure the edges are smooth and clean. Sand them lightly if needed. Align the pieces squarely to create a strong joint. Precise fitting helps the lamp base stay balanced.
Securing With Glue And Screws
Apply wood glue along the edges where the pieces meet. Spread the glue evenly for a good bond. Press the pieces together and wipe off any extra glue.
Use screws to add extra strength. Drill small pilot holes first to avoid wood splitting. Insert screws slowly and tighten them firmly. This ensures the base stays solid and safe.
Let the glue dry completely before moving the lamp base. This prevents it from coming apart during use. A well-secured base holds the lamp steady on your desk.

Credit: www.youtube.com
Wiring The Lamp
Wiring your wooden desk lamp is a crucial step that brings your creation to life. This phase requires care and attention to detail, as it ensures your lamp works safely and efficiently. Let’s break down the wiring process into manageable parts so you feel confident handling the electrical setup yourself.
Installing The Socket
Start by choosing a socket that fits your bulb type and lamp design. A common choice is a standard E26 or E27 socket, which suits most desk lamp bulbs.
Secure the socket firmly to the wooden base or arm of your lamp using screws or mounting hardware. Make sure it’s stable to avoid any wobbling when you change the bulb.
Think about the socket’s position—does it allow easy bulb replacement and enough space for heat to dissipate? Proper placement can prevent overheating and extend your lamp’s life.
Connecting The Wiring
Use a lamp cord with an inline switch for easy control. Strip about half an inch of insulation from the wire ends to expose the copper.
Connect the wires to the socket terminals: usually, the ribbed wire attaches to the neutral terminal, and the smooth wire to the live terminal. Tighten the screws securely to prevent loose connections.
Don’t forget to attach the ground wire if your socket requires it, especially for metal parts in the lamp. Safety is key—double-check your connections before moving on.
Testing The Electrical Setup
Before final assembly, plug in your lamp and switch it on to check if the bulb lights up. If it doesn’t, turn off the power and inspect your wiring again for any missed connections or loose screws.
Listen for any buzzing sounds or look for flickering light, which might indicate a wiring issue. Correcting these early avoids hazards later on.
Have you ever tested something only to realize a small detail was overlooked? Taking this time now can save you from bigger headaches down the road.
Finishing Touches
Finishing touches can make or break the look of your wooden desk lamp. This stage is where your creativity shines, and every detail comes together. Pay close attention to each step to ensure your lamp not only looks great but lasts long.
Applying Stain Or Paint
Choosing between stain and paint depends on the style you want. Stain highlights the wood’s natural grain, giving a warm, organic feel. Paint, on the other hand, offers a chance to add bold colors or a sleek finish.
Before applying, sand your lamp smoothly to avoid rough spots. Use a brush or cloth for even coverage, and always work in thin layers. Have you tried mixing stains to create a unique shade that matches your room?
Adding A Lampshade
The lampshade controls the light’s mood and direction. Pick a shade that complements your lamp’s wood tone and your workspace’s ambiance. Fabric shades soften light, while metal or glass shades create a more focused glow.
Check the size carefully; a too-large shade can overpower the lamp’s design, while a too-small one might look off-balance. Have you considered repurposing an old lampshade for a custom look?
Final Assembly
Now it’s time to bring all parts together. Secure the wiring carefully to avoid any hazards, and tighten all screws firmly. Test your lamp by plugging it in before placing it on your desk.
Small adjustments can make a big difference, such as repositioning the bulb or shade angle. How will you personalize your lamp to fit your workspace perfectly?
Troubleshooting Tips
Troubleshooting is a key part of crafting your wooden desk lamp. It helps you spot problems early and fix them before they become bigger issues. By knowing what to look for, you can save time and avoid frustration during your project.
Common Electrical Issues
Electrical problems are the most frequent challenge when making a desk lamp. If your lamp doesn’t turn on, first check the bulb and power source. Sometimes, a simple loose connection or faulty bulb is the culprit.
Wiring mistakes can cause shorts or flickering. Double-check that all wires are connected correctly and securely. Using a multimeter can help you test if the current flows properly through the circuit.
Be careful with the lamp socket. If it’s not fitted tightly, it might cause sparking or intermittent lighting. Have you noticed any unusual smells or sounds? These can signal electrical hazards that need immediate attention.
Wood Assembly Problems
Woodworking errors can affect the lamp’s stability and look. If parts don’t fit well, your lamp might wobble or look uneven. Measure twice, cut once—this old advice really matters here.
Glue or screw issues are common. Using the wrong type of glue or over-tightening screws can crack the wood. If a joint feels weak, try clamping it and letting the glue dry longer.
Sometimes, wood warps or splits after assembly. This often happens if the wood wasn’t properly dried or sealed. Are you using the right finish to protect your lamp from moisture and heat? This step is crucial for durability.
Maintenance And Care
Maintaining your wooden desk lamp is key to keeping it both functional and beautiful over time. Wood needs gentle care to preserve its natural look, while the electrical parts require attention to ensure safety. With the right upkeep, your handmade lamp will continue to brighten your workspace for years.
Cleaning The Lamp
Dust and dirt can dull the wood’s finish and reduce the lamp’s glow. Use a soft, dry cloth to wipe down the wood regularly. Avoid harsh chemicals; instead, a slightly damp cloth with mild soap works well for stubborn spots.
Be careful not to let water seep into joints or electrical parts. You might wonder how often you should clean it—try to do this at least once a week if your workspace tends to collect dust quickly. This simple habit keeps the lamp looking fresh without risking damage.
Replacing Bulbs Safely
Changing the bulb is more than just swapping one light for another. Always unplug the lamp before you start to avoid any electrical shock. Wait for the bulb to cool completely; I learned this the hard way when I accidentally touched a hot bulb once.
Use the correct wattage recommended for your lamp to prevent overheating. If your lamp uses LED bulbs, they typically last longer and generate less heat, which is a nice bonus for safety and energy savings. Have you checked your bulb’s compatibility with the lamp recently? It’s worth confirming to keep your setup safe.

Credit: m.youtube.com
Frequently Asked Questions
What Materials Do I Need To Make A Wooden Desk Lamp?
You need wood pieces, a lamp kit, screws, glue, sandpaper, and paint or finish. Ensure quality wood for durability.
How Do I Safely Wire A Wooden Desk Lamp?
Always unplug power before wiring. Follow lamp kit instructions carefully. Use insulated wires and secure connections to avoid hazards.
What Wood Types Are Best For Desk Lamps?
Choose hardwoods like oak, maple, or walnut. They are sturdy, durable, and have attractive finishes for a stylish lamp.
Can I Customize The Lamp Design Easily?
Yes, wood is versatile. You can cut shapes, carve, or paint to create unique, personalized desk lamps.
Conclusion
Building a desk lamp from wood is a fun and rewarding project. It brings warmth and style to your workspace. You learn new skills while creating something useful. Each step is simple and easy to follow. Your handmade lamp will shine bright for years.
Try it yourself and enjoy the process. Creativity and patience make all the difference. A wooden desk lamp adds a personal touch to any room. Give it a go and see the results!


