
Looking to add a stylish and practical piece to your living space? Learning how to make a square ottoman pouf is easier than you think, and it can transform any room instantly.
Imagine having a cozy spot to rest your feet, extra seating for guests, or even a unique centerpiece—all crafted by your own hands. In this guide, you’ll discover simple steps and tips that will help you create a beautiful, sturdy pouf tailored to your style.
Ready to start your DIY project and impress everyone with your creativity? Keep reading to unlock the secrets to making your very own square ottoman pouf.
Materials Needed
Gathering the right materials makes building a square ottoman pouf easy and fun. Having quality fabric, filling, and tools ensures a neat, durable result. This section covers the essential items you need.
Fabric Choices
- Choose sturdy fabrics like canvas, denim, or upholstery fabric.
- Pick colors and patterns that match your room decor.
- Consider fabrics that are easy to clean and maintain.
- Opt for fabric with a tight weave to withstand wear and tear.
Filling Options
- Polyester fiberfill offers a soft, plush feel for your pouf.
- Foam pieces provide firmer support and shape retention.
- Old clothes or fabric scraps can work as budget-friendly fillers.
- Combine foam and fiberfill for a balanced comfort level.
Tools Required
- Sewing machine speeds up stitching and provides strong seams.
- Fabric scissors cut fabric cleanly without fraying edges.
- Measuring tape ensures precise fabric and filling sizes.
- Pins keep fabric pieces aligned during sewing.
- Needle and thread help with hand-sewing finishing touches.
- Chalk or fabric marker marks cutting lines clearly.
Preparing The Fabric
Preparing the fabric is a crucial part of making a square ottoman pouf. It sets the foundation for a neat and professional-looking final product. Taking your time here will save you frustration during sewing and stuffing.
Measuring And Cutting
Start by measuring the dimensions of your ottoman pouf carefully. Remember to add extra fabric for seams and stuffing space. Using a clear ruler or measuring tape helps keep your lines straight and accurate.
Lay your fabric flat on a clean surface and smooth out any wrinkles. Pin the fabric if needed to prevent shifting. Then, cut along the measured lines with sharp fabric scissors to get clean edges.
Have you ever tried to cut fabric without precise measurements? It often leads to wasted material or uneven sides. Taking a few extra minutes here can make a big difference.
Marking Seam Allowances
Next, mark your seam allowances clearly on the fabric pieces. Most pouf patterns call for a ½ inch to 1 inch seam allowance depending on the thickness of your fabric.
Use tailor’s chalk or a washable fabric marker to draw these lines. They guide you while sewing and ensure your pouf keeps the right shape and size.
Think about how much fabric you’ll need to fold under when sewing seams. Marking seam allowances before stitching avoids surprises and makes your sewing process smoother.
Sewing The Ottoman Pouf
Sewing the ottoman pouf is where your project starts to take shape. This step demands careful attention to detail to ensure your pouf is sturdy and looks polished. Keep your stitching consistent and strong, especially around the corners where fabric tension will be highest.
Stitching The Sides
Begin by sewing the side panels together to form a square tube. Use a straight stitch and maintain an even seam allowance, typically about 1/2 inch, to ensure durability.
Pin the fabric edges before stitching to keep them aligned. This prevents shifting and creates a clean edge. If your fabric frays easily, consider finishing the seams with a zigzag stitch or serger.
Remember, a neat side seam helps your pouf maintain its shape over time. If you’ve ever sewn a pillowcase, you’ll find similar techniques apply here—just be mindful of the extra bulk from filling later on.
Creating The Top And Bottom Panels
The top and bottom panels give your pouf its flat surfaces. Cut two squares matching the size of the pouf’s cross-section. Accuracy here is key to avoid puckering when attaching these pieces.
Sew one edge of the top panel to the side tube, easing the fabric as you go. This step can feel tricky, but take it slow and use pins liberally to guide the fabric smoothly.
Once the top is attached, repeat the process with the bottom panel, leaving a small gap unstitched if you plan to insert filling later. This opening will make stuffing easier and allow you to adjust firmness.
Have you noticed how a simple, precise stitch can transform the whole look? Focus on neatness and your pouf will look professional and hold up through years of use.

Credit: www.amazon.com
Assembling The Pouf
Begin by arranging all pouf pieces on a flat surface. Connect the fabric panels carefully, ensuring edges align well. Use stuffing or foam to fill the pouf evenly before closing the final seams securely.
Assembling the pouf is the next step after cutting the fabric. This phase requires careful attention. It’s where all pieces come together to form the pouf. You’ll need your sewing machine and thread. Ensure the thread matches the fabric color. A mismatched thread can spoil the look. Let’s dive into the process.Joining All Pieces
Lay out the fabric pieces on a flat surface. Align the edges of the square pieces. Use pins to hold them together. This prevents shifting during sewing. Sew the pieces with a straight stitch. A half-inch seam allowance is ideal. Make sure the stitches are tight and secure. This ensures durability.Leaving An Opening For Filling
When sewing the last seam, leave an opening. This is important for filling the pouf. A 6-inch gap is usually enough. Ensure the opening is on one side. This keeps it hidden later. After filling, sew this gap closed. Use a needle and thread for a neat finish.Stuffing The Pouf
Stuffing the pouf is a key step in making it comfortable and durable. The filling affects the shape, firmness, and how the pouf holds up over time. Choosing the right stuffing and using proper filling techniques ensures the pouf looks good and feels right when you sit on it.
Choosing The Right Filling
Select stuffing that matches your comfort and budget. Common options include:
- Polyester fiberfill – soft and lightweight
- Foam pieces – provide firm support
- Old clothes or fabric scraps – eco-friendly and cheap
- Bean bag beads – mold to shape but may shift
Consider how firm you want the pouf. Soft filling feels cozy but may lose shape quickly. Firmer filling keeps the pouf structured but might be less cushy.
Filling Techniques For Firmness
Stuff the pouf evenly for a balanced look and feel. Use these tips:
- Fill corners first to maintain shape
- Press down filling as you add it to avoid lumps
- Add filling gradually, testing firmness by pressing
- Adjust stuffing until the pouf feels firm but soft
Stuffing tightly results in a pouf that holds shape longer. Looser stuffing allows more give but may sag with use.
Finishing Touches
Finishing touches bring your square ottoman pouf to life. This stage transforms basic sewing into a polished, functional piece. Proper finishing ensures durability and style. It also hides raw edges and stuffing. Focus on neatness and creativity here. The right finish will impress every guest and make your pouf last longer.
Closing The Opening
Leave a small gap when stuffing your pouf. Use strong thread and a needle for closing. Sew the opening with small, tight stitches. Try the ladder stitch for an invisible seam. Pull the thread gently to avoid puckering. Knot the thread securely at the end. Tuck the knot inside the pouf for a clean look. This step keeps your stuffing in place and maintains shape.
Adding Decorative Elements
Decorations add personality to your ottoman pouf. Choose from buttons, tassels, or fabric paint. Sew buttons at corners for a tufted style. Attach tassels to each corner for a boho vibe. Use fabric paint to create patterns or designs. Add a trim or ribbon around edges for a neat finish. Keep decorations simple to match your room’s style. Personal touches make your pouf unique and inviting.
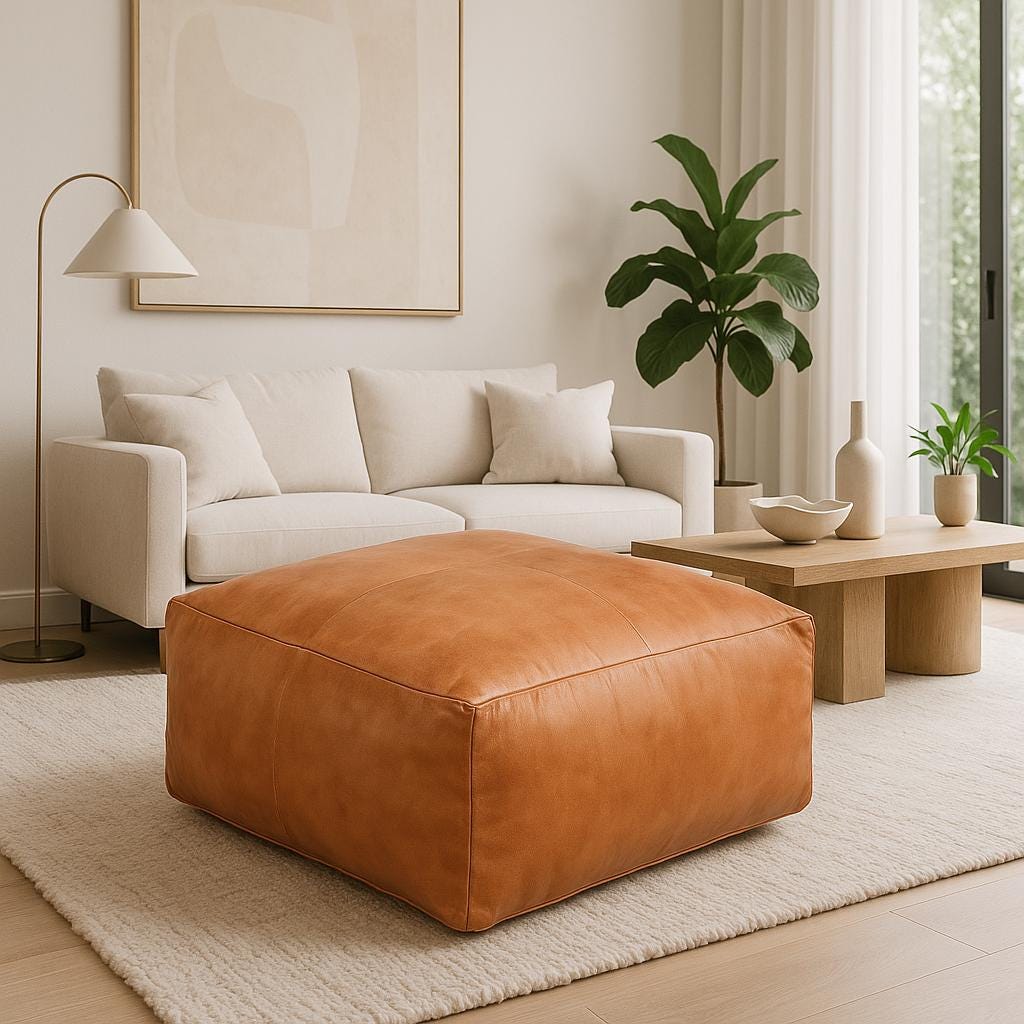
Styling Ideas
Styling your square ottoman pouf enhances both function and charm. It transforms a simple piece into a statement. The right styling fits your space and personality. Small touches can create a big impact. Consider colors, patterns, and placement carefully. These details guide your decor choices and harmony.
Color And Pattern Tips
Select colors that match your room’s mood. Soft tones create calm and relaxation. Bright colors add energy and fun. Patterns bring texture and interest. Stripes make the pouf look longer. Geometric shapes add a modern vibe.
Mix solid colors with patterned fabrics for balance. Avoid too many patterns to keep it neat. Use colors from your cushions or rugs for unity. A well-chosen pouf color can tie the room together.
Placement In Your Home
Place the pouf where it is easy to reach. Near sofas or chairs for extra seating works well. Use it as a footrest to add comfort. It can double as a small table for trays or books.
In bedrooms, put it at the foot of the bed. It offers a spot to sit or place clothes. In entryways, a pouf invites guests to sit while removing shoes. Think about traffic flow and space size. Make sure it does not block walkways.

Credit: dwalinam.com
Maintenance Tips
Maintaining your square ottoman pouf keeps it looking fresh and lasting longer. Regular care prevents damage and preserves its shape. Simple habits protect your pouf from dirt, stains, and wear. Follow these tips to enjoy your pouf every day.
Cleaning Instructions
Vacuum the pouf often using a soft brush attachment. This removes dust and loose dirt. Spot clean spills quickly with a damp cloth. Use mild soap mixed with water for stubborn stains. Avoid harsh chemicals that can damage the fabric. Allow the pouf to air dry completely before use. For removable covers, follow the washing instructions on the label. Keep the pouf away from direct sunlight to prevent fading.
Repairing Wear And Tear
Check the pouf regularly for loose threads or small holes. Use a needle and thread to sew minor tears. Patch larger holes with matching fabric pieces. Tighten any loose seams to maintain its shape. Replace stuffing if the pouf feels flat or uneven. Repairing damages early stops them from getting worse. Handle the pouf gently to reduce wear and tear.
Credit: www.etsy.com
Frequently Asked Questions
What Materials Are Needed To Make A Square Ottoman Pouf?
You need fabric, foam or stuffing, plywood, a staple gun, scissors, and sewing tools. Choose durable fabric for longevity. Foam density affects comfort, so select accordingly. Plywood forms the base, ensuring stability and shape.
How Do You Assemble A Square Ottoman Pouf Frame?
Cut plywood into a square base and sides. Attach sides to the base using screws or nails. Ensure edges align perfectly for a sturdy frame. This creates the ottoman’s core structure, ready for padding and covering.
What Type Of Stuffing Is Best For Ottoman Poufs?
High-density foam offers firm support and durability. Polyester fiberfill adds softness but may compress over time. Combining foam with fiberfill balances comfort and shape retention. Choose stuffing based on desired firmness and usage.
Can I Customize The Fabric For My Ottoman Pouf?
Yes, select fabric that matches your decor and style. Durable, easy-to-clean fabrics like cotton or polyester blends work well. You can also use patterned or textured fabrics for a unique look. Customization enhances both function and aesthetics.
Conclusion
Creating a square ottoman pouf can be fun and simple. You only need a few materials and some patience. Each step brings you closer to a cozy, stylish piece for your home. This project adds comfort and charm to any room.
Try making one to enjoy a personal touch in your space. Handmade items always feel special and unique. Start today and see how satisfying DIY can be.


