

Are you looking to add style and extra storage to your kitchen without spending a fortune? Floating shelves are the perfect solution.
They give your kitchen a clean, modern look while keeping your favorite items within easy reach. In this guide, you’ll learn simple steps to make your own floating shelves, even if you’ve never done a DIY project before. By the end, you’ll have the confidence to build shelves that not only look great but also fit perfectly in your space.
Ready to transform your kitchen? Let’s get started!
Choosing Materials
Choosing the right materials is key to making sturdy and attractive floating shelves for your kitchen. The materials affect the shelf’s strength, style, and durability. Good choices ensure your shelves hold weight and match your kitchen’s look.
Selecting Wood Types
Wood is the most common material for floating shelves. Solid wood offers strength and natural beauty. Popular choices include:
- Oak – strong and durable with a classic grain
- Pine – affordable and easy to work with
- Maple – smooth finish and light color
- Walnut – dark, rich tone for a modern look
Choose wood that fits your kitchen style and supports the items you want to place on the shelves.
Picking The Right Brackets
Brackets hold the shelves securely to the wall. Hidden brackets create the floating effect. Look for:
- Heavy-duty metal brackets for strength
- Adjustable brackets for easy leveling
- Brackets with a long support arm for stability
Make sure the brackets fit inside the shelf thickness and can support the weight you plan to add.
Gathering Tools And Supplies
Having the right tools makes the project smooth and safe. You will need:
- Drill with bits for wood and wall anchors
- Level to keep shelves straight
- Stud finder to locate wall studs
- Measuring tape and pencil for accuracy
- Screwdriver or impact driver
Prepare all materials and tools before starting to save time and avoid interruptions.

Credit: www.create-enjoy.com
Measuring And Planning
Measuring and planning are the foundation of making floating shelves that look great and hold up well in your kitchen. Skipping this step or rushing through it can lead to uneven shelves or ones that can’t support your dishes. Taking time here ensures your shelves fit perfectly and stay secure.
Determining Shelf Size
Start by deciding what you want to place on your shelves. Will it be heavy pots, cookbooks, or just decorative items? This affects the depth and length you choose.
Typically, kitchen shelves range from 8 to 12 inches deep to hold most items comfortably. Think about your wall space too—too long shelves might overpower a small kitchen.
Write down your ideal shelf dimensions. This prevents guesswork later and helps when buying wood or brackets.
Locating Wall Studs
Wall studs are key to making your floating shelves strong. Attaching shelves only to drywall won’t support heavy kitchenware and risks accidents.
Use a stud finder to locate studs behind your wall. Move it slowly until it signals a stud, then mark the spot with a pencil.
If you don’t have a stud finder, try tapping the wall and listen for a solid sound or look for electrical outlets, which usually attach to studs.
Marking Placement
Once you know where the studs are, mark your shelf’s position carefully. Use a level to ensure the marks are perfectly horizontal.
Think about the height too. Too high, and it’s hard to reach; too low, and it might get in the way of counters or appliances.
Double-check your measurements before drilling. A small mistake here can mean a crooked shelf or one that doesn’t fit your kitchen’s flow.
Cutting And Preparing Wood
Choose wood that fits your kitchen style and needs. Measure and cut boards carefully for smooth, even shelves. Sand edges to avoid splinters and prepare surfaces for finishing.
Cutting and preparing wood is the heart of making floating shelves. It’s crucial to get this right for a perfect fit in your kitchen. Accurate measurements and smooth finishes are essential. Let’s dive into the details.Measuring And Cutting Boards
Start by measuring the space where the shelves will go. Use a tape measure for accuracy. Note the length, width, and depth. Transfer these measurements to your wood. Mark clear lines with a pencil and straight edge. Use a saw to cut along the lines. Ensure the cuts are straight and even.Sanding Edges
Sanding smooths the edges of your boards. It removes splinters and rough spots. Use sandpaper or a sanding block. Start with coarse grit and move to finer grit. Sand in the direction of the grain. This helps prevent scratches. Check the edges with your hand. They should feel smooth to the touch.Applying Finish Or Paint
Choose a finish that suits your kitchen style. Options include varnish, stain, or paint. Apply the finish with a brush or cloth. For paint, use a primer first. Let each coat dry completely. Apply multiple coats for durability. A good finish protects the wood and enhances its appearance.Installing Brackets
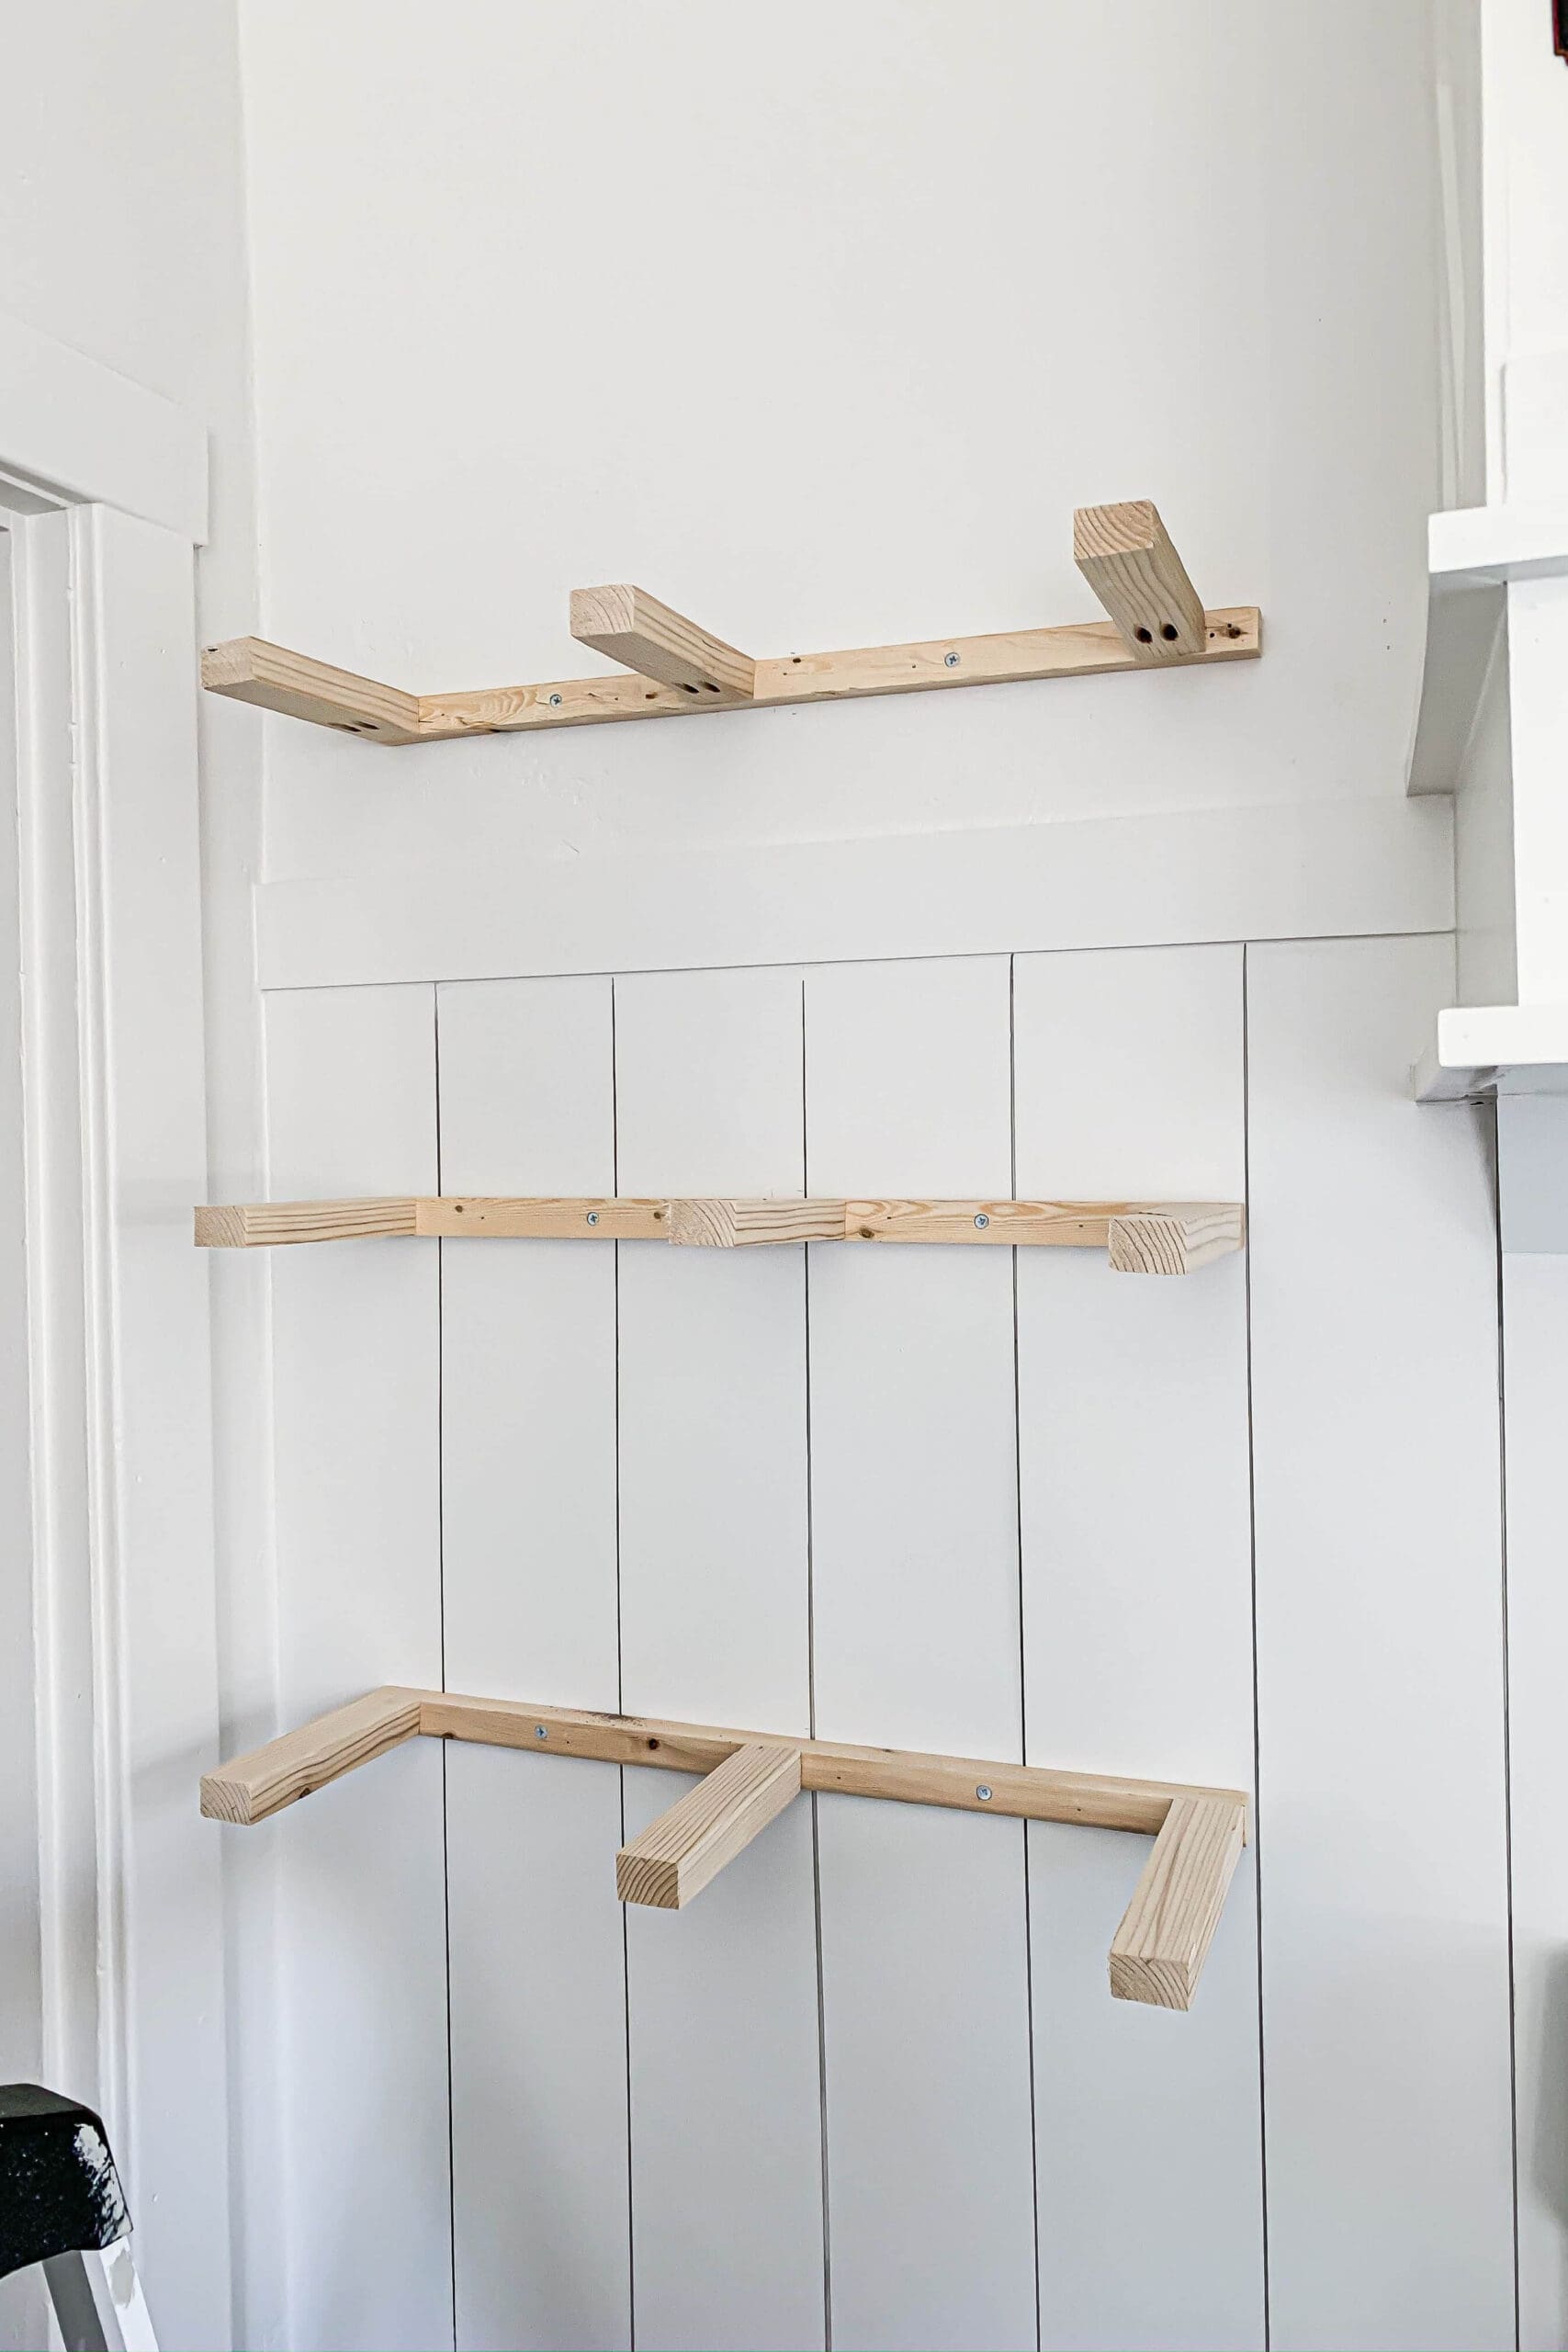
Installing brackets is the foundation for sturdy floating shelves in your kitchen. The right placement and secure attachment ensure your shelves hold up under the weight of dishes, spices, and gadgets. Taking your time at this stage saves you from future sagging or accidents.
Aligning Brackets On Wall
Start by measuring the height where you want your shelves. Mark the wall lightly with a pencil for each bracket position. Use a level to make sure the marks are perfectly horizontal—this keeps your shelves straight and professional-looking.
Have you ever hung a shelf only to find it tilting? Checking alignment before drilling can prevent that. Also, locate studs behind your wall using a stud finder; brackets anchored into studs hold much better than those fixed to drywall alone.
Drilling Pilot Holes
Drilling pilot holes before inserting screws helps avoid splitting the wall or brackets. Use a drill bit slightly smaller than your screws to make the holes. This step makes screwing easier and ensures a tight fit.
Keep your drill steady and perpendicular to the wall. If the holes aren’t straight, the screws may go in crooked, weakening the support. Taking this extra moment adds big strength to your installation.
Securing Brackets
Once pilot holes are ready, position the brackets and drive screws in firmly. Use screws long enough to penetrate the studs by at least an inch for maximum grip. Tighten the screws until the bracket feels solid—no wiggle or play.
Double-check the bracket’s level after securing it. Even a small misalignment can make your shelf look off. If your wall doesn’t have studs where you want the brackets, use heavy-duty wall anchors designed for your wall type to keep everything secure.
Mounting The Shelves
Mounting the shelves is a key part of creating floating shelves for your kitchen. This process ensures the shelves stay firm and can hold your items safely. Careful mounting makes your shelves look clean and stylish without visible support. Follow these steps to place, secure, and check your shelves for stability.
Placing Shelves On Brackets
Start by gently setting each shelf on its bracket. Align the shelf edges with the wall for a neat look. Make sure the shelf sits fully on the bracket without gaps. This step helps the shelf stay balanced and prevents tilting.
Securing Shelves
Use screws to fasten the shelves to the brackets. Drill pilot holes to avoid splitting the wood. Tighten the screws just enough to hold the shelf firmly. Avoid overtightening, which can damage the shelf or bracket.
Checking Stability
Press down lightly on the shelf to test its strength. Watch for any movement or wobbling. If the shelf feels loose, tighten the screws further. Repeat this check for all shelves to ensure safety before use.
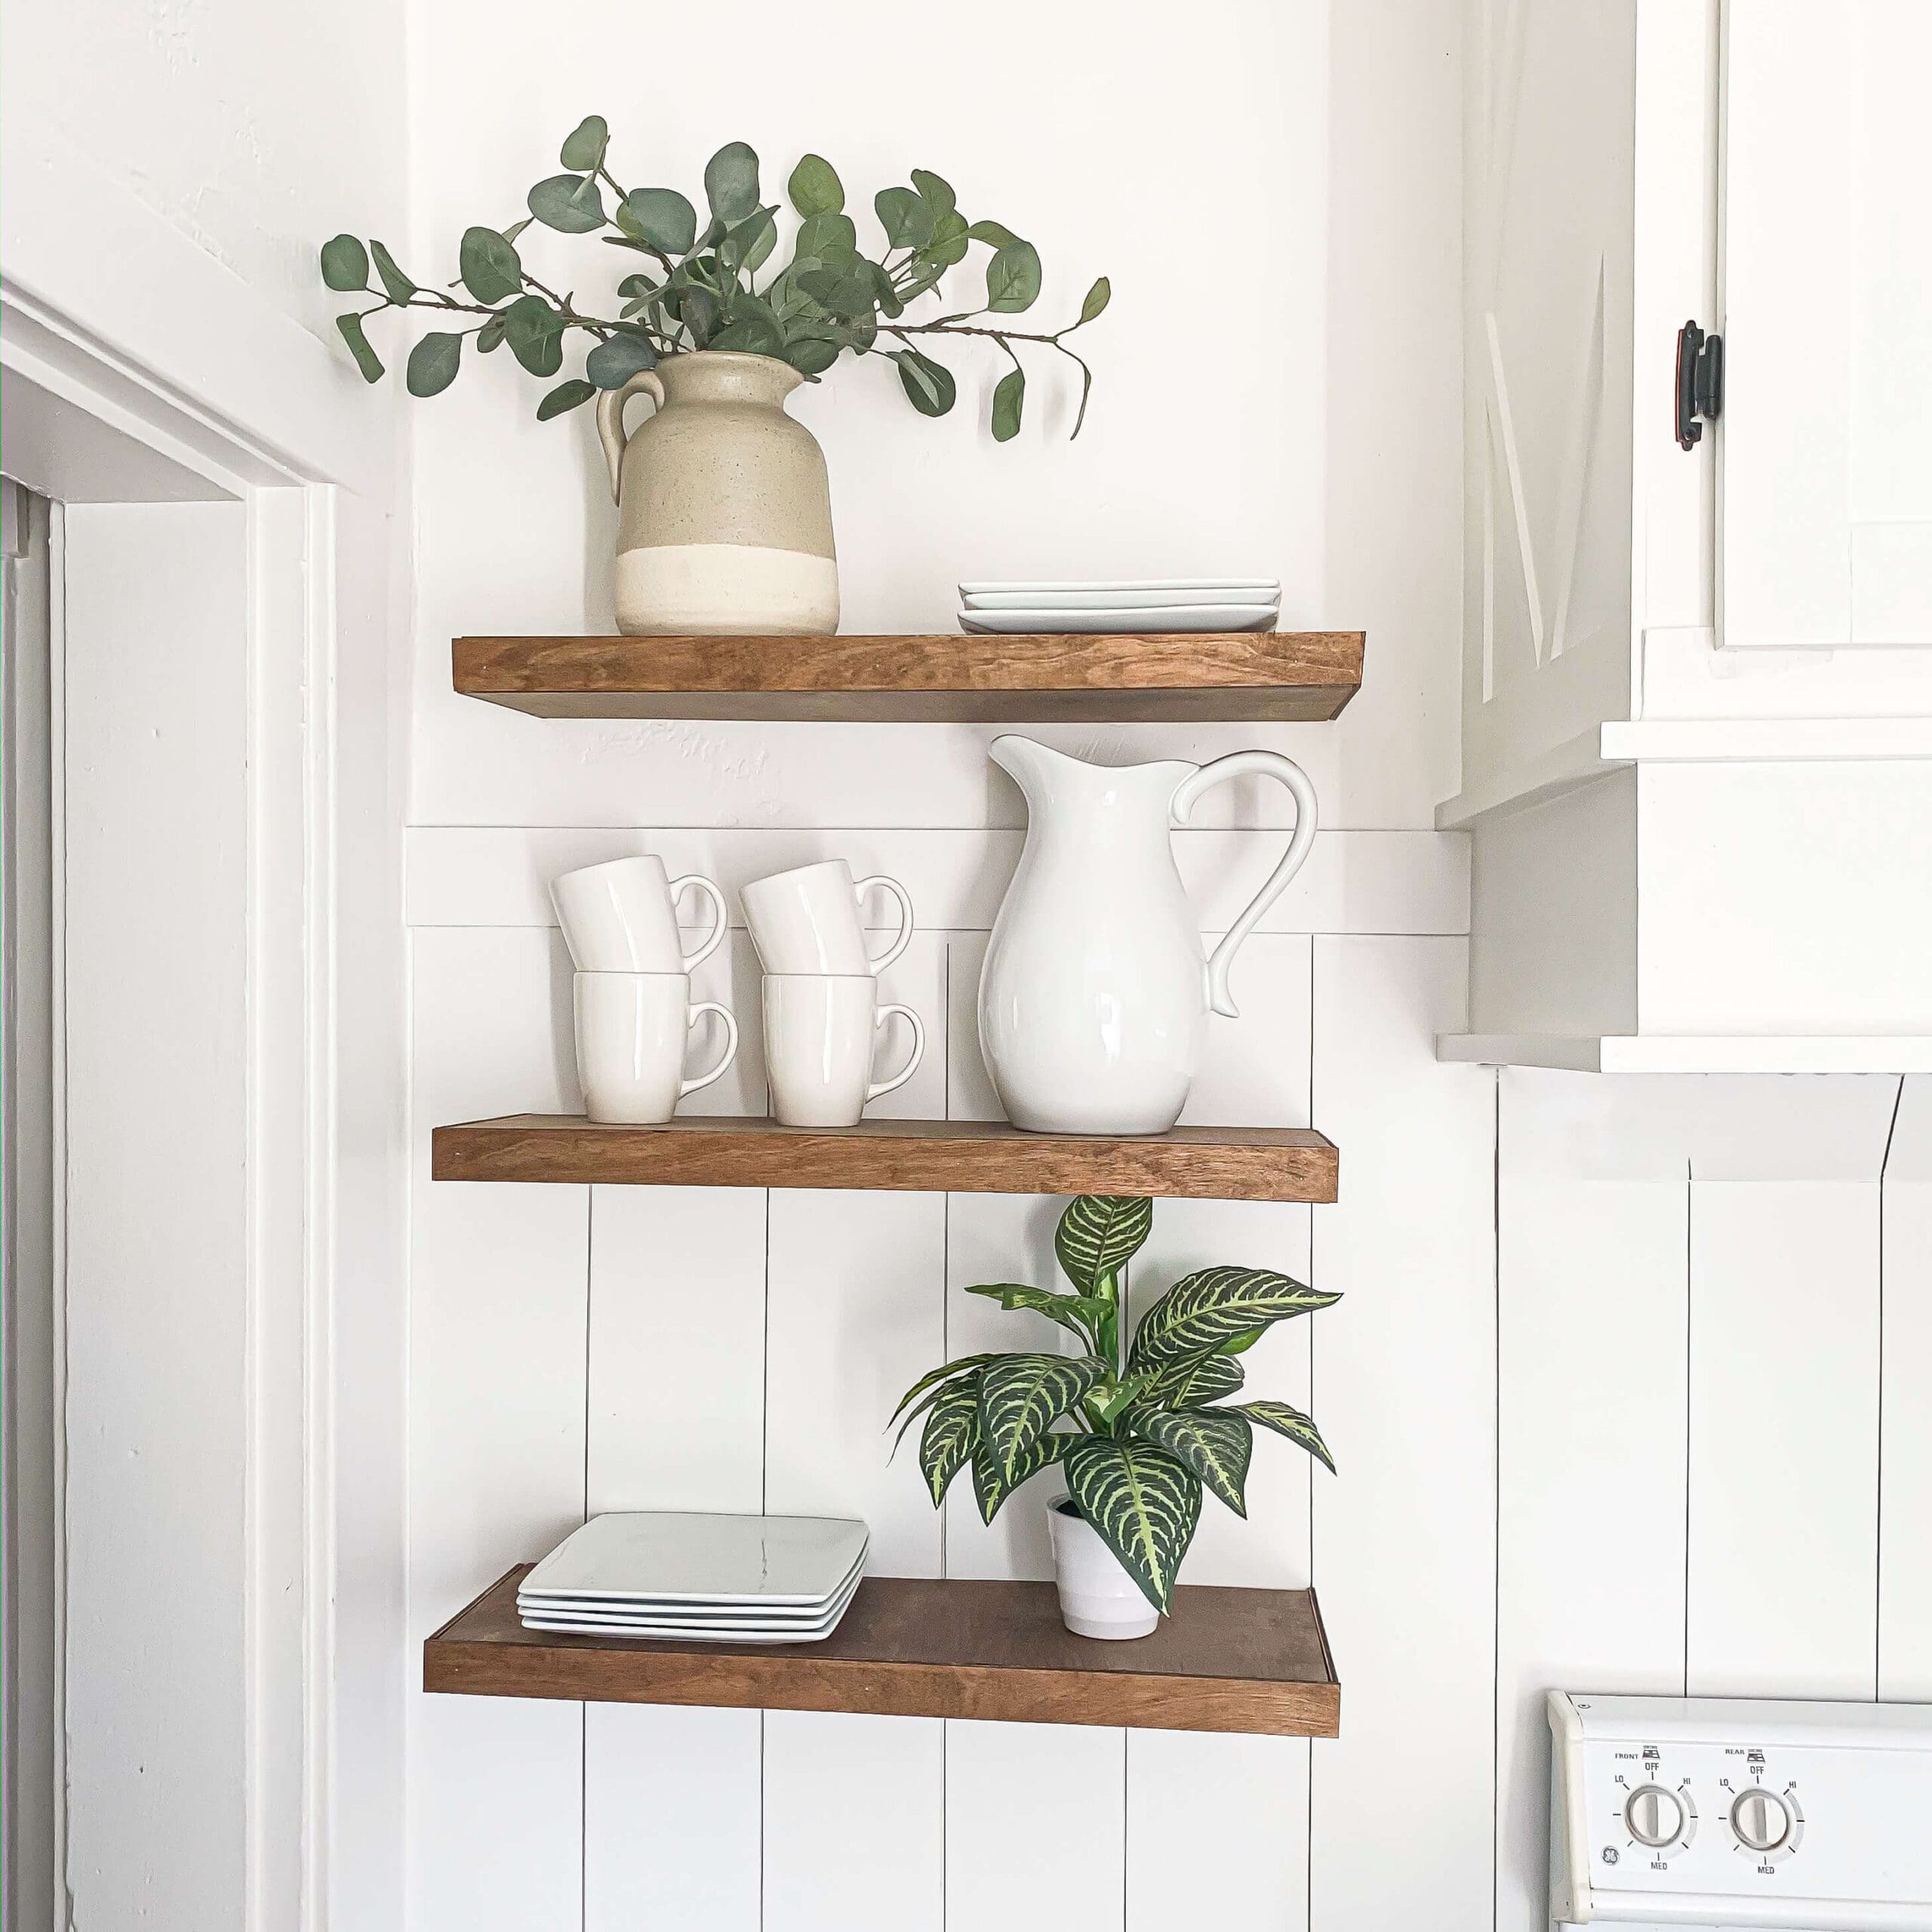
Styling Your Kitchen Shelves
Styling your kitchen shelves transforms them from simple storage to a charming focal point. Thoughtful arrangement and decoration bring personality and warmth to your kitchen. Clean, well-organized shelves also improve kitchen efficiency and look inviting.
Arranging Kitchen Items
Group similar items together for a neat look. Place frequently used items within easy reach. Use containers or baskets to keep small items organized. Display attractive cookware or glassware to add visual interest. Balance heavy and light items to avoid clutter.
Adding Decorative Touches
Mix functional items with decorative pieces for style. Add small plants or herbs for freshness and color. Use framed prints or signs to reflect your personality. Choose colorful jars or bowls to brighten the space. Keep decor minimal to maintain a clean, open feel.
Maintaining Shelf Cleanliness
Dust shelves regularly to keep them looking fresh. Wipe spills immediately to prevent stains. Remove expired food or unused items often. Use shelf liners to protect surfaces from damage. Keep the area tidy to enhance the shelf’s appeal.
Troubleshooting Tips
Floating shelves add style and storage to any kitchen. Sometimes, these shelves can face common problems after installation. Troubleshooting helps fix these issues quickly and keeps shelves safe and sturdy.
Fixing Wobbly Shelves
Wobbly shelves feel unsafe and unstable. Start by checking the screws and brackets. Tighten any loose screws with a screwdriver. If screws spin without tightening, replace them with longer or thicker ones.
Make sure the shelf is mounted on wall studs. Use a stud finder to locate studs behind drywall. Anchors alone may not support heavy kitchen items. Adding more brackets can also improve stability.
Addressing Wall Damage
Wall damage can occur from drilling or heavy shelves. Small holes or cracks need quick repair. Use spackle or wall filler to cover holes. Let it dry, then sand smooth before repainting.
For larger damage, patch the drywall with a repair kit. Avoid placing shelves where the wall is weak or crumbly. Reinforce the area with a backer board if needed.
Enhancing Shelf Strength
Strong shelves hold heavier kitchen tools and decor. Choose hardwood or thick plywood for better support. Add a hidden metal bracket under the shelf for extra strength.
Distribute weight evenly across the shelf surface. Avoid placing heavy items on one side. Consider installing more shelves to reduce load on each.
Credit: crystelmontenegrohome.com
Credit: crystelmontenegrohome.com
Frequently Asked Questions
How Do I Install Floating Shelves In My Kitchen?
To install floating shelves, locate wall studs and use a level to mark placement. Drill holes, insert anchors, and secure the mounting brackets before attaching the shelves. Proper support ensures stability and safety for kitchen items.
What Materials Are Best For Kitchen Floating Shelves?
Solid wood like oak, maple, or pine works best for kitchen floating shelves. These materials provide strength, durability, and a natural look. Consider sealed or painted finishes to protect against moisture and stains.
How Much Weight Can Floating Shelves Hold?
Floating shelves typically hold 20 to 50 pounds, depending on materials and mounting. Properly anchored shelves on studs support heavier kitchen items safely. Always check weight limits before placing heavy objects to avoid damage.
Can I Make Floating Shelves Without Special Tools?
Basic tools like a drill, level, measuring tape, and screwdriver are enough to make floating shelves. While special tools help, careful measuring and proper anchors allow DIY installation with common household tools.
Conclusion
Floating shelves add style and storage to any kitchen. They save space and keep items easy to reach. Building them yourself is simple and cost-effective. Follow the steps carefully for strong, safe shelves. Choose materials that match your kitchen’s look.
Take your time to measure and install properly. Enjoy a neat, organized kitchen with your new shelves. Small changes can make a big difference in your space. Try making floating shelves to improve your kitchen today.


