
Are you looking to add style and storage to your space without spending a fortune? Making floating shelves with plywood is a smart, budget-friendly way to do just that.
Imagine having sleek, sturdy shelves that seem to float on your wall, showing off your favorite books, plants, or décor. In this guide, you’ll learn simple steps to create these shelves yourself, even if you’re not an expert. By the end, you’ll have the confidence and know-how to transform your walls and impress your guests.
Ready to get started? Let’s dive in!
Materials And Tools Needed
Gathering the right materials and tools is key to making sturdy floating shelves with plywood. This step ensures your project goes smoothly and the shelves last long. Focus on quality plywood and reliable tools for best results.
Choosing The Right Plywood
Select plywood that is strong and smooth. Look for hardwood plywood with a thickness of at least 3/4 inch. Birch or oak plywood works well for shelves. Avoid soft or thin plywood as it may bend or break easily. Choose plywood with a clean, even surface for a neat finish.
Essential Tools For The Project
- Measuring tape – to get accurate shelf dimensions
- Electric drill – for making holes and driving screws
- Level – to keep shelves perfectly straight
- Stud finder – to locate wall studs for secure mounting
- Jigsaw or circular saw – to cut plywood to size
- Sandpaper or electric sander – for smooth edges
Additional Supplies
- Wood screws – strong enough to hold shelves and weight
- Wall anchors – for extra support if no studs found
- Wood glue – to reinforce joints
- Paint or wood stain – to finish and protect plywood
- Paintbrush or cloth – for applying finish

Credit: www.youtube.com
Planning Your Shelf Design
Planning your shelf design is the first key to building sturdy floating shelves with plywood. Thoughtful planning helps fit the shelves perfectly into your space. It ensures the shelves support your items safely and look great on your wall.
Consider the room’s style and what you want to display. This helps decide the shelf’s size, thickness, and style. Careful measuring of your wall space avoids mistakes and wasted materials. A good plan saves time and effort during building.
Determining Shelf Size And Thickness
Choose shelf size based on what you want to hold. Small items need less space; books or plants need more. Thickness matters for strength; thicker plywood holds heavier items better. Standard plywood thickness ranges from ¾ inch to 1 inch. Balance size with weight to avoid sagging or breaking.
Selecting The Shelf Style
Floating shelves come in many styles. Simple rectangular shelves are easy to build and versatile. You can add rounded edges for a softer look. Consider open shelves for easy access or closed ones for a modern feel. Style affects how the shelf fits with your room decor.
Measuring Wall Space
Measure the wall area carefully before cutting plywood. Use a tape measure to mark the length and height. Check for studs inside the wall; these support the shelf better. Mark the stud positions on the wall for strong mounting. Accurate measuring prevents uneven shelves and wasted wood.
Cutting And Preparing Plywood
Start by measuring and marking the plywood carefully for accurate cuts. Use a saw to cut the pieces smoothly, ensuring clean edges for easy assembly. Sand the surfaces to remove rough spots and prepare the wood for finishing.
Cutting and preparing plywood is a crucial step in creating sturdy floating shelves. The quality of your cuts will impact the shelf’s appearance and stability. Using the right techniques ensures precision and safety. Let’s dive into the essentials of marking, cutting, and finishing your plywood.Marking Cut Lines
Start with accurate measurements. Use a tape measure to determine the desired length and width of your shelves. Mark your cut lines with a pencil for visibility. A straight edge or ruler helps keep your lines straight. Double-check measurements to avoid errors.Safe Cutting Techniques
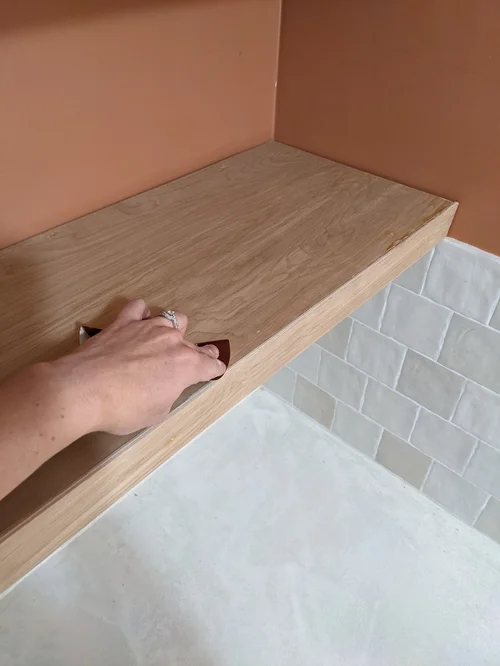
Safety is key when cutting plywood. Equip yourself with safety goggles and gloves. Use a circular saw for straight cuts. Secure the plywood with clamps to prevent movement. Always follow the saw’s guide for straight lines. Work slowly to maintain control and precision.Sanding And Smoothing Edges
Once cut, the plywood edges need smoothing. Use sandpaper to remove rough edges. Start with coarse grit, then move to finer grit for smoothness. Sand in the direction of the grain to avoid scratches. Keep checking the edges for a polished finish. Smooth edges enhance the shelf’s look and safety.Assembling The Shelf
Assembling your floating shelf is where the pieces start to come together. This stage requires precision and patience to ensure your shelf not only looks good but holds up well. Let’s break down how to build a strong, reliable shelf frame, attach the right support brackets, and check for stability before mounting.
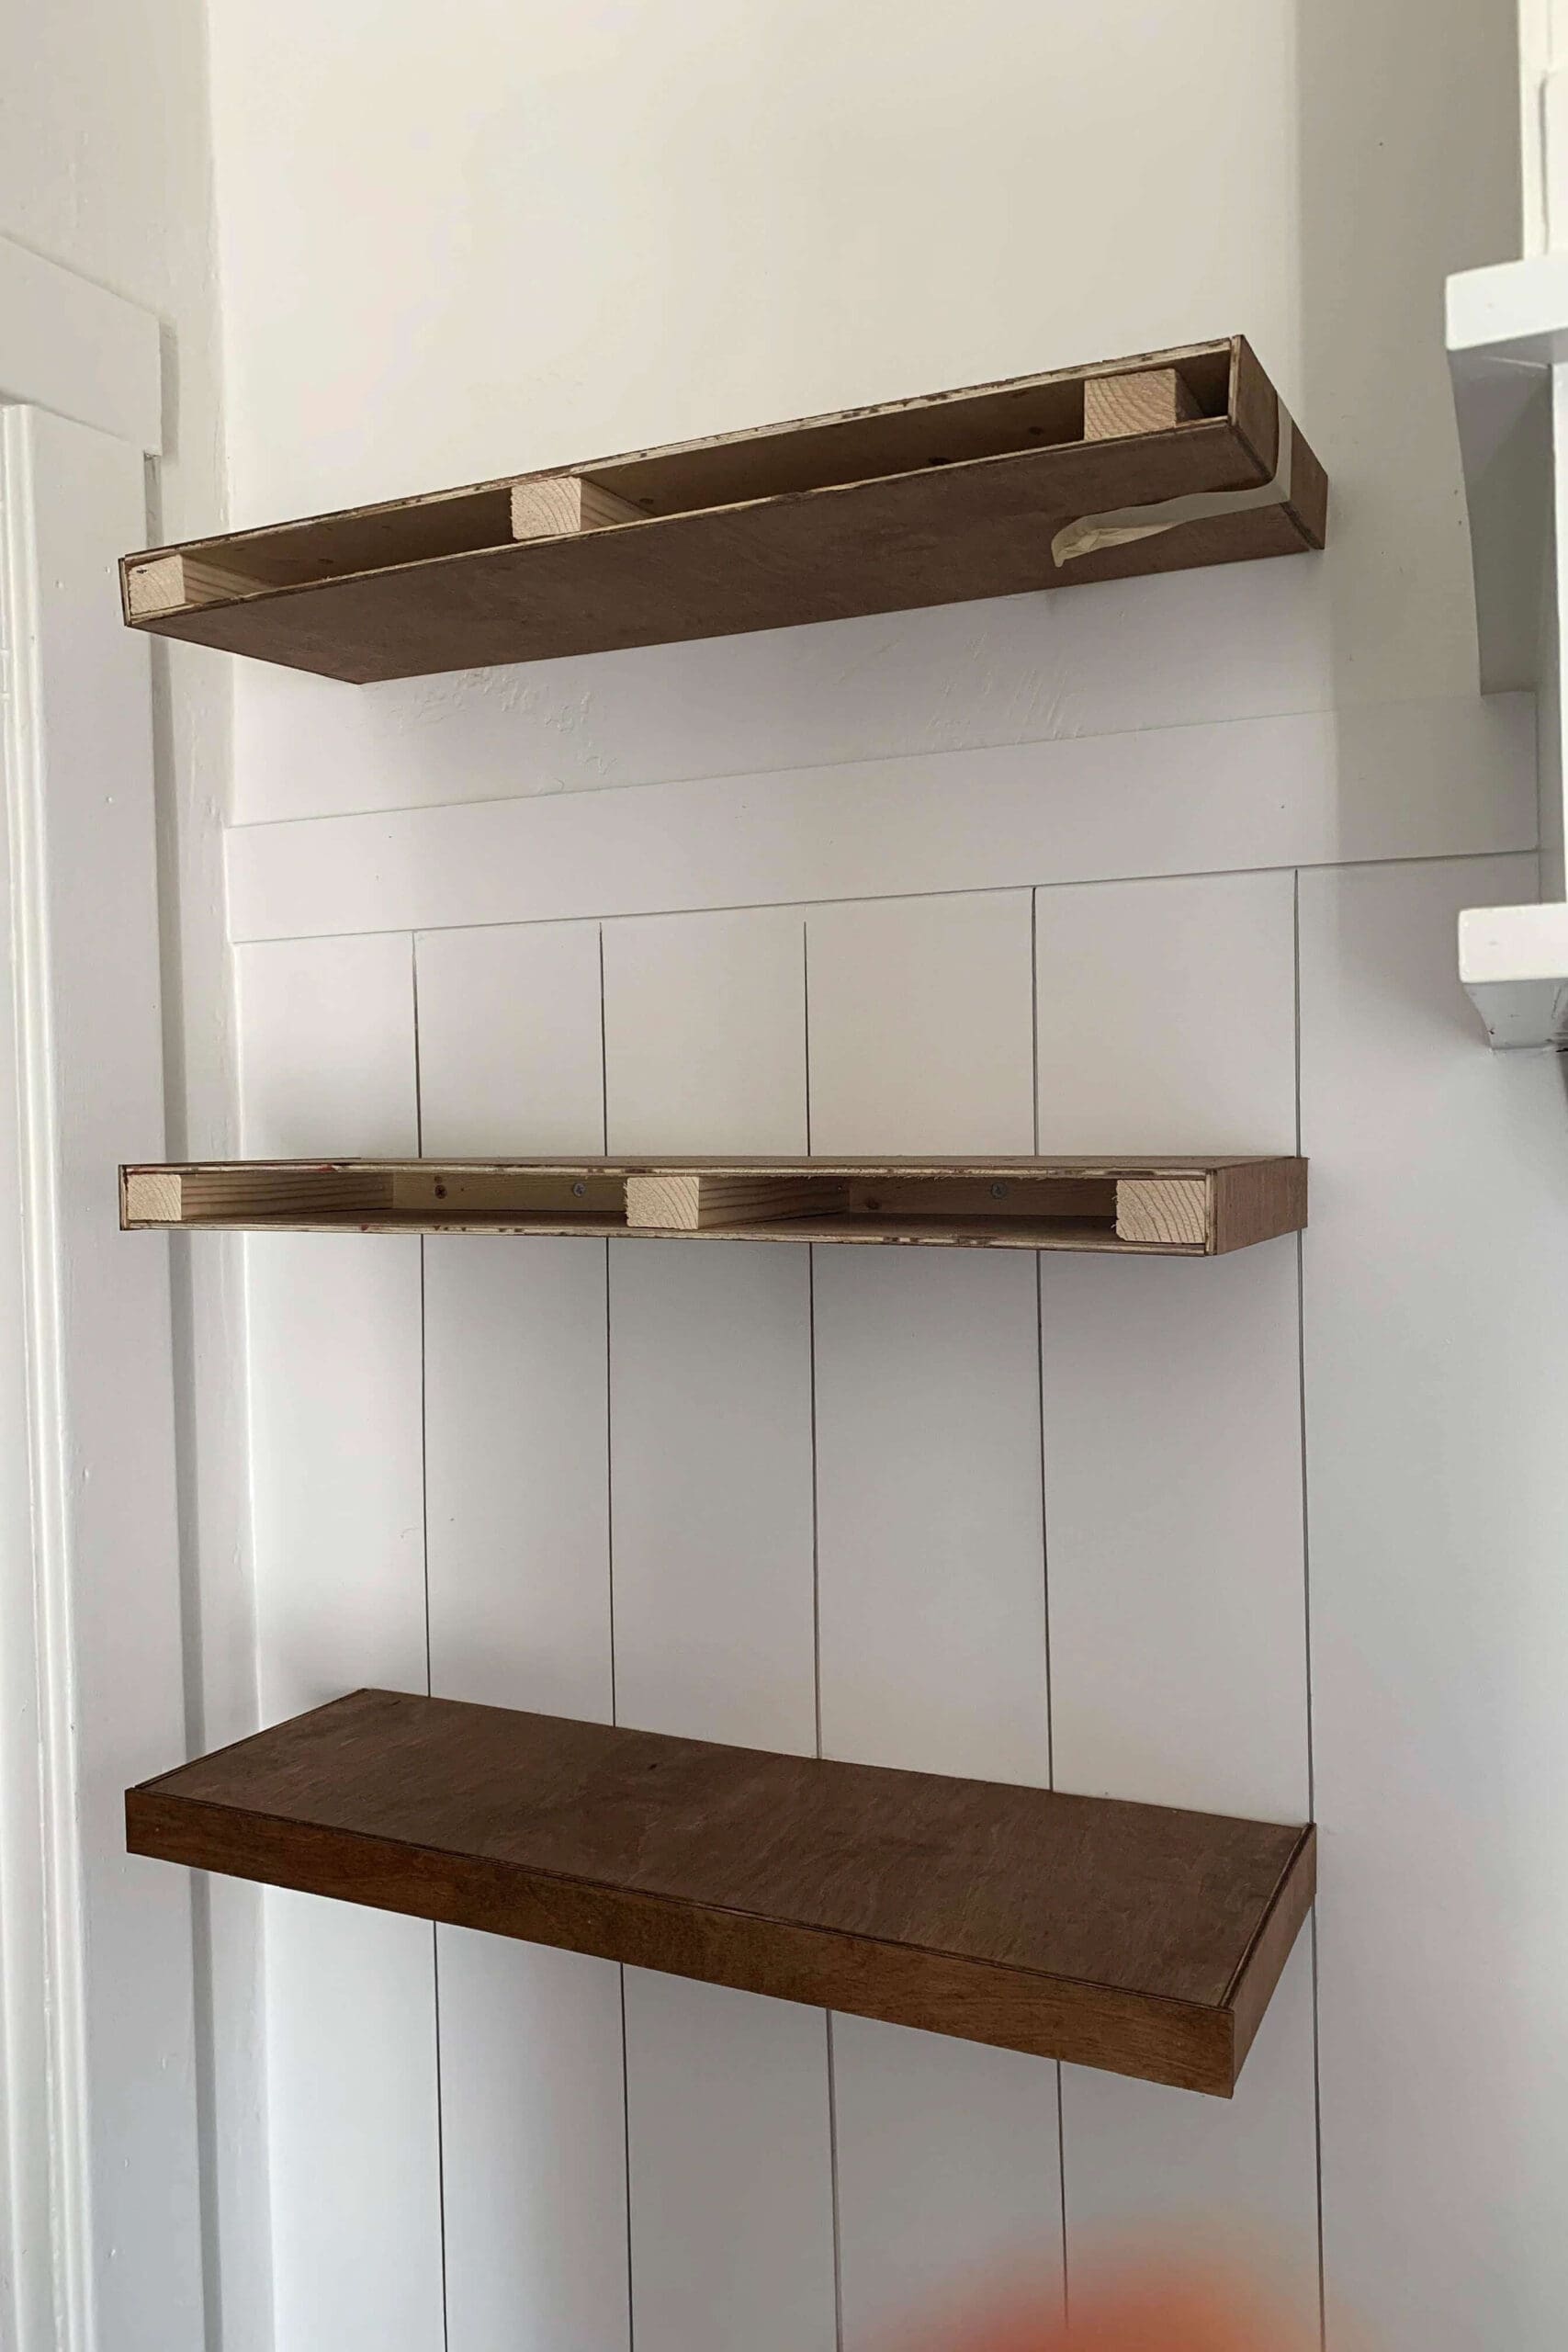
Creating The Shelf Frame
Begin by cutting your plywood to the exact dimensions of your shelf. Use a straight edge and sharp blade to get clean, smooth edges—this helps the shelf fit snugly against the wall.
Next, join the pieces to form a hollow frame. You can use wood glue and finishing nails or screws to secure the edges. This hollow design keeps the shelf lightweight but sturdy enough to hold your items.
Don’t forget to sand the edges and surfaces for a polished look. A well-prepared frame makes attaching brackets easier and improves the final appearance.
Attaching Support Brackets
Choose strong metal brackets designed for floating shelves—they should fit inside the hollow frame snugly. Slide the brackets into place, ensuring they align perfectly with the frame edges.
Secure the brackets to the frame with screws long enough to hold firmly without splitting the plywood. Then, mark the bracket positions on your wall carefully.
Using a level during this step is crucial. It guarantees your shelf will sit straight once mounted, avoiding that frustrating crooked look.
Ensuring Stability
After attaching the brackets, test the shelf’s stability by gently pressing on different areas. If it feels loose or wobbly, tighten the screws or add extra support.
Consider the weight you plan to place on the shelf. Heavier items require stronger brackets and additional wall anchors to prevent sagging.
Have you ever installed a shelf that didn’t hold up? Taking the time to check stability now saves you from that hassle later. A secure shelf means you can display your favorite items without worry.
Finishing Touches
Finishing touches bring your floating shelves to life. They not only enhance the look but also protect the plywood from daily wear and tear. Paying close attention here ensures your shelves stay beautiful and sturdy for years.
Applying Paint Or Stain
Choose paint or stain based on the style you want. Paint offers vibrant colors and a smooth finish, while stain highlights the wood’s natural grain. Use a brush or foam applicator to spread evenly, avoiding drips and streaks.
Try testing a small scrap piece first to see how the color looks on your plywood. Have you noticed how a simple coat can completely change a room’s mood? That’s the power of a well-chosen finish.
Sealing For Durability
Seal your shelves with a clear polyurethane or varnish to protect against moisture and scratches. This layer acts like armor for the wood, especially in kitchens or bathrooms where humidity is higher.
Apply thin, even coats and sand lightly between each one for a flawless finish. It might feel tedious, but this patience pays off when your shelves resist marks and stains over time.
Drying And Curing Time
Never rush the drying process. Let each coat dry fully according to the product’s instructions—usually several hours. Curing, the time it takes for the finish to harden completely, can take days or even weeks.
Think about it: a rushed finish can peel or dull quickly. Giving your shelves the right time to dry means they’ll look great and last longer. What’s your plan to keep your workspace dust-free during this waiting period?
Credit: crystelmontenegrohome.com
Mounting Shelves On The Wall
Mounting floating shelves on the wall is the key step that transforms your plywood boards into a functional and stylish storage solution. It demands precision and care to ensure the shelves stay secure and level, supporting your items safely over time. Let’s break down the crucial aspects of this task, so your shelves not only look great but hold up well.
Finding Studs For Secure Installation
Locating the wall studs is essential for a sturdy shelf mount. Studs provide the strength needed to hold the weight of your shelves and the items you place on them.
Use a stud finder to scan the wall slowly. Mark each stud location with a pencil—these marks will guide where you drill your screws.
What if your studs don’t align perfectly with your shelf brackets? You might need to adjust the shelf length or use additional support methods, but always aim to anchor into studs when possible.
Using Anchors And Screws
If you can’t mount directly into studs, heavy-duty wall anchors are your next best option. They distribute the shelf’s weight and prevent damage to drywall.
Choose anchors rated for the weight you expect your shelves to hold. Insert them carefully and screw in your brackets or mounting hardware tightly.
Remember, the right screws matter too—wood screws for studs, and machine screws for anchors. Using the correct hardware ensures your shelves won’t loosen over time.
Leveling The Shelves
Nothing ruins the look of floating shelves like a crooked installation. Use a spirit level or a laser level to check the shelf’s horizontal alignment before tightening screws fully.
Place the level on top of the shelf and adjust until the bubble is perfectly centered. Double-check both ends of the shelf to avoid a tilt.
Have you ever placed a picture frame only to realize it was off? Floating shelves demand the same careful attention—small adjustments early save frustration later.
Tips For Maintenance And Care
Keeping your floating shelves made from plywood looking great and lasting long requires some thoughtful care. Simple maintenance habits can prevent damage and keep your shelves sturdy and attractive. Let’s look at some practical tips to help you protect your investment and enjoy your shelves every day.
Cleaning Techniques
Dust your shelves regularly using a soft cloth or microfiber duster. This prevents buildup that can scratch the plywood surface over time.
For deeper cleaning, use a damp cloth with mild soap and water. Avoid soaking the wood, as excess moisture can cause warping or peeling of the finish.
Have you noticed sticky spots or stains? Gently rub those areas with a mixture of vinegar and water, then dry immediately. This keeps your shelves fresh without harsh chemicals.
Avoiding Overloading
Floating shelves look sleek but have weight limits. Resist the urge to pile on heavy items like large books or appliances.
Check the shelf’s thickness and mounting hardware to estimate its capacity. For plywood shelves, staying under 20-30 pounds per shelf is usually safe.
Ask yourself: Are the items on my shelf adding beauty or just clutter? Keeping weight in check prevents sagging and potential falls.
Periodic Inspections
Set a reminder to inspect your shelves every few months. Look for signs of loosening screws, cracks, or peeling edges.
If you find any issues, tighten hardware promptly and touch up finishes as needed. Small repairs now save bigger headaches later.
Think of this as a quick health check for your shelves—regular attention keeps them strong and reliable.
Credit: www.oliveandjunehome.com
Frequently Asked Questions
What Type Of Plywood Is Best For Floating Shelves?
Birch plywood is ideal for floating shelves due to its strength and smooth finish. It supports weight well and looks polished, enhancing shelf durability and appearance.
How Do You Secure Floating Shelves To The Wall?
Use sturdy wall anchors or screws driven into wall studs. This ensures the shelves are firmly attached and can safely hold heavy items without sagging or falling.
Can I Make Floating Shelves Without Special Tools?
Basic tools like a drill, saw, and level are sufficient. Special tools help but aren’t necessary, making this a doable DIY project for most beginners.
How Thick Should Plywood Be For Floating Shelves?
A thickness of 3/4 inch is recommended for strength and stability. Thinner plywood may bend under weight, while thicker boards are heavier and harder to handle.
Conclusion
Making floating shelves with plywood is simple and fun. You only need a few tools and some basic skills. These shelves save space and look modern on any wall. Follow the steps carefully to get strong and neat results. Try different sizes or shapes to fit your style.
Enjoy your new shelves for books, plants, or decorations. Give it a try and add a personal touch to your home.


