
Are you looking to create professional-looking studio lighting without spending a fortune? What if I told you that your simple desk lamp could be the key to transforming your photos and videos?
You don’t need expensive gear or a big setup to get great lighting. You’ll discover easy steps to turn your desk lamp into a powerful lighting tool. By the end, you’ll have the skills to make your shots stand out and capture attention every time.
Ready to light up your creativity? Let’s dive in!

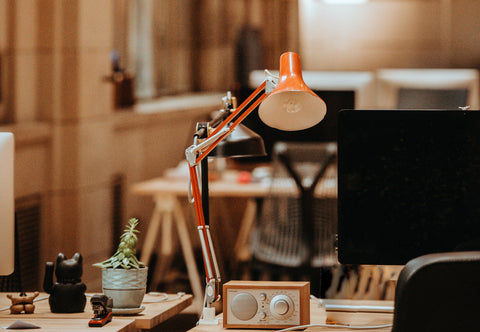
Credit: www.designcafe.com
Choosing The Right Desk Lamp
Choosing the right desk lamp is key to creating good studio lighting. The lamp must give enough light and be easy to adjust. The color of the light should also match the look you want. Picking a lamp with the right features helps you get clear and bright photos or videos.
Lamp Types And Brightness
Desk lamps come in many types. LED lamps use less power and last longer. Incandescent lamps give warm light but use more energy. Fluorescent lamps are bright but can flicker. Brightness matters too. A lamp with adjustable brightness lets you control the light level. Choose a lamp that can get bright enough for your work.
Adjustability And Positioning
Good studio lighting needs the light in the right place. Pick a lamp with a flexible arm or a swivel head. This helps direct light exactly where you want it. A lamp that can be tilted up, down, or side to side gives more control. A stable base is important to keep the lamp steady. Adjustability makes your lighting more useful and creative.
Color Temperature Importance
Color temperature changes the mood of your photos or videos. Warm light looks yellow or orange, like a sunset. Cool light is bluish and feels like daylight. Neutral light is balanced and natural. Choose a lamp with a color temperature between 3000K and 6500K. This range works well for most studio projects. Some lamps let you change the color temperature. This adds flexibility for different scenes.
Setting Up Your Workspace
Setting up your workspace for studio lighting using a desk lamp is more than just placing a light on your desk. The right setup can transform simple lighting into a professional-looking effect. Small adjustments in your workspace can make a big difference in the quality of your photos or videos.
Ideal Desk Placement
Position your desk near a power source to avoid tangled cords or awkward extensions. You want easy access to your lamp’s switch and the flexibility to move the lamp around. Placing your desk where natural light can complement your desk lamp helps balance shadows and highlights.
Try placing your desk facing a wall rather than a window directly. This prevents harsh backlighting and gives you more control over your lighting conditions.
Background Considerations
Choose a simple, uncluttered background that won’t distract from your subject. A plain wall or a fabric backdrop works well. If your background is too bright or reflective, it might compete with the lighting on your subject.
Think about adding a matte poster board or a dark cloth behind your setup. These absorb extra light and reduce unwanted glare, making your subject stand out more clearly.
Minimizing Reflections And Shadows
Desk lamps often create harsh shadows and reflections if not positioned carefully. Try angling the lamp slightly above and to the side of your subject to soften shadows. You can also diffuse the light by covering the bulb with a piece of parchment paper or a thin white cloth.
Check your setup from your camera’s point of view. Are there any glaring reflections or deep shadows? Adjust the lamp’s distance and angle until the light looks even and natural.
Enhancing Light Quality
Softening a desk lamp’s light can reduce harsh shadows and create a gentle glow. Using materials like white paper or fabric helps spread light evenly for better studio results. Adjusting the lamp’s angle also improves light quality and highlights.
Enhancing Light Quality Getting the right light quality in your photos or videos can be a game-changer. A desk lamp might not seem like a professional tool, but with a few tweaks, it can deliver impressive results. The secret lies in how you manipulate and enhance the light.Using Diffusers And Softboxes
Diffusers and softboxes are essential for softening harsh light. You can create a simple diffuser by using a white shower curtain or a piece of white fabric. Drape it over the lamp to spread the light evenly and reduce shadows. For a DIY softbox, consider using a cardboard box lined with aluminum foil. Cut a hole for the lamp and cover the opening with a white sheet. This setup will help mimic the soft, even light typically achieved with professional softboxes.Diy Reflectors And Bounce Cards
Reflectors can help redirect light to fill in shadows and add depth. A piece of white poster board or a large sheet of aluminum foil can work wonders as a reflector. Position it opposite the light source to bounce light onto the subject. Bounce cards, on the other hand, are smaller and more focused. Use a piece of white card stock or a small mirror to direct light precisely where you need it. Experiment with angles to achieve the best effect.Controlling Light Spread
Controlling light spread ensures that the light focuses exactly where you want it. Use black paper or cardboard to create a snoot, a tube-like structure that narrows the light beam. Attach it to the lamp to direct the light and avoid spillage. Consider using barn doors made from cardboard to further shape the light. Attach them to the sides of the lamp to adjust the width and direction of the light beam. This gives you control over the lighting, helping you create more dynamic and professional-looking images.Creating Different Lighting Effects
Creating different lighting effects with a desk lamp can change the mood of your studio shots. Small changes in light direction and intensity make a big difference. Experimenting with various setups helps find the best look for your subject.
Key Light Setup
The key light is the main light source that highlights your subject. Place the desk lamp at a 45-degree angle from the front. Adjust the height to create shadows that add depth. Use a lampshade or paper to soften harsh light. This setup shapes the face and draws attention.
Fill Light Techniques
Fill light reduces shadows created by the key light. Position another desk lamp opposite the key light but lower in brightness. Use a white sheet or reflector to bounce light softly onto shadow areas. This balances the lighting and keeps details visible.
Backlight And Rim Light Tips
Backlight adds separation between the subject and the background. Place the desk lamp behind the subject, facing the camera. Use a dimmer or distance to avoid overpowering. Rim light highlights edges and outlines. Aim the lamp at the subject’s side or back for a glow effect.
Safety And Practical Tips
Using a desk lamp to create studio lighting can be a smart and affordable choice. However, it’s essential to keep safety and practicality in mind to avoid hazards and ensure your setup lasts. Let’s look at some key tips that can help you manage heat, wiring, and maintenance effectively.
Heat Management
Desk lamps are not originally designed for prolonged, high-intensity use. The bulbs can get very hot, which can be a fire risk if left unchecked. Always use LED bulbs instead of incandescent ones—they produce less heat and are more energy-efficient.
Keep the lamp away from flammable materials like paper or fabric. Also, make sure your workspace is well-ventilated to disperse any heat buildup. Have you noticed your lamp’s surface becoming warm? That’s a sign to turn it off or switch to a cooler bulb.
Power Source And Wiring
Check the lamp’s power cord and plug for any signs of wear before each use. Damaged wiring can cause electrical shorts or shocks, which are dangerous. Avoid overloading power strips by plugging in too many devices at once.
If your desk lamp doesn’t have a long cord, use extension cords rated for the lamp’s power needs. Avoid running cords under rugs or heavy furniture to prevent damage. Have you ever tripped over a cable? Securing cords properly can save you from accidents and equipment damage.
Maintaining Equipment
Dust and dirt can accumulate on bulbs and reflectors, reducing light quality and causing overheating. Clean your lamp regularly with a dry cloth—never use water or harsh chemicals. If a bulb flickers or dims, replace it immediately to maintain consistent lighting.
Inspect screws and joints to keep the lamp stable and avoid falls. A wobbly lamp not only disrupts your shots but can break your gear. Do you take a moment to check your setup before each shoot? Small checks can prevent big problems.
Credit: www.youtube.com
Budget-friendly Lighting Hacks
Creating effective studio lighting doesn’t have to drain your wallet. Using everyday items and simple tricks, you can transform a basic desk lamp into a powerful lighting tool. These budget-friendly lighting hacks will help you shape light and shadow, enhancing your photos or videos without expensive gear.
Repurposing Household Items
Look around your home for objects that can soften or reflect light. White bedsheets, parchment paper, or even a clear plastic container can act as diffusers to reduce harsh shadows. Aluminum foil or a mirror works great as a reflector to bounce light and brighten dark areas.
I once used a baking tray lined with foil to direct light precisely where I needed it. It was a quick fix that made a noticeable difference in my shots. What common item could you turn into a lighting helper right now?
Affordable Accessories
Small investments can upgrade your desk lamp significantly. Clip-on diffusers, inexpensive color gels, or flexible tripods allow you to control the lamp’s position and color temperature. These accessories cost just a few dollars but add versatility and professionalism to your setup.
- Clip-on lamp holders for better angles
- Colored gels to adjust mood and tone
- Basic tripods to stabilize and raise the lamp
Think about how even one small accessory could expand your creative options.
Diy Light Modifiers
You don’t need fancy tools to build your own light modifiers. Cardboard boxes can turn into snoots that narrow your beam, and translucent plastic can soften light like a professional softbox. Tape, scissors, and a bit of patience are all you need to customize your lighting effects.
Once, I crafted a homemade barn door attachment using black cardstock to control light spill. It gave me precise control over where the light hit, improving the overall look of my shot. What shape or effect could you create with simple DIY modifiers?

Credit: www.numberanalytics.com
Frequently Asked Questions
How Can I Use A Desk Lamp For Studio Lighting?
You can use a desk lamp by adding a diffuser and adjusting its angle. This softens light and reduces shadows, creating professional studio lighting on a budget.
What Bulbs Work Best For Desk Lamp Studio Lighting?
LED bulbs with daylight color temperature (5000K-6500K) work best. They provide bright, natural light without overheating or flickering.
How Do I Avoid Harsh Shadows With A Desk Lamp?
Place the lamp at a 45-degree angle from your subject. Use a diffuser or white cloth to soften the light and minimize shadows.
Can I Create Multiple Light Sources With Desk Lamps?
Yes, using multiple desk lamps positioned strategically creates balanced, multi-directional lighting. This adds depth and reduces flatness in photos or videos.
Conclusion
A desk lamp can create great studio lighting with simple steps. Adjust the lamp’s angle and distance to change shadows and brightness. Use white paper or cloth to soften the light for better results. Experiment with different bulbs to find the right color and warmth.
This method saves money and works well for photos or videos. Try it yourself and see how a small lamp can light up your studio space. Simple tools, clear results.


