
Are you looking to add a personal touch to your walls without spending a fortune? Making wall art stickers at home is easier than you think, and it gives you full control over the design and style.
Imagine turning your favorite ideas into unique decorations that brighten up any room. In this guide, you’ll discover simple steps to create your own wall art stickers quickly and easily. Get ready to transform your space with creativity that’s all yours! Keep reading to unlock the secrets to making stunning wall art stickers at home.

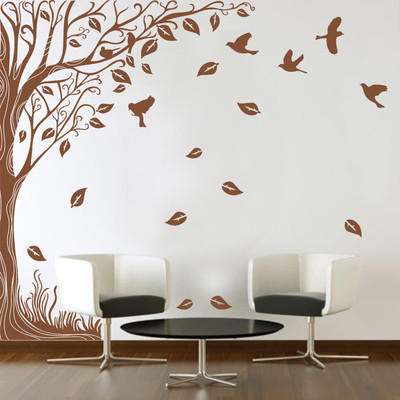
Credit: www.etsy.com
Materials Needed
Creating your own wall art stickers at home is a fun and rewarding project. Before you start, gathering the right materials is crucial. The quality of your supplies will directly affect the look and durability of your stickers.
Types Of Sticker Paper
Choosing the right sticker paper is key. You can find several types, such as:
- Matte sticker paper:Offers a non-glossy finish, perfect for a subtle, modern look.
- Glossy sticker paper:Adds shine and vibrant color, ideal if you want your designs to pop.
- Transparent sticker paper:Great for creating stickers that blend seamlessly with your wall color.
- Waterproof sticker paper:Useful if you want durable stickers that last long and resist moisture.
Think about where you’ll place your stickers and how they should look before picking your paper.
Essential Tools
Besides sticker paper, some tools make the process smoother and more precise:
- Printer:A good inkjet or laser printer to print your designs with sharp colors.
- Cutting tools:Scissors or a craft knife for detailed cuts.
- Cutting mat:Protects your surface and helps you cut accurately.
- Ruler and pencil:Useful for measuring and marking where to cut.
- Computer and design software:To create or customize your sticker designs.
Imagine how much easier your work becomes with a sharp craft knife and a steady ruler at hand!
Optional Decorative Supplies
Want to add a personal touch? Consider these extras:
- Glitter or metallic pens:Add sparkle or shine to your stickers after printing.
- Clear adhesive laminate sheets:Protect your stickers and make them waterproof.
- Stencils or stamps:Help create patterns or textures.
- Colored markers or paint pens:Enhance details or add hand-drawn elements.
Have you ever tried mixing printed designs with hand-drawn accents? It can make your wall art uniquely yours.
Design Ideas
Designing wall art stickers at home lets you personalize your space easily. Creative ideas make the process fun and fulfilling. Simple themes or complex drawings can inspire unique stickers. Experiment with colors, shapes, and styles to fit your room.
Choosing Themes
Pick a theme that matches your room’s mood. Nature themes like leaves or flowers bring calmness. Geometric shapes add a modern touch. Kids’ rooms suit cartoon characters or animals. Seasonal themes work well for holidays and events.
Creating Custom Artwork
Draw your own designs by hand for a personal touch. Use pencils, markers, or watercolors to create unique images. Scan or photograph your artwork to digitize it. Adjust colors and size on your computer before printing. Handmade designs make stickers special and one of a kind.
Using Digital Templates
Digital templates save time and offer many style options. Find free or paid templates online that suit your taste. Customize colors, patterns, and text easily with editing software. Print templates on sticker paper for quick results. Templates help beginners create professional-looking stickers fast.
Preparing Your Design
Choose a simple design that fits your wall space. Draw or print it clearly on paper for easy tracing. Prepare your materials like sticker paper and cutting tools before starting.
Creating your own wall art stickers at home can be an exciting and rewarding project. To ensure your designs come out just right, it’s crucial to prepare them carefully before printing. This involves making important decisions about the size, layout, colors, and print quality. Each of these factors will influence how your finished stickers look on your walls.Sizing And Layout
Before diving into the design process, consider the space where your stickers will be placed. Measure the wall area and decide on the size of the stickers. Do you want them to be the focal point or a subtle accent? Sketch out different layouts on paper or using design software. Playing around with different configurations can help you visualize the final look. This stage is where you can get creative, experimenting with varied shapes and arrangements.Editing For Print
Once you’ve nailed down the basic design, it’s time to refine it for printing. Ensure your design is in a high-resolution format to avoid blurriness. Use vector-based programs like Adobe Illustrator for crisp, scalable designs. Check for any details that might not translate well onto the sticker material, such as very thin lines or intricate patterns. Simplifying your design can sometimes lead to a more impactful result, especially when viewed from a distance.Color Considerations
Color choice can dramatically affect the mood and impact of your wall art stickers. Think about the existing color scheme of the room and how your stickers will complement or contrast with it. Be mindful of how colors appear on different materials. What looks vibrant on your screen might not be as lively in print. Test small samples if possible, to ensure your chosen hues come out as expected. What colors evoke the feelings you want in your space? Bold and bright for energy, or soft and muted for calm? Your color choices can transform a room and reflect your personal style.Printing Stickers
Printing your wall art stickers at home lets you customize designs easily and see immediate results. Getting the print quality right is key to making your stickers look professional and vibrant. Let’s dive into the important details to help you print stickers that stick and impress.
Printer Settings
Adjust your printer settings before printing to get the best color accuracy and sharpness. Choose the highest print quality option available, often labeled as “Photo” or “Best.”
Select the correct paper type in your printer settings, usually “Sticker Paper” or “Photo Paper,” to avoid ink smudging or fading.
Turn off any settings like “Grayscale” or “Draft Mode” to ensure your stickers have full color and detail.
Test Prints
Always print a test sheet on regular paper before using your sticker paper. This saves material and lets you check if the colors and sizes are right.
Cut out the test print to check if the design fits the intended wall space perfectly. Adjust your design or print size if needed.
Test prints also help you spot any alignment issues or unexpected color shifts early on.
Troubleshooting Common Issues
If your print looks blurry or colors are dull, clean your printer heads and run a nozzle check. Dust and dried ink can cause poor print quality.
Paper jams often happen with thicker sticker sheets—make sure your paper feeds smoothly by loading only a few sheets at a time.
Colors appearing off? Calibrate your monitor and printer profiles to match colors more closely between screen and print.
What printing problems have you faced? Tackling these early can save time and frustration in your sticker project.
Cutting And Finishing
Cutting and finishing your wall art stickers at home is where your project truly comes to life. Precise cutting defines the look, while finishing touches protect and prepare your stickers for smooth application. Paying attention to these details not only improves the final appearance but also extends the sticker’s durability on your walls.
Cutting Techniques
Sharp tools make all the difference. Use a craft knife or precision scissors to carefully cut around your design edges. If you have a cutting machine like a Cricut or Silhouette, set the blade depth correctly to avoid cutting through the backing paper.
Try cutting slowly and steadily to keep lines clean. For curved shapes, small, controlled snips give better results than long cuts. Have you noticed how a slight slip can ruin the whole shape? Take your time and keep your workspace well-lit.
Adding Protective Layers
Adding a clear protective layer over your sticker helps it resist scratches and fading. You can use a clear laminate sheet or spray a thin coat of clear acrylic sealer for this purpose. Both options add a durable finish without changing the colors or texture.
Make sure the sticker surface is clean and dry before applying any protective layer. If using spray, apply in light, even coats and allow each layer to dry completely. Have you ever handled a sticker that peeled off too easily? Protective layers keep your artwork intact longer.
Peeling And Application Tips
Peeling your sticker off the backing can be tricky. Start by lifting a corner gently with your fingernail or a plastic tool. Pull slowly to avoid stretching or tearing the sticker. If you struggle, try using a piece of tape to help lift the edge.
When applying, position the sticker carefully before pressing down. Use a flat tool like a credit card to smooth out air bubbles from the center outward. Have you ever had bubbles ruin your sticker’s look? Taking your time during application prevents this.

Credit: www.etsy.com
Applying Wall Stickers
Applying wall stickers at home can transform any space quickly and with minimal effort. The key to a flawless finish lies in how you prepare the surface, position the sticker, and handle adjustments after application. These simple but important steps will ensure your wall art looks sharp and stays in place.
Surface Preparation
Start by cleaning the wall thoroughly. Dust, grease, or moisture can prevent the sticker from sticking properly. Use a damp cloth or mild soap solution to wipe the area, then let it dry completely before you proceed.
Check the texture of your wall. Smooth surfaces like painted drywall or glass work best. If your wall is rough or textured, the sticker might not adhere well or could peel off over time.
Placement Tips
Think about your design layout before peeling off the backing. Use painter’s tape to temporarily place the sticker and step back to see how it looks. This helps avoid misalignment and gives you a chance to adjust the position.
Peel the backing slowly and apply the sticker from one edge, smoothing it out as you go. Use a flat tool like a credit card to press out air bubbles gently. Don’t rush—taking your time here pays off with a smooth, bubble-free finish.
Removing And Repositioning
If you notice a bubble or misplacement, don’t panic. Carefully peel the sticker off the wall, starting from one corner, and reposition it. Stickers made from vinyl are usually forgiving, but be gentle to avoid stretching or tearing.
Wondering how many times you can reposition? It varies by sticker quality, but typically two or three adjustments are possible before the adhesive weakens. Keep this in mind when experimenting with placement to avoid damage.
Creative Variations
Adding creative variations to your wall art stickers can transform simple designs into eye-catching decorations. Experimenting with different styles keeps your projects fresh and personal. What new twist will you try next to make your walls truly stand out?
Layered Stickers
Layering stickers adds depth and dimension to your wall art. Cut out different shapes or colors and stack them carefully, using double-sided tape or glue dots to keep them slightly raised. This technique works great for creating shadows or 3D effects without complicated tools.
Try layering translucent materials like vellum over solid colors to play with light. You can even combine textures, such as matte and glossy finishes, for a tactile experience. Have you thought about how layering could change the vibe of your favorite design?
Mixed Media Art
Combining wall art stickers with other materials unlocks endless possibilities. Attach fabric scraps, small wooden shapes, or even dried flowers around your stickers to add unique textures. This approach makes your art feel more handcrafted and vibrant.
Use markers or paint pens to add extra details or outlines after applying your stickers. This personal touch can highlight features or add movement to static images. What materials do you have at home that could elevate your sticker art?
Seasonal And Themed Designs
Creating stickers that match seasons or special themes makes decorating fun and relevant. Design snowflakes and cozy motifs for winter, or bright florals and butterflies for spring. Changing your wall art with the seasons can refresh your space instantly.
Think about holidays, birthdays, or even movie nights as inspiration for your themes. Customizing stickers to fit these occasions adds a personal and festive feel to your home. How could your next celebration come alive with themed wall stickers?

Credit: maminka.co.uk
Frequently Asked Questions
How Do I Start Making Wall Art Stickers At Home?
Begin by choosing your design and materials like adhesive paper or vinyl. Use a printer or draw by hand. Cut out the shapes carefully for neat stickers.
What Materials Are Best For Diy Wall Art Stickers?
Use adhesive vinyl or printable sticker paper. Both stick well and are easy to cut. Choose materials that are durable and removable for walls.
Can I Reuse Wall Art Stickers Made At Home?
Most homemade stickers are single-use due to adhesive strength. Some vinyl types may allow gentle repositioning but expect limited reusability.
How Do I Ensure Wall Stickers Stick Properly?
Clean the wall surface thoroughly before application. Avoid textured or dusty walls. Press stickers firmly and smooth out air bubbles for better adhesion.
Conclusion
Making wall art stickers at home is simple and fun. You only need a few materials and some creativity. Try different designs and colors to fit your style. This project saves money and lets you personalize your space. Enjoy the process and see your walls come alive.
Start today and make your home unique with your own art stickers.


