
Have you ever looked at a mirror glued to your wall and wondered how to remove it without causing damage? Whether you’re redecorating or just want a fresh look, taking down a glued mirror can feel tricky and risky.
But don’t worry—you’re not alone, and you don’t have to stress. In this guide, you’ll discover simple, effective steps to safely remove that stubborn mirror and protect your walls. Keep reading, and you’ll learn exactly what to do to avoid cracks, holes, or leftover glue mess.
Your walls will thank you!

Credit: www.angi.com
Tools Needed
A utility knife, heat gun or hairdryer, and a putty knife are essential tools. Safety gloves protect your hands during removal. A soft cloth helps clean residue afterward.
Removing mirrors glued to a wall can seem daunting at first, but with the right tools, it’s a manageable task. Having the proper equipment not only ensures your safety but also makes the process more efficient. Before you dive into this project, let’s explore the essential tools you’ll need.Basic Supplies
To successfully remove a glued mirror, you’ll need a few basic supplies that you might already have at home:- Putty Knife:A flexible putty knife is ideal for prying the mirror away from the wall. Opt for a wide blade to cover more surface area.
- Wire Saw:This is essential for cutting through the adhesive behind the mirror. It’s thin and sharp, making it perfect for tight spaces.
- Adhesive Remover:To deal with any residual glue, an adhesive remover can help clean up the area once the mirror is detached.
- Drop Cloths:Protect your floors from falling debris by laying down drop cloths beneath the mirror.
Safety Gear
Safety should always be a top priority, especially when dealing with potentially sharp glass and strong adhesives:- Safety Glasses:Protect your eyes from glass shards and dust. Even a small speck in your eye can cause discomfort.
- Gloves:Wear sturdy gloves to shield your hands from sharp edges. Choose cut-resistant materials for added protection.
- Dust Mask:A dust mask prevents inhalation of any dust or fumes from the adhesive remover.
Preparing The Area
Before you start removing a mirror glued to your wall, setting up the area properly is crucial. A well-prepared space makes the process safer and smoother. It also helps you avoid damage to your walls and belongings.
Clearing The Space
Clear out the area around the mirror completely. Move furniture, decorations, and any fragile items away to avoid accidents. This gives you enough room to work and maneuver tools safely.
Think about where broken glass might fall. Are there rugs or carpets that could catch shards? Consider removing them or covering them to protect your flooring.
Protecting Surfaces
Protect your walls and floors before you start prying or scraping. Use painter’s tape around the mirror edges to shield the paint from damage. Lay down a drop cloth or thick plastic sheet under the mirror to catch debris.
Don’t forget to wear gloves and safety goggles. Protecting yourself is as important as protecting your home. You’ll thank yourself if the mirror slips or breaks unexpectedly.
Softening The Adhesive
Softening the adhesive is a crucial step to safely remove mirrors glued to your wall without causing damage. Adhesives harden and bond strongly, so loosening them first makes the mirror easier to detach. Understanding how to soften the glue can save you time and prevent costly repairs.
Using Heat
Heat is a powerful tool to soften adhesive. You can use a hairdryer or heat gun on a low setting to warm the glued area gently. The warmth loosens the bond, making the adhesive less sticky and easier to pry off.
Hold the heat source a few inches away from the mirror edge to avoid overheating or cracking the glass. Move it slowly across the glued sections for about 2-3 minutes. Can you feel the difference when the adhesive gets tacky? That’s your signal to start loosening the mirror carefully.
Applying Solvents
Certain solvents break down adhesive bonds effectively. Acetone, rubbing alcohol, or commercial adhesive removers work well for this purpose. Apply a small amount to a cloth and dab it onto the glued area, allowing it to soak in for a few minutes.
Be cautious not to spill solvents on painted surfaces, as they may damage the finish. Always test on a hidden spot first. Have you ever tried using everyday household liquids to solve tough problems? This approach often surprises with its effectiveness.
Credit: bfymirror.com
Removing The Mirror
Removing a mirror glued to a wall can feel tricky. The key is to work patiently to avoid damage to both the mirror and the wall. Knowing the right approach helps you stay safe and keep the surface intact.
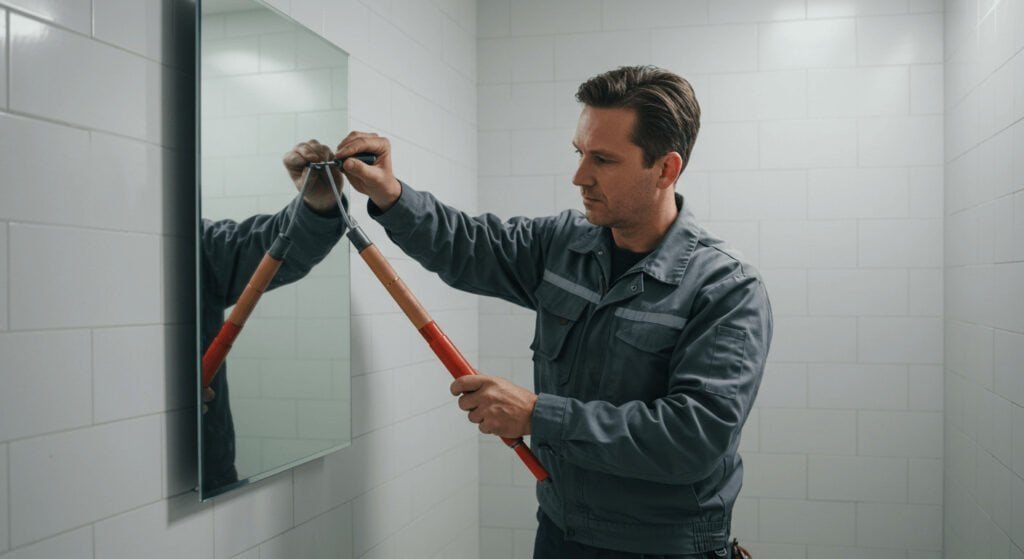
Sliding Techniques
Try gently sliding a thin, flexible tool like a wire or dental floss behind the mirror. Move it slowly in a sawing motion to cut through the adhesive. This reduces the risk of cracking the glass compared to prying directly.
Keep the pressure even and steady. Sudden moves can cause the mirror to snap or fall. If the mirror feels stuck, add a little heat with a hairdryer to soften the glue before sliding again.
Prying Carefully
If sliding doesn’t work, use a flat tool such as a putty knife or paint scraper to pry the mirror off. Insert the tool at the edge, but be gentle to avoid chipping the glass or wall.
Work your way around the mirror, lifting just a bit at a time. If the mirror resists, warm the area with a heat gun to loosen the adhesive. Always wear gloves and eye protection—you don’t want shards causing injury.
Dealing With Residue
After removing a mirror glued to your wall, you’ll often find sticky residue left behind. This leftover glue can be stubborn and tricky to clean. Handling it properly ensures your wall looks smooth and ready for whatever comes next.
Scraping Off Glue
Start by gently scraping off the thicker glue patches. Use a plastic scraper or an old credit card to avoid damaging your wall’s surface. Metal scrapers might seem effective but can leave scratches or marks.
If the glue is particularly tough, soften it first by applying a little heat with a hairdryer. This makes the adhesive easier to lift without excessive force. You’ll be surprised how much easier it gets once the glue warms up.
Cleaning The Wall
Once the bulk of the glue is removed, focus on cleaning any remaining sticky spots. A mixture of warm water and dish soap usually does the trick. Dampen a cloth with the solution and gently rub the area.
For stubborn residue, try rubbing alcohol or a commercial adhesive remover. Test a small hidden spot first to ensure it doesn’t damage your paint or wallpaper. Have you ever tried using vinegar for this? It’s a natural alternative some swear by.
Dry the wall thoroughly after cleaning. This step prevents any water damage and prepares the surface for painting or new decorations. Clean walls are the foundation of a fresh look!
Repairing Wall Damage
Removing mirrors glued to your wall can leave behind unsightly holes and damage. Repairing this damage is essential to restore a smooth, clean surface before repainting or redecorating. Let’s focus on how to fill those holes and prepare your wall for a fresh coat of paint.
Filling Holes
Start by cleaning out any loose debris or dust from the holes left by the mirror. Use a putty knife to apply spackling compound or wall filler directly into the holes. Press the filler firmly to ensure it fills the entire cavity and smooth out the surface as much as possible.
Let the filler dry completely, which usually takes a few hours depending on the product. You might need to apply a second layer if the hole is deep or if the first layer shrinks while drying. Are you making sure every hole is fully covered before moving on? This step determines how seamless your wall will look later.
Sanding And Painting
Once the filler is dry, gently sand the patched areas with fine-grit sandpaper. Sand in small circular motions until the surface feels flush with the surrounding wall. Avoid over-sanding, which can create depressions that are tricky to fix later.
After sanding, wipe the wall with a damp cloth to remove dust. Now your wall is ready for painting. Use a primer first, especially on patches, to help the paint adhere evenly. Then apply your paint in thin, even coats for the best finish.
Have you ever noticed how small imperfections can stand out after painting? Taking the time to fill and sand properly makes all the difference. Your wall will look smooth and flawless, ready for your next decorating project.
Safety Tips
Removing mirrors glued to a wall needs care and caution. Safety is a must to avoid injuries and damage. Follow these tips to keep yourself safe and protect your wall.
Handling Broken Glass
- Wear thick gloves to protect your hands from cuts.
- Use safety goggles to shield your eyes from shards.
- Work slowly to prevent the mirror from shattering suddenly.
- Keep a broom and dustpan ready to collect glass pieces.
- Dispose of broken glass in a sturdy container to avoid accidents.
Avoiding Wall Damage
- Use a plastic scraper instead of metal tools to lift the mirror.
- Apply gentle pressure to loosen glue without pulling hard.
- Consider using heat from a hairdryer to soften the adhesive.
- Protect the wall with painter’s tape around the mirror edges.
- Check the wall often to stop any peeling or paint damage.

Credit: www.youtube.com
Frequently Asked Questions
How Do I Safely Remove A Glued Mirror From The Wall?
Use a utility knife to score the adhesive around the mirror edges. Then, gently insert a thin wire or putty knife behind the mirror and saw back and forth to loosen the glue. Work slowly to avoid breaking the glass or damaging the wall.
What Tools Are Needed To Remove A Glued Mirror?
You need a utility knife, thin wire or putty knife, gloves, safety goggles, and adhesive remover. These tools help cut the glue, protect you, and safely detach the mirror without damage.
Can Heat Help Remove Mirrors Glued To Walls?
Yes, applying heat with a hairdryer softens the adhesive, making it easier to remove the mirror. Heat the edges evenly, then carefully pry the mirror off using the proper tools.
How To Protect Walls When Removing Glued Mirrors?
Score around the mirror edges with a utility knife to minimize wall damage. Use gentle, even pressure when prying the mirror off, and avoid sharp tools that can scratch or dent the wall surface.
Conclusion
Removing mirrors glued to walls takes patience and care. Use the right tools to avoid damage. Work slowly and gently to protect your wall. Clean the surface well after removal for best results. Taking your time helps prevent accidents and repairs.
Remember, safety first—wear gloves and eye protection. Following these steps makes the job easier and safer. You can restore your wall smoothly and enjoy a fresh space. Simple methods lead to great results.


