
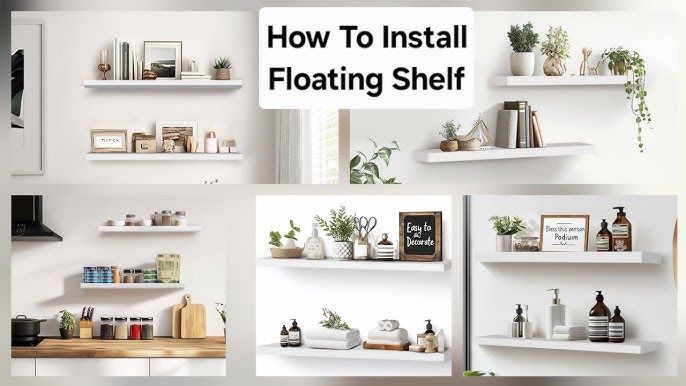
Are you ready to add stylish floating shelves to your walls but worried about mounting them on drywall? You’re not alone.
Installing floating shelves can transform any room, giving you extra space and a sleek look. But if you don’t mount them correctly, they might fall and cause damage. In this guide, you’ll learn simple, step-by-step tips to securely mount floating shelves on drywall—no special tools or skills needed.
Keep reading, and you’ll gain the confidence to tackle this project yourself and enjoy your new shelves for years to come.
Credit: www.christeneholderhome.com
Choosing The Right Shelves
Choosing the right floating shelves is key to a successful wall display. The shelves must fit your room’s style and hold your items safely. Consider both the look and the strength before buying.
Materials And Styles
Floating shelves come in many materials like wood, metal, and glass. Wood offers a warm, classic look. Metal shelves work well in modern or industrial rooms. Glass shelves add a light, elegant touch.
Styles vary too. Some shelves have a rustic feel, while others look sleek and simple. Pick a style that matches your room’s decor and your personal taste.
Weight Capacity Considerations
Check the weight limit of each shelf. Drywall can only support so much weight. Shelves with strong brackets hold heavier items better.
Think about what you will place on the shelves. Books, plants, or kitchenware need sturdy shelves. Light decorations or small items work on lighter shelves.
Choosing shelves with the right weight capacity keeps your walls safe and your items secure.
Gathering Tools And Supplies
Gathering the right tools and supplies sets the foundation for mounting floating shelves on drywall. Having everything ready makes the installation smoother and faster. It also helps avoid unnecessary trips to the store.
Focus on getting essential tools first. Then, collect the required hardware to ensure strong, secure shelves. Preparing well leads to better results and a safer setup.
Essential Tools
- Electric drill with drill bits
- Level for straight alignment
- Stud finder to locate wall studs
- Measuring tape for precise placement
- Screwdriver or impact driver
- Pencil for marking spots
- Wall anchors (if no studs are found)
- Hammer for anchors or nails
Required Hardware
- Floating shelf brackets or mounting kits
- Appropriate screws (usually included with brackets)
- Drywall anchors rated for shelf weight
- Wall plugs for extra hold on drywall
Locating Wall Studs
Finding the right spot to mount your floating shelves is crucial for safety and stability. Drywall alone can’t hold much weight, so you need to anchor into the wall studs. Locating these studs is your first step to ensure your shelves won’t come crashing down.
Using A Stud Finder
A stud finder is a handy tool that makes locating wall studs quick and accurate. Simply slide it across the wall, and it will beep or light up when it detects a stud behind the drywall. This tool saves you guesswork and prevents unnecessary holes in your wall.
Some stud finders also detect live wires and pipes, adding extra safety before you drill. If you don’t own one, they are affordable and available at most hardware stores.
Alternative Methods
If you don’t have a stud finder, don’t worry—you can still find studs using simple tricks. Try tapping the wall lightly with a hammer; a solid sound often indicates a stud, while a hollow sound suggests empty drywall.
You can also look for clues like electrical outlets or light switches, which are usually attached to studs. Measure about 16 or 24 inches from these points to guess where the next stud might be. Mark these spots and test with a small nail to confirm.
Have you ever tried these methods? Sometimes, mixing a few approaches works best to find the perfect mounting spot. What challenges have you faced when mounting shelves on drywall?
Marking And Measuring
Marking and measuring are the foundations of a successful floating shelf installation on drywall. Without precise marks and measurements, your shelves could end up crooked or poorly supported. Taking your time here saves you from costly mistakes later and ensures your shelves look professional and hold up well.
Determining Shelf Placement
Start by deciding exactly where you want your floating shelf to live. Consider what you’ll place on it and how it fits with the rest of your room’s layout. Think about eye level and accessibility—too high or too low can make your shelf impractical.
Use a pencil to lightly mark the wall where the shelf will go. If you’re hanging multiple shelves, measure the distance between them to keep consistent spacing. Remember, small differences can throw off your entire arrangement.
Ensuring Level Alignment
Nothing ruins a shelf display faster than a tilt. Grab a spirit level and hold it against the marks you made. Adjust until the bubble sits perfectly centered—this step guarantees your shelf won’t lean.
If you don’t have a spirit level, a smartphone app can help. Many free apps provide accurate leveling tools, making it easy to check your alignment. Double-checking your marks before drilling prevents frustrating fixes later.
Drilling And Installing Anchors
Drilling and installing anchors is a key step in mounting floating shelves on drywall. Anchors provide the needed support to hold the shelf and its contents safely. Choosing the right anchor and drilling properly ensures a strong, lasting installation.
Choosing Anchor Types
Select anchors based on the shelf weight and drywall condition. Plastic expansion anchors work for light loads. For medium to heavy shelves, use metal anchors or toggle bolts. Molly bolts offer strong grip in drywall. Consider weight limits clearly to avoid damage.
- Plastic expansion anchors:Best for lightweight shelves.
- Molly bolts:Provide firm hold for medium weight.
- Toggle bolts:Ideal for heavy shelves and uneven surfaces.
- Metal anchors:Strong and durable for varied weights.
Proper Drilling Techniques
Mark the shelf bracket holes on drywall before drilling. Use a drill bit matching the anchor size exactly. Drill straight into the wall to avoid angled holes. Clear dust from holes to ensure anchor fits well. Insert anchors gently, avoiding force that can damage drywall.
- Use a level to mark drill points accurately.
- Start with a small pilot hole if needed.
- Drill at a slow, steady speed for control.
- Check anchor fit before mounting the shelf.
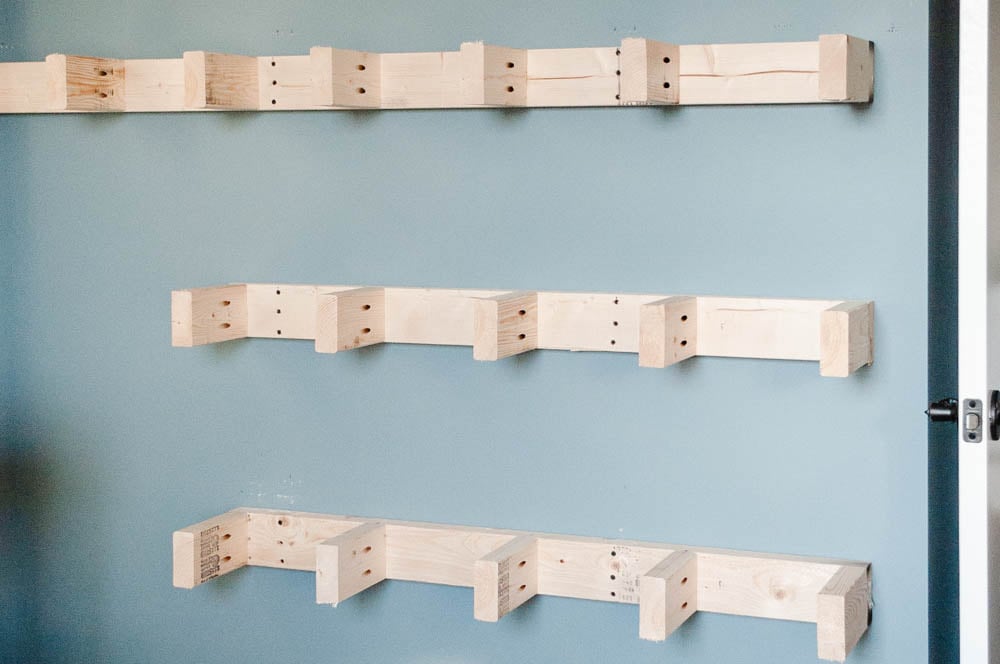
Mounting The Brackets
Mounting the brackets involves aligning them on the wall and securing them with screws. Use a level to ensure accuracy. This creates a stable base for your floating shelves on drywall.
Mounting floating shelves on drywall can seem daunting. But with the right guidance, it becomes straightforward. This section focuses on mounting the brackets securely. A proper bracket installation is crucial for the shelf’s stability. Let’s delve into the details.Securing To Studs Or Anchors
Locate the wall studs using a stud finder. Mark their positions. If a stud aligns with your bracket, screw directly into it. This gives the strongest support. If no stud is available, choose drywall anchors. Use a drill to make holes for the anchors. Insert the anchors snugly into the wall. Attach the brackets by screwing into the anchors. Ensure the screws are tight and secure.Double-checking Stability
After mounting, check the brackets for stability. Gently apply pressure to each bracket. They should not wobble or move. Use a level to ensure the brackets are even. Uneven brackets can cause shelves to tilt. Adjust if necessary. A stable bracket setup ensures your shelves remain secure.Attaching The Shelves
Attaching floating shelves to drywall is the moment your project truly takes shape. This step requires precision and care to ensure the shelves hold firm and look great. Taking your time here avoids wobbly shelves and potential damage later.
Aligning Shelves On Brackets
Start by placing the shelf on the wall brackets carefully. Check that the shelf sits evenly and flush against the wall without any gaps. A small spirit level can help you confirm the shelf is perfectly horizontal.
It’s easy to rush this part, but ask yourself: is the shelf aligned well enough to support items without tipping? If not, adjust the brackets slightly or reposition the shelf until it fits snugly. Remember, even a tiny tilt can cause issues when you add weight.
Fastening Shelves Securely
Once aligned, secure the shelf by fastening it to the brackets. Use screws that are the right length—not too short to avoid slipping, and not too long to prevent damage to the wall. Tighten screws firmly but avoid over-tightening, which can crack the shelf or drywall.
Double-check the tightness by gently pressing on the shelf’s edge. Does it feel stable and solid? If it moves, tighten the screws a bit more or use wall anchors for extra support. Your shelves should feel like they’re part of the wall, not just attached.

Credit: shelfology.com
Tips For Maintaining Stability
Maintaining the stability of floating shelves is essential for safety and longevity. Proper care helps avoid damage to drywall and keeps shelves secure. Small efforts can prevent big problems later.
Weight Distribution
Balance the items evenly across the shelf. Avoid placing heavy objects all on one side. Spread weight to reduce stress on brackets and drywall anchors. Use lighter items near the edges to keep shelves steady. This helps prevent sagging or falling.
Regular Inspections
Check shelves regularly for signs of looseness or damage. Look for cracks in the drywall or wobbling shelves. Tighten screws and brackets as needed to keep shelves firm. Early fixes stop small issues from growing. Stay safe by inspecting often.
Common Mistakes To Avoid
Mounting floating shelves on drywall might seem straightforward, but many overlook key details that lead to weak installations or worse, damage. Understanding the common mistakes can save you time, effort, and even expensive repairs. Let’s look at some pitfalls you should avoid to ensure your shelves stay secure and your walls stay intact.
Ignoring Wall Type
Drywall isn’t the same everywhere. Some walls have studs behind them, while others might be hollow or have different materials like plaster. If you skip checking your wall type, you could end up anchoring shelves where there’s nothing solid to hold them.
Always locate studs using a stud finder before drilling. If you can’t hit a stud, choose anchors specifically designed for drywall. Have you ever tried hanging something heavy only to watch it fall minutes later? That’s usually because the wall type wasn’t considered.
Overloading Shelves
Floating shelves have weight limits, and pushing beyond those limits is a common mistake. Even if your shelves are installed perfectly, putting too many heavy items on them risks pulling them off the wall.
Think about what you plan to place on the shelves. Books, plants, or kitchenware all add weight quickly. Don’t assume your shelf can hold “just a little more.” Instead, check the manufacturer’s weight guidelines and keep your display light and balanced.

Credit: chill-house.co.uk
Frequently Asked Questions
How Do I Find Studs For Floating Shelves?
Use a stud finder to locate studs behind drywall. Mark the stud positions with a pencil. Anchoring shelves into studs ensures strong support and prevents wall damage.
What Anchors Work Best For Drywall Shelves?
Toggle bolts and molly bolts are ideal for drywall. They provide strong support by spreading weight over a larger area. Avoid using plastic anchors for heavy shelves.
How Much Weight Can Floating Shelves Hold?
Weight capacity depends on anchor type and stud support. Properly mounted shelves can hold 20-50 pounds or more. Always check manufacturer guidelines for specific shelf limits.
Can I Mount Floating Shelves Without Studs?
Yes, but use heavy-duty drywall anchors like toggle bolts. Shelves without stud support hold less weight and risk wall damage if overloaded. Use anchors rated for your shelf’s weight.
Conclusion
Mounting floating shelves on drywall is simple with the right steps. Use anchors or find studs to ensure strong support. Measure and level carefully for a neat look. Take your time to drill and fix each part securely. Enjoy extra space and a tidy wall after installation.
Shelves add style and function to any room. Now, you can display books, plants, or decor easily. A small effort brings big changes to your home. Try it yourself and see the difference.


