
Getting your Christmas tree to glow just right can feel tricky. You want those lights to sparkle evenly, creating a warm, festive glow that fills your room with holiday cheer.
But where do you start? How do you make sure your lights don’t end up tangled or uneven? In this guide, you’ll discover simple, step-by-step tips to help you wrap your tree lights like a pro. By the time you finish, your tree will look stunning, and you’ll feel proud of the cozy atmosphere you’ve created.
Ready to make your tree shine brighter than ever? Let’s get started!

Credit: www.youtube.com
Choosing The Right Lights
Choosing the right Christmas tree lights sets the mood for the whole holiday. Lights bring warmth and sparkle to your tree. Picking the best type and color makes decorating easier and more fun. Safety and energy use also matter for a happy season.
Types Of Christmas Lights
Several types of Christmas lights suit different styles and needs. Traditional incandescent lights shine warmly but use more energy. LED lights last longer and save power. Mini lights are small and perfect for dense coverage. C7 and C9 bulbs are bigger and brighter for a bold look. Net lights cover branches quickly. Rope lights add a unique glow around the tree.
Selecting Bulb Size And Color
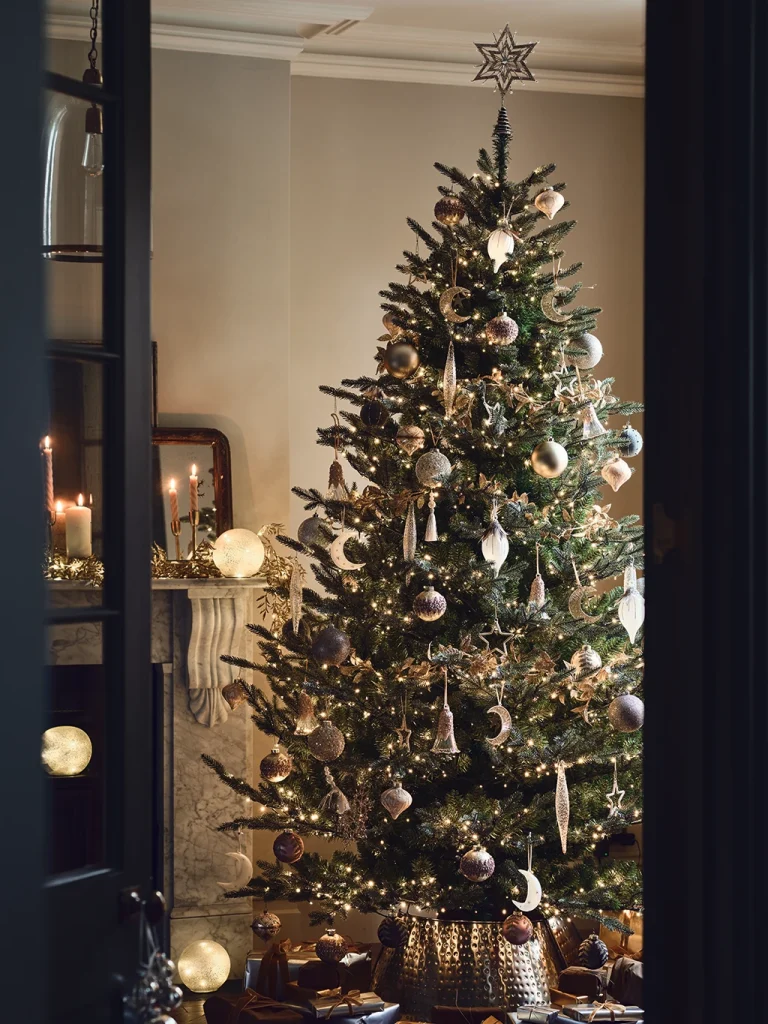
Bulb size affects the tree’s overall look. Tiny bulbs create a delicate, twinkling effect. Larger bulbs stand out and give a classic feel. Color choice changes the tree’s mood. White lights offer a clean, elegant shine. Multicolor lights create a playful and joyful vibe. Warm white lights feel cozy and inviting. Pick colors that match your home’s style and holiday theme.
Energy Efficiency And Safety
Energy-efficient lights lower electricity bills and last longer. LED lights use less power than traditional bulbs. Check for lights labeled UL or ETL for safety. Avoid lights with frayed wires or broken bulbs. Use outdoor-rated lights for trees placed outside. Turn off lights before sleeping to prevent hazards. Proper care keeps your home safe and your tree bright.

Credit: www.youtube.com
Preparing The Tree
Preparing your Christmas tree before lighting it up sets the foundation for a dazzling display. The way you set up, shape, and inspect your tree can make all the difference in how your lights look and last throughout the season. Taking a little extra time here pays off when your tree shines beautifully and stays safe.
Setting Up The Tree Securely
Start by placing your tree stand on a flat, stable surface to prevent any wobbling. Tighten the screws or clamps firmly to hold the trunk in place. A secure base stops the tree from leaning or tipping, which can cause uneven lighting or even accidents.
Think about where you want your tree to be in the room—near an outlet but away from heat sources. Positioning it well before you begin lighting saves you from awkward adjustments later. Have you ever had to move a fully decorated tree? It’s much harder than you’d expect!
Fluffing And Shaping Branches
Take time to pull out and spread each branch individually. This step fills gaps and gives your tree a fuller appearance. Don’t rush; shaping your tree this way creates more space for lights to nestle in and shine.
Focus on spreading branches both horizontally and vertically. This allows light to reach deeper layers, avoiding dark patches. You might find some branches bend easily—use that flexibility to your advantage to create a balanced look.
Checking For Damaged Branches
Inspect your tree carefully for any broken or brittle branches. These can pose safety hazards or ruin your tree’s overall shape. Remove any damaged parts to prevent them from falling off once the lights are on.
Sometimes, a damaged branch can be tucked behind others or trimmed to keep the tree looking natural. Have you noticed how a small fix can save your tree from looking sparse? This little effort ensures your lighting setup is smooth and secure.
Planning Your Lighting Design
Start by choosing the right lights that fit your tree size and style. Wrap the lights evenly from the bottom to the top, tucking wires gently between branches for a neat look. Test the lights before placing them to ensure everything shines bright.
Planning your lighting design is an exciting step in decorating your Christmas tree. It sets the tone for your holiday ambiance and reflects your personal style. Whether you prefer a classic look or a modern twist, a well-thought-out lighting plan can transform your tree into a festive masterpiece.Deciding On Light Density
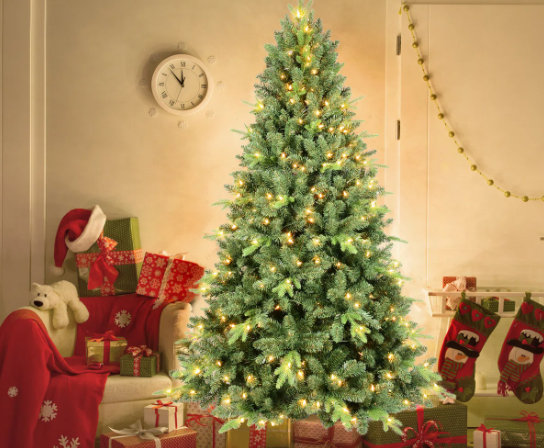
Deciding how many lights to use can make or break your tree’s appearance. A general rule of thumb is 100 lights for every foot of tree height. However, if you love a brighter glow, add more strands for a stunning effect. Consider the size and shape of your tree. A bushy tree might need more lights to ensure even coverage. On the other hand, a slimmer tree can shine beautifully with fewer lights.Wiring Patterns To Consider
Choosing the right wiring pattern can enhance the tree’s beauty. Spiral the lights around the tree from top to bottom for a classic look. Alternatively, try weaving them in a zig-zag pattern for a unique flair. Another popular method is the vertical pattern, where lights are hung from top to bottom and then back up. This approach can make your tree look fuller and more luminous.Balancing Lights And Ornaments
Balancing lights and ornaments is crucial for achieving a cohesive look. Start by placing your lights to ensure even distribution. This provides a glowing backdrop for your decorations. Once your lights are in place, hang your ornaments strategically. Place larger ornaments near the bottom and smaller ones higher up to create depth and interest. Remember, less can be more. A well-lit tree allows each ornament to shine without overwhelming the senses. What lighting design will you try this year to make your tree sparkle?Step-by-step Lighting Application
Applying Christmas tree lights can transform any tree into a glowing centerpiece. The process is simple with clear steps. Follow these tips to make your tree shine bright and even.
Starting At The Base Or Top
Choose the starting point for your lights: base or top. Starting at the base allows easy access to the power source. This method lets you work upward, securing lights along the way.
Starting at the top offers a neat look, especially on tall trees. It helps place lights evenly from the tip down. Either way, keep the plug within reach for safety.
Wrapping Branches Evenly
Wrap lights around each branch to spread the glow. Move the lights slowly to avoid clumps or bare spots. Keep spacing consistent for balanced brightness.
Use the tip of each branch to guide the lights inward. Wrap lights around branches in a spiral or zigzag pattern. This covers the tree well and creates depth.
Handling Light Strands Safely
Inspect lights for broken bulbs or frayed wires before use. Use only outdoor-rated lights for trees placed outside. Plug lights into grounded outlets to avoid electrical hazards.
Avoid overloading sockets by connecting a few strands only. Unplug lights when not in use to save energy and prevent fire risks. Store lights carefully to prevent damage after the holidays.
Troubleshooting Common Issues
Setting up Christmas tree lights can sometimes bring challenges. Common issues like flickering bulbs, overloaded circuits, and tangled strands can disrupt the festive mood. Troubleshooting these problems quickly helps keep your tree shining bright and safe.
Fixing Dead Or Flickering Bulbs
Check bulbs carefully for damage or loose connections. Replace any dead bulbs with ones of the same type. Sometimes, flickering occurs due to a bulb not fitting tightly in its socket. Press each bulb gently to secure it. Use a bulb tester to find faulty bulbs fast. Keep spare bulbs handy for quick swaps.
Avoiding Overloading Circuits
Know the power limit of your outlet and light strands. Plugging too many lights into one socket can cause outages or fire hazards. Spread your lights across multiple outlets or use power strips with built-in circuit breakers. Turn off lights when leaving the house or sleeping. This helps prevent overload and keeps your home safe.
Managing Tangled Light Strands
Untangle strands before wrapping them on the tree. Lay strands flat and separate each light cluster carefully. Avoid pulling or yanking, which can damage wires. Use twist ties or clips to keep strands organized while working. Store lights properly after the holidays to prevent future tangles.
Enhancing The Display
Enhancing the display of your Christmas tree lights brings extra magic to your holiday decor. Small touches can create a big impact. These additions make your tree stand out and brighten your space with ease. The right tools and ideas help keep the lights shining beautifully all season.
Adding Timers And Remote Controls
Timers and remote controls simplify managing your Christmas lights. Set timers to turn lights on and off automatically. This saves energy and ensures the tree lights glow at the perfect times. Remote controls let you change settings without leaving your seat. Adjust brightness or turn lights off quickly and easily. These tools add convenience and help keep the display consistent.
Incorporating Color And Effects
Color and effects add depth and excitement to your tree. Mix warm and cool tones for a rich look. Use multi-colored lights for a festive feel or stick to one color for elegance. Effects like twinkling, fading, or chasing lights create movement. These patterns bring your tree to life and catch the eye. Experiment with different combinations to find your favorite style.
Maintaining Lights Throughout The Season
Keep your lights shining bright by checking them regularly. Replace any burnt-out bulbs to avoid dark spots. Secure loose wires to prevent tangling or damage. Avoid overloading electrical outlets for safety. Clean your lights gently with a soft cloth to remove dust. A little care ensures your display stays beautiful from start to finish.
Credit: www.wayfair.ca
Frequently Asked Questions
How Do You Prepare A Christmas Tree For Lights?
Start by choosing a fresh, sturdy tree. Remove old decorations. Check the lights for damage. Untangle the light strands before wrapping them around the tree evenly.
What Is The Best Way To Wrap Christmas Tree Lights?
Begin at the bottom, wrapping lights around branches. Move upward in a spiral, spacing lights evenly. Ensure lights face inward to highlight ornaments and create a balanced glow.
How Many Light Strands Do I Need For My Tree?
Use about 100 lights per foot of tree height. For a 6-foot tree, 600 lights work well. Adjust based on your desired brightness and tree density.
Should I Test Christmas Lights Before Decorating?
Yes, testing prevents surprises. Plug in lights and replace any faulty bulbs. This ensures your tree glows beautifully without interruptions during the holidays.
Conclusion
Putting lights on your Christmas tree can be fun and simple. Start at the trunk and work your way out. Spread the lights evenly for a bright, cheerful look. Check each string before hanging to avoid dark spots. Remember to keep safety in mind with electrical cords.
Enjoy the warm glow that fills your home. A well-lit tree brings joy to the holiday season. Take your time and make it your own. Happy decorating!


