
Want your wall stickers to look flawless and perfectly aligned every time? You’re not alone.
Putting up wall stickers evenly can be tricky, and a crooked decal can ruin the whole look of your room. But don’t worry—this guide will show you simple, step-by-step tips to make sure your stickers go up straight and smooth.
By the end, you’ll have the confidence to transform your space with ease. Ready to get started? Let’s dive in!

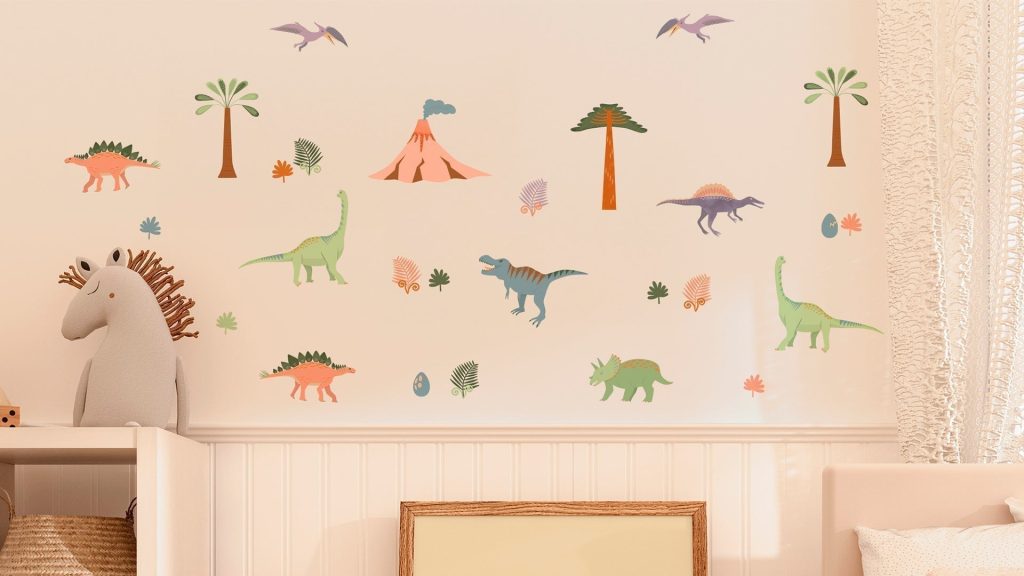
Credit: hiveartes.com
Choose The Right Wall Stickers
Choosing the right wall stickers is the foundation for a smooth and even application. It’s not just about picking something that looks good; you need to consider the type, material, and size to ensure it sticks well and fits your space perfectly. Have you ever tried to place a sticker only to find it peeling off or looking crooked? Picking the right sticker helps you avoid those frustrations.
Types Of Wall Stickers
Wall stickers come in various types, each suited for different surfaces and purposes. Vinyl stickers are popular because they are durable and easy to clean, making them perfect for high-traffic areas like kitchens and hallways.
Fabric-based stickers offer a matte finish and are easier to reposition but may not last as long on rough surfaces. Removable decals work great if you like changing your decor frequently, as they peel off without damaging your walls.
- Vinyl:Durable, water-resistant, ideal for smooth surfaces.
- Fabric:Matte finish, repositionable, best for low-traffic areas.
- Removable Decals:Easy to remove, suitable for renters.
Material Considerations
Material matters because it affects how well the sticker adheres and how easy it is to apply evenly. Smooth, painted walls are the best surfaces for most stickers, especially vinyl. Textured or rough walls can cause stickers to peel or bubble.
Think about the finish of your wall—matte, glossy, or satin—and choose a sticker material compatible with it. Also, check if the sticker is waterproof if you plan to put it in a bathroom or kitchen.
| Wall Type | Recommended Sticker Material |
|---|---|
| Smooth Painted Walls | Vinyl or Fabric |
| Textured Walls | Removable Decals (test first) |
| Bathrooms/Kitchens | Waterproof Vinyl |
Design And Size Selection
Choosing the right design and size affects how balanced your wall will look once the sticker is applied. Large stickers can make a bold statement but can be tricky to align perfectly. Smaller, repeated patterns are easier to place evenly and give you more flexibility in positioning.
Measure your wall space before buying. Would a single large decal overpower the area, or would multiple smaller stickers work better? Visualize the layout by taping paper cutouts on the wall first to see how the design and size feel in the room.
Prepare Your Wall Surface
Preparing the wall surface is the first step to place wall stickers evenly. A clean, smooth, and dry wall helps stickers stick better and last longer. This process prevents air bubbles and peeling, ensuring a neat finish. Spend time preparing the wall well before applying the stickers.
Clean The Wall Thoroughly
Remove dust, dirt, and grease from the wall surface. Use a soft cloth or sponge with mild soap and water. Avoid harsh cleaners that may damage the paint or wallpaper. Rinse with clean water and wipe dry. Clean walls help stickers stick firmly and avoid peeling.
Smooth Out Imperfections
Check the wall for bumps, holes, or cracks. Fill small holes with wall putty or spackle. Sand rough spots gently to create a smooth surface. Uneven walls cause stickers to wrinkle or bubble. Smooth walls give a flat base for easy sticker application.
Ensure Dryness
Make sure the wall is completely dry before applying stickers. Moisture reduces the adhesive power and causes stickers to peel. Wait several hours after cleaning or patching before sticking. A dry wall surface ensures the sticker sticks well and stays put.
Gather Essential Tools
Gather a ruler, level, pencil, and masking tape before starting. These tools help measure and align stickers for a straight, even look. Having everything ready saves time and prevents mistakes.
Before you start transforming your space with wall stickers, gathering the right tools is crucial. Having the essentials on hand ensures a smoother application and helps you avoid frustrating mistakes. Let’s dive into the tools you’ll need to get those stickers up evenly and perfectly.Measuring Tape And Level
A measuring tape is your best friend when it comes to precision. It helps you determine the exact placement of your stickers, ensuring symmetry and balance on your wall. Use a level to make sure everything is straight—crooked stickers can ruin the look, no matter how beautiful they are. Imagine a picture-perfect gallery wall—created effortlessly because you measured and leveled. Do you want that satisfaction?Pencil And Masking Tape
These simple items can save you a lot of hassle. Use a pencil to lightly mark the placement of your stickers on the wall. Masking tape is perfect for holding the sticker in place temporarily, allowing you to step back and ensure everything looks right before committing. Wouldn’t it be nice to avoid unnecessary holes and adjustments?Squeegee Or Credit Card
A squeegee is excellent for smoothing out air bubbles and creases. If you don’t have one, a credit card wrapped in a soft cloth works just as well. Press gently from the center outwards to adhere the sticker smoothly to the wall. Have you ever noticed how a little pressure can make things look flawless?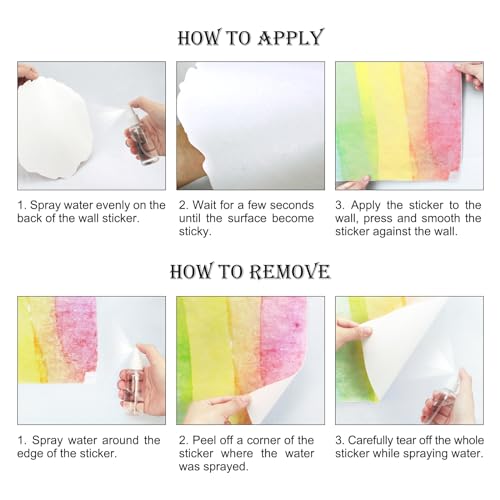
Credit: www.amazon.ie
Plan Your Sticker Layout
Planning your sticker layout is key to a neat and balanced look. Taking time to prepare helps avoid crooked or uneven stickers. It also saves effort by preventing mistakes during application. A clear plan guides you through the process with confidence and accuracy.
Marking Reference Points
Start by choosing where the sticker will go on the wall. Mark small, light dots with a pencil at the edges or corners. These marks act as guides to place the sticker correctly. Use a ruler to measure equal distances from walls or ceiling. This ensures the sticker is centered or aligned as desired.
Using A Level For Alignment
A level tool helps keep your sticker straight. Place it along the pencil marks to check for evenness. Adjust the marks until the bubble is centered in the level. This avoids a slant that can spoil the look. A level is especially useful for long or wide stickers.
Dry Positioning
Before sticking, hold the sticker against the wall without peeling it. Step back and see if the placement feels right. Check the reference points and alignment again. This trial run reduces errors and boosts confidence. If needed, move the sticker and try again until perfect.
Apply Wall Stickers Smoothly
Applying wall stickers smoothly can transform your space instantly, but it requires a steady hand and some patience. The key is to handle the sticker with care and ensure it adheres evenly to avoid wrinkles or bubbles. Let’s look at how to get that flawless finish step by step.
Peeling Backing Paper Carefully
Start by peeling the backing paper slowly and evenly. Pull it back at a sharp angle rather than straight up to avoid stretching or tearing the sticker. If the sticker begins to lift with the backing paper, pause and press it back down gently before continuing.
Try to expose only a small section at a time. This gives you better control and prevents the adhesive from sticking prematurely to the wall. Have patience here—rushing can cause wrinkles that are hard to fix later.
Positioning And Pressing
Once a small part of the sticker is free, position it carefully on your wall. Use your hands or a soft cloth to press the exposed section firmly in place. This helps anchor the sticker and keeps it from shifting as you reveal more of it.
Work your way slowly, pressing as you go. A clean, flat surface is essential—dust or uneven walls can cause the sticker to lift. Ask yourself: Is this spot perfectly aligned? If not, gently lift and reposition before pressing down hard.
Removing Air Bubbles
Air bubbles are the most common issue, but they’re easy to fix if caught early. Use a credit card or a squeegee wrapped in a soft cloth to smooth the sticker from the center outward. This pushes trapped air toward the edges and helps create a smooth finish.
If a bubble persists, gently lift the nearest edge and press again. Avoid puncturing the sticker unless it’s a last resort, as this can damage the design. Have you noticed a tiny bump? Don’t ignore it—addressing these small imperfections immediately makes a big difference.
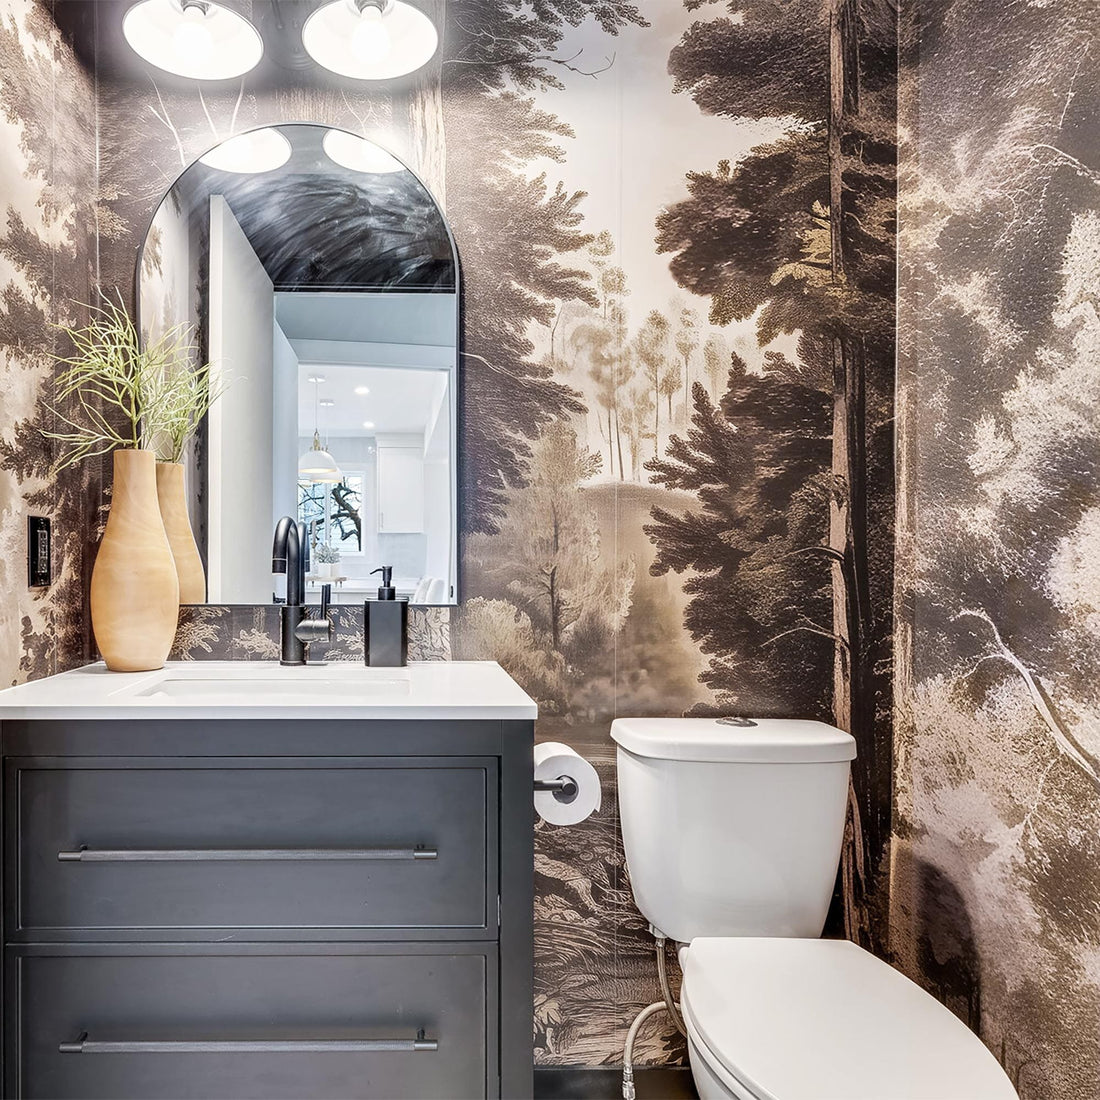
Credit: uwdecals.com
Fixing Mistakes Quickly
Mistakes happen, especially when putting up wall stickers. The key is to fix them quickly before the adhesive sets too firmly. Acting fast can save your wall and keep your sticker looking perfect.
Peeling Off And Reapplying
If your sticker isn’t aligned right, don’t panic. Gently peel it off starting from one corner. Pull slowly to avoid stretching or tearing the sticker.
Once removed, check the back for any dirt or dust and wipe it clean with a soft cloth. Reapply the sticker carefully, smoothing it out with a flat tool like a credit card. This simple step often corrects small misplacements without ruining the sticker.
Using Heat To Adjust
Sometimes stickers wrinkle or bubble after application. A hairdryer can be your best friend here. Warm the sticker for a few seconds; the heat softens the adhesive, making it easier to reposition.
Be cautious not to overheat, as excessive warmth can damage the sticker or paint underneath. After heating, smooth out bubbles or edges with a flat tool, working from the center outward. This technique works wonders for stubborn imperfections.
Preventing Damage
Fixing mistakes is easier when you protect both the sticker and your wall. Avoid using sharp tools that can scratch surfaces or tear the sticker. Soft cloths and plastic cards do the job without harm.
Also, test your sticker on a small, hidden wall area first. This helps you see how well it peels off and reattaches. Have you ever had a sticker ruin your freshly painted wall? Taking these precautions can save you from that frustration.
Maintenance Tips
Maintaining wall stickers helps keep them fresh and attractive for longer. Simple care routines prevent damage and preserve their look. Follow these tips to enjoy your wall stickers without extra effort.
Cleaning Wall Stickers
Use a soft, dry cloth to wipe dust gently. Avoid harsh chemicals or scrubbing, which can damage the sticker. For stubborn dirt, slightly dampen the cloth with water only. Pat dry immediately to prevent moisture from lifting the edges.
Avoiding Peeling And Fading
Keep stickers away from direct sunlight to stop fading. Heat and humidity weaken the adhesive, causing peeling over time. Avoid placing stickers near heaters or vents. Press edges firmly after installation to ensure full contact with the wall.
Long-term Care
Check stickers regularly for any lifting corners. Reapply gentle pressure to stuck areas if needed. Use a mild adhesive tape to secure loose edges temporarily. Avoid repositioning stickers multiple times to protect the adhesive layer. Store spare stickers flat in a cool, dry place.
Frequently Asked Questions
How Do I Align Wall Stickers Evenly?
Use a level tool and measuring tape to mark guidelines. Place the sticker along these lines to ensure even alignment. This method helps avoid crooked or uneven placement.
What Surface Is Best For Wall Sticker Application?
Smooth, clean, and dry surfaces like painted walls, glass, or tiles work best. Avoid textured or dusty surfaces for better adhesion and even placement.
Can I Reposition Wall Stickers After Applying?
Yes, many wall stickers can be gently peeled and repositioned shortly after application. Be careful to avoid stretching or tearing the sticker during repositioning.
How To Prevent Air Bubbles Under Wall Stickers?
Apply the sticker slowly, smoothing from the center outward with a squeegee or credit card. This technique helps push out trapped air bubbles effectively.
Conclusion
Putting up wall stickers evenly takes patience and care. Start by cleaning the wall well. Use a level or tape to mark straight lines. Peel the sticker slowly and press it firmly from one side to the other. Smooth out any bubbles with a soft cloth or card.
Take your time to adjust before fully sticking it. These simple steps help your wall look neat and stylish. Enjoy your decorated space without any hassle or uneven spots. Simple tricks make a big difference in the final look.


