
Are you struggling to make sense of the numbers and graphs on a ventilator screen? Understanding this vital information can feel overwhelming, but it’s easier than you think.
When you know how to read a ventilator screen, you gain a powerful tool to monitor a patient’s breathing and spot problems early. This knowledge can boost your confidence and help you make faster, smarter decisions in critical moments. Keep reading, and you’ll discover simple steps to decode the screen like a pro—no medical jargon, just clear guidance you can trust.
Your ability to interpret these readings could make all the difference.
Ventilator Basics
Understanding ventilator basics is essential before you learn how to read a ventilator screen. Ventilators are complex machines designed to assist or replace spontaneous breathing. Knowing their types and key components helps you interpret the data they provide and respond appropriately.
Types Of Ventilators
Ventilators come in various types, each suited for different patient needs and clinical settings.
- Invasive Ventilators:These use a tube inserted into the patient’s airway. They provide precise control over breathing but require careful monitoring.
- Non-invasive Ventilators:These deliver air through masks or nasal prongs. They are less intrusive and often used for patients who can breathe partially on their own.
- Portable Ventilators:Compact and lightweight, these are used during transport or in emergency situations.
- High-frequency Ventilators:Deliver very rapid breaths at small volumes. They are used in specific cases like neonatal care.
Knowing which type you are working with affects how you read the screen and interpret the settings.
Key Components
Each ventilator has essential parts that display critical information on the screen. Understanding these components helps you quickly assess the patient’s breathing status.
- Screen/Display:Shows real-time data like respiratory rate, tidal volume, and airway pressures.
- Control Panel:Allows adjustments to ventilation settings like mode, oxygen concentration, and alarms.
- Alarms:Alert you to changes or problems like high pressure or low oxygen levels.
- Breathing Circuit:Connects the ventilator to the patient, including tubing and humidifiers.
When you first see a ventilator screen, focus on these components. Ask yourself: what is the current respiratory rate? Are the pressures within safe limits? This mindset helps you stay alert and responsive.
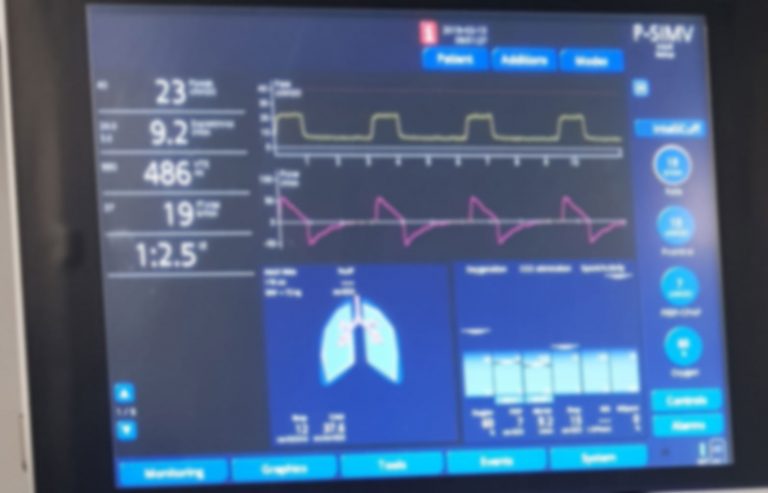
Screen Layout
The screen layout of a ventilator is your window into the patient’s breathing and the machine’s performance. It shows real-time information that helps you make quick decisions. Understanding how to read this layout can improve patient care and make your work smoother.
Waveforms And Loops
Waveforms display the flow, volume, and pressure of air during each breath. You’ll usually see three main types: pressure, volume, and flow waveforms. Each curve tells a story about how the patient’s lungs are responding to the ventilator.
Loops, like pressure-volume and flow-volume loops, offer a snapshot of lung mechanics. They can reveal issues like airway resistance or lung compliance changes. If you spot an abnormal loop shape, it might mean the patient needs an adjustment in settings or further assessment.
Look closely at the shape and timing of these waveforms. Are the pressure and volume rising smoothly? Is the flow pattern consistent? These details help you spot problems early, even before alarms sound.
Numeric Displays
Numeric displays show critical values such as tidal volume, respiratory rate, PEEP, and FiO2. These numbers are your quick reference points for how the ventilator is set and how the patient is doing.
Check these numbers regularly. For example, a sudden drop in tidal volume might mean a leak or tube blockage. Changes in respiratory rate or FiO2 can tell you if the patient’s condition is improving or worsening.
Don’t just glance at the numbers—understand what they mean in context. Combine what you see here with the waveforms to get a complete picture of the patient’s respiratory status. What patterns can you detect that might need your attention right now?
Essential Parameters
Understanding the essential parameters on a ventilator screen is key to managing patient care effectively. These numbers and settings tell you how well the patient is breathing and how the machine is supporting them. Paying close attention to these values helps you make quick decisions and adjust settings safely.
Tidal Volume
Tidal volume shows the amount of air delivered to the lungs with each breath. It is measured in milliliters (mL). Watching this number helps you ensure the patient is getting enough air without causing lung injury from too much volume.
Think about a patient with weak lungs—you might want to keep this value lower to avoid overstretching lung tissue. Always ask yourself, is the tidal volume meeting the patient’s oxygen needs without causing harm?
Respiratory Rate
This parameter indicates how many breaths the ventilator gives per minute. It affects how much air the patient gets overall. If the rate is too high, it might cause fatigue; too low, and the patient might not get enough oxygen.
In a case I observed, adjusting the respiratory rate helped stabilize a patient’s blood gases within hours. Have you noticed how small changes in rate can make a big difference in patient comfort?
Peak Inspiratory Pressure
Peak inspiratory pressure (PIP) measures the highest pressure applied during inhalation. Keeping PIP within safe limits prevents lung damage from excessive pressure. It’s a critical number to watch, especially with stiff or damaged lungs.
If you see this number rising, consider what might be causing increased resistance or decreased lung compliance. Are secretions or airway obstructions involved? This parameter often signals when intervention is needed.
Peep Levels
PEEP stands for positive end-expiratory pressure. It keeps the lungs partially inflated between breaths to improve oxygen exchange. Adjusting PEEP helps prevent the lungs from collapsing and supports better breathing.
When I adjusted PEEP for a patient struggling with oxygenation, their saturation improved noticeably. Could tweaking this setting help your patient breathe easier today?
Fio2 Settings
FiO2 is the fraction of inspired oxygen the patient receives. It ranges from 21% (room air) to 100%. Managing FiO2 is about balancing oxygen delivery with minimizing oxygen toxicity risk.
Have you ever had to reduce FiO2 gradually to prevent damage while keeping oxygen levels stable? This setting requires constant monitoring and adjustment based on patient response.
Credit: owlcation.com
Interpreting Waveforms
Interpreting waveforms on a ventilator screen is essential for understanding a patient’s breathing status. Waveforms provide real-time feedback on how air moves in and out of the lungs. They help identify problems with ventilation and guide adjustments to settings.
Each waveform type shows different information. Learning to read pressure, flow, and volume waveforms improves patient care. Recognizing normal and abnormal patterns is key.
Pressure Waveform
The pressure waveform shows airway pressure over time during breathing. It helps monitor lung and airway resistance. Look for smooth, regular rises and falls in the waveform.
- A rapid rise means high resistance or a cough.
- A plateau phase indicates lung compliance.
- Sudden drops suggest leaks or disconnections.
Pressure waveforms guide adjustments to keep pressure safe and effective.
Flow Waveform
The flow waveform displays the speed of air moving in and out of the lungs. It shows inspiration and expiration phases clearly. Watch for sharp peaks and smooth returns to zero flow.
- Inspiration flow is positive; expiration flow is negative.
- Flattened or prolonged flows may indicate airway obstruction.
- Flow patterns help detect patient effort and synchrony.
Volume Waveform
The volume waveform traces the amount of air delivered with each breath. It helps measure tidal volume and lung capacity. A steady rise and fall indicate proper ventilation.
- Low volume may signal leaks or poor lung expansion.
- High volume might cause lung injury risk.
- Waveform shape can reveal breath stacking or incomplete exhalation.
Alarm Indicators
Alarm indicators on a ventilator screen show important warnings about patient breathing. These signals help caregivers quickly spot and fix issues. Understanding these alerts keeps patients safe and ensures proper ventilator function.
Alarm indicators play a vital role in ventilator management. They alert healthcare professionals to changes in a patient’s condition. Quick response to alarms can prevent complications. Understanding these alarms is crucial for patient safety.Common Alarm Types
Ventilators use different alarms for various conditions. The most common include:- High-pressure alarm:Indicates blocked airways or patient coughing.
- Low-pressure alarm:Signals leaks or disconnected tubing.
- Apnea alarm:Alerts when the patient stops breathing.
- High respiratory rate alarm:Warns of fast breathing rates.
Troubleshooting Alarms
When an alarm sounds, stay calm. Assess the situation methodically. Follow these steps:- Check for patient distress signs.
- Inspect all ventilator connections.
- Ensure tubing is not kinked or blocked.
- Review ventilator settings for accuracy.

Credit: itsairborne.com
Adjusting Settings
Adjusting the settings on a ventilator screen is a critical task that requires careful attention and understanding. Each parameter affects how the machine supports the patient’s breathing. Making the right changes can improve comfort and outcomes, but incorrect adjustments may cause harm.
When To Change Parameters
You should change ventilator settings based on the patient’s clinical condition and response. Signs like rising carbon dioxide levels, changes in oxygen saturation, or increased work of breathing signal a need for adjustment.
Regular monitoring of blood gases and vital signs helps guide these changes. For example, if a patient’s oxygen saturation drops, increasing the FiO2 or PEEP might be necessary. Always verify the reason behind abnormal readings before modifying parameters.
Ask yourself: Are these changes addressing the root cause or just masking symptoms? This mindset helps prevent unnecessary or harmful adjustments.
Impact On Patient
Each setting directly influences the patient’s respiratory effort and comfort. Increasing tidal volume can improve ventilation but may also risk lung injury if set too high.
Adjustments in respiratory rate affect how often the patient receives breaths, impacting CO2 removal. Sudden changes can cause discomfort or anxiety, so gradual modifications are often better tolerated.
Always watch for signs of distress or improvement after making changes. A patient’s feedback, even nonverbal cues, can guide whether the settings are helping or causing harm.
Clinical Scenarios
Clinical scenarios often require quick and accurate interpretation of ventilator screens. Understanding key signs on the screen helps healthcare providers make timely decisions. These scenarios include detecting low oxygen levels, identifying patient-ventilator mismatches, and spotting airway blockages. Each situation demands careful attention to specific parameters displayed on the ventilator.
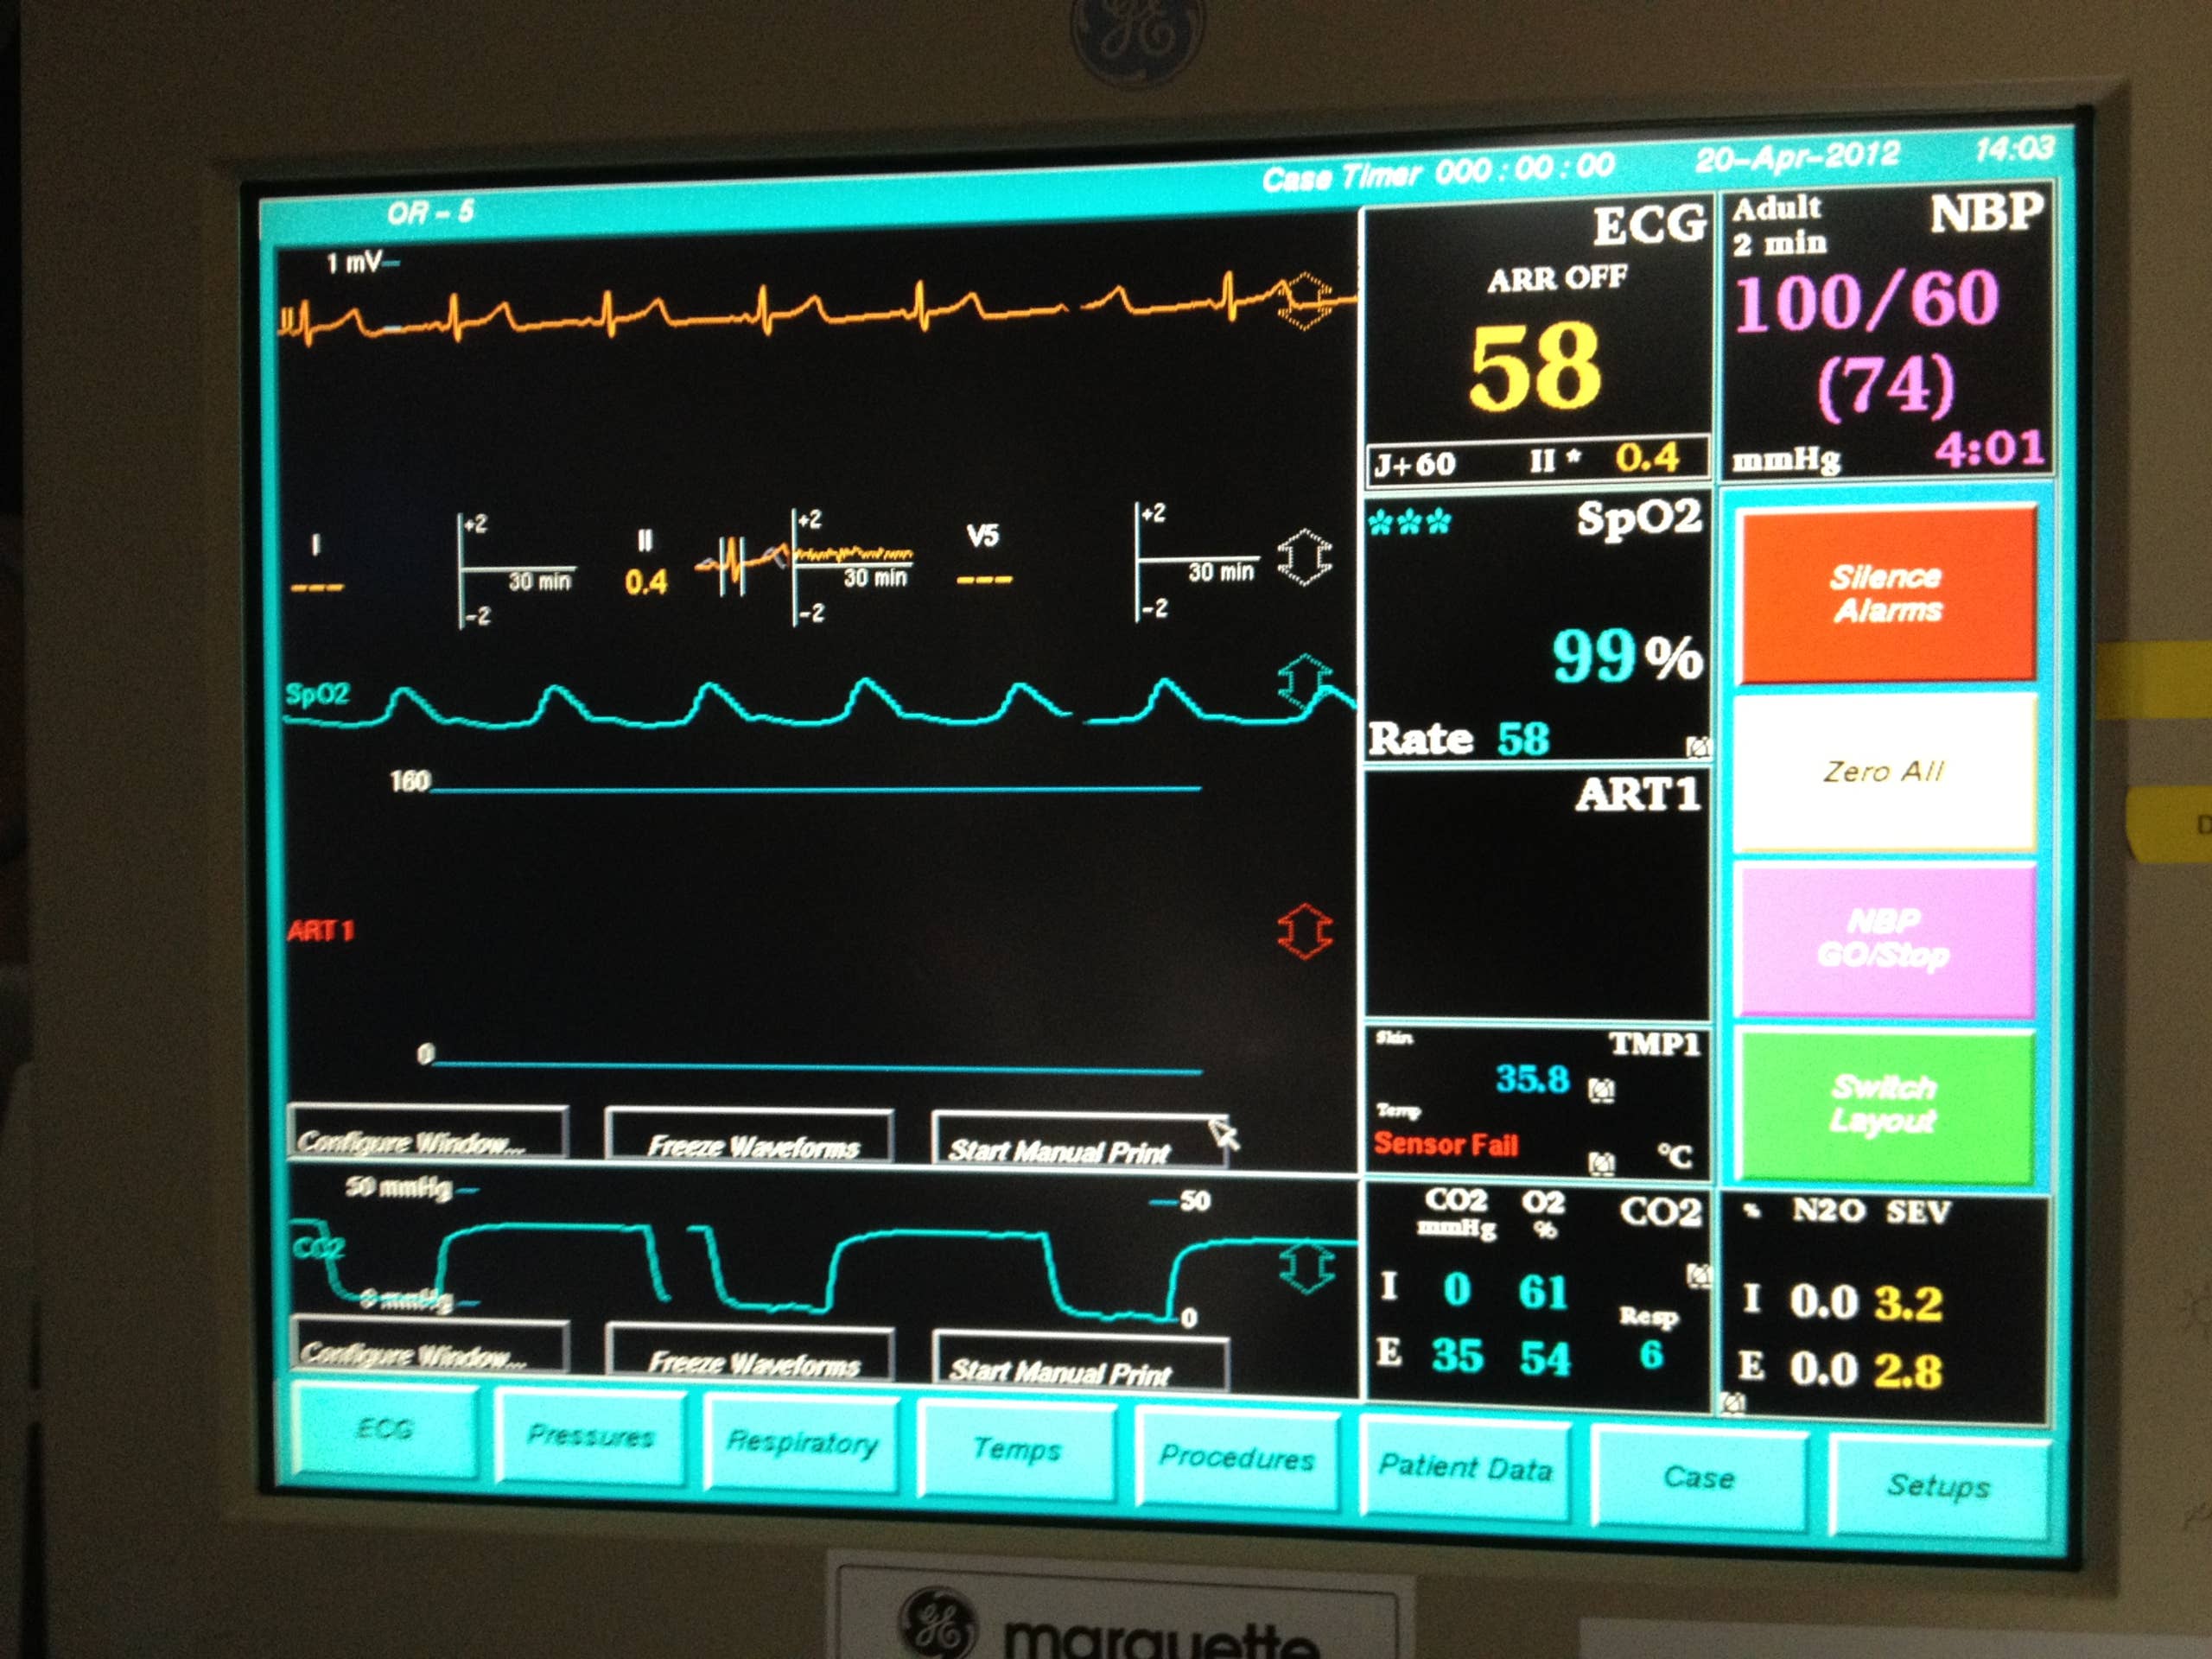
Hypoxemia Detection
Hypoxemia means low oxygen in the blood. The ventilator screen shows oxygen saturation (SpO2) and fraction of inspired oxygen (FiO2). A drop in SpO2 below 90% signals possible hypoxemia. Watch for alarms related to oxygen levels. Adjusting FiO2 or ventilation settings may be needed to improve oxygenation.
Patient-ventilator Asynchrony
Patient-ventilator asynchrony happens when the patient’s breathing does not match the ventilator’s cycles. Look for irregular breathing patterns on the flow and pressure waveforms. Signs include double triggering, missed breaths, or delayed cycling. Asynchrony can cause discomfort and reduce ventilation efficiency. Adjust settings like trigger sensitivity or inspiratory time to correct this.
Detecting Airway Obstruction
Airway obstruction blocks airflow and raises airway pressure. The screen shows increased peak inspiratory pressure (PIP) and changes in flow curves. Look for a prolonged expiratory phase or a sawtooth pattern on the waveform. Common causes include mucus plugs or bronchospasm. Clearing the airway or suctioning may be necessary to restore normal airflow.

Credit: www.youtube.com
Tips For Mastery
Understanding key numbers and symbols on a ventilator screen helps ensure proper patient care. Focus on reading waveforms and alarms carefully to track breathing patterns accurately. Practice regularly to build confidence and reduce errors.
Understanding how to read a ventilator screen is crucial for medical professionals working in critical care environments. Mastering this skill ensures patient safety and effective treatment. Here are some actionable tips that can help you become proficient in interpreting ventilator screens.Regular Monitoring
Make it a habit to check the ventilator screen regularly. This helps you notice any subtle changes in the patient’s condition. By frequently reviewing the data, you can quickly identify trends or abnormalities. Quick detection can be the difference between a minor adjustment and a major intervention. Ask yourself: Are you catching these changes in time?Collaborating With Team
Effective teamwork can enhance your understanding of ventilator readings. Discuss observations with colleagues to gain different perspectives. Team collaboration can lead to innovative solutions and improved patient care. Sharing insights and experiences makes the learning curve less steep for everyone involved. How often do you share your insights with your team?Continuing Education
Healthcare is always evolving, and so is technology. Participate in workshops and online courses to stay updated on the latest in ventilator technology. These educational opportunities can offer new techniques and insights into interpreting ventilator data. Continuous learning ensures you remain confident and competent. Are you investing in your ongoing education?Frequently Asked Questions
What Are The Key Parameters On A Ventilator Screen?
Key parameters include tidal volume, respiratory rate, FiO2, PEEP, and peak pressure. These help monitor lung function and patient status.
How Do I Interpret Tidal Volume On A Ventilator?
Tidal volume shows the air delivered per breath. Normal values vary by patient size and condition, guiding ventilation effectiveness.
Why Is Monitoring Fio2 Important On Ventilators?
FiO2 indicates oxygen concentration delivered to the patient. Monitoring prevents hypoxia and oxygen toxicity, ensuring safe oxygen therapy.
What Does Peep Indicate On A Ventilator Screen?
PEEP stands for Positive End-Expiratory Pressure. It keeps alveoli open, improving oxygenation and preventing lung collapse in ventilated patients.
Conclusion
Reading a ventilator screen takes practice and patience. Focus on key numbers like tidal volume and respiratory rate. Watch for alarms and understand their meanings. Keep learning bit by bit every day. This skill helps provide better patient care. Stay calm and double-check settings often.
Small steps lead to greater confidence. Ventilator screens tell important stories. Listen to them carefully.


