
Have you ever faced the tricky task of removing a glued mirror from your wall without causing damage? It can feel frustrating and even a little scary.
You want to keep your wall intact and avoid broken glass, but the mirror just won’t budge. Don’t worry—this guide will walk you through simple, effective steps to get that mirror off safely. By the end, you’ll have the confidence and know-how to handle the job like a pro.
Keep reading to discover the best techniques and tools to make this tricky task much easier for you.
Tools And Materials Needed
Removing a glued mirror from a wall requires careful handling and the right tools. Using proper materials reduces damage to both the mirror and the wall. Prepare everything before starting to make the process smooth and safe.
Protective Gear
- Safety goggles to protect your eyes from glass shards.
- Work gloves to protect your hands from sharp edges.
- Long-sleeve shirt to avoid skin cuts.
Cutting Tools
- Utility knife with a sharp blade to cut through adhesive.
- Wire or dental floss to slide behind the mirror and loosen glue.
Support And Lifting Tools
- Suction cups for a firm grip on the mirror surface.
- Putty knife or plastic scraper to gently pry edges.
- Soft cloth or towel to place under the mirror during removal.
Cleaning Supplies
- Adhesive remover or rubbing alcohol to clean glue residue.
- Soft sponge or cloth for wiping the wall and mirror.
- Bucket of warm water to help soften the glue.

Credit: www.reddit.com
Preparing The Work Area
Clear the area around the mirror to avoid accidents. Lay down a drop cloth to catch debris and protect the floor. Gather all necessary tools before starting the removal process.
Removing a glued mirror from a wall requires careful preparation. Before you begin, set up your work area for safety and efficiency. A well-prepared space helps avoid accidents and damage.Clear The Surrounding Area
Move furniture and items away from the mirror. Create ample space to work freely. Remove any decorations or fixtures nearby. This prevents damage and provides a clear path.Protect The Floor
Place a drop cloth or old sheet on the floor. This catches any falling debris. It also protects the flooring from scratches. Use a thick material for better protection.Gather Necessary Tools
Assemble the tools needed for the task. You will need a utility knife, pry bar, and safety gear. Having tools ready saves time and effort.Wear Safety Gear
Put on safety goggles and gloves. Protect your eyes and hands from sharp edges. Safety gear is essential for injury prevention.Ensure Adequate Lighting
Check that the area is well-lit. Good lighting helps you see clearly. It reduces the chance of mistakes and ensures precision.Check For Electrical Outlets
Identify any electrical outlets near the mirror. Ensure that power is off to avoid accidents. Safety is the top priority during removal.Safety Precautions
Removing a glued mirror from a wall can be risky without proper safety steps. Glass can break and cause injuries. Taking safety precautions protects you and your home.
Prepare your workspace carefully. Clear the area around the mirror to avoid tripping or knocking things over. Use tools with care and stay alert throughout the process.
Wear Protective Gear
Always wear safety glasses to protect your eyes from shards. Gloves are essential to avoid cuts from broken glass or sharp edges. Long sleeves and pants help shield your skin from scratches.
Use The Right Tools Safely
Select tools designed for removing glued items, like putty knives or scrapers. Avoid excessive force that can shatter the mirror. Handle tools firmly and keep fingers clear of blades.
Work Slowly And Carefully
Take your time to loosen the glue gently. Quick movements increase the risk of accidents. Watch for any signs of the glass cracking or breaking.
Protect The Surrounding Area
Lay down a drop cloth or thick blanket under the mirror. This catches any falling pieces and prevents damage to floors. Tape plastic sheeting around the mirror to contain dust and debris.
Have A First Aid Kit Ready
Keep basic first aid supplies nearby. Treat any minor cuts or scrapes immediately. Knowing where the kit is can save time during an emergency.
Loosening The Adhesive
Removing a glued mirror from a wall requires patience and care. The key is loosening the adhesive that holds the mirror firmly. This step makes the mirror easier to remove without damage. Two common ways to soften glue include using heat or applying solvents. Each method works differently but aims to weaken the bond between the mirror and wall.
Using Heat To Soften Glue
Heat makes many adhesives soft and flexible. Use a hairdryer or heat gun on low setting. Hold it a few inches away from the mirror’s edges. Move the heat source slowly to avoid overheating one spot. Warm the glued area for several minutes. The heat loosens the glue’s grip, helping the mirror to come off gently.
Test the glue by gently pushing the mirror. If it moves slightly, the heat worked. Avoid using high heat to prevent cracking the glass or damaging the wall paint.
Applying Solvents Safely
Solvents dissolve glue and make removal easier. Choose a solvent safe for your wall and mirror type. Common options include rubbing alcohol, vinegar, or commercial adhesive removers. Apply the solvent carefully around the mirror’s edge with a cotton swab or small brush.
- Wear gloves to protect your skin.
- Ventilate the room well to avoid fumes.
- Test the solvent on a small hidden spot first.
Let the solvent sit for a few minutes to break down the glue. Gently try to lift the mirror after applying. Repeat if needed, but avoid soaking the wall to prevent damage.
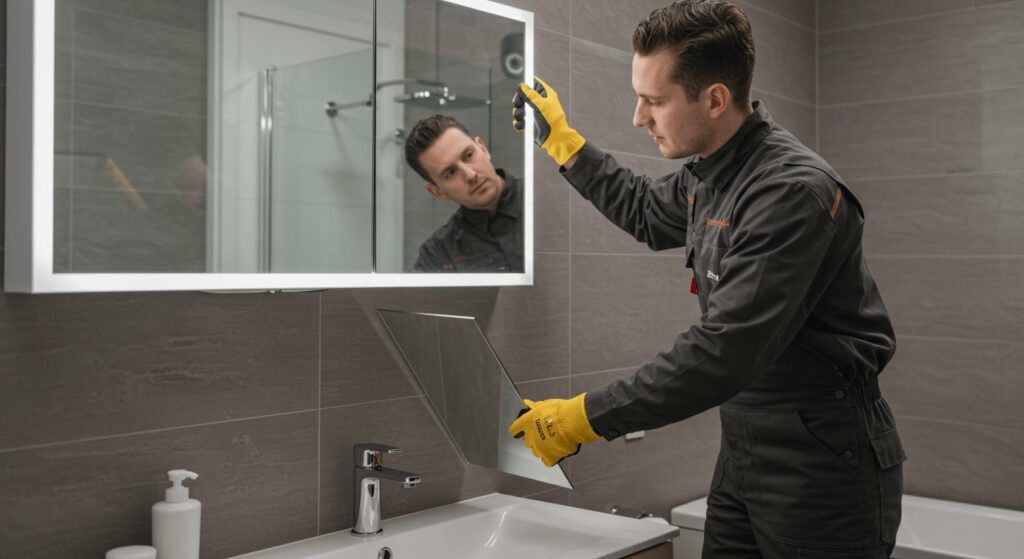
Removing The Mirror
Removing a glued mirror requires patience and care. The goal is to separate the mirror from the wall without breaking it or damaging the surface. Taking small, careful steps helps keep the mirror intact and ready for reuse or disposal.
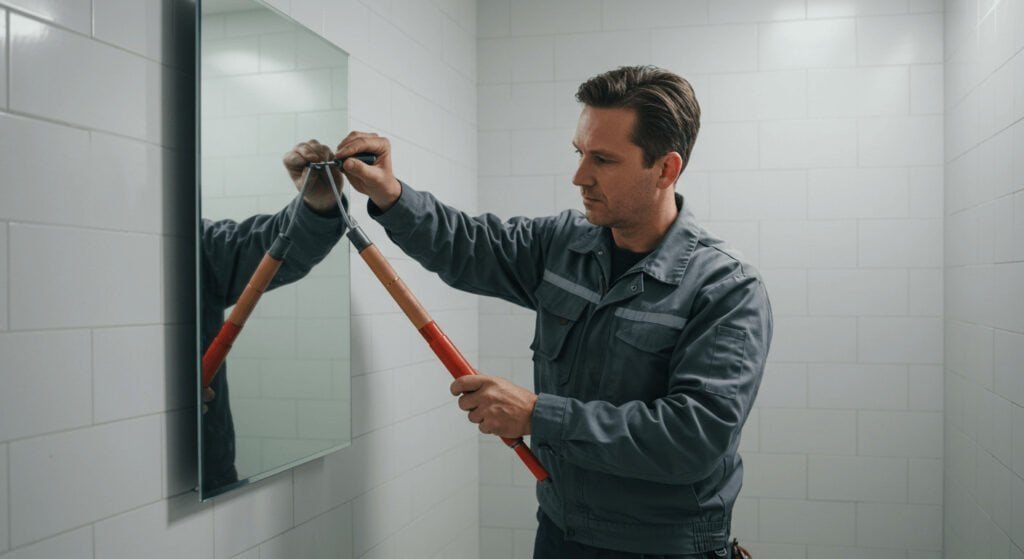
Gently Prying The Edges
Start by locating a small gap between the mirror and the wall. Use a thin, flat tool like a putty knife or a plastic card. Insert it carefully under the mirror’s edge. Move the tool slowly back and forth to loosen the glue. Avoid forcing the tool too hard to prevent cracks.
Work your way around the mirror’s edges. Pry gently at several points instead of one spot. This helps reduce stress on the glass. Keep the tool as flat as possible to avoid scratching the mirror or wall.
Handling The Mirror Carefully
Once the mirror starts to lift, support it with your hands. Hold it firmly but gently to avoid dropping it. If the mirror is large, ask for help to hold both sides. Keep the mirror upright to reduce the chance of breaking.
Place the mirror on a soft, flat surface after removal. Use blankets or foam to protect it from scratches. Dispose of or store the mirror safely to prevent accidents. Handle all glass with care and wear gloves for safety.

Credit: www.youtube.com
Cleaning Residue From The Wall
After successfully removing a glued mirror from your wall, you’re often left with stubborn adhesive residue. Cleaning this residue can feel frustrating, but it’s essential to restore the wall’s smooth surface and prepare it for repainting or new decor. The right approach makes all the difference between damaging your wall and achieving a clean finish.
Identify The Type Of Adhesive Left Behind
Not all glue residues are the same. Some adhesives soften with heat, while others respond better to solvents. Take a moment to check the texture and smell of the residue—this helps you pick the most effective cleaning method.
Use Gentle Solvents To Avoid Wall Damage
Try using household items like rubbing alcohol or vinegar before reaching for harsh chemicals. Apply a small amount on a cloth and gently rub the residue. This usually softens the glue without harming paint or drywall.
Scrape Off Residue Carefully
Once the adhesive softens, use a plastic scraper or an old credit card to lift it off. Avoid metal tools that can gouge your wall. Work slowly and steadily to prevent peeling paint or creating dents.
Clean The Wall With Warm Soapy Water
After scraping, wash the area with warm water and mild soap to remove leftover stickiness. This step refreshes your wall and helps spot any missed spots. Let the surface dry completely before any further work.
Consider Sanding For A Smooth Finish
If residue persists or the wall surface feels rough, lightly sand the area with fine-grit sandpaper. Sanding evens out imperfections and prepares the wall for repainting. Remember to wipe away dust with a damp cloth afterward.
Test Cleaning Solutions On A Small Area First
Before applying any solvent or cleaner over a large patch, test it on an inconspicuous spot. This simple step can save your wall from discoloration or damage. Have you ever skipped this and regretted it later? It’s worth the extra caution.
Repairing Wall Damage
Removing a glued mirror can leave your wall looking rough, with glue residue, holes, or even torn drywall. Repairing this damage is crucial to restore a smooth, clean surface that’s ready for repainting or rehanging. Taking the time to fix the wall properly saves you from future headaches and ensures your space looks polished.
Assessing The Damage
Start by closely examining the wall where the mirror was attached. Is there leftover glue, chipped paint, or gouges in the drywall? Understanding the extent of damage helps you decide which repair materials and tools you’ll need.
Look for small cracks or dents around the edges, as these can worsen over time if left untreated. You might find spots where the wall surface has peeled away with the mirror, which will need filling.
Removing Glue Residue Safely
Glue residue can be stubborn, but removing it is key for a smooth repair. Use a putty knife or scraper to gently lift and peel off thick glue patches.
For sticky areas, apply a cloth dampened with warm, soapy water or a mild adhesive remover. Test the remover on a hidden spot first to avoid damaging your paint or drywall.
Filling Holes And Cracks
Small holes and cracks require filling with spackle or joint compound. Use a putty knife to press the filler into the damaged spots, smoothing it out evenly.
Allow the filler to dry completely—this usually takes a few hours. Sand the area lightly with fine-grit sandpaper to achieve a flat surface that blends with the rest of the wall.
Priming And Painting The Repaired Area
After sanding, apply a primer to seal the patched spots. Primer helps paint stick better and prevents uneven color.
Once the primer dries, paint over the repair with your wall’s matching color. You might need two coats for full coverage and a seamless look.
Preventing Future Damage
Think about how the mirror was mounted to avoid similar damage next time. Could you use mirror clips or a frame that doesn’t require glue?
Choosing alternative mounting methods not only protects your walls but also makes future removals easier. What’s your plan to keep your walls damage-free going forward?
Credit: bfymirror.com
Frequently Asked Questions
How Do I Safely Remove A Glued Mirror From A Wall?
Use a utility knife to cut the glue around the mirror edges. Then, gently pry the mirror with a putty knife. Work slowly to avoid damage and wear safety gloves to protect your hands.
What Tools Are Needed To Remove A Glued Mirror?
You will need a utility knife, putty knife, adhesive remover, safety gloves, and protective eyewear. These tools help loosen the glue and safely detach the mirror without breaking it or damaging the wall.
Can I Reuse A Mirror After Removing It From The Wall?
Yes, if the mirror stays intact during removal. Clean off any adhesive residue carefully. Inspect for cracks or chips before reinstalling or repurposing the mirror.
How To Avoid Wall Damage When Removing A Glued Mirror?
Cut the glue carefully using a sharp utility knife. Use a putty knife to gently pry the mirror. Go slow and avoid forcing the mirror to prevent wall and mirror damage.
Conclusion
Removing a glued mirror takes patience and the right tools. Work slowly to avoid damage to your wall. Use heat or gentle prying to loosen the glue. Clean any leftover adhesive carefully once the mirror is off. Take your time and stay safe during the process.
Following these steps helps you remove the mirror with less stress. You can handle this task even without much experience. Now, your wall is ready for a new look or decoration.


