
Removing a glued mirror from your wall can feel like a tough and risky job. You might worry about damaging the wall or breaking the mirror.
But what if you knew a simple, safe way to get it done without stress? You’ll discover clear, step-by-step tips that make the process easier than you think. Whether you want to update your space or fix a problem, these methods will save you time and frustration.
Keep reading—you’re about to learn how to handle this task like a pro.

Credit: www.youtube.com
Tools Needed
Removing a glued mirror from a wall demands the right tools to avoid damage and injury. Having everything ready before you start saves time and frustration. Let’s look at the essential items you’ll need for a smooth removal process.
Safety Gear
Safety should be your first priority. Grab sturdy gloves to protect your hands from sharp edges or broken glass. Safety goggles are also a must to shield your eyes from shards or dust.
Cutting Tools
A utility knife or a razor blade will help you carefully slice through the adhesive around the mirror’s edges. Make sure the blade is sharp; dull blades can slip and cause accidents. Patience here is key—rushing can crack the mirror or damage the wall.
Heat Source
A heat gun or a hairdryer can soften the glue, making it easier to separate the mirror from the wall. Keep the heat moving to avoid overheating one spot, which can crack the glass. Have you ever noticed how a little warmth can make sticky things release?
Flat Tools For Prying
Use a putty knife or a thin pry bar to gently wedge between the mirror and the wall. Choose tools with a wide, flat edge to minimize pressure points. Avoid metal tools if you fear wall damage; plastic scrapers can work well but might need more effort.
Adhesive Remover
After the mirror is off, adhesive residue often remains. A commercial adhesive remover or rubbing alcohol will break down leftover glue. Test a small area first to ensure it doesn’t harm your wall’s paint or finish.
Support Materials
Consider having a helper hold the mirror or place it on a padded surface as you work. Thick blankets or foam sheets protect the glass and your floor. Do you have a spot ready to safely set the mirror down once removed?
Safety Tips
Protect your eyes and hands with safety gear before removing a glued mirror. Work slowly to avoid breaking the glass and causing injury. Ensure the area is clear to prevent accidents during the removal process.
Removing a glued mirror from the wall requires caution. Safety is a top priority. Mirrors can be heavy and fragile. Improper handling may lead to injury or damage. Follow these safety tips to ensure a smooth and secure removal process.Wear Protective Gear
Before starting, put on safety gear. Wear gloves to protect your hands. Use safety goggles to shield your eyes from glass shards. This gear minimizes the risk of injury.Clear The Area
Remove objects from the work area. Clear the space around the mirror. This reduces the chance of tripping or damaging items. Keep the floor free of obstacles.Use Proper Tools
Select the right tools for the job. Use a heat gun to soften the adhesive. A putty knife or wire can help pry the mirror off. Avoid sharp tools that might break the glass.Work With A Partner
A partner provides extra support. Mirrors can be heavy and awkward to handle alone. A second person helps guide and steady the mirror. It reduces the risk of dropping or breaking it.Handle The Mirror Carefully
Lift the mirror slowly and evenly. Use both hands for a firm grip. Avoid sudden movements or jerks. This helps prevent the mirror from cracking.Dispose Of Debris Safely
After removal, dispose of debris carefully. Use a broom and dustpan for small glass pieces. Place shards in a sturdy container. This ensures safe disposal without harming others.Preparing The Area
Before you start removing a glued mirror from your wall, setting up the area properly is crucial. It makes the process safer and helps protect your walls and belongings from damage. Taking time to prepare also reduces stress and unexpected messes.
Clear The Surrounding Space
Remove any furniture, decorations, or objects near the mirror. This gives you enough room to work and prevents accidental damage. Even small items like vases or picture frames should be moved to a safe spot.
Protect The Floor And Walls
Lay down a thick drop cloth or old blankets on the floor beneath the mirror. This catches any falling debris or glass shards if the mirror breaks. You might also want to tape cardboard or foam sheets around the mirror edges to shield the wall.
Gather Safety Gear
Wear safety goggles and thick gloves to protect yourself from sharp glass or adhesive residue. If you have a dust mask, use it to avoid inhaling any dust or particles released during removal. Safety is often overlooked but essential here.
Prepare Tools And Materials
Have all your tools within reach—putty knives, heat gun or hair dryer, adhesive remover, and a sturdy work surface for the mirror once detached. This avoids scrambling mid-task and keeps the process smooth. Think about what worked best when you fixed things around your home before.
Credit: bfymirror.com
Softening The Adhesive
Softening the adhesive is a key step to remove a glued mirror safely. This process weakens the glue’s hold on the wall. It makes it easier to detach the mirror without damage. Two common ways to soften adhesive are using heat or applying solvents. Each method suits different types of glue and surfaces.
Using Heat
Heat helps break down the adhesive’s bond. Use a hairdryer or heat gun on low setting. Keep the device moving to avoid overheating one spot.
- Hold the heat source about 6 inches from the mirror edge.
- Warm the area for 1 to 2 minutes to soften the glue.
- Test the glue by gently pressing with a plastic card or putty knife.
Heat works well with many glue types, especially silicone and glue tape. Avoid high heat as it can crack glass or damage paint.
Applying Solvents
Solvents dissolve or loosen the glue for easier removal. Choose a solvent that matches the glue type. Common solvents include rubbing alcohol, acetone, or commercial adhesive removers.
- Apply the solvent with a cotton ball or cloth at the glue edge.
- Let it sit for 5 to 10 minutes to penetrate the adhesive.
- Gently try to lift the mirror using a plastic card or putty knife.
Test the solvent on a small wall area first. Some solvents may damage paint or wallpaper. Use solvents in a well-ventilated space and avoid skin contact.
Removing The Mirror
Removing a glued mirror from the wall requires patience and care. The goal is to avoid breaking the glass or damaging the wall. Start by focusing on the edges where the glue holds the mirror firmly. Loosening these edges makes the next step easier and safer.
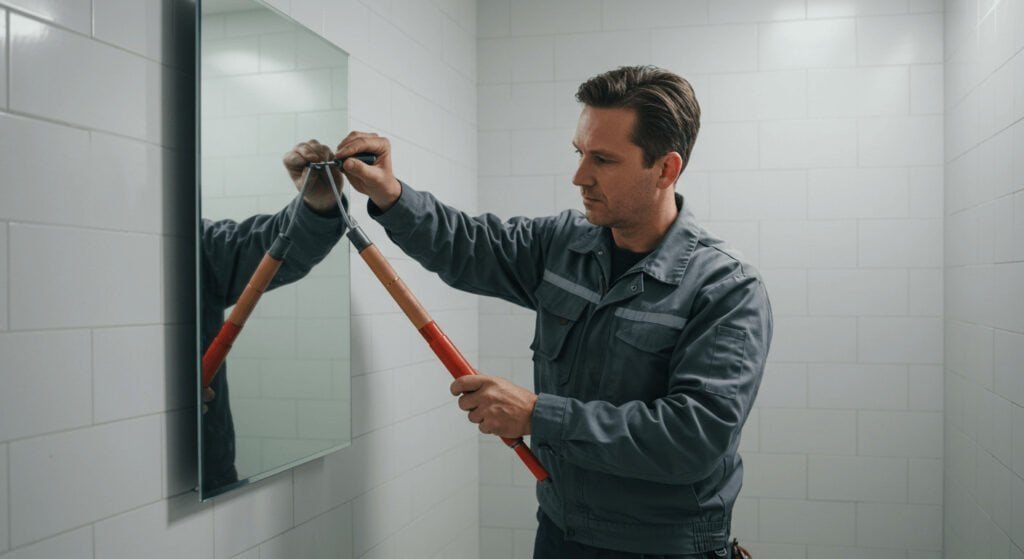
Loosening The Edges
Use a thin, flat tool like a putty knife or a plastic scraper. Gently insert it between the mirror and the wall at one corner. Move the tool slowly, working it along the edges to break the glue seal. Avoid forcing the tool too hard to prevent cracking the mirror.
If the glue is strong, apply heat with a hairdryer. Warm the edges to soften the adhesive. Keep the hairdryer moving to avoid overheating any spot. After heating, try to slide the tool again under the mirror’s edge. Repeat the process until the glue loosens enough.
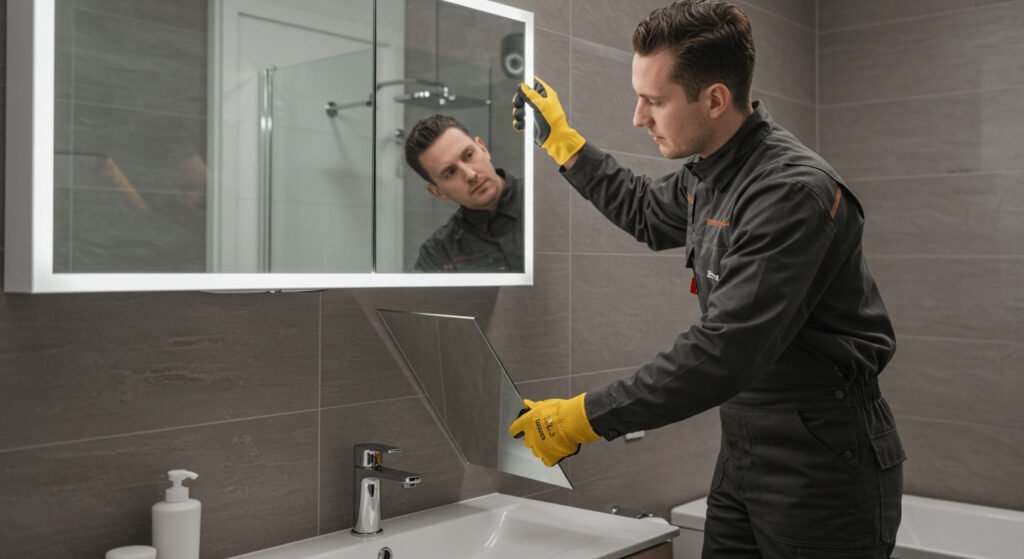
Prying The Mirror Off
Once the edges are loose, begin prying the mirror carefully. Use the flat tool or a wide putty knife to lift the mirror slightly. Work gently around the mirror, lifting bit by bit. Avoid pulling too fast or hard, as this can cause the mirror to break.
For larger mirrors, it helps to have a second person assist. They can hold the mirror steady as you pry. Place a soft cloth or blanket under the mirror to catch it when it comes off. This setup protects both the mirror and the floor.
Cleaning The Wall
After successfully removing a glued mirror from your wall, the next crucial step is cleaning the surface. This process prepares the wall for repainting or redecorating and ensures no sticky residue or damage compromises the look of your space. Taking time to clean thoroughly can save you from future headaches and give your wall a fresh start.
Removing Residue
Sticky glue residue can be stubborn and tricky to remove. Try using a gentle adhesive remover or rubbing alcohol applied to a soft cloth. Rub the area in small circular motions to lift off the residue without damaging the paint or drywall.
If you don’t have adhesive remover, cooking oil or peanut butter can sometimes break down the glue’s stickiness. Apply a small amount, let it sit for a few minutes, then wipe it away with a clean cloth. Always test a small hidden spot first to avoid discoloration.
Patience is key here. Rushing might cause more damage or leave smudges. Have you ever tried scraping off glue only to leave scratches behind? Avoid that by working gently and steadily.
Repairing Surface Damage
It’s common to find small holes, scratches, or paint peeling after removing a glued mirror. These imperfections need to be fixed before you repaint or hang something new. Use spackle or wall filler to cover holes and smooth out rough spots.
Apply the filler with a putty knife, then let it dry completely. After drying, sand the area lightly with fine-grit sandpaper until it feels smooth to the touch. This simple repair makes a big difference in the final appearance of your wall.
If paint has chipped off, consider touching up with matching paint or primer to create an even base. Do you notice uneven patches? Fixing those now will help your wall look flawless once you add new decor.
Disposing Of The Mirror Safely
Disposing of a glued mirror requires care and attention. Broken glass can cause injuries. Proper disposal also protects the environment. Follow safe steps to handle the mirror after removal.
Wrap The Mirror Securely
Use thick blankets or bubble wrap to cover the mirror. Wrap it tightly to prevent glass shards from falling out. Secure the wrapping with strong tape. This step keeps the glass contained during transport.
Use Protective Gloves And Gear
Wear heavy-duty gloves to protect your hands. Safety goggles shield your eyes from flying glass. Long sleeves and closed shoes add extra protection. Safety gear lowers the risk of cuts and injuries.
Check Local Disposal Rules
Many areas have rules for glass disposal. Some require you to take mirrors to special recycling centers. Others may ask you to label the package as “fragile glass.” Contact your local waste management for instructions.
Transport The Mirror Carefully
Place the wrapped mirror in a sturdy box. Fill empty spaces with packing peanuts or crumpled paper. Carry the box gently to avoid breaking the glass. Proper transport prevents accidents and damage.
Consider Recycling Options
Mirrors can sometimes be recycled with glass materials. Search for recycling centers that accept mirrors. Recycling helps reduce landfill waste. It also allows materials to be reused safely.

Credit: www.thehandymanjohannesburg.co.za
Frequently Asked Questions
How Do I Safely Remove A Glued Mirror From The Wall?
To safely remove a glued mirror, use a thin wire or fishing line to cut through the adhesive. Work slowly to avoid breaking the glass. Apply heat with a hairdryer to soften the glue if needed, and wear protective gloves for safety.
What Tools Are Needed To Remove A Glued Mirror?
You need a thin wire or fishing line, a hairdryer or heat gun, gloves, a putty knife, and adhesive remover. These tools help loosen the glue and safely detach the mirror without damaging the wall or glass.
Can I Reuse The Mirror After Removing It?
Yes, you can reuse the mirror if it remains intact and undamaged. Clean off any residual adhesive carefully. Inspect the edges for cracks before reinstalling or repurposing it.
How To Prevent Wall Damage When Removing A Glued Mirror?
Apply heat to soften the glue and use a wire to gently separate the mirror. Avoid prying aggressively. Use a putty knife to clean off leftover adhesive carefully to protect the wall surface.
Conclusion
Removing a glued mirror from a wall can be done safely with patience. Use the right tools and work slowly to avoid damage. Protect yourself with gloves and eye protection. Take breaks to stay careful and steady. Clean the wall well after removal for a smooth surface.
Following these steps helps keep your space safe and neat. Now, you can handle this task with confidence and ease.


