
Are you staring at a mirror wall that no longer fits your style or needs? Removing it might seem tricky, but you don’t have to be a pro to get the job done.
Imagine transforming your space quickly and safely, without causing damage or stress. In this guide, you’ll discover simple steps and insider tips that make removing a mirror wall easier than you think. Keep reading to find out how you can reclaim your walls and refresh your room today.
Prepare The Workspace
Preparing your workspace is a crucial part of safely and efficiently removing a mirror wall. Taking the time to organize your area minimizes risks and makes the process smoother. Have you ever rushed into a project only to find missing tools or unexpected messes slowing you down? Avoid that frustration by setting up properly first.
Clear The Area
Start by removing furniture and items near the mirror wall. This gives you plenty of room to work and prevents damage to your belongings. Even small objects on the floor can become tripping hazards, so clear everything within at least a three-foot radius.
Consider moving rugs and fragile decorations as well. If the mirror is large, you might want to temporarily relocate nearby electronics or plants. A tidy, open space helps you focus and reduces accidents.
Gather Necessary Tools
Before you begin, collect all the tools you’ll need in one place. Typical tools for mirror removal include:
- Utility knife or razor blade
- Putty knife or scraper
- Gloves and safety goggles
- Adhesive remover or rubbing alcohol
- Plastic sheeting or drop cloth
Having everything ready means you won’t waste time searching mid-task. Think about what worked or didn’t in past home projects to decide if you need any extra supplies.
Wear Protective Gear
Mirrors can shatter unexpectedly, so protecting yourself is non-negotiable. Always wear thick gloves to guard your hands from sharp edges. Safety goggles shield your eyes from glass shards and dust.
Long sleeves and pants add an extra layer of protection. If you have respiratory sensitivities, consider a dust mask, especially when scraping off old adhesive. Your safety should never be the part you skip.

Credit: www.youtube.com
Assess The Mirror Installation
Before you start pulling down a mirror wall, it’s crucial to understand how it’s installed. Assessing the mirror installation helps you avoid damage to your wall and ensures a smoother removal process. Taking time to examine the setup can save you from unexpected repairs or costly mistakes later on.
Check Mounting Type
Look closely at how the mirror is attached to the wall. Is it held by clips, brackets, or a frame? Sometimes, mirrors are simply hung like pictures using wires or hooks.
Knowing the mounting type tells you what tools you’ll need and how much effort removal might take. For example, mirrors secured with clips may come off easier than those glued directly to drywall. Have you noticed any screws or hardware around the edges? That’s a good clue.
Identify Adhesive Or Fasteners
If you don’t see any visible hardware, the mirror might be glued. Common adhesives include construction glue or mirror mastic. These can bond very tightly and require careful prying or solvents to loosen.
Fasteners like nails or screws are easier to spot but be prepared for some drywall patching afterward. If adhesive is involved, check if there’s any evidence of caulk or sealant around the edges. This often means you’ll need to work slowly to avoid cracking the mirror or damaging the wall.
Loosen The Mirror
Carefully loosen the edges of the mirror using a flat tool to avoid damage. Gently pry the mirror away from the wall, working slowly for safety.
Loosening a mirror wall is a careful task that requires patience and precision. The key is to soften the adhesive holding the mirror securely. This step is crucial for the safe removal of a mirror wall. Let’s explore how to loosen the mirror effectively.Use Heat To Soften Adhesive
Heat is an effective way to weaken the adhesive bond. Use a hairdryer or a heat gun. Direct the heat along the edges of the mirror. Move the tool slowly and evenly. This softens the glue without damaging the wall. Keep the heat moving to prevent overheating any spot.Pry Gently With Tools
Once the adhesive is soft, use prying tools. Plastic putty knives work well. Insert the tool between the mirror and the wall. Apply gentle pressure to separate the mirror. Work slowly to avoid cracking the glass. Continue around the mirror until it loosens completely.Remove The Mirror Safely
Removing a mirror wall requires care and attention to avoid damage and injury. Safety is the top priority during this task. Taking the right steps helps protect both the mirror and yourself.
Lift Mirror Carefully
Start by loosening the edges of the mirror gently. Use a putty knife or similar tool to separate the mirror from the wall. Avoid forcing or prying aggressively. Hold the mirror firmly with both hands. Lift it slowly and steadily to prevent cracks or breaks. Keep your body close to the mirror to maintain control.
Enlist Help For Large Mirrors
Large mirrors are heavy and hard to manage alone. Ask a friend or family member to assist you. Two people can lift and carry the mirror more safely. Plan your moves before lifting to avoid sudden shifts. Communicate clearly during the process. Use protective gloves to improve grip and prevent cuts.
Handle Adhesive Residue
Removing a mirror wall often leaves behind stubborn adhesive residue that can be tough to clean. This sticky leftover not only looks messy but can also interfere if you plan to repaint or install something new. Handling this residue carefully will save you time and prevent damage to your wall.
Scrape Off Remaining Glue
Start by gently scraping off the thickest parts of the adhesive. Use a plastic scraper or putty knife to avoid scratching your wall’s surface. Be patient and work slowly to peel away the residue without gouging the drywall or plaster.
If the glue feels too hard, soften it by applying a warm, damp cloth for a few minutes. This loosens the adhesive, making scraping easier and less likely to damage the wall. Have you tried warming stubborn glue before scraping? It often makes a big difference.
Use Cleaning Solutions
After scraping, some sticky spots might still cling to the wall. Apply a cleaning solution like rubbing alcohol, vinegar, or a commercial adhesive remover. These help break down the glue’s bonds and make wiping it off simpler.
Always test your chosen cleaner on a small, hidden area first to avoid discoloration. Use a soft cloth or sponge to gently rub the residue, then wipe the wall clean with water. Remember, strong chemicals can damage paint or wallpaper, so choose your cleaner wisely.
Repair Wall Surface
After removing a mirror wall, your wall surface will likely have imperfections that need fixing before it looks good again. Repairing the wall surface is essential to restore a smooth, clean finish. This process involves filling holes and cracks, sanding the surface, and finally repainting or refinishing.
Fill Holes And Cracks
Start by inspecting the wall for any holes or cracks left from the mirror removal. Use a quality spackling paste or joint compound to fill these areas. Apply it with a putty knife, pressing firmly to fill gaps completely.
Allow the filler to dry fully, which usually takes a few hours. If necessary, apply a second layer to ensure a level surface. Have you ever skipped this step and regretted it when the paint didn’t look smooth?
Sand And Smooth Surface
Once the filler is dry, sand the patched areas with fine-grit sandpaper. Sanding helps blend the repair into the surrounding wall and removes any rough spots. Use a sanding block or sponge to keep the surface even.
Don’t forget to wipe away dust with a damp cloth before moving to the next step. A smooth wall not only looks better but also makes painting easier and more effective.
Repaint Or Refinish Wall
Repainting the wall refreshes its appearance and hides all repairs. Choose a paint that matches your existing wall color or consider a new shade to update your space. Use a primer first if you worked with patching compounds, as it improves paint adhesion.
Apply at least two coats of paint, letting each coat dry completely. Taking your time here guarantees a flawless finish that hides any previous damage. How much difference can a fresh coat of paint make in your room’s vibe?
Dispose Of Mirror Properly
Disposing of a mirror properly is essential to keep yourself and others safe, and to protect the environment. Mirrors are made of glass and sometimes other materials that require careful handling. If you rush this step or ignore local rules, you might cause injuries or fines.
Wrap For Safety
Before throwing your mirror away, wrap it carefully to avoid sharp edges causing harm. Use thick blankets, bubble wrap, or old towels to cover the entire surface. Secure the wrapping with strong tape to keep it from slipping off during transport.
Consider adding a cardboard layer around the mirror after wrapping. This extra protection helps prevent breakage and protects sanitation workers handling the waste. Have you ever seen broken glass scattered at a dump? Proper wrapping stops that from happening.
Follow Local Disposal Guidelines
Every area has different rules for disposing of large glass items like mirrors. Some places accept them with regular trash, while others require special drop-off locations or recycling centers. Check your city or town’s website or call waste management to learn the proper procedure.
Some facilities ask you to label the mirror as “glass” to alert handlers. Others may charge a small fee or require an appointment. Knowing these details ahead saves you time and prevents illegal dumping, which can hurt your community.

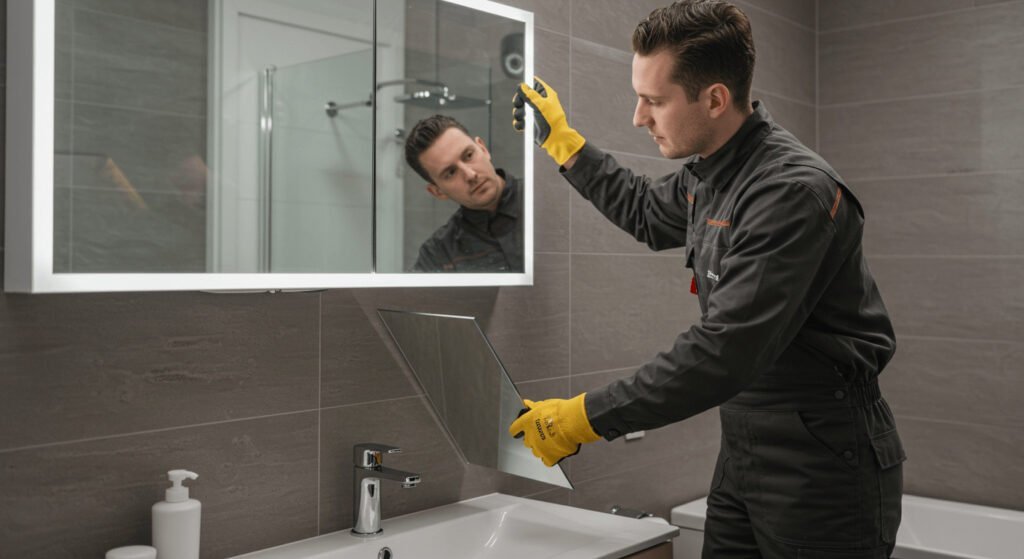
Credit: www.youtube.com
Credit: bfymirror.com
Frequently Asked Questions
How Do I Safely Remove A Mirror Wall?
Start by protecting the floor and wearing safety gloves. Score the edges with a utility knife. Gently pry the mirror using a putty knife or suction cups. Remove adhesive residue with a scraper and adhesive remover.
What Tools Are Needed To Remove A Mirror Wall?
Essential tools include safety gloves, utility knife, putty knife, suction cups, scraper, and adhesive remover. A drop cloth protects surfaces. Having these tools ensures safe and efficient mirror wall removal.
How To Handle Mirror Wall Adhesive Removal?
Apply an adhesive remover or warm soapy water to soften the glue. Use a scraper carefully to avoid wall damage. Repeat as needed until all residue is gone. Clean the surface thoroughly after removal.
Can I Remove A Mirror Wall Without Damaging Drywall?
Yes, by scoring the mirror edges and prying gently, you minimize drywall damage. Use appropriate tools and avoid excessive force. Be patient to ensure the drywall stays intact during removal.
Conclusion
Removing a mirror wall can seem tricky but is doable with care. Take your time and follow each step closely. Use the right tools to avoid damage to your wall. Safety matters—wear gloves and eye protection throughout the process. After removal, clean the area well and check for any needed repairs.
This simple guide helps you handle the task smoothly and safely. Your space will look fresh and new without the mirror wall. Give yourself confidence to complete the job well.


