
Have you ever stood in front of a large mirror and wondered how to take it down without causing damage or injury? Removing a big mirror from your wall can feel tricky and even risky if you don’t know the right steps.
But don’t worry—this guide will walk you through simple, safe methods to get the job done smoothly. By the end, you’ll feel confident handling your mirror removal like a pro, saving time and avoiding costly mistakes. Ready to learn how to remove your large mirror with ease?
Let’s dive in.

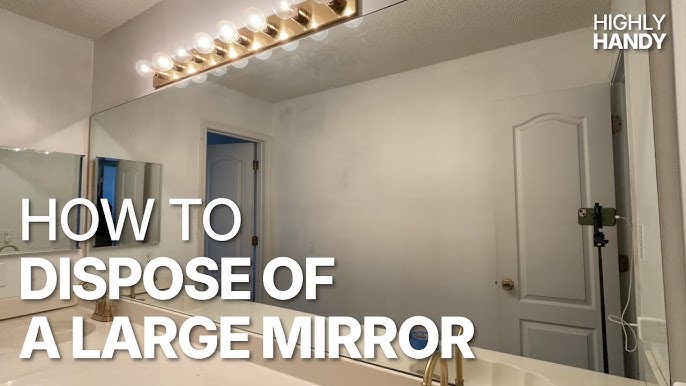
Credit: www.youtube.com
Tools Needed
Removing a large mirror from your wall requires more than just muscle. Having the right tools at hand makes the task safer and smoother. Before you get started, gather everything you need to avoid interruptions and reduce the risk of damage or injury.
Essential Equipment
Start with a sturdy utility knife. It helps cut through any caulking or adhesive holding the mirror in place. A putty knife or a flat pry bar is crucial to gently separate the mirror from the wall without cracking it.
You’ll also want a pair of suction cups designed for glass. These provide a secure grip on the mirror’s surface, making it easier to lift and carry without dropping. Don’t forget a step ladder if your mirror is mounted high, so you can work comfortably and safely.
Safety Gear
Protect yourself with safety goggles to shield your eyes from glass shards or dust. Thick gloves are equally important—they guard your hands against sharp edges and accidental cuts. Wearing long sleeves and sturdy shoes adds an extra layer of protection during the removal process.
Have a first aid kit nearby just in case. Think about your safety first—would you risk a quick job without the right gear? Preparing properly means you avoid injuries and keep the mirror intact for reuse or disposal.
Preparing The Area
Preparing the area before removing a large mirror is essential to keep you safe and protect your space. Taking time to organize and shield your surroundings can save you from costly damages and unexpected accidents. Let’s focus on getting your area ready so the removal process goes smoothly.
Clearing The Space
Start by moving furniture and decorative items away from the mirror. This gives you enough room to work comfortably and reduces the chance of knocking things over. Don’t forget to remove rugs or any objects on the floor that could cause you to trip while handling the mirror.
Think about how much space you’ll need to safely carry the mirror once it’s off the wall. Giving yourself extra room is better than squeezing into a tight spot. If you have pets or children, consider keeping them out of the area during the removal.
Protecting Surroundings
Cover the floor and nearby furniture with thick drop cloths or old blankets. Glass shards can fall unexpectedly, so a protective layer can prevent scratches or stains. Use painter’s tape to secure the covers so they don’t slide around as you work.
Don’t forget the walls next to the mirror. Applying corner guards or padding can help avoid dents or chips if the mirror bumps against them. Also, wearing safety goggles and gloves protects you from potential glass splinters—never skip this step for your own safety.
Inspecting The Mirror Mount
Check how the mirror is attached to the wall before removal. Look for screws, clips, or brackets holding the mount securely. Understanding the mount type helps avoid damage during removal.
Inspecting the mirror mount is the first step in safely removing a large mirror from your wall. Understanding how your mirror is mounted helps prevent damage. It also ensures a smooth removal process. Let’s explore the different types of mounts and identify how your mirror is secured.Types Of Mounts
Mirrors can be mounted using various methods. Each requires a specific approach for removal. Here are common types:- Brackets:Metal or plastic clips hold the mirror in place. These are often visible at the corners.
- Cleats:A wooden or metal strip supports the mirror. The mirror hangs on this cleat.
- Frames:The mirror is held within a decorative frame. The frame is usually attached to the wall.
Checking For Adhesives Or Screws
Adhesives and screws are common in mirror mounts. Identifying them is crucial before removal. Start by inspecting the mirror’s edges and corners. Look for screws or nails securing it. Use a flashlight to check for adhesive behind the mirror. Feel for any resistance when gently pulling on one side. If the mirror is glued, adhesive might be holding it.Removing Screws Or Brackets
Removing screws or brackets is a crucial step when taking down a large mirror from your wall. It requires care to avoid damage to both the mirror and the wall surface. Knowing how to handle these fasteners properly can save you time and frustration.
Using The Right Tools
Choosing the correct tools makes all the difference. A screwdriver that fits the screw head snugly prevents stripping and slipping. If your screws have a Phillips head, use a Phillips screwdriver; for flathead screws, a flat screwdriver works best.
Sometimes, you may need a power drill with a screwdriver bit to speed up the process. But be cautious with power tools—too much torque can damage the screw or wall. Having a magnetic screwdriver can help keep screws from falling once they’re loose.
Handling Stubborn Fasteners
What if the screws refuse to budge? Applying a little penetrating oil can loosen rusted or stuck screws. Let it sit for 10-15 minutes before trying again.
If the screw head is stripped, try using rubber bands for extra grip or switch to pliers to gently twist it out. In extreme cases, carefully drilling out the screw might be necessary, but only if you’re comfortable with that level of repair.
Don’t rush this part. Patience and the right approach prevent damage to your wall and mirror frame. Have you ever dealt with a screw that just wouldn’t come out? How did you manage it?
Detaching Adhesive Mirrors
Removing a large mirror that’s stuck to the wall with adhesive can feel like a daunting task. The key lies in detaching it carefully without damaging your wall or the mirror itself. Understanding how the adhesive behaves and applying the right techniques will save you time and stress.
Softening Adhesive
Adhesive used for mirrors is designed to hold strong, but it softens under heat. You can use a hairdryer or a heat gun set on low to warm up the edges of the mirror. Hold the heat source about 6 inches away and move it slowly around the perimeter for a few minutes.
Heating loosens the glue’s grip, making it easier to separate the mirror from the wall. Be cautious not to overheat, as excessive heat can crack the glass. Have patience as this step often takes several passes to get the adhesive pliable enough.
Careful Separation Techniques
Once the adhesive is softened, the next challenge is to gently pry the mirror away without causing damage. Slide a thin, flexible tool like a putty knife or a dental floss string behind the mirror’s edge.
- If using a putty knife, wiggle it slowly to create a gap and gradually work it along the adhesive line.
- If you choose dental floss, use a sawing motion to cut through the softened glue.
Ask yourself: Are you applying steady, even pressure? Sudden force risks breaking the mirror or tearing the wall surface. Keep going slowly, retreating to apply more heat if you hit resistance. This method might test your patience, but it protects your walls and mirror effectively.

Credit: www.youtube.com
Lifting The Mirror Safely
Lifting a large mirror from the wall requires care and attention to prevent damage and injury. Mirrors can be surprisingly heavy and fragile, so handling them safely is crucial. Knowing the right techniques will make the process smoother and protect both you and your mirror.
Proper Lifting Methods
Start by assessing the mirror’s size and weight before you lift. Position your hands firmly on the edges, avoiding pressure on the glass itself.
Bend your knees and keep your back straight while lifting. This posture reduces strain and helps you maintain control.
Use your legs to power the lift, not your back. This simple adjustment can prevent serious injury.
Working With A Partner
Large mirrors almost always require two people to lift safely. Coordinate with your partner before you begin moving the mirror.
Agree on commands like “lift,” “stop,” and “set down” to keep communication clear. This helps avoid sudden movements that could lead to accidents.
Stand on opposite sides and lift together evenly. Balancing the weight between two people prevents the mirror from tipping or breaking.
Cleaning The Wall After Removal
After removing a large mirror from your wall, you might notice leftover adhesive, dust, or even small damage. Cleaning the wall properly is key to preparing the surface for repainting or hanging something new. Taking your time here will save you effort later and make your space look fresh and flawless.
Removing Residue
Sticky residue from glue or tape can be stubborn. Start by gently scraping off any thick bits with a plastic scraper or an old credit card to avoid damaging the wall. Then, dampen a cloth with warm soapy water and rub the area to soften the leftover adhesive.
If the residue remains, try rubbing a small amount of rubbing alcohol or vinegar on a cloth and test it on a hidden spot first. These liquids can break down sticky substances without harming most paint finishes. Remember, patience is your best friend here—work slowly and check your progress frequently.
Repairing Wall Damage
Large mirrors often leave behind small holes or dents from screws, nails, or mounting brackets. Use a putty knife to apply a lightweight spackling compound to fill any holes or cracks. Smooth it out evenly and let it dry completely according to the product instructions.
Once dry, lightly sand the repaired spots with fine-grit sandpaper until smooth and flush with the wall surface. This step is crucial for a seamless look, especially if you plan to repaint. Have you ever noticed how even tiny bumps can stand out after a fresh coat of paint? Fixing them now avoids that problem.

Credit: www.youtube.com
Frequently Asked Questions
How Do I Safely Remove A Large Mirror From The Wall?
To safely remove a large mirror, first protect the floor with a soft cloth. Use gloves to avoid cuts. Gently pry the mirror from the wall using a putty knife or similar tool. Enlist help to hold and lower the mirror carefully to prevent damage.
What Tools Are Needed To Remove A Wall-mounted Mirror?
Common tools include a putty knife, gloves, a pry bar, and possibly a screwdriver. These tools help loosen adhesive or screws securing the mirror. Protective materials like blankets or cardboard protect the mirror and floor during removal.
Can I Remove A Mirror Without Damaging The Wall?
Yes, to minimize wall damage, gently pry the mirror off using a putty knife. Work slowly to avoid pulling off paint or drywall. After removal, repair minor holes or marks with spackle and repaint if needed.
How Do I Handle Mirror Adhesive During Removal?
Heat the adhesive with a hairdryer or heat gun to soften it. Carefully insert a putty knife behind the mirror to separate it from the wall. Work slowly to avoid breaking the glass or damaging the wall surface.
Conclusion
Removing a large mirror from the wall can seem tough. Take your time and follow safety steps carefully. Use the right tools to avoid damage. Ask someone to help hold the mirror steady. Clean the wall after removal for a fresh look.
With patience and care, you can do it yourself. Keep these tips handy for your next mirror project. Simple steps make the job easier and safer. You’re ready to remove that mirror without stress.


