
Are you tired of fumbling in the dark or constantly flipping switches to turn on your lights? Setting up motion sensor lights with a light switch can change that instantly.
Imagine your lights turning on automatically the moment you step into a room, saving you time and energy. In this guide, you’ll learn simple steps to install and adjust motion sensor lights so they work perfectly for your home. Keep reading, and you’ll discover how easy it is to boost your home’s convenience, security, and energy savings all at once.
Choosing The Right Motion Sensor Light
Choosing the right motion sensor light can transform your home’s safety and convenience. It’s not just about picking any sensor; it’s about finding one that fits your specific needs and environment. Understanding your options helps you make a smarter choice that saves energy and enhances security.
Types Of Motion Sensor Lights
Motion sensor lights come in several types, each designed for different uses and locations.
- Indoor Sensor Lights:Ideal for hallways, closets, and rooms where you want automatic lighting without flipping switches.
- Outdoor Sensor Lights:Built to withstand weather conditions, perfect for driveways, gardens, and entryways.
- Floodlights with Motion Sensors:Provide a broad beam of light and are great for security purposes.
- Compact Sensor Lights:Small and discreet, suitable for tight spaces or as accent lighting.
Ask yourself where you want the light to work. Is it for security, convenience, or both? Your answer will guide you towards the right type.
Factors To Consider Before Buying
Before purchasing, consider the sensor’s range and sensitivity. You don’t want a light that triggers every small movement or one that misses people entirely.
- Detection Range:Check the distance and angle the sensor covers. A wider range is better for outdoor security.
- Light Duration:Look for adjustable timers so you control how long the light stays on after activation.
- Power Source:Decide between wired, battery-operated, or solar-powered lights based on your installation options.
- Brightness Level:Choose a brightness that matches the area’s need—too bright can be intrusive, too dim might be ineffective.
- Weather Resistance:For outdoor lights, ensure they have a good IP rating to handle rain, dust, and temperature changes.
Think about your routine and the environment around your home. Could a solar-powered light reduce your electricity bills? Or would a wired model offer more reliability? These questions help you pick the best fit for your lifestyle.
Gathering Necessary Tools And Materials
Before setting up your motion sensor light switch, gather all necessary tools and materials. Having everything ready saves time and makes installation smoother. This preparation ensures safety and helps avoid interruptions.
Essential Tools For Installation
- Screwdriver (flathead and Phillips)
- Wire stripper and cutter
- Voltage tester
- Electrical tape
- Wire nuts
- Drill with bits (if new holes are needed)
- Measuring tape
Safety Equipment To Use
- Insulated gloves to prevent electrical shocks
- Safety goggles to protect your eyes
- Non-slip shoes for stable footing
- Flashlight or portable light source
- Fire extinguisher nearby, just in case
Preparing The Installation Area
Clear the area around the light switch to ensure easy access. Turn off the power at the circuit breaker for safety before starting. Make sure the wall surface is clean and dry for proper installation.
Preparing the installation area is crucial for setting motion sensor lights. A well-prepared area ensures a smooth installation process. It also minimizes risks and enhances safety. Before starting, gather necessary tools and equipment.Turning Off Power Supply
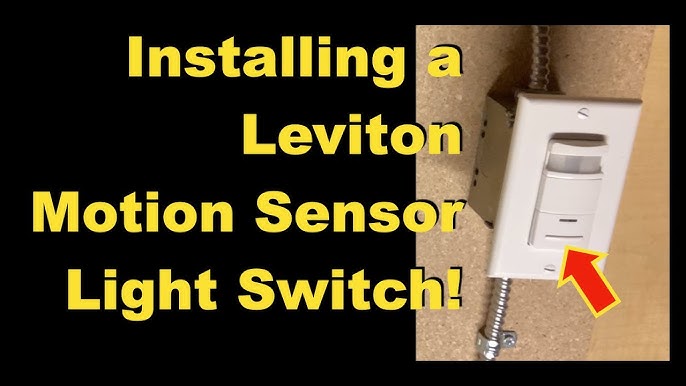
Safety is the top priority. First, turn off the power supply to the light switch. Find the main electrical panel in your home. Locate the circuit breaker for the light switch. Flip the switch to the “off” position. Use a voltage tester to confirm the power is off. This step prevents electric shock and ensures safety.Removing Existing Light Switch
Once the power is off, remove the existing light switch. Use a screwdriver to take off the switch plate cover. Unscrew the mounting screws holding the switch in place. Pull the switch gently from the wall. Note the wire connections before disconnecting them. This helps in connecting the new motion sensor switch correctly. Handle the wires carefully to avoid damage.
Credit: www.youtube.com
Wiring The Motion Sensor Light Switch
Wiring a motion sensor light switch might seem tricky at first, but breaking it down makes the process manageable. Getting your wires connected correctly ensures your sensor works perfectly and safely. Let’s look closely at how to identify the wires in your setup and connect them to the sensor switch.
Identifying Wires
Before touching any wires, turn off the power at the circuit breaker. Use a voltage tester to confirm no electricity is flowing.
Most homes have three main wires in the switch box:
- Line (Hot) wire:Brings power from the electrical panel.
- Load wire:Sends power to the light fixture.
- Neutral wire:Completes the electrical circuit.
Sometimes you’ll see a ground wire, usually green or bare copper. It’s crucial for safety but often overlooked.
Not every switch box has all these wires visible. Does your box have a bundle of white wires twisted together? That’s usually the neutral. How can you tell which is line and which is load? You might need to test or trace wires carefully.
Connecting Wires To The Sensor Switch
Once you know which wire is which, it’s time to connect them to your motion sensor switch. Your sensor switch will have labeled terminals such as “Line,” “Load,” “Neutral,” and “Ground.”
- Attach the line wireto the terminal marked “Line.”
- Connect the load wireto the terminal marked “Load.”
- Join the neutral wireto the “Neutral” terminal, if your sensor requires one.
- Connect the ground wireto the green screw or ground terminal.
Use wire nuts to secure connections and gently tuck wires back into the box. Tight connections avoid flickering or malfunction.
Here’s a quick checklist to avoid common pitfalls:
| Common Mistake | What Happens | How to Fix |
|---|---|---|
| Mixing line and load wires | Sensor won’t work or light stays on | Retest wires and swap connections |
| Skipping neutral wire | Sensor may not power on | Ensure neutral is connected if sensor needs it |
| Loose wire nuts | Intermittent lighting or sensor failure | Tighten nuts securely |
Have you ever had a light switch that just wouldn’t behave? Often, it’s a wiring detail like these. Taking time to identify and connect wires properly saves you frustration and keeps your home safe.
Mounting The Motion Sensor Switch
Mounting the motion sensor switch correctly ensures it works properly and lasts longer. Proper placement helps detect movement accurately and controls lighting efficiently. Take time to mount the switch firmly and test its position before finalizing.
Securing The Switch To The Wall
Start by turning off the power to the switch. Remove the old switch carefully and disconnect wires. Connect the motion sensor switch wires according to instructions. Push the wires neatly into the electrical box.
Align the switch with the wall box holes. Use screws provided to secure the switch to the wall. Tighten screws evenly to avoid tilting. Make sure the switch sits flush against the wall surface. Loose mounting can cause poor sensor performance.
Testing The Switch Placement
Turn the power back on after securing the switch. Walk around the area to check sensor detection range. Adjust the angle if the sensor misses movement. Avoid pointing the sensor towards direct light or heat sources.
Test different distances and heights for best detection. Confirm the light turns on and off smoothly. Small adjustments can improve sensor accuracy and lighting control. The goal is to cover the desired area without false triggers.
Configuring Sensor Settings
Configuring the sensor settings of your motion sensor light switch is crucial for getting the best performance. Proper adjustments ensure your light responds exactly when you need it, avoiding unnecessary triggers or missed detections. Let’s dive into how you can fine-tune these settings to match your space and lifestyle.
Adjusting Sensitivity And Timer
Sensitivity controls how easily your sensor detects movement. If it’s too high, the light might turn on with minor motions like a passing car or a pet. Too low, and it might not detect you until you’re very close.
Try starting with a medium sensitivity setting. Walk around the sensor area to test its response. Adjust gradually until it detects you reliably without false alarms.
The timer setting determines how long the light stays on after detecting motion. If it’s too short, the light might turn off while you’re still nearby. Too long, and it wastes energy by staying on unnecessarily.
Think about how much light you need when moving through the space. For instance, in a hallway, a shorter timer might work well, while in a backyard, a longer timer could be more practical.
Setting Detection Range
The detection range sets how far the sensor can “see” movement. You don’t want it to trigger from across the street or miss someone approaching from a short distance.
Check your sensor’s manual for maximum range specs. Then, adjust it to cover just the area you want monitored—like a doorway or driveway.
If your sensor has adjustable lenses or angle settings, use them to narrow or widen the detection zone. This prevents unwanted triggers from areas outside your focus.
Ask yourself: Is the sensor covering the right spots? Would adjusting the range improve convenience or security? Small tweaks here can make a big difference in how well your lights perform.
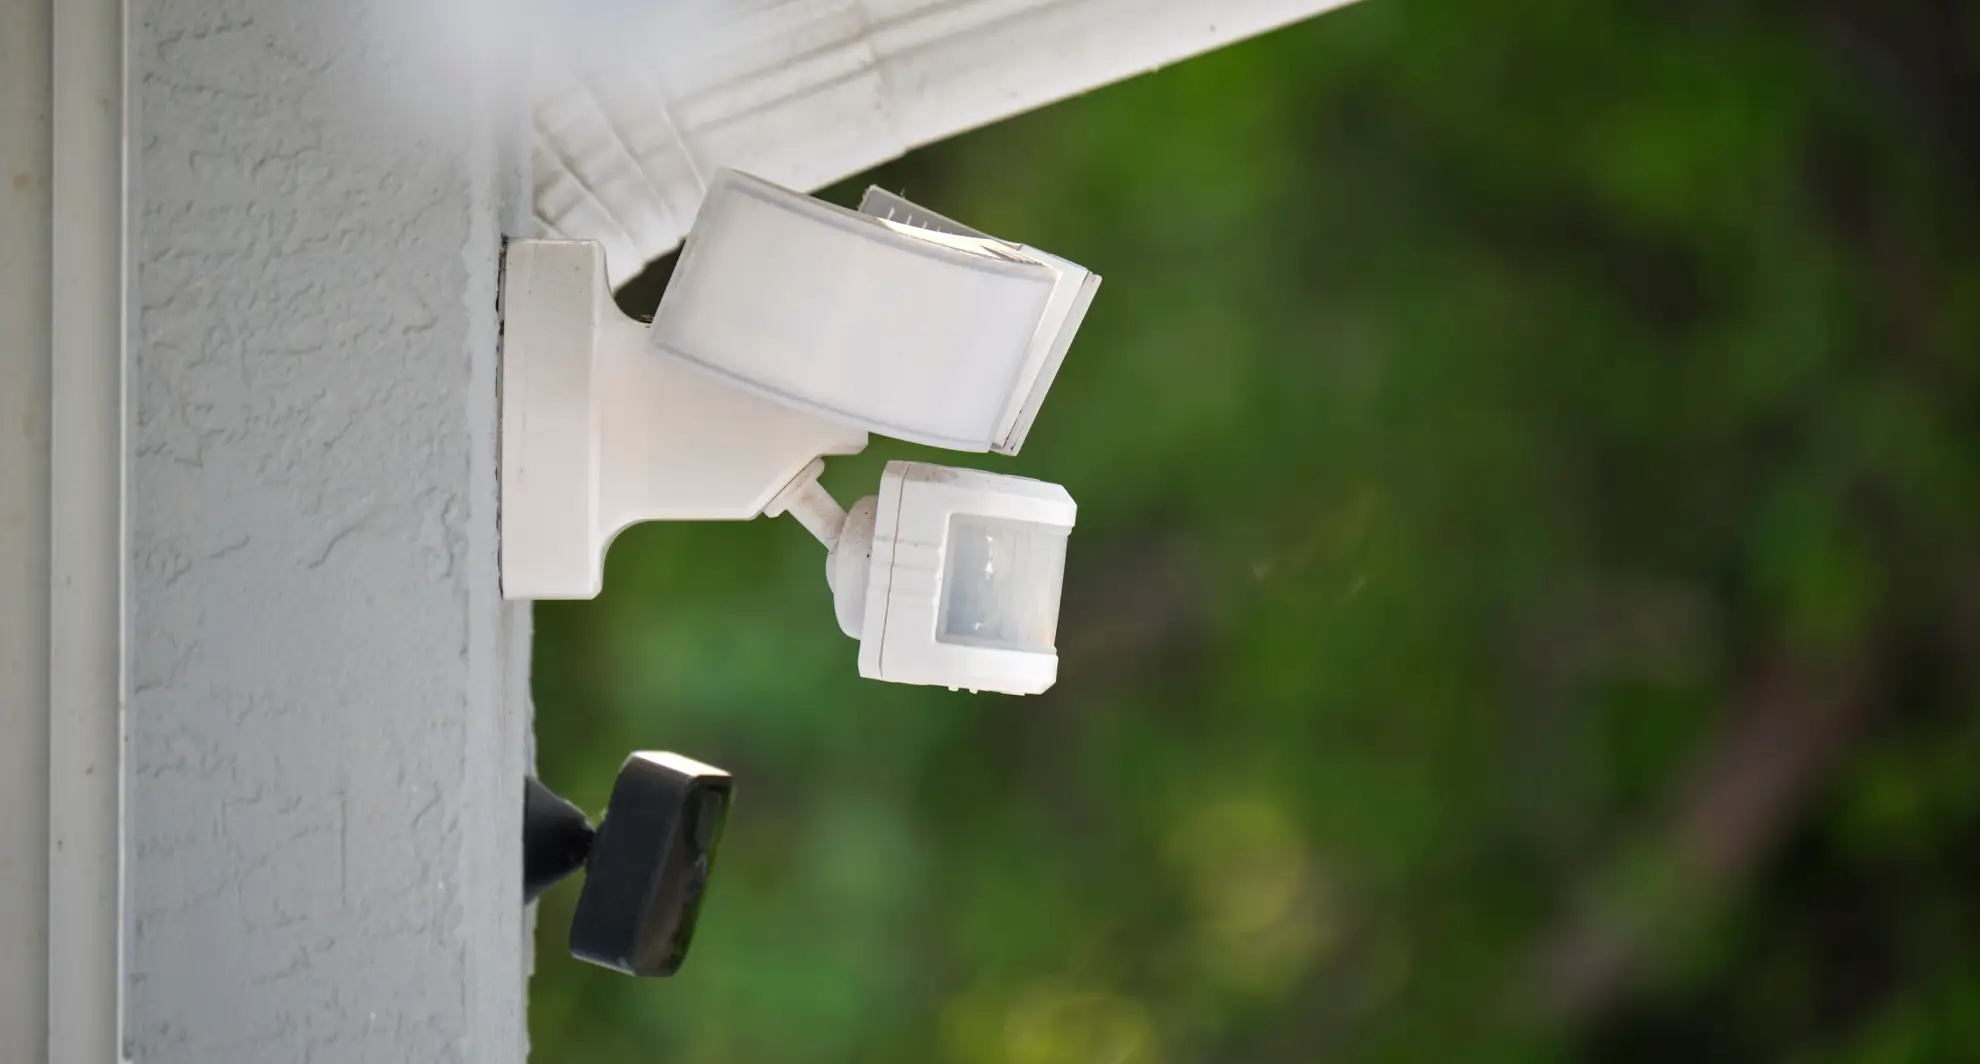
Testing The Motion Sensor Light
Testing the motion sensor light is crucial after installation. It ensures the sensor and light work together correctly. Proper testing helps avoid false triggers or no response. Let’s explore how to check your new setup quickly and easily.
Powering On And Initial Test
Turn on the power at the circuit breaker or wall switch. Wait a few seconds for the sensor to activate. Move slowly in front of the sensor to trigger the light. The light should turn on immediately when motion is detected. Stay still and watch if the light stays on for the set time. Walk away to see if the light turns off after the delay.
This quick test confirms the sensor detects movement and controls the light. Adjust the sensor’s angle if it does not respond well. Make sure nothing blocks its view.
Troubleshooting Common Issues
- Light does not turn on: Check the power supply and wiring connections.
- Light stays on constantly: Sensor may be too sensitive or obstructed.
- Light turns off too quickly: Increase the timer setting on the sensor.
- Sensor triggers randomly: Clear any objects or pets from the sensor’s range.
- Light flickers: Verify the bulb is compatible with the sensor switch.
Re-test after each adjustment. Small changes improve sensor performance and reliability. Proper testing saves time and ensures safety at night.

Credit: www.eufy.com
Maintaining Your Motion Sensor Lights
Maintaining your motion sensor lights ensures they work efficiently and last longer. Proper care keeps the sensors responsive and the lights bright. Regular upkeep prevents common issues like dim lighting or sensor failure.
Cleaning And Care Tips
Dust and dirt can block sensors and light lenses. Clean the surface gently using a soft cloth. Avoid harsh chemicals that may damage the sensor or light cover. Wipe sensors regularly to keep them clear and sensitive to movement.
Check for spider webs or debris around the sensor area. Remove any obstructions to maintain accurate detection. Keep the light fixture dry and free from moisture to prevent damage.
Replacing Batteries And Parts
Some motion sensor lights use batteries; check them often. Replace batteries when the light starts to flicker or dims. Use the correct battery type recommended by the manufacturer.
Inspect other parts like the sensor or light bulbs for wear. Replace faulty parts promptly to avoid full system failure. Keep spare bulbs and batteries ready for quick replacements.
Credit: mrelectric.com
Frequently Asked Questions
How Do I Install A Motion Sensor Light Switch?
Turn off power at the breaker. Remove the old switch. Connect wires to the motion sensor switch. Secure the switch and restore power. Test the sensor’s operation.
Can I Replace A Regular Switch With A Motion Sensor?
Yes, most motion sensor switches replace standard switches. Ensure compatibility with your wiring. Follow installation instructions carefully for safety.
How Do I Adjust Motion Sensor Sensitivity?
Locate the sensitivity dial or switch on the device. Turn it to increase or decrease detection range. Test adjustments to suit your needs.
What Is The Best Placement For Motion Sensor Lights?
Place sensors where movement is expected, like entrances or hallways. Avoid obstructions and direct sunlight for accurate detection.
Conclusion
Setting motion sensor light switches can improve home safety and save energy. Follow each step carefully for best results. Test the lights after installation to ensure they work properly. Adjust the sensor sensitivity to fit your needs. Regularly check the batteries or wiring for smooth operation.
This simple upgrade adds convenience to your daily life. Enjoy the benefits of automated lighting with confidence.


