
Have you ever looked at your canvas print and wished it looked tighter, fresher, or just like new again? Stretching a canvas print might sound tricky, but with the right steps, you can do it yourself and bring your artwork back to life.
Imagine turning a loose, sagging canvas into a crisp, professional-looking piece that truly stands out on your wall. In this guide, you’ll learn exactly how to stretch your canvas print easily and effectively—no special tools or experience needed. Ready to transform your artwork and impress everyone who sees it?
Keep reading, because your canvas makeover starts here.

Credit: www.youtube.com
Tools Needed
Essential tools include canvas pliers, a staple gun, and a hammer. A measuring tape and scissors help ensure precise stretching and trimming.
Stretching a canvas print might seem like a daunting task, but with the right tools, it can be a satisfying experience. Whether you’re a DIY enthusiast or someone trying it out for the first time, having the correct tools at your disposal is crucial. This ensures not only a smooth process but also a professional-looking final product.Essential Supplies
To begin your canvas stretching journey, you’ll need a few must-have tools:- Canvas Pliers: These are specially designed to grip the canvas tightly, allowing you to pull it across the frame without slipping.
- Staple Gun: A reliable staple gun will help secure the canvas to the frame. Opt for one with an ergonomic design to reduce hand fatigue.
- Wooden Stretcher Bars: These bars form the framework that supports your canvas. Choose bars that match the size of your canvas for a perfect fit.
- Hammer: Sometimes staples need a little extra encouragement, and a hammer is perfect for tapping them in securely.
- Measuring Tape: Precision is key. A measuring tape ensures your canvas is centered and aligned correctly on the frame.
Optional Tools
While the essentials will get the job done, a few optional tools can enhance your experience:- Rubber Mallet: This is ideal for assembling stretcher bars without damaging the wood.
- Artist Tape: Useful for marking areas on the canvas or frame, ensuring consistency in your stretch.
- Level: Ensures your finished piece hangs straight. This might not affect the stretching process directly, but it aids in the final presentation.
- Ruler or Straight Edge: For those who like everything perfectly aligned, these can help ensure straight lines and corners.
Credit: www.prodigi.com
Preparing The Workspace
Preparing the workspace is key to stretching a canvas print smoothly. A well-organized area helps avoid mistakes and damage to the canvas. It also makes the process faster and less stressful. Focus on creating a clean, bright, and comfortable space before you start.
Choosing A Clean Surface
Pick a flat surface that is large enough to hold your canvas and frame. A clean table or sturdy workbench works well. Clear away dust, dirt, or sharp objects that might scratch the canvas. Use a soft cloth to wipe the surface. Avoid carpets or uneven floors that can cause wrinkles.
Setting Up Proper Lighting
Good lighting lets you see details clearly while stretching. Natural daylight is best, but bright white lamps work too. Position lights to reduce shadows and glare on the canvas. Avoid harsh or dim lighting that can hide wrinkles or loose areas. Proper lighting helps you spot problems early.
Removing The Canvas From The Frame
Removing the canvas from the frame is the first key step in stretching a canvas print. This process requires care to avoid damage. Taking your time ensures the canvas stays intact for restretching or framing.
Loosening Staples Or Tacks
Start by examining the back of the frame. Staples or tacks hold the canvas tightly in place. Use a flathead screwdriver or a staple remover to lift them gently. Work slowly to avoid tearing the canvas or scratching the frame. Remove all fasteners around the edges before trying to lift the canvas.
Handling The Canvas Carefully
Once the fasteners are removed, handle the canvas with clean, dry hands. Support the entire surface to prevent stretching or creasing. Avoid folding the canvas as this can cause permanent marks. Lay the canvas on a clean, flat surface for the next steps. Proper handling keeps your print in good condition for stretching.
Stretching The Canvas
Stretching the canvas is a crucial step to ensure your print looks professional and lasts for years. It’s not just about pulling the canvas tight; it’s about evenly distributing tension so the image remains smooth and undistorted. Getting this right will make your artwork pop and avoid frustrating wrinkles or sagging later on.
Positioning The Canvas On The Frame
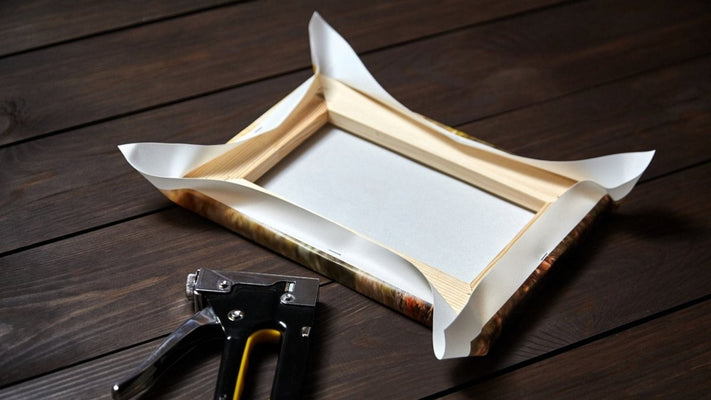
Start by laying the canvas print face down on a clean surface. Place your wooden frame on top, making sure the image is centered exactly where you want it. Leave about 1.5 to 2 inches of canvas overlapping the frame edges on all sides—this extra material is what you’ll pull and staple.
Take a moment here to check the alignment. Have you positioned the canvas so the main subject isn’t too close to the edges? Small adjustments now save you from stretching an off-center print.
Starting With The Center Staples
Begin stretching by attaching a staple in the center of one side of the frame. Pull the canvas tight but don’t overdo it—you want firm tension without distortion. Then move directly to the opposite side and staple the center there, pulling the canvas evenly.
This back-and-forth approach helps you maintain balanced tension across the frame. Think of it like tightening a drum: if one side is too loose or too tight, the whole canvas will look uneven.
Working Toward The Corners
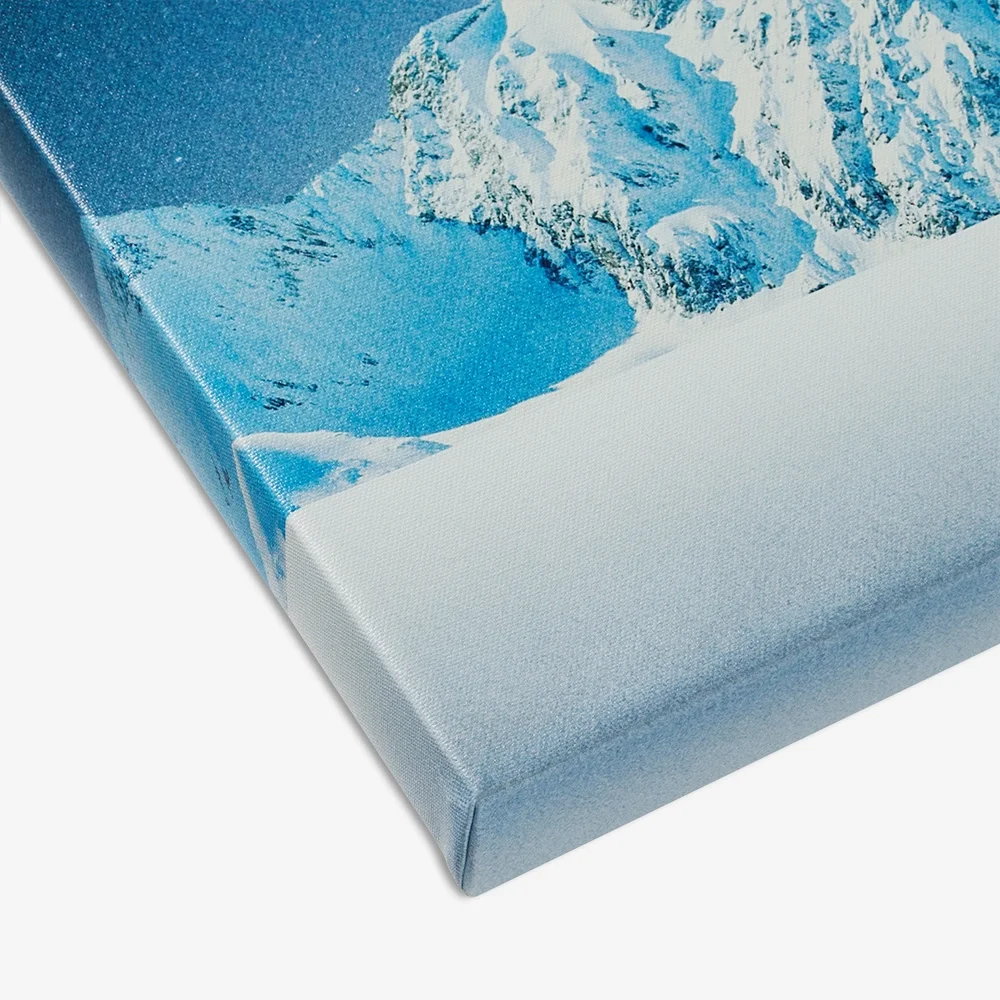
After the center staples are secure, continue stapling outward toward each corner. Pull the canvas firmly before each staple, alternating sides to keep the tension even. When you reach the corners, fold the canvas neatly and staple securely to avoid bulky or loose edges.
Have you noticed how uneven tension can cause wrinkles near the corners? Taking your time here makes a visible difference. Keep checking the front of the canvas as you work to ensure the surface remains smooth and flat.
Securing The Canvas
Securing the canvas is a crucial part of stretching a canvas print. It keeps the artwork tight and smooth, preventing sagging or damage over time. Your approach here affects the final look and durability of your print.
Using A Staple Gun
A staple gun is your best friend for firmly attaching the canvas to the stretcher bars. Start by pulling the canvas tight on one side and place a staple in the center of the bar. Then move to the opposite side, pull tight again, and staple in the center there as well.
Continue adding staples, moving from the center toward the corners, alternating sides to keep the tension even. Use about 1 to 2 inches between staples for a secure hold. Avoid stapling too close to the edge to prevent tearing the fabric.
Checking For Wrinkles And Adjusting
Once stapled, examine the canvas surface closely. Are there any wrinkles or loose spots? If you spot any, gently pull the fabric away from the staple and add another staple to tighten that area.
Don’t be afraid to remove a few staples and reposition the canvas if needed. Small adjustments now save you from a distorted print later. Have you ever noticed how a wrinkle can ruin the entire look? Catching them early is key to a professional finish.
Finishing Touches
Finishing touches are crucial to give your canvas print a neat and professional look. After stretching the canvas tightly over the frame, the final steps ensure the artwork stays secure and the edges look clean. Taking care during these stages helps preserve your print for years.
Trimming Excess Canvas
Trim the extra canvas carefully using a sharp utility knife or scissors. Leave about one to two inches beyond the staples for a margin. Cut close to the frame edges but avoid cutting too near the staples. This prevents unraveling and keeps the canvas taut.
Work slowly around each side. Check that the canvas remains tight as you trim. Dispose of the trimmed pieces properly to keep your workspace clean.
Reassembling The Frame
Put the frame parts back together if you disassembled them before stretching. Ensure the corners fit snugly without gaps. Tighten any screws or fasteners to secure the frame firmly.
Place protective pads or bumpers on the frame corners. This protects walls and helps the canvas hang evenly. Finally, clean the canvas surface gently with a soft cloth to remove dust or fingerprints.
Tips For Best Results
Stretching a canvas print properly can make a huge difference in how your artwork looks and lasts. Getting the best results means paying close attention to details and avoiding common pitfalls that can ruin your effort. Here are some practical tips to help you stretch your canvas like a pro and keep it looking great for years.
Avoiding Common Mistakes
One of the biggest mistakes is pulling the canvas too tight all at once. This can cause uneven tension and may warp the frame. Instead, start by gently stretching the canvas on one side, then move to the opposite side, alternating as you go.
Another common error is neglecting to check the corners. Wrinkles or folds here can ruin the entire look. Make sure you fold the canvas neatly and secure it firmly before stapling.
Have you ever stretched a canvas only to find it sagging after a few days? This often happens when people skip the step of pre-stretching the canvas or don’t use enough staples. Adding more staples spaced evenly along the frame helps maintain a strong hold.
Maintaining Canvas Tension Over Time
After stretching, the canvas can loosen as it adjusts to the new tension and environmental changes like humidity. To keep your canvas tight, check it regularly, especially in the first few weeks.
If you notice any slack, gently re-stretch the canvas by pulling it tighter and adding a few extra staples where needed. Avoid overdoing it—too much tension can tear the canvas or damage the frame.
Consider the room where you hang your canvas. High humidity or temperature swings can cause the fabric to expand and contract, affecting tension. Would using a dehumidifier or placing your artwork in a stable environment help prolong its perfect stretch?
Credit: www.pictureframes.com
Frequently Asked Questions
How Do You Prepare A Canvas For Stretching?
First, select a sturdy frame and clean the canvas surface. Lay the canvas flat and align it evenly on the frame. This preparation ensures smooth, wrinkle-free stretching and better final results.
What Tools Are Needed To Stretch A Canvas Print?
You need canvas pliers, a staple gun, staples, a hammer, and a measuring tape. These tools help secure the canvas tightly and evenly over the frame.
How Tight Should A Canvas Be Stretched?
Stretch the canvas firmly but avoid over-tightening. It should be taut enough to prevent wrinkles but not so tight that it warps the frame or damages the print.
Can You Stretch A Canvas Print At Home?
Yes, with the right tools and patience, you can stretch a canvas print at home. Follow step-by-step instructions carefully to achieve professional results.
Conclusion
Stretching a canvas print can improve its look and durability. Follow the steps carefully to avoid mistakes. Use the right tools and take your time. Practice helps you get better with each try. Your artwork will look neat and professional.
Enjoy showing off your stretched canvas with pride. This simple skill adds value to your art. Keep your canvas tight and smooth for best results. Try stretching different sizes to gain confidence. A well-stretched canvas makes any space feel special.


