
Are you staring up at that beautiful chandelier and wondering how to take it down safely? Whether you’re redecorating, cleaning, or replacing it, removing a chandelier can feel like a tricky task.
But don’t worry—this guide will walk you through each step clearly and simply. You’ll learn how to handle the wiring, avoid common mistakes, and keep yourself safe. By the end, you’ll have the confidence to take down your chandelier without stress or damage.
Ready to get started? Let’s dive in!

Credit: www.reddit.com
Prepare For Removal
Preparing for chandelier removal requires careful planning. Safety and efficiency depend on proper preparation. Taking time to organize tools and secure the area makes the task easier. Follow these key steps to get ready before starting the removal.
Gather Necessary Tools
Collect all tools needed before beginning. Typical tools include:
- A sturdy ladder or step stool
- Screwdrivers (flathead and Phillips)
- Wire cutters or pliers
- Voltage tester
- Electrical tape
- Soft cloth or blanket to protect surfaces
Having tools ready prevents unnecessary interruptions during removal.
Turn Off Power Supply
Safety starts with cutting power to the chandelier. Locate the circuit breaker for the room. Switch it off to stop electricity flow. Test the chandelier wires with a voltage tester. Confirm no power is present before touching wires or fixtures. This step avoids shocks and injuries.
Set Up Safety Measures
Clear the area around and under the chandelier. Remove furniture or cover it with blankets. Place a soft surface like a thick blanket or mattress underneath. This cushions falling parts and protects floors. Wear safety goggles and gloves to shield eyes and hands. Ensure the ladder is stable and on flat ground. These precautions keep you safe throughout removal.

Credit: www.reddit.com
Remove Bulbs And Shades
Removing bulbs and shades is a crucial step before taking down a chandelier. This ensures safety and prevents damage to the delicate parts. Paying attention here makes the rest of the process smoother and protects your investment.
Handle Bulbs Carefully
Always turn off the power before touching any bulbs. Use a soft cloth or gloves to avoid oils from your skin transferring onto the bulbs, which can cause them to burn out faster.
Remove each bulb by gently twisting it counterclockwise. If a bulb feels stuck, don’t force it; wiggle it slightly to loosen it. Have a safe spot ready to place the bulbs—like a padded box—so they don’t roll off and break.
Detach Shades And Covers
Shades and covers often come off in different ways—some twist, others have small clips or screws. Take a close look at how your chandelier’s shades are attached before you start pulling.
Use the right tools if screws are involved, and keep all hardware in a container. This makes reassembly easier and prevents losing small parts.
Have you noticed how one loose shade can make the whole fixture wobbly? Removing these first stabilizes your chandelier and makes it safer to lower.
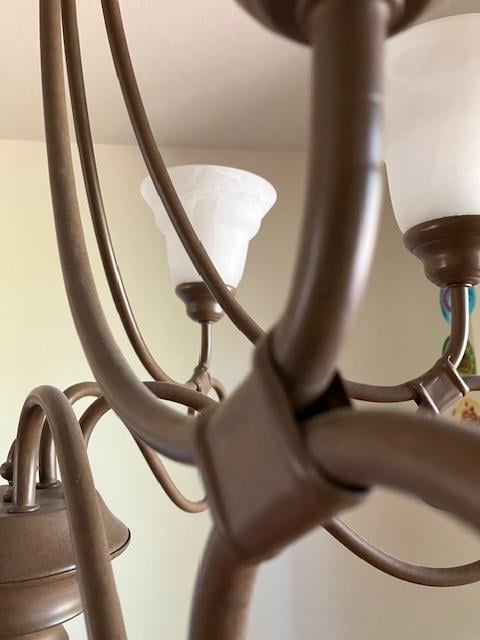
Disconnect Electrical Wiring
Turn off the power at the circuit breaker before touching any wires. Carefully disconnect the electrical wiring by unscrewing wire nuts and separating the wires safely.
Disconnecting electrical wiring is a crucial step in taking down a chandelier. Ensure safety first. Turn off the power supply at the breaker. This prevents any accidental shocks. Use a voltage tester to confirm no electricity flows. Once safe, you can proceed with disconnecting the wiring.Identify Wiring Connections
Locate the electrical box on the ceiling. It holds the wiring connections. Identify the wires coming from the ceiling and the chandelier. Typically, you’ll see black, white, and green or bare wires. The black wire is usually the hot wire. The white wire is neutral. The green or bare wire is the ground wire. Take note of how these wires are connected.Safely Separate Wires
Use a screwdriver to remove the wire connectors. Gently twist them counterclockwise. Carefully separate the wires. Do not pull or yank them apart. Keep the wire ends straight. This helps during reinstallation or storage. Wrap each end with electrical tape. This prevents any potential contact. Store the connectors safely for future use.Detach The Chandelier
Detaching a chandelier can feel intimidating, but breaking it down into clear actions makes the task manageable. This stage is all about safely separating the fixture from its mount without causing damage to your ceiling or the chandelier itself.
Support The Fixture
Before you start loosening screws, make sure you have a firm hold on the chandelier. Use one hand or a helper to support its weight. This prevents the fixture from suddenly dropping, which could cause injury or break the delicate parts.
Using a sturdy ladder that reaches the fixture comfortably helps you maintain control. If the chandelier is heavy or large, consider using a temporary support like a rope tied to the ceiling or a hook nearby. Have you ever underestimated the weight of a chandelier? Supporting it first saves you from surprise accidents.
Unscrew Mounting Hardware
Locate the screws or bolts that hold the chandelier’s mounting bracket to the ceiling. These are usually hidden under a decorative cover or canopy. Carefully remove any covers to expose the hardware.
Use the right screwdriver or wrench to unscrew these fasteners. Turn them slowly to avoid stripping the screws. Once loosened, gently lower the fixture while continuing to support it.
Keep track of all screws and small parts by placing them in a container. This organization will make reinstallation or repair easier later on. What’s your strategy for keeping tiny hardware safe during projects?
Handle And Store Components
Handling and storing chandelier components carefully keeps them safe and ready for reuse. Each piece needs attention to avoid damage or loss. Proper storage also makes reassembly easier and faster.
Wrap Fragile Parts
Use soft materials like bubble wrap or cloth to cover delicate parts. Wrap each piece separately to prevent scratches and breaks. Secure the wrapping with tape but avoid sticking tape directly on surfaces. Store wrapped parts in sturdy boxes with padding for extra protection.
Organize Hardware For Reuse
Collect screws, hooks, and small hardware in labeled containers. Use clear bags or small boxes to keep similar items together. Label each container with the part name or chandelier section. This system saves time and prevents losing important pieces during reinstallation.

Credit: www.reddit.com
Inspect Ceiling And Wiring
Inspecting the ceiling and wiring is crucial before removing a chandelier. This step ensures safety and prepares the area for a new fixture. Careful examination helps identify any hidden problems. These issues can cause electrical hazards or damage during removal. Take your time to look closely and plan the next steps.
Check For Damage
Start by examining the ceiling around the chandelier. Look for cracks, holes, or water stains. These signs may indicate structural damage. Check the wiring carefully for frays, exposed wires, or loose connections. Old or damaged wiring can cause electrical shocks or fires. Use a flashlight to see inside the ceiling box. If any damage appears, consult a professional electrician before proceeding.
Prepare For New Fixture Installation
After confirming the ceiling and wiring are sound, prepare the area for the new fixture. Ensure the electrical box can support the new chandelier’s weight. Some fixtures require stronger support or special mounting brackets. Note the wiring configuration and take pictures for reference. Turn off the power at the breaker to avoid accidents. Clear the work area of obstacles to move safely while installing.
Frequently Asked Questions
How Do I Safely Disconnect A Chandelier?
Turn off power at the circuit breaker first. Use a voltage tester to confirm no electricity flows. Carefully unscrew bulbs and remove any decorative parts. Disconnect wiring by loosening wire nuts, then separate wires. Always follow safety guidelines to avoid electrical hazards.
What Tools Are Needed To Remove A Chandelier?
Common tools include a ladder, screwdriver, voltage tester, wire cutters, and pliers. Have a helper hold the chandelier during removal. Use a bucket or box to keep screws and parts organized. Proper tools ensure a smooth and safe chandelier takedown.
Can I Remove A Chandelier Alone?
Removing a chandelier alone is risky, especially large ones. It’s safer to have a helper support the fixture’s weight. Assistance prevents accidents and damage. For small chandeliers, ensure you have steady footing and use proper safety measures if working solo.
How Do I Handle Wiring When Taking Down A Chandelier?
Label wires before disconnecting to simplify reinstallation. Twist off wire nuts carefully and separate wires. Cap exposed wires with wire nuts or electrical tape. If unsure, consult a licensed electrician to avoid wiring mistakes and ensure safety.
Conclusion
Taking down a chandelier can be safe and simple. Follow the steps carefully to avoid damage or injury. Make sure to turn off the power before starting. Use the right tools and ask for help if needed. Handle each piece gently to keep everything intact.
Taking your time helps prevent accidents. With patience and care, you can remove a chandelier without trouble. Ready to try it yourself? Safety first, then success follows.


