
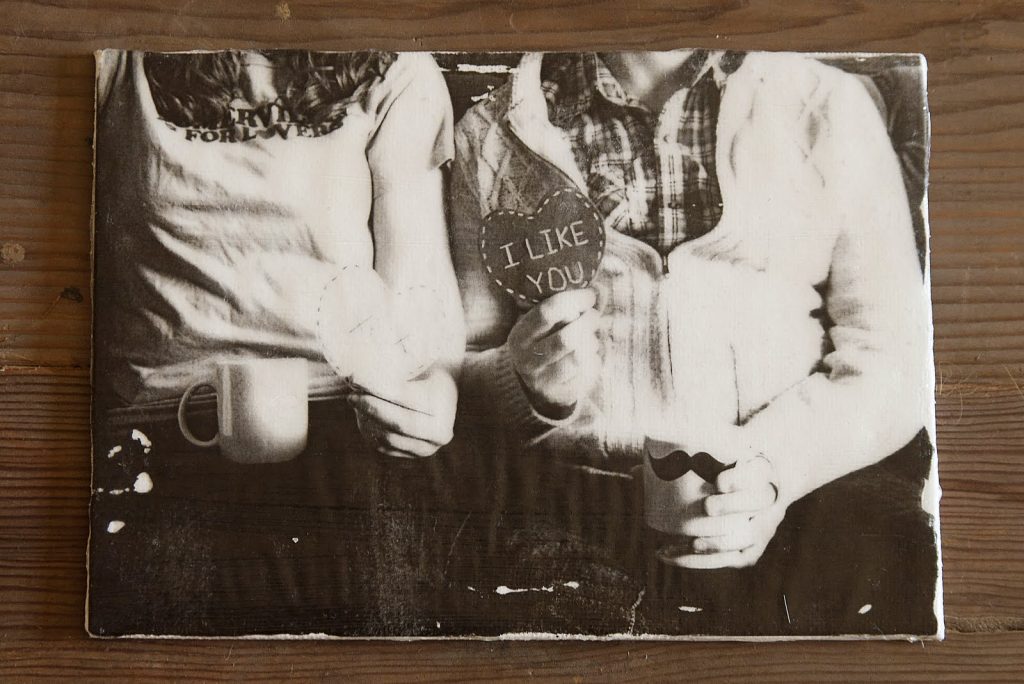
Have you ever wanted to turn your favorite photo or artwork into a stunning canvas display? Transferring a print to canvas is a simple way to create personalized, eye-catching decor that reflects your style.
Whether it’s a cherished memory or a creative project, you can achieve professional-looking results right at home. You’ll discover easy steps and expert tips to help you transfer your print to canvas flawlessly. Keep reading, and you’ll be amazed at how simple and rewarding this process can be!

Credit: www.hollisbrownthornton.com
Materials Needed
Gather a canvas, printed image, gel medium, and a brush for a smooth transfer. A sponge or cloth helps remove air bubbles and excess medium.
Transferring a print to canvas can elevate your artwork. To achieve the best results, gathering the right materials is key. This section will guide you through essential choices and tools for a successful transfer process.Choosing The Right Canvas
Select a canvas that complements your print. Canvas types vary in texture and size. Choose one with a smooth surface for detailed prints. Pre-stretched canvases save time and effort. Consider the weight and weave for durability. Ensure the canvas is primed for better print adherence.Selecting Print Materials
Choose high-quality print materials for vibrant results. Inkjet prints work well with canvas transfers. Use laser prints for a more durable finish. Glossy paper enhances color depth. Ensure the print size matches the canvas dimensions. Test a small print first to check compatibility.Essential Tools And Supplies
Gather essential tools for a smooth process. You will need:- Transfer medium for bonding the print to the canvas
- A brayer or roller for even application
- Scissors for precise trimming
- A sponge or cloth to smooth out bubbles
- Sealant to protect the finished piece
Credit: www.rapidresizer.com
Preparing The Print
Preparing the print is a crucial step in transferring your image onto canvas. It sets the foundation for a sharp, vibrant final product. Taking the time to carefully choose and prepare your print can save you from frustration later on.
Selecting The Image
Choose an image that speaks to you and fits the size of your canvas. High-contrast photos work well because they transfer with clear details. Think about the colors and shapes—simple, bold images often produce better results than overly complex ones.
Have you noticed how some pictures lose impact when resized? That’s why picking the right image is more than just personal preference—it’s about clarity after transfer. Avoid images with too many fine details that might blur or fade.
Adjusting Print Size And Quality
Resize your image to match your canvas dimensions precisely. This avoids stretching or shrinking during transfer, which can distort the final look. Use photo editing software to check the resolution; aim for at least 300 DPI for crisp prints.
Before printing, zoom in on your image to inspect details. Are edges sharp? Are colors balanced? Adjust brightness and contrast if necessary to ensure your print won’t turn out dull or washed out once transferred.
Printing On Transfer Paper
Choose the correct transfer paper for your printer type—inkjet or laser—to ensure proper ink adherence. Print your image in mirror mode if your design includes text or directional elements; this keeps everything legible after transfer.
Print on a clean, flat surface and let the ink dry completely before moving on. Handling wet prints can smudge your design and ruin the transfer. Have you ever rushed this step and ended up reprinting? Patience here pays off.
Preparing The Canvas
Preparing the canvas is a crucial step before transferring your print. It sets the foundation for how well your image will adhere and how vibrant the final result appears. Taking time to clean and prime your canvas ensures you avoid common issues like peeling or uneven textures.
Cleaning And Priming
Start by wiping the canvas with a dry cloth to remove dust and loose fibers. If the canvas feels grimy, use a lightly dampened cloth but avoid soaking it. Moisture can weaken the canvas and affect print adhesion.
Next, apply a coat of gesso or a similar primer. This acts as a sealant that prevents the paint or transfer medium from soaking into the fabric. Use a flat brush to spread the primer evenly across the surface.
Let the primer dry completely before moving on. Skipping this step can cause your print to fade or peel prematurely. Think of priming as creating a smooth, protective barrier for your artwork.
Ensuring A Smooth Surface
A smooth canvas surface helps your print stick better and look sharper. After priming, lightly sand the canvas with fine-grit sandpaper. This removes any rough spots or brush strokes left behind.
Be gentle during sanding—too much pressure can damage the canvas fibers. Wipe away the sanding dust with a clean cloth afterward. This simple step significantly improves the quality of the transfer.
Have you ever noticed a print with blotchy or patchy areas? That’s often due to an uneven surface. Taking these extra minutes to prepare your canvas can make your transfer look professional and lasting.
Transfer Methods
Transferring prints to canvas opens up creative possibilities for personalized artwork and gifts. Choosing the right transfer method can affect the final look, texture, and durability of your piece. Let’s explore practical ways you can achieve a sharp and lasting image on canvas.
Using Heat Transfer Technique
The heat transfer technique involves printing your image on special transfer paper and then applying heat to move the print onto the canvas. You’ll need an iron or heat press for this process, making sure the temperature and pressure are just right.
I once tried this method with a family photo on canvas, and the key was patience—applying heat evenly and slowly. If you rush or use uneven heat, the image may come out patchy or faded. Do you have a heat press, or will a household iron do the job for you?
- Print on transfer paper designed for fabric or canvas
- Set your heat source to the recommended temperature
- Press the image firmly for the suggested time
- Let the canvas cool before peeling off the paper
Applying Gel Medium Transfer
Gel medium transfer is a popular choice for artists wanting a textured, vintage look. You print your image with a laser printer, apply gel medium onto the canvas, then press the print face down.
After it dries, you gently rub away the paper with water, leaving the ink embedded in the gel. This method requires a bit of trial and error but offers creative control over how much texture and detail you keep.
- Use a laser-printed image, avoid inkjet for this method
- Apply an even layer of gel medium to your canvas
- Place the print face down and smooth out bubbles
- Let it dry completely (usually overnight)
- Moisten and rub off the paper carefully
Alternative Transfer Options
If heat or gel medium isn’t your style, there are other options like Mod Podge transfers, acetone transfers, or even direct printing on canvas with special printers. Each has its own pros and cons.
Mod Podge offers a simpler approach, perfect if you want a quick DIY project without special tools. On the other hand, acetone transfers work well for small designs but can be tricky to control.
| Transfer Option | Best For | Considerations |
|---|---|---|
| Mod Podge Transfer | Easy DIY projects | Less durable, may yellow over time |
| Acetone Transfer | Small, detailed designs | Requires acetone, can be messy |
| Direct Canvas Printing | Professional quality | Needs special equipment |
Which method fits your project’s needs and tools? Trying a small test piece can save you frustration and help you find the best transfer technique for your creative vision.
Step-by-step Transfer Process
Transferring a print to canvas can transform your artwork into a stunning display. The process requires care and patience. Follow these clear steps to ensure a smooth transfer and a beautiful result.
Positioning The Print On Canvas
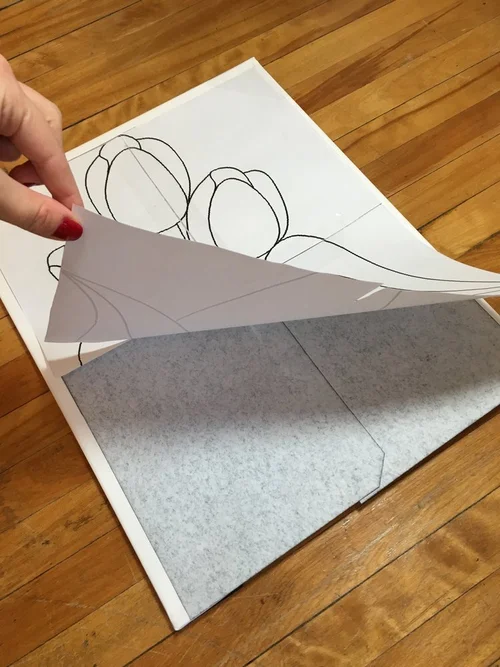
Start by placing your print face down on the canvas. Align the edges carefully for a balanced look. Use painter’s tape to hold the print in place. This prevents shifting during the transfer. Check that the print is flat without wrinkles or bubbles.
Applying Heat Or Gel Medium
Choose a heat source or gel medium for the transfer. For heat, use an iron set to medium heat without steam. Press the iron firmly and move it slowly across the back of the print. For gel medium, apply a thin, even layer on the canvas before placing the print. Press the print onto the wet gel, smoothing out any air pockets.
Peeling And Revealing The Image
Allow the print to cool or the gel medium to dry completely. Slowly peel the paper from one corner. Use water and a soft cloth to gently rub away the paper fibers. Continue until the entire image shows clearly on the canvas. Let the canvas dry fully before handling or framing.

Credit: mavenart.com
Finishing Touches
After transferring your print to canvas, the final phase is all about protecting and enhancing your artwork. These finishing touches ensure your piece not only looks great but lasts longer. Paying attention to these details can make a significant difference in the overall impact and durability of your canvas print.
Sealing The Artwork
Sealing your canvas print locks in the colors and prevents damage from dust and moisture. Choose a clear acrylic sealer spray for an even, protective coat that won’t alter the vibrancy of your print.
Hold the spray about 12 inches away from the canvas and apply light, even layers. Allow each layer to dry completely before adding the next. This simple step adds durability without changing the texture of your artwork.
Adding Protective Coating
For extra protection, especially if your canvas will be displayed in a high-traffic area, consider applying a varnish. Matte, satin, or gloss finishes are available depending on the look you want.
Use a soft brush to spread the varnish evenly, avoiding drips or bubbles. This coating shields your print from UV rays and scratches, extending the life of your artwork.
Enhancing With Paint Or Details
Adding hand-painted accents can bring depth and uniqueness to your canvas print. Use acrylic paint to highlight certain areas or add texture where the print may feel flat.
Try subtle brushstrokes or even metallic paints to create a striking effect. This personal touch transforms your print into a one-of-a-kind piece that truly reflects your style.
Tips For Best Results
Transferring prints to canvas can bring your art to life. Following key tips ensures crisp images and lasting quality. Small actions make a big difference in the final result. Proper care before, during, and after transfer matters.
Avoiding Common Mistakes
- Choose high-quality prints with clear details.
- Use the right transfer medium for your print type.
- Apply even pressure to avoid bubbles and wrinkles.
- Let the print dry completely before peeling off the paper.
- Work in a dust-free, clean space to prevent debris.
- Test on a small canvas piece to check results first.
Maintaining Your Canvas Art
- Keep the canvas away from direct sunlight to avoid fading.
- Dust gently with a soft, dry cloth regularly.
- Use a protective spray to seal the transferred image.
- Avoid moisture and extreme temperature changes.
- Store canvas art upright to prevent warping.
- Handle the canvas by the edges to avoid smudges.
Frequently Asked Questions
How Do I Transfer A Print Onto Canvas?
To transfer a print onto canvas, use heat transfer paper or gel medium. Print your image, place it face down on canvas, then apply heat or press with a brush. Let it dry for best results.
What Materials Are Needed For Canvas Print Transfer?
You need a printed image, canvas, transfer medium (gel or heat transfer paper), a brush or iron, and a protective sealant for durability.
Can I Use An Inkjet Printer For Canvas Transfers?
Yes, inkjet printers work well for transfers. Use compatible transfer paper and avoid smudging by letting ink dry before transferring.
How Long Does A Print Transfer On Canvas Last?
A well-applied transfer can last for years. Using a sealant protects the print from fading, moisture, and wear.
Conclusion
Transferring prints to canvas is easier than it seems. Follow each step with care and patience. Choose the right materials for the best results. Practice helps improve your technique over time. Enjoy creating unique artwork that lasts long. This process brings your images to life beautifully.
Try it yourself and see the difference. Keep experimenting to find what works best. Your creativity will shine on every canvas.