
When testing a mechanical suctioning unit, you want to be absolutely sure it works perfectly every time. This device plays a critical role in keeping patients safe by clearing airways quickly and effectively.
If something goes wrong, the results can be serious. That’s why knowing exactly how to test your suctioning unit is essential. You’ll discover simple steps and key tips that help you check your device’s performance with confidence. Keep reading to make sure your suctioning unit is always ready when it matters most.
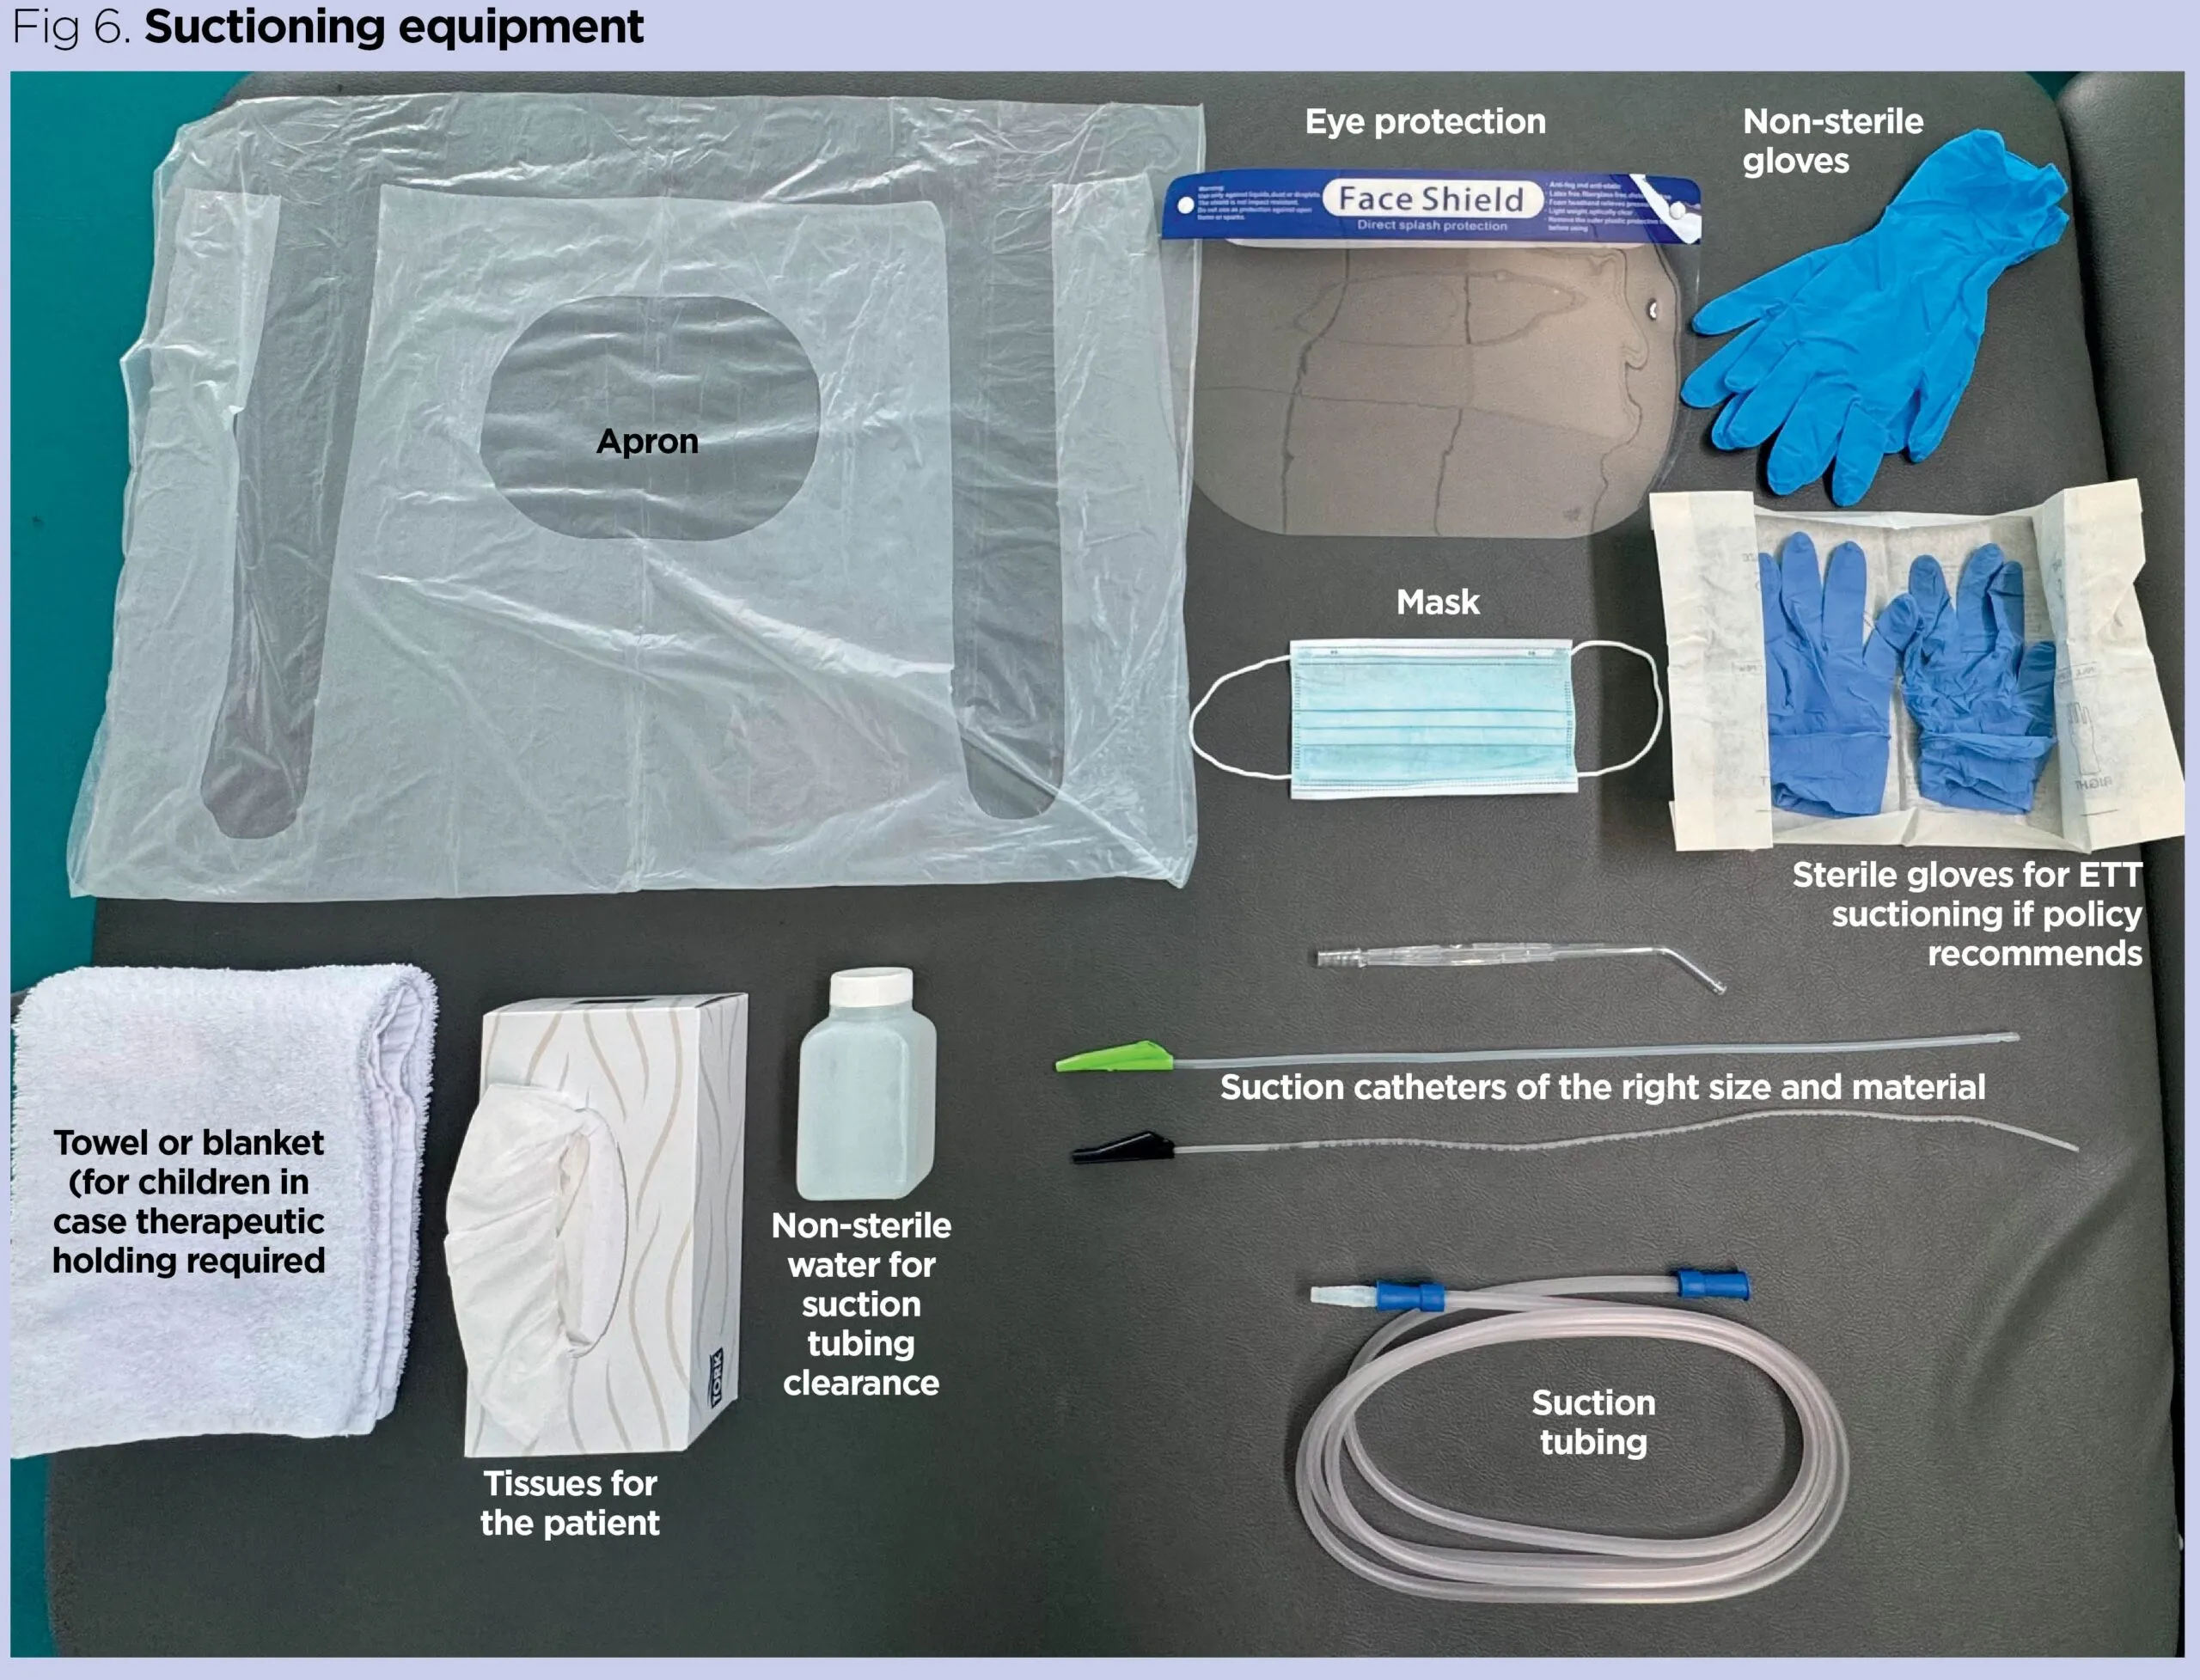
Credit: www.nursingtimes.net
Preparing The Unit
Preparing the mechanical suctioning unit is a vital step before testing. It ensures the device works safely and effectively. Careful preparation avoids mistakes and delays during testing. Focus on inspecting, gathering tools, and setting up the right environment.
Inspecting Components
Check all parts of the suction unit carefully. Look for cracks, wear, or damage on tubes and connectors. Verify that filters are clean and not clogged. Inspect the power cord and switch for any faults. Replace damaged parts before testing.
Gathering Necessary Tools
Collect all tools needed to test the suction unit. Common tools include a pressure gauge, vacuum tester, and cleaning supplies. Have spare parts ready, such as extra tubing and filters. Organize tools in one place to avoid interruptions.
Setting Up The Environment
Choose a clean, well-lit space for testing. Ensure the area is free from dust and moisture. Place the unit on a stable, flat surface. Make sure there is easy access to power outlets. Keep a waste container nearby for used materials.
Safety Precautions
Testing a mechanical suctioning unit demands strict safety precautions to protect yourself and maintain the device’s reliability. Overlooking these steps can lead to accidents or damage to the equipment. You need to be fully aware of potential risks and take active measures to minimize them before starting any testing procedure.
Wearing Protective Gear
Always wear appropriate protective gear before handling the suctioning unit. This includes gloves, safety goggles, and a lab coat or apron to prevent contact with fluids or contaminants. I once underestimated this and ended up with a small splash on my skin—something easily avoidable with gloves.
Protecting your eyes is crucial because unexpected fluid sprays can occur during testing. Never compromise on this simple but vital safety step.
Ensuring Proper Ventilation
Test the suctioning unit in a well-ventilated area to avoid inhaling any harmful fumes or aerosols. Closed spaces can accumulate airborne particles, putting your respiratory health at risk. Have you ever noticed a strange smell when operating medical devices? That’s your cue to improve ventilation.
Open windows or use exhaust fans to maintain airflow. This keeps the environment safe and comfortable while you work.
Checking Electrical Connections
Before powering up, inspect all electrical connections carefully. Loose wires or damaged plugs can cause short circuits or electrical shocks. In one instance, a faulty connection tripped the circuit breaker, halting my work and creating a hazardous situation.
Make sure cables are intact, plugs fit securely, and the power source is stable. Don’t skip this step—your safety depends on it.
Functional Testing
Functional testing is essential to ensure your mechanical suctioning unit operates safely and efficiently. It confirms that all components work as intended before use, reducing risks during critical procedures. Let’s break down the key steps you should focus on during this testing phase.
Powering On The Unit
Start by connecting the unit to a reliable power source and switch it on. Watch for any unusual delays or failure to boot, which could indicate electrical or internal faults. If the unit has indicator lights or a display, verify they activate properly to confirm the system is responsive.
Have you ever turned on a device only to find it unresponsive? Catching this early saves time and prevents last-minute surprises during patient care.
Verifying Suction Pressure
Use a calibrated pressure gauge to measure the suction force generated by the unit. The reading should match the manufacturer’s specified range, ensuring the unit can effectively remove fluids. Test at various settings if your device allows adjustments, confirming consistent performance across levels.
Remember, insufficient suction pressure can compromise patient safety, while too strong suction might cause tissue damage. Accurate verification helps you maintain the right balance.
Assessing Noise Levels
Listen carefully to the unit during operation. Excessive noise or unusual sounds like grinding or rattling may signal mechanical problems or worn parts. Compare the noise to baseline levels provided in the user manual or from previous tests to detect deviations.
Quiet operation is not just about comfort; it often reflects smoother mechanical function. Could a noisy unit be warning you of future breakdowns?
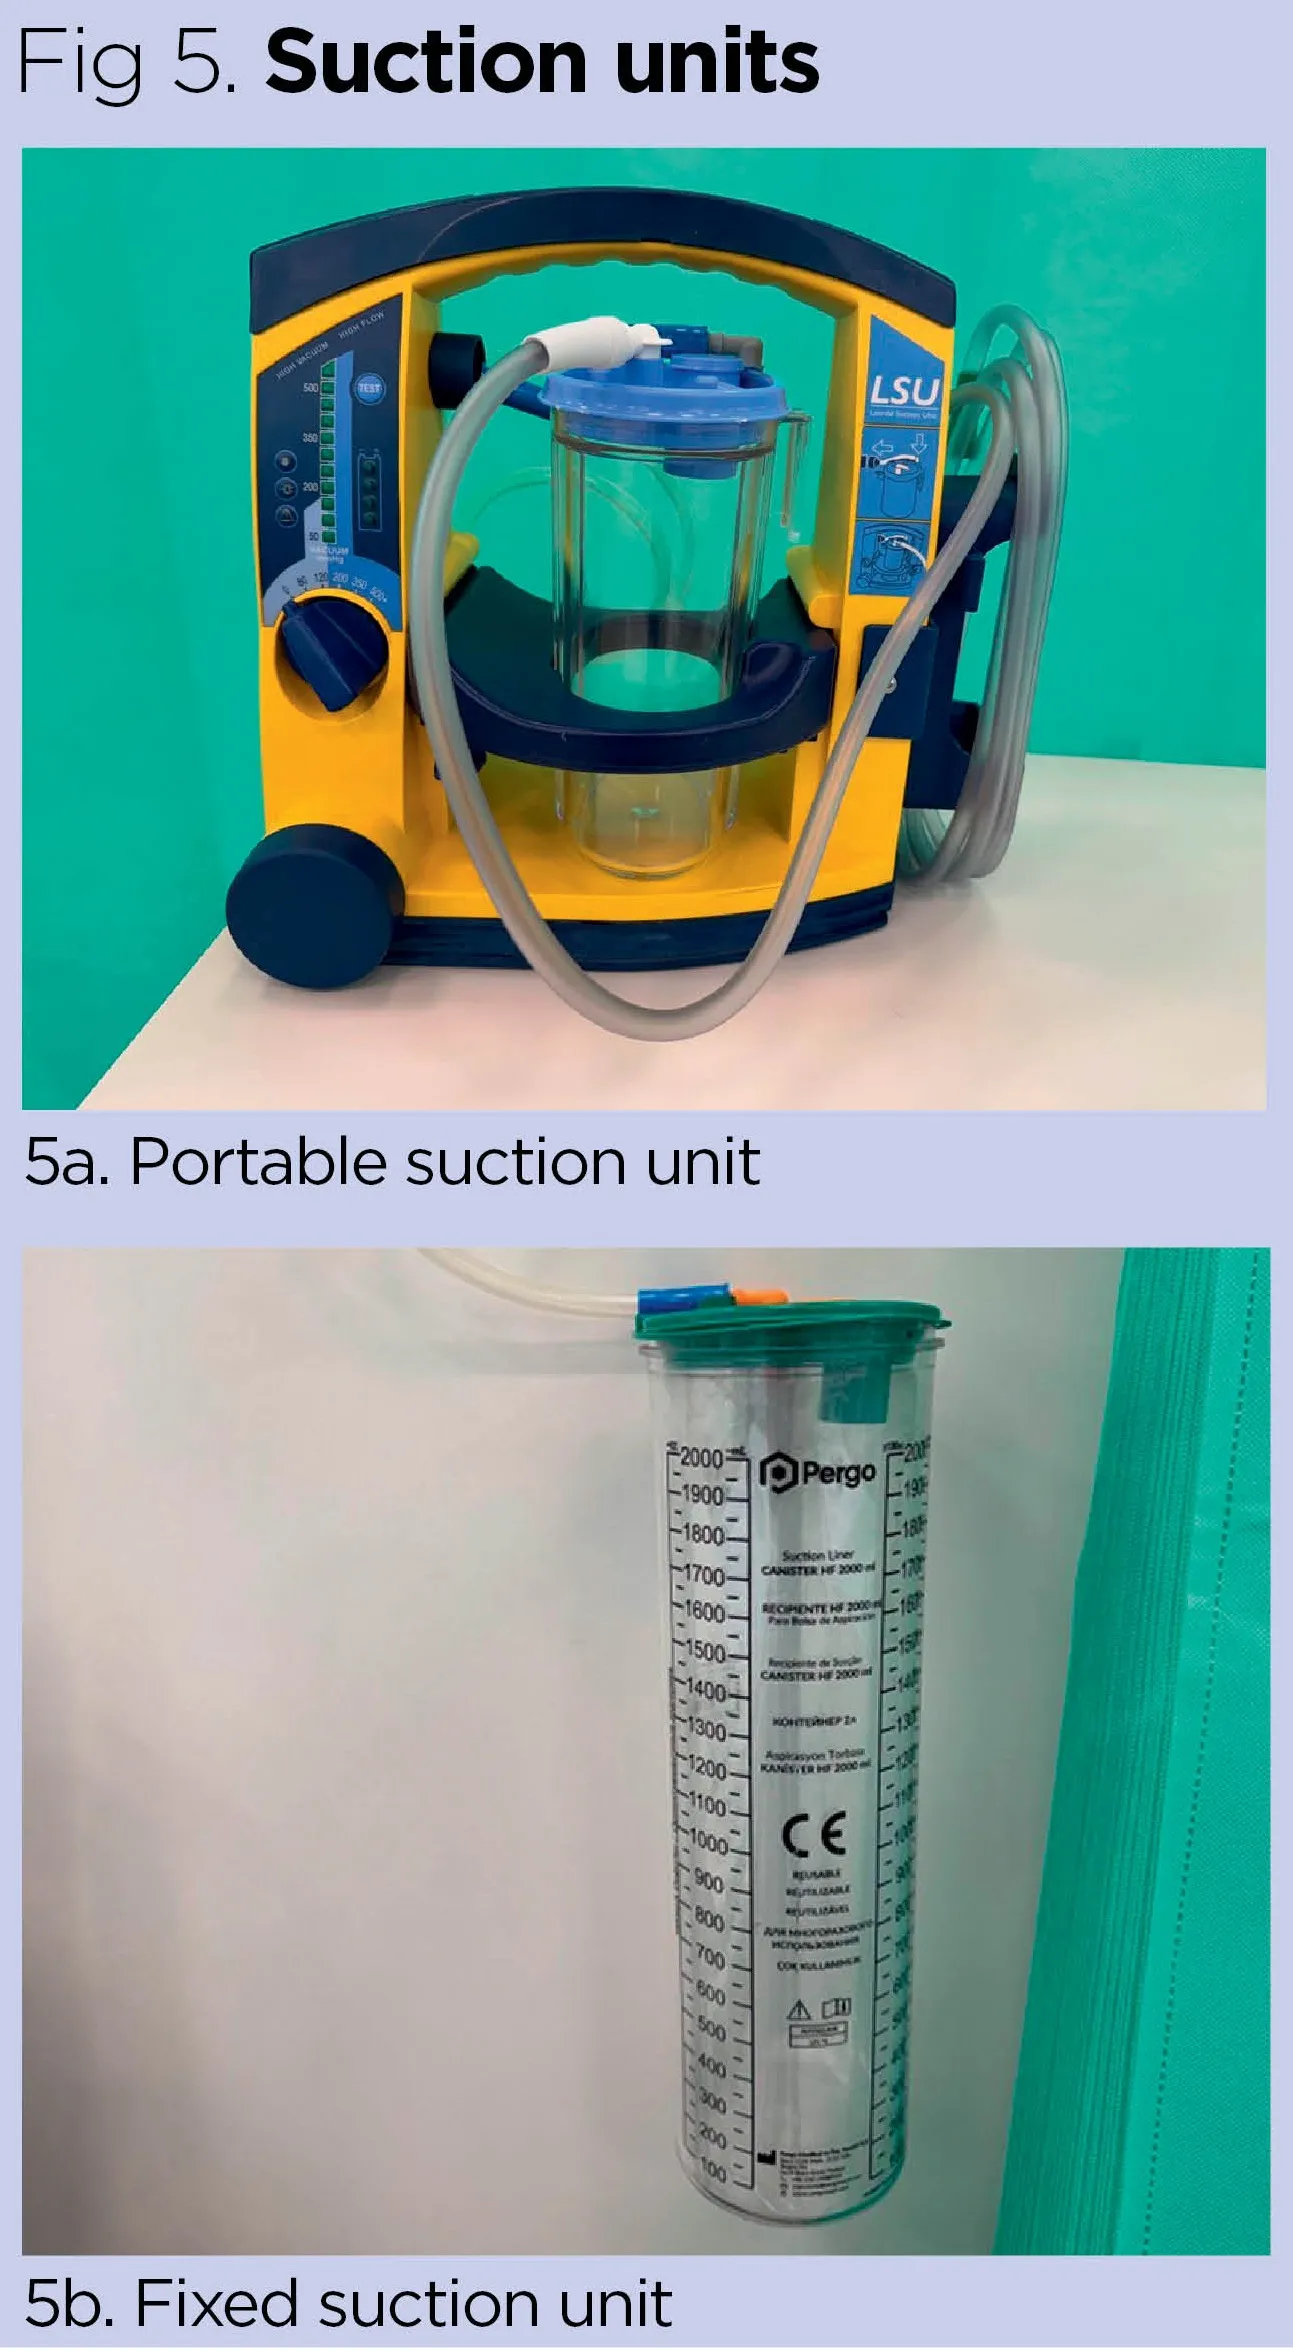
Credit: www.nursingtimes.net
Maintenance Checks
Maintenance checks keep a mechanical suctioning unit working safely and efficiently. Regular care prevents breakdowns and extends the device’s lifespan. These checks focus on key parts that affect performance and hygiene.
Cleaning Filters And Tubing
Filters trap dust and debris that can block airflow. Clean them often to maintain suction power. Tubing can collect mucus and other substances. Flush tubes with warm water and mild detergent. Dry all parts before reassembling to avoid mold growth.
Lubricating Moving Parts
Moving parts need lubrication to reduce friction and wear. Use a light machine oil or the manufacturer’s recommended lubricant. Apply it sparingly to gears, hinges, and joints. This keeps the unit running smoothly and quietly.
Replacing Worn Components
Check parts for cracks, tears, or signs of wear. Replace filters, tubing, and seals regularly to ensure proper function. Always use parts designed for your model. Worn components can cause leaks or reduce suction efficiency.
Troubleshooting Common Issues
Mechanical suctioning units are vital tools, but they can sometimes act up during testing. Identifying and fixing common issues quickly ensures your equipment stays reliable and effective. Let’s look at some practical ways to troubleshoot typical problems you might encounter.
Dealing With Low Suction
If your suction unit isn’t pulling as strongly as it should, first check for blockages. Tubing or filters clogged with debris can significantly reduce suction power.
Also, examine the connections to ensure they are tight and secure. Loose fittings often cause air leaks, which lower suction efficiency.
Have you checked the collection canister? A full or improperly sealed canister can reduce suction. Empty it regularly and make sure the lid seals tightly.
Fixing Electrical Failures
Electrical problems can stop your suction unit from working altogether. Start by inspecting the power cord for any visible damage or frayed wires.
Check the fuse or circuit breaker in the unit; a blown fuse is a common culprit and easy to replace. Also, make sure the power outlet is functioning by testing it with another device.
If the unit still won’t power on, the internal wiring or motor might be at fault. In such cases, consulting a professional technician can save you time and prevent further damage.
Addressing Unusual Noises
Strange sounds from your suction unit often signal mechanical issues. Rattling or grinding noises might mean loose or worn-out parts inside the motor or pump.
Listen carefully to pinpoint the noise source. Sometimes, debris stuck in the tubing or canister can cause unexpected sounds.
Regular maintenance like lubricating moving parts and tightening screws can prevent these noises. If the noise persists, consider replacing faulty components before they cause more damage.
Documentation And Reporting
Documentation and reporting play a crucial role in testing a mechanical suctioning unit. Clear records ensure that equipment functions safely and effectively. Proper documentation helps identify patterns and prevent future issues. It also aids in maintaining compliance with industry standards.
Recording Test Results
Begin by noting the date and time of testing. Record all results in a structured format. Include measurements like suction pressure and flow rate. Ensure the data is legible and easy to understand. Use digital tools for accuracy and ease of access.
Noting Repairs And Adjustments
Document any repairs made during testing. Specify parts replaced or adjusted. Describe the issue and the action taken. This record helps track equipment performance over time. It also assists in troubleshooting future problems.
Scheduling Follow-up Tests
Plan follow-up tests based on initial results. Schedule tests regularly to ensure reliability. Record the schedule in a visible location. Regular testing can prevent unexpected failures. It ensures the unit remains in optimal condition.
Credit: www.nursingtimes.net
Frequently Asked Questions
How Do You Test A Mechanical Suctioning Unit?
Testing involves checking the suction pressure, tubing integrity, and motor function. Ensure all parts operate smoothly and meet manufacturer specifications. Perform routine maintenance and verify safety features to maintain effective suction performance.
What Safety Checks Are Needed For Suctioning Units?
Check for electrical safety, secure connections, and proper grounding. Inspect filters and tubing for blockages or damage. Confirm alarms and emergency shut-off functions work correctly to ensure user safety.
How Often Should Mechanical Suction Units Be Tested?
Test the unit before each use and conduct detailed inspections monthly. Regular testing ensures reliability and prevents device failure during critical procedures. Follow manufacturer guidelines for maintenance intervals.
What Common Issues Occur During Suction Unit Testing?
Common problems include reduced suction power, motor noise, and tubing leaks. These issues can compromise device performance and patient safety. Promptly address any faults to maintain optimal function.
Conclusion
Testing a mechanical suctioning unit ensures it works safely and well. Check all parts carefully before use. Clean and maintain the unit regularly. This helps avoid problems during operation. Always follow the instructions step by step. Proper testing keeps patients safe and equipment reliable.
Small efforts bring big results in medical care. Stay attentive and never skip important checks. Your careful testing makes a real difference every time.


