
Do you have a favorite photo that deserves to be bigger and better? Maybe a family portrait, a stunning landscape, or a special moment you want to showcase on your wall.
But where can you get that picture blown up and framed just right? You want it to look perfect, last long, and fit your style. You’ll discover the best places and tips to turn your photo into a beautiful piece of art.
Keep reading to find out how to make your memories stand out in any room.
Choosing The Right Photo For Enlargement
Choosing a clear, high-resolution photo ensures a sharp and vibrant enlargement. Visit local print shops or online services to get your picture blown up and framed professionally. Quality matters for the best results.
Choosing the right photo for enlargement is crucial. A photo that looks good on your phone might not look great on a wall. Consider the details and quality before deciding. Proper selection ensures the final product is stunning and eye-catching.Image Resolution And Quality
Image resolution plays a vital role in enlarging photos. High resolution means more detail. More detail results in a clearer and sharper image. Aim for a minimum of 300 DPI for enlargements. This ensures the photo maintains its quality when blown up. Low-resolution images often appear pixelated or blurry. Before choosing, check the resolution of your image. Make sure it meets the required standards for enlargement.Best Photo Formats For Blowing Up
Different photo formats have varying impacts on quality. JPEG and TIFF are the most common for enlargements. JPEG is widely used and offers good quality. It is also easy to share and store. TIFF, on the other hand, provides higher quality but takes more space. Choose TIFF if quality is your priority. It preserves the details better than JPEG. Avoid using formats like GIF or BMP. They don’t support high-quality enlargements well.Selecting Photos With Strong Composition
Composition affects how a photo looks enlarged. A well-composed photo draws attention naturally. Look for photos with balanced elements. Ensure the subject is clear and central. Consider the rule of thirds for better composition. Photos with strong lines and shapes work well. They guide the viewer’s eyes across the image. Check the background too. A cluttered background can distract from the main subject. Keep it simple for a more focused look.
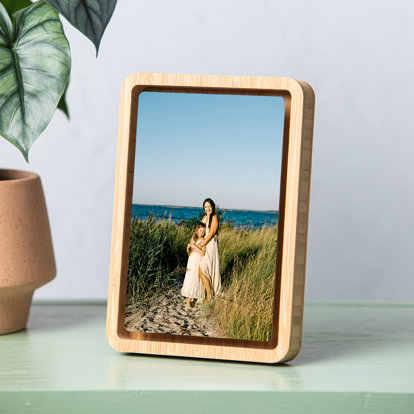
Credit: www.prints-online.com
Where To Enlarge Your Photo
Enlarging a photo lets you create a stunning display piece. Choosing the right place to enlarge your photo affects its quality and look. Several options fit different needs and budgets. Each offers unique services and results. Here are some popular places to enlarge your photo.
Local Print Shops
Local print shops provide personal service and quick turnaround. You can see paper types and finishes before printing. Staff often help with file checks and adjustments. These shops use high-quality printers for sharp images. Support local businesses and get advice face to face. Prices vary but often include framing options. A great choice for last-minute or hands-on projects.
Online Printing Services
Online printing services offer convenience and a wide range of sizes. Upload your photo from home and choose materials easily. Many sites provide preview tools to check your image. Delivery usually takes a few days. Prices are competitive, with frequent discounts available. Some include framing and mounting services. Perfect for those who prefer shopping from their computer.
Specialized Photo Labs
Specialized photo labs focus on high-quality enlargements and expert care. They use professional-grade printers and archival papers. Labs offer color correction and retouching to improve your photo. Ideal for important images or art prints. Framing options often include custom choices to suit your style. Expect a higher price for premium results. Best for those wanting museum-quality enlargements.
Framing Options For Enlarged Photos
Choosing the right frame for an enlarged photo enhances its beauty and protects it. Frames come in many styles and materials, fitting various decors and preferences. This guide explores popular framing options to help you display your photo perfectly.
Types Of Frames
- Wood Frames:Classic and warm, available in many finishes.
- Metal Frames:Sleek and modern, often lightweight and durable.
- Plastic Frames:Affordable and versatile, with many colors.
- Floating Frames:Create depth by suspending the photo inside.
- Custom Frames:Made to fit specific sizes and styles.
Matting Choices
Matting adds a border around the photo, enhancing its look. It also protects the image from touching the glass. Choose from:
- Single Mat:One layer of color, simple and elegant.
- Double Mat:Two layers for added depth and style.
- Colored Mats:Highlight colors in the photo or room.
- Acid-Free Mats:Preserve the photo by preventing damage.
Glass And Acrylic Options
Protect your enlarged photo with a clear cover. Different materials offer various benefits:
- Standard Glass:Affordable but heavier and fragile.
- Non-Glare Glass:Reduces reflection for better viewing.
- Acrylic Sheets:Lightweight, shatter-resistant, and clear.
- UV-Protective Glass:Prevents fading from sunlight exposure.
Diy Vs Professional Framing
Choosing between DIY and professional framing can be tricky. Both options have their own strengths. Understanding these can help you decide the best path for your blown-up picture.
DIY framing offers control and cost savings. Professional framing delivers quality and durability. The choice depends on your budget, skills, and the value of your picture.
Benefits Of Professional Framing
- Expertise ensures perfect fit and finish.
- High-quality materials protect your picture.
- Custom options match your decor.
- UV glass prevents color fading.
- Long-lasting frames increase artwork value.
- Professionals handle delicate or large pieces safely.
Tips For Diy Framing At Home
- Measure your picture accurately before buying materials.
- Choose a frame style that suits your space.
- Use acid-free mats to protect the print.
- Handle the picture with clean hands or gloves.
- Use proper tools for cutting mats and frames.
- Work on a clean, flat surface to avoid damage.
- Secure the picture firmly to avoid slipping inside the frame.
Cost Comparisons
| Framing Option | Average Cost | Key Cost Factors |
|---|---|---|
| DIY Framing | $20 – $100 | Frame size, material, tools, mats |
| Professional Framing | $100 – $400+ | Custom sizes, glass type, labor, design |
Preparing Your Photo For Printing And Framing
Preparing your photo for printing and framing takes careful attention. It ensures the final print looks sharp and vibrant. Small details during preparation make a big difference in the finished product.
Focus on the image quality before sending it off. Adjust colors and fix any flaws. This way, your photo will stand out and fit perfectly in its frame.
Editing And Enhancing Images
Start by cropping the image to the desired size and shape. Remove any distracting elements or blemishes. Adjust brightness, contrast, and sharpness for clear details.
Use simple photo editors like Photoshop or free tools online. Avoid heavy filters that may reduce image quality. Keep the natural look to preserve the photo’s charm.
Color Calibration And Proofing
Colors on screen differ from printed colors. Calibrate your monitor for accurate color display. This step prevents unexpected color shifts in the print.
Request a proof print if possible. It shows how the final image will appear. Check the colors, brightness, and details carefully before the full print run.
File Preparation Tips
- Save the image in a high-resolution format, like TIFF or PNG.
- Set the resolution to at least 300 DPI for sharp prints.
- Use the correct color profile, typically sRGB or Adobe RGB.
- Avoid compressing the file too much to keep quality high.
- Rename the file clearly to avoid confusion during printing.

Credit: www.howtobegoodforsanta.com
Budgeting For Enlargement And Framing
Budgeting for enlarging and framing a picture helps avoid surprises. Knowing costs upfront guides your choices. It also ensures you get good value without overspending.
Consider all aspects of the process. Enlargement size, frame material, and finish all affect price. Planning your budget carefully lets you enjoy the final artwork stress-free.
Pricing Factors To Consider
Picture size matters. Larger prints cost more due to materials and printing time. Frame style also affects price. Wood frames usually cost more than metal or plastic.
Glass or acrylic glazing protects the picture but adds to cost. Mounting and matting options can raise the price too. Custom framing is more expensive than ready-made frames.
Ask about labor costs for cutting mats and assembling frames. Shipping or delivery fees may also add to your total. Always check if taxes apply to your order.
Finding Discounts And Deals
Look for sales at local print shops or online stores. Seasonal promotions often lower prices on framing services. Bulk orders or multiple prints may qualify for discounts.
Coupons and promo codes can reduce costs significantly. Sign up for newsletters from framing companies to get exclusive offers. Some stores offer student or senior discounts.
Compare prices from several providers before choosing. Read reviews to ensure quality is not sacrificed for a lower price.
Balancing Quality And Cost
Cheaper frames may lack durability and look less attractive. High-quality materials protect your picture longer and enhance appearance. Decide what matters most: saving money or lasting quality.
Consider mid-range options that offer good quality without high costs. Simple frames with clear glazing often provide good value. Avoid very cheap materials that can damage your print over time.
Invest in a frame that suits your style and budget. A well-chosen frame adds value and beauty to your enlarged picture.
Maintaining And Displaying Your Enlarged Photo
Getting your photo blown up and framed is just the beginning. How you maintain and display your enlarged photo makes a big difference in keeping it vibrant and eye-catching over time. Small choices in hanging, protecting, and cleaning can preserve your photo’s impact and make it a lasting part of your space.
Proper Hanging Techniques
Choosing the right spot to hang your enlarged photo is crucial. Use sturdy hooks or wall anchors that match the frame’s weight to prevent accidents. Make sure the photo hangs at eye level for maximum visual appeal and easy viewing.
Think about the wall material too—drywall needs different hardware than brick or wood. Using a level ensures your photo doesn’t lean or tilt, which can be distracting. Have you ever noticed how crooked pictures affect a room’s vibe? Straightening it up instantly improves the space.
Protecting From Light And Moisture
Light can fade your photo over time, especially direct sunlight or harsh artificial lights. Place your photo away from windows or use UV-protective glass in the frame to block damaging rays. This simple step can keep colors bold and details sharp for years.
Moisture is another enemy. Avoid hanging your photo in humid areas like bathrooms or kitchens. If your space tends to be damp, consider using a dehumidifier or placing silica gel packets behind the frame to absorb moisture.
Cleaning And Care Tips
Dust your framed photo regularly using a soft, dry cloth or a gentle brush to avoid scratches. Never spray cleaner directly on the glass or photo; instead, lightly dampen the cloth if needed. Harsh chemicals can damage both the frame and the image.
If your frame has glass, clean it gently to avoid streaks. For wood or metal frames, check the manufacturer’s care instructions before using any polish. Have you ever cleaned a frame only to find smudges or residue? Taking your time pays off in a crystal-clear display.
Credit: globalnews.ca
Frequently Asked Questions
Where Can I Get My Picture Blown Up Professionally?
You can get your picture blown up at local print shops, online photo printing services, or specialized framing stores. Many offer high-quality enlargements with options for paper type and finish. Choose a service known for sharp, vibrant prints to ensure the best results.
What Types Of Frames Are Best For Blown-up Pictures?
Wooden and metal frames are popular choices for blown-up pictures. They provide durability and style while protecting your photo. Consider the decor of your room and the photo size when selecting a frame. Custom framing shops often offer tailored options to match your needs.
How Much Does It Cost To Blow Up And Frame A Picture?
Costs vary depending on size, framing material, and print quality. Basic enlargements start around $20, while custom framing can range from $50 to $200 or more. Online services may offer competitive pricing, but local shops provide personalized advice and framing options.
Can I Blow Up Pictures From My Phone Or Digital Camera?
Yes, you can blow up pictures from phones or digital cameras if the resolution is high enough. Higher resolution images produce clearer enlargements. Check your photo’s pixel dimensions before printing to avoid blurry or pixelated results.
Conclusion
Getting a picture blown up and framed can make your memories stand out. Local print shops and online stores offer many options. Choose the right size and frame to fit your style. Quality materials protect your photo for years. Take time to compare prices and services.
This helps you find the best deal. Your favorite photo will look great on any wall. Make your space more personal and inviting today. Simple steps lead to beautiful results you will enjoy.


