
Have you ever wanted to turn your favorite photo into a beautiful canvas that adds a personal touch to your space? Imagine seeing your special moments come alive on your wall, creating a unique piece of art that everyone will admire.
You don’t need to be an artist or spend a fortune to make this happen. In this guide, you’ll discover simple, step-by-step ways to transform any picture into a stunning canvas. Keep reading, and you’ll soon have the skills to create something truly special for your home or as a meaningful gift.

Credit: www.jenniferbrecheisen.com
Choosing The Right Photo
Choose a clear, high-quality photo with good lighting and sharp details. Pictures with simple backgrounds work best for canvas prints. Bright colors and strong contrasts make the image stand out beautifully on the canvas.
Choosing the right photo to transform into a canvas is a pivotal step that determines the final impact of your artwork. A canvas print can bring a photo to life, adding depth and vibrancy to your space. But which photo is worthy of such a transformation? Let’s explore the key factors that will help you make that decision.Resolution And Quality
Resolution is crucial for a crisp, clear canvas. High-resolution photos ensure that your image won’t appear pixelated when enlarged. Aim for photos that are at least 300 DPI (dots per inch). Check the file size. Larger files often indicate higher quality. Use original files instead of social media downloads, which are often compressed.Subject Matter Selection
Consider what you want the canvas to convey. Is it a serene landscape, a cherished family moment, or a striking portrait? Each tells a different story. Think about the space where the canvas will hang. A bold, dynamic image might suit a living room, while a tranquil scene could enhance a bedroom.Color And Contrast Tips
Vibrant colors can make a canvas pop, while muted tones offer subtle elegance. Consider your room’s color palette to ensure harmony. Contrast is key. Ensure your photo has a good balance between light and dark areas for depth and interest. Adjust brightness and contrast settings if necessary. Choosing the right photo involves a blend of technical considerations and personal taste. By focusing on resolution, subject, and color, you can create a canvas that truly resonates. What memories do you want to capture and display?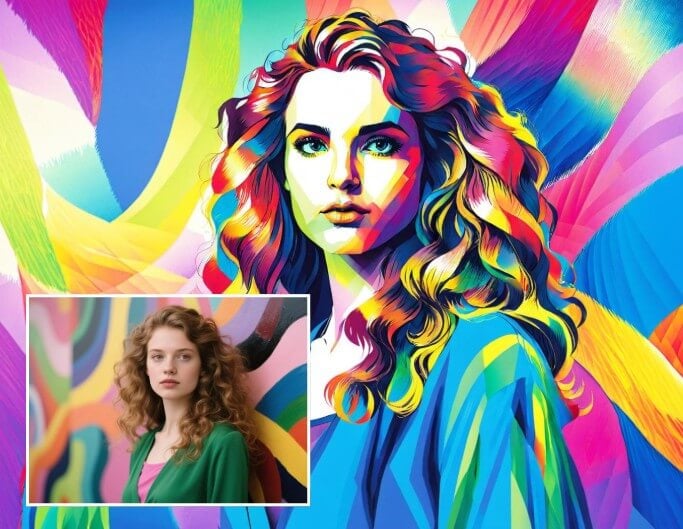
Credit: www.fotor.com
Preparing The Image
Preparing your image is a key part of turning a picture into a beautiful canvas. It ensures your final product looks sharp, vibrant, and perfectly sized. Taking time here can save you from surprises later, like blurry prints or awkward cropping.
Editing And Enhancing
Start by adjusting brightness, contrast, and saturation to make your image pop. Even small tweaks can bring out hidden details and create a more dynamic canvas.
Remove any blemishes or unwanted objects to keep the focus on your main subject. Think about sharpening the image slightly, but don’t overdo it—too much sharpening can cause unnatural edges.
Cropping For Canvas Size
Canvas sizes rarely match standard photo dimensions, so cropping is essential. Decide on the canvas size before you crop to avoid cutting off important parts.
Use cropping tools to maintain the aspect ratio of your chosen canvas size. If your image has important elements near the edges, reposition it within the crop box to keep them visible.
File Formats To Use
Save your edited image in a high-quality file format like TIFF or PNG. These formats keep details sharp and colors rich, unlike JPEGs that compress data and lose quality.
Check with your printing service about their preferred file formats and resolution requirements. Usually, 300 DPI (dots per inch) is the standard for clear, crisp canvas prints.
Selecting Canvas Materials
Selecting the right canvas materials is crucial for turning your picture into a beautiful canvas print. The materials affect the look, feel, and durability of the final product. Understanding the types of canvas, sizes, thickness, and frame options helps you make the best choice. This section breaks down these elements to guide you through the selection process.
Types Of Canvas
Canvas comes in different materials, each with unique qualities.
- Cotton Canvas:Soft texture and natural look. Great for most pictures.
- Linen Canvas:Stronger and more textured. Offers a premium feel.
- Polyester Canvas:Durable and water-resistant. Ideal for outdoor displays.
Choose a canvas type that fits your picture style and where you plan to display it.
Canvas Sizes And Thickness
Canvas size impacts the detail and impact of your picture. Bigger sizes highlight details but need higher resolution images.
Thickness varies from slim (around 0.5 inches) to deep (up to 1.5 inches). Thick canvases offer a modern, gallery-style look.
- Small: Perfect for desks or small walls.
- Medium: Works well in living rooms or offices.
- Large: Best for statement walls and open spaces.
Frame Options
Frames add structure and style to your canvas. Some options include:
- Gallery Wrap:Canvas stretched around the edges with no visible frame.
- Floating Frame:Frame surrounds the canvas with space in between for a modern look.
- Traditional Frame:Classic wooden or metal frame around the canvas edges.
Consider the room decor and your picture’s theme when choosing a frame style.

Credit: www.fotor.com
Printing Techniques
Printing techniques play a big role in turning a picture into a beautiful canvas. The right print style affects the colors, sharpness, and overall look of your artwork. Choosing the best method depends on your budget, quality needs, and the type of image you want to display.
Inkjet Vs. Giclée Printing
Inkjet printing uses small nozzles to spray ink onto canvas. It works well for simple projects and basic photos. Giclée printing is a type of inkjet but with higher quality inks and resolution.
Giclée prints last longer and show more detail. Colors appear richer and smoother. For art prints or photos you want to keep for years, giclée is the better choice. Inkjet is fine for quick, casual prints or tests.
Using Professional Services
Professional printing services offer expert advice and top gear. They use advanced printers and premium canvas materials. Services include color correction and quality checks. Your image will look sharper and more vibrant.
Professionals wrap the canvas tightly on wooden frames. They provide options for different canvas textures and finishes. This makes the final product ready to hang and display.
Diy Printing Tips
Printing canvas at home needs careful preparation. Use high-quality photo paper designed for canvas prints. Choose a printer with good color accuracy and resolution.
- Set the printer to the highest quality mode.
- Use fade-resistant inks for longer life.
- Allow the print to dry fully before handling.
- Consider sealing the print with a clear spray to protect it.
Remember, home printing might not match professional results. Still, it’s a good way to create personal or budget-friendly canvas art.
Stretching And Mounting The Canvas
Stretching and mounting your picture onto a canvas is the key step that transforms a simple print into a ready-to-display piece of art. This process not only gives your picture a professional look but also ensures it stays taut and wrinkle-free over time. If you’ve ever seen a perfectly stretched canvas in a gallery, you know how much difference this step makes.
Tools Needed
- Canvas stretcher bars:These form the frame to stretch your canvas over.
- Staple gun and staples:Essential for securing the canvas firmly to the frame.
- Canvas pliers:Help you grip and pull the canvas tight without damaging it.
- Scissors or utility knife:For trimming excess canvas.
- Measuring tape:To check your canvas and frame dimensions.
- Rubber mallet:Useful for assembling stretcher bars snugly if needed.
Step-by-step Stretching Guide
Start by assembling your stretcher bars into a frame, ensuring the corners fit tightly. Lay your printed canvas face down on a clean surface, then position the frame on top, centering the image.
Using canvas pliers, grip the canvas near the center of one side, pull it tight, and staple it to the back of the stretcher bar. Move to the opposite side and repeat, pulling evenly to avoid wrinkles. Continue this process with the remaining sides, always working from center to corners to maintain even tension.
Pay extra attention to the corners. Fold the canvas neatly and staple securely to keep the edges smooth and sharp. This part can be tricky, but taking your time here makes a big difference in the finished look.
Securing The Canvas
Once all sides are stapled, go back and add extra staples about every 2-3 inches to reinforce the tension. Check for any loose spots by gently pressing on the canvas; it should feel tight like a drum.
If you notice any sagging, carefully pull the canvas tighter with the pliers and add more staples. Trim any excess canvas with scissors to avoid bulk on the back of the frame.
Have you ever thought about how much the tightness of a canvas affects the visual impact of your picture? A well-stretched canvas not only looks cleaner but also helps your image stand out sharply on the wall.
Finishing Touches
Finishing touches bring your picture-turned-canvas to life. These final steps protect your art and enhance its look. They help your canvas fit beautifully in your space. Pay attention to details for a polished result. Here are key tips for perfect finishing touches.
Protective Coatings
Apply a clear protective coating to guard your canvas. It shields your picture from dust, moisture, and fading. Choose between matte, glossy, or satin finishes. Use a spray or brush-on varnish designed for canvas art. Let the coating dry completely before moving on. This step keeps colors vibrant and prolongs your canvas’ life.
Framing Ideas
Frames add style and structure to your canvas. Floating frames create a modern, clean look. Wooden frames offer warmth and a classic feel. Metal frames add a sleek, contemporary touch. Consider frame color and texture to match your décor. Some prefer no frame for a minimalist vibe. Pick what suits your space and artwork best.
Hanging And Display Tips
Choose a sturdy hook or wire for hanging your canvas. Ensure the wall can support the weight. Hang at eye level for best viewing. Use a level to keep the canvas straight. Group multiple canvases for a gallery effect. Avoid direct sunlight to prevent fading. These tips help your artwork shine in any room.
Common Mistakes To Avoid
Turning a picture into a canvas can be rewarding. Avoiding common mistakes ensures the final product looks professional and lasts long. These errors can affect image quality, durability, and overall appearance.
Image Resolution Issues
Low-resolution images cause blurry, pixelated prints. Always use high-resolution pictures for clarity. Check image size before printing on canvas. Larger prints need higher resolution to avoid quality loss.
Improper Stretching
Stretching the canvas too tight or unevenly creates warps. Loose canvas leads to sagging and wrinkles. Use even tension on all sides. Proper stretching keeps the image smooth and flat.
Neglecting Protective Finishes
Skipping protective finishes exposes canvas to dust and moisture. Finishes like varnish protect colors and texture. They also prevent fading from sunlight. Apply finishes carefully for long-lasting results.
Creative Variations
Creative variations make turning a picture into a canvas exciting and personal. Experimenting with different styles and techniques can highlight your photo in unique ways. These ideas can inspire you to design a canvas that fits your taste and space perfectly.
Collage Canvases
Collage canvases combine multiple photos on one canvas. This style tells a story or shows different moments together. Arrange pictures in grids, overlapping layers, or fun shapes. Use different sizes to create depth and interest. Collages give a dynamic and lively look to your wall art.
Mixed Media Options
Mixed media adds texture and dimension to your canvas. Combine your photo with paint, fabric, or paper elements. Use brush strokes to enhance colors or add patterns. Adding materials like wood or metal can create a tactile experience. Mixed media makes your canvas more artistic and unique.
Custom Shapes And Sizes
Canvas shapes and sizes can change the feel of your artwork. Choose squares, circles, or even abstract shapes to fit your space. Large canvases make a bold statement, while small ones fit cozy areas. Custom sizes allow your photo to shine exactly how you want. Unique shapes catch the eye and add style.
Frequently Asked Questions
How Do I Turn A Photo Into A Canvas Print?
You can turn a photo into a canvas print by uploading the image to an online service. Choose your canvas size and finish. The service will print and stretch the photo over a wooden frame for a ready-to-hang canvas.
What Materials Are Needed To Make A Photo Canvas?
To make a photo canvas, you need a high-resolution photo, canvas fabric, wooden stretcher bars, a printer or print service, and adhesive. You also need tools like a staple gun and scissors to stretch and secure the canvas.
Can I Make A Canvas From A Digital Picture At Home?
Yes, you can make a canvas at home using printable canvas sheets and an inkjet printer. After printing, stretch the canvas over a frame and secure it. This DIY method is budget-friendly and customizable.
What Resolution Is Best For Canvas Photo Printing?
For canvas printing, use a photo with at least 150 DPI at your desired print size. Higher resolution ensures clear, sharp images. Low resolution can result in pixelated or blurry canvas prints.
Conclusion
Turning a picture into a canvas adds charm to any space. It lets your memories shine in a fresh way. You can create personalized art that feels special. The process is simple and fun to try. Choose your favorite image and follow easy steps.
Enjoy seeing your photo come alive on canvas. This craft brings joy and beauty to your home. Give it a go and make your walls speak. A little effort creates lasting, meaningful decoration.


