
Are you looking for a smart way to add storage without taking up extra space? Building a shelf into your wall is the perfect solution.
It makes your room look cleaner, saves floor space, and adds a stylish touch. But you might wonder, “Where do I start? ” Don’t worry—this guide will walk you through every step, making the process simple and doable. By the end, you’ll have a strong, beautiful shelf that fits perfectly into your space.
Ready to transform your wall and boost your home’s organization? Let’s dive in!
Choosing The Right Location
Choosing the right location for building a shelf into a wall sets the foundation for a strong and functional space. It impacts how the shelf will hold weight and fit within the room’s design. Understanding your wall and surroundings helps avoid costly mistakes. This part covers how to find the best spot safely and smartly.
Assessing Wall Type
Start by identifying the wall material. Drywall, plaster, brick, or concrete each needs a different approach. Drywall is common but often requires finding studs for support. Brick and concrete need special tools and anchors. Knowing the wall type ensures the shelf stays secure and stable.
Finding Studs And Avoiding Wiring
Studs are vertical wooden beams behind drywall. Shelves must attach to studs for strength. Use a stud finder to locate these supports. Move the finder slowly across the wall until it signals a stud. Avoid cutting into electrical wires or pipes hidden in walls. A wire detector tool helps prevent accidents and damage.
Measuring Space For The Shelf
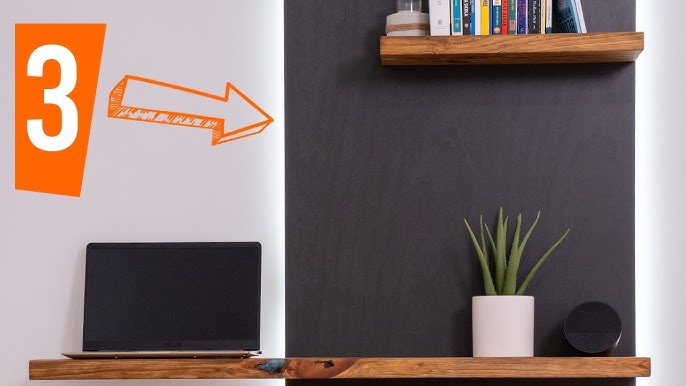
Measure the available space carefully. Take the height, width, and depth into account. Ensure the shelf fits without blocking switches, vents, or doors. Mark the area clearly on the wall. Double-check measurements before cutting or drilling. Accurate sizing keeps the shelf functional and neat.

Credit: www.reddit.com
Selecting Materials And Tools
Selecting the right materials and tools is key to building a strong wall shelf. The choice affects how sturdy and lasting your shelf will be. This section covers the basics to help you prepare well.
Picking Shelf Material
Wood is popular for shelves. It looks good and holds weight well. Pine is affordable and easy to cut. Oak and maple are harder and last longer. Plywood offers a smooth surface and resists warping.
Consider metal for a modern look. Metal shelves are durable and support heavy items. Glass shelves look sleek but need strong support. Choose materials that match your room style and shelf use.
Gathering Essential Tools
Tools make the job easier and safer. A drill will help you make holes and insert screws. Use a level to keep the shelf straight. A stud finder locates wall studs for strong mounting. A tape measure ensures precise cuts and placement.
Other useful tools include a screwdriver, hammer, and pencil for marking. Sandpaper smooths rough edges on wood. Safety gear like goggles and gloves protects you during work.
Choosing Fasteners And Brackets
Fasteners hold the shelf firmly to the wall. Screws work best with studs. Wall anchors help if no stud is available. Use heavy-duty anchors for heavier shelves.
Brackets support the shelf from below. Metal brackets are strong and come in many styles. Floating shelf brackets hide the support for a clean look. Match bracket size to the shelf depth and weight load.
Preparing The Wall
Clear the wall surface and remove any nails or screws before starting. Mark the shelf area and check for studs to ensure strong support.
Preparing the wall for a built-in shelf is crucial. It sets the stage for a successful installation. This process involves careful planning and attention to detail. Let’s explore how to prepare your wall effectively.Marking The Shelf Position
Identify where the shelf will go. Use a measuring tape to ensure accuracy. Mark the position with a pencil. Double-check the measurements before cutting. Accurate marking prevents costly mistakes.Cutting The Drywall Safely
Put on safety goggles and gloves. Use a drywall saw for precise cuts. Follow your pencil marks closely. Cut slowly to avoid damaging the wall. Ensure no electrical wires are in the path.Cleaning And Smoothing The Opening
Remove debris from the opening. Use sandpaper to smooth rough edges. Ensure the opening is clean and even. This helps the shelf fit snugly. A smooth finish enhances the final appearance.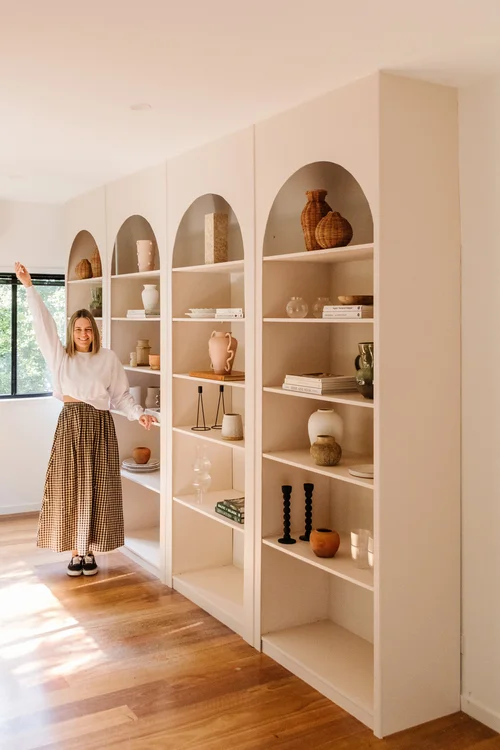
Credit: www.smorhome.com
Building The Shelf Frame
Building the shelf frame is the key to a strong, lasting shelf. This step creates the skeleton that holds the shelf in place. A well-built frame fits snugly inside the wall cavity. It supports the weight of items placed on the shelf. Careful measuring and cutting help the frame fit perfectly.
Use quality wood to ensure durability. Follow safety rules when cutting and assembling. The frame must be sturdy and square before installation.
Cutting And Assembling Frame Pieces
Measure the wall cavity height and width carefully. Mark the wood pieces before cutting. Use a saw to cut the pieces to size. The frame usually consists of two vertical sides and two horizontal supports.
Lay the pieces flat on a clean surface. Assemble them using wood screws or nails. Use wood glue at joints for extra strength. Check each corner to make sure it forms a right angle.
Securing Frame Inside The Wall
Place the frame inside the wall opening. Ensure it fits snugly without forcing. Use a level to check the vertical and horizontal alignment.
Secure the frame to the wall studs using long screws. Drive screws through the frame edges into the studs. Add screws at all corners and midpoints for stability.
If the wall has drywall, be careful not to damage it. Use drywall anchors if studs are not accessible.
Checking For Level And Stability
Use a spirit level on the top and sides of the frame. Adjust the frame by tapping it gently with a hammer. Insert shims between the frame and wall if needed. Tighten screws after adjustments.
Test stability by pressing on the frame lightly. It should not move or wobble. A solid frame ensures your shelf will hold weight safely.
Installing The Shelf Surface
Installing the shelf surface is where your project truly takes shape. This phase transforms your framed space into a functional and attractive shelf. Each step requires precision and care to ensure the shelf not only fits perfectly but also supports the weight it will carry.
Cutting Shelf Boards To Size
Start by measuring the exact length and width needed for your shelf boards. Use a reliable saw to cut the boards cleanly, making sure edges are straight and smooth. If you have multiple shelves, labeling each board helps keep your work organized and efficient.
Attaching Shelf To Frame
Place the cut boards onto the wall frame carefully, checking alignment as you go. Use screws or brackets designed for shelves to secure the boards firmly to the frame. Don’t rush this part—loose attachment can cause instability and damage.
Finishing Touches And Sealing
Once the shelf is attached, sand any rough spots to avoid splinters and give the surface a polished look. Applying a sealant or varnish protects the wood from moisture and wear. Think about the room’s style—choosing the right finish can enhance your shelf’s appearance and longevity.
Painting And Decorating
Painting and decorating your built-in wall shelf brings it to life. This step makes the shelf blend with your room’s style. A fresh coat of paint can protect the wood and give a clean finish. Decorating adds personality and charm to the space. Follow simple tips to make your shelf look great and last longer.
Priming And Painting The Shelf
Start by sanding the shelf surface smooth. Remove dust with a clean cloth. Use a primer to prepare the wood. Primer helps paint stick better and last longer.
Choose paint suitable for wood or drywall. Use a brush or roller for even coverage. Apply two thin coats rather than one thick coat. Allow the paint to dry fully between coats.
Adding Decorative Elements
Decorate the shelf to match your room’s theme. Use wallpaper or contact paper on the back panel. Add molding or trim for a classic look.
Try stencils or decals for patterns and shapes. Small plants, books, or art pieces enhance the shelf’s appeal. Keep decorations balanced and not overcrowded.
Maintaining The Shelf Over Time
Dust the shelf regularly with a soft cloth. Avoid harsh cleaners that damage paint or wood. Touch up scratches or chips with matching paint.
Check for loose screws or brackets. Tighten them to keep the shelf secure. Proper care keeps your shelf looking fresh and sturdy.
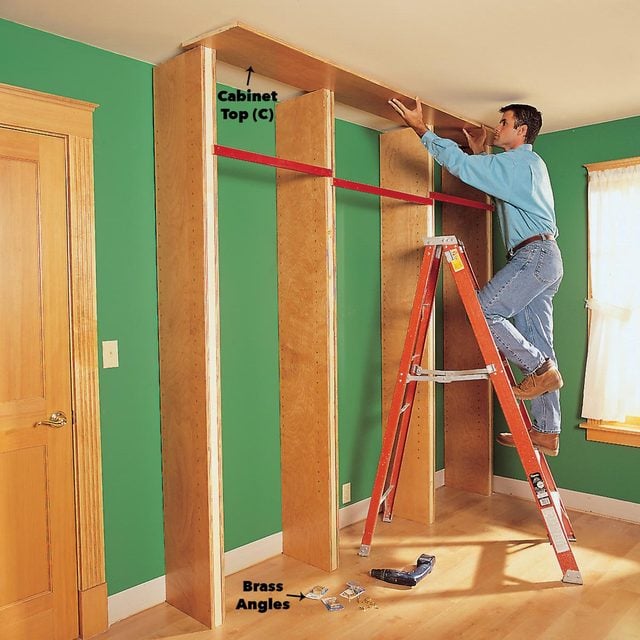
Credit: www.familyhandyman.com
Frequently Asked Questions
How Do I Start Building A Shelf Into A Wall?
Begin by locating studs with a stud finder. Measure and mark the desired shelf space. Cut an opening between the studs. Install support brackets or a frame inside the wall. Secure the shelf board onto the supports. Finish with drywall and paint.
What Tools Are Needed For Wall Shelf Installation?
You need a stud finder, measuring tape, level, saw, drill, screws, and a screwdriver. Also, have a pencil for marking and safety gear like goggles and gloves. These tools ensure precise cutting, secure mounting, and safe construction.
Can I Build Shelves In Drywall Without Studs?
Yes, but use heavy-duty wall anchors or toggle bolts. These provide extra support in drywall. However, shelves won’t hold as much weight as when attached to studs. Always assess the weight your shelf will carry before installation.
How Much Weight Can A Built-in Wall Shelf Hold?
Weight capacity depends on stud spacing, shelf material, and fasteners used. Typically, a properly mounted shelf on studs can hold 20-50 pounds per linear foot. Always use strong brackets and secure screws to increase stability and load capacity.
Conclusion
Building a shelf into a wall saves space and adds style. It takes some tools and careful steps. Measure well, cut carefully, and secure the shelf firmly. Use the right materials to keep it strong. This project can improve any room’s look and function.
Try it yourself and enjoy the neat, clean result. Small efforts bring big changes to your home. Keep practicing to get better each time. Simple shelves can hold many things safely and look great too.


