
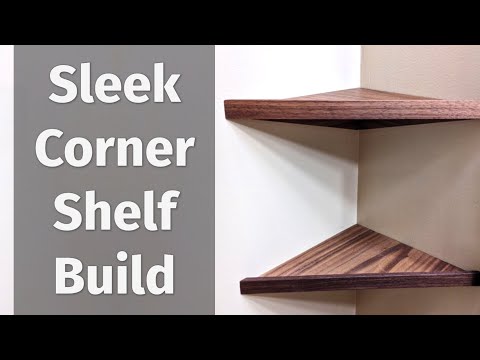
Looking to add style and storage without taking up floor space? A corner floating shelf is the perfect solution for you.
It’s a simple way to make use of unused corners, giving your room a fresh, modern look while keeping your favorite items on display. Whether you’re a beginner or just want a quick, clear guide, this post will walk you through each step so you can build your own sturdy, attractive corner floating shelf.
Ready to transform your space and impress everyone with your DIY skills? Let’s get started!
Choosing The Right Materials
Choosing the right materials is crucial for building a corner floating shelf that is both sturdy and stylish. The materials you pick will affect the shelf’s durability, appearance, and how easy it is to install. Let’s break down what you need to consider before starting your project.
Selecting Wood Types
The type of wood you choose sets the foundation for your shelf’s look and strength. Hardwoods like oak or maple offer excellent durability and a rich finish, perfect if you want a long-lasting piece. Softwoods such as pine are easier to work with and more budget-friendly, but they might dent or scratch more easily.
Think about where you’ll place the shelf and what you’ll put on it. Heavy items need stronger wood. If you want to paint your shelf, plywood or MDF are good choices since they have smooth surfaces that accept paint well.
Picking The Best Brackets
Brackets are the hidden heroes of floating shelves. They support the weight and keep the shelf securely attached to the wall. Choose brackets specifically designed for floating shelves—they fit inside the wood and don’t show.
Consider the weight you plan to put on the shelf. Steel brackets offer great strength and durability. If you want a minimalist look, slim-profile brackets are ideal but make sure they can handle your load.
Gathering Tools And Supplies
Having the right tools makes the project smoother and safer. Basic tools include a drill, level, stud finder, screws, and a measuring tape. Don’t forget sandpaper to smooth the wood edges and wood glue for extra strength.
Double-check that your screws and anchors match the wall type—drywall, plaster, or brick need different hardware. Missing one key tool can turn a quick project into a frustrating one. What tools do you already have that can help you get started today?
Credit: simplyalignedhome.com
Measuring And Planning
Measuring and planning are key steps to create a sturdy corner floating shelf. Precise measurements prevent mistakes and ensure a perfect fit. Planning helps visualize the final look and avoid surprises during installation. Take time to measure carefully and plan your design well.
Finding The Perfect Corner
Choose a corner that is easy to reach and fits your room’s style. Check the wall condition to hold the shelf safely. Avoid corners with pipes or wires inside the wall. Use a stud finder to locate strong support points behind the drywall.
Marking Dimensions Accurately
Use a tape measure to get exact wall lengths. Mark the shelf height clearly on both walls of the corner. Double-check measurements to avoid errors. Mark the width of the shelf on each wall, keeping balance in mind. Use a pencil for easy adjustments.
Designing The Shelf Layout
Sketch the shelf shape on paper or use a digital tool. Decide the shelf depth and length based on available space. Plan for brackets or hidden supports to keep the shelf stable. Think about the items you want to place on the shelf. Create a simple, clean design that fits your room style.
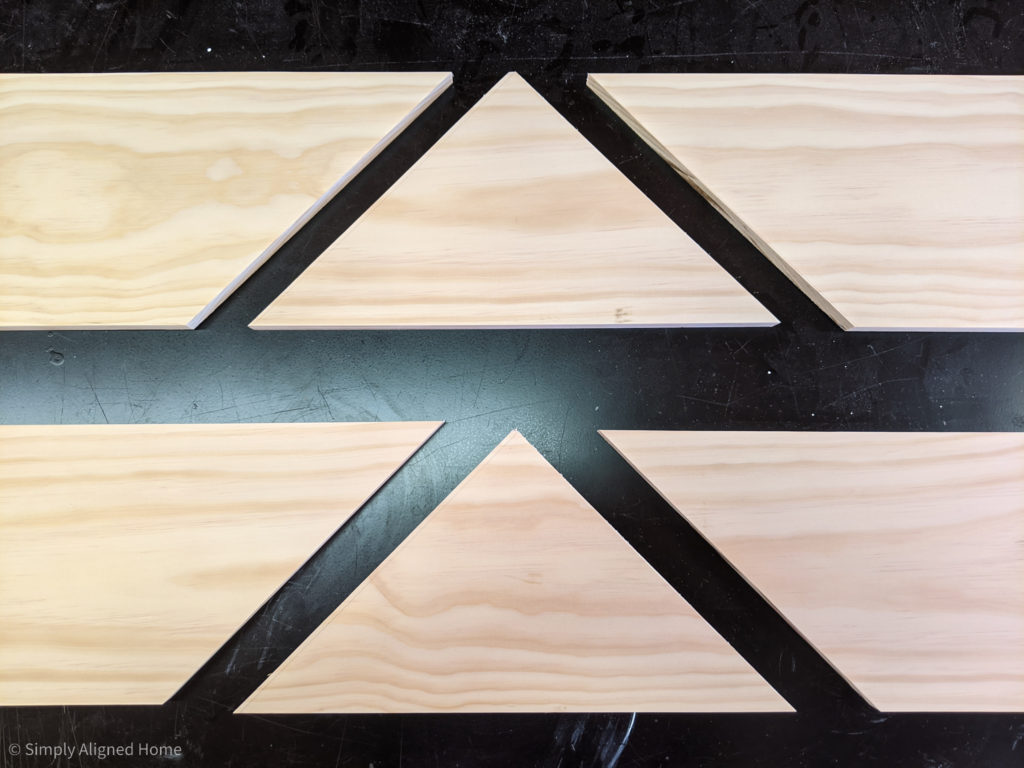
Cutting And Preparing Wood
Creating a corner floating shelf can be a rewarding DIY project, but it starts with cutting and preparing the wood correctly. This phase is crucial for ensuring that your shelf is both sturdy and visually appealing. With the right approach, you’ll set the foundation for a beautiful piece that fits seamlessly into your living space.
Measuring And Marking Cuts
Begin by measuring the space where your shelf will be installed. Use a tape measure to get precise dimensions. Remember, accuracy here will save you time and frustration later.
Once you have the measurements, transfer them onto your wood. Use a pencil for clear, erasable markings. A square tool can help ensure your lines are straight, giving you a perfect guide for cutting.
Using Saws Safely
Safety should be your top priority when cutting wood. Always wear safety goggles and gloves. Keep your workspace clear of any clutter to avoid accidents.
Choose the right saw for your needs. A circular saw is great for long, straight cuts, while a jigsaw works well for curves. Keep your hands clear of the blade, and never rush through a cut—patience leads to precision.
Sanding For Smooth Edges
After cutting, your wood pieces will likely have rough edges. Sanding smooths these edges, making your shelf look polished and professional. Use medium-grit sandpaper for initial smoothing, followed by fine-grit for a sleek finish.
Consider using an electric sander for larger pieces, as it saves time and effort. Always sand in the direction of the wood grain to avoid scratches. Can you feel the difference when you run your hand over the sanded surface? That’s the sign of a job well done.
Taking the time to properly cut and prepare your wood will ensure your corner floating shelf is not only functional but also a beautiful addition to your home. Are you ready to see your project take shape?
Assembling The Shelf
Assembling your corner floating shelf is a crucial phase that determines how well it will hold up and look on your wall. Careful attention to each part ensures your shelf is both secure and visually appealing. Let’s break down the process so you can confidently build a shelf that stands the test of time.
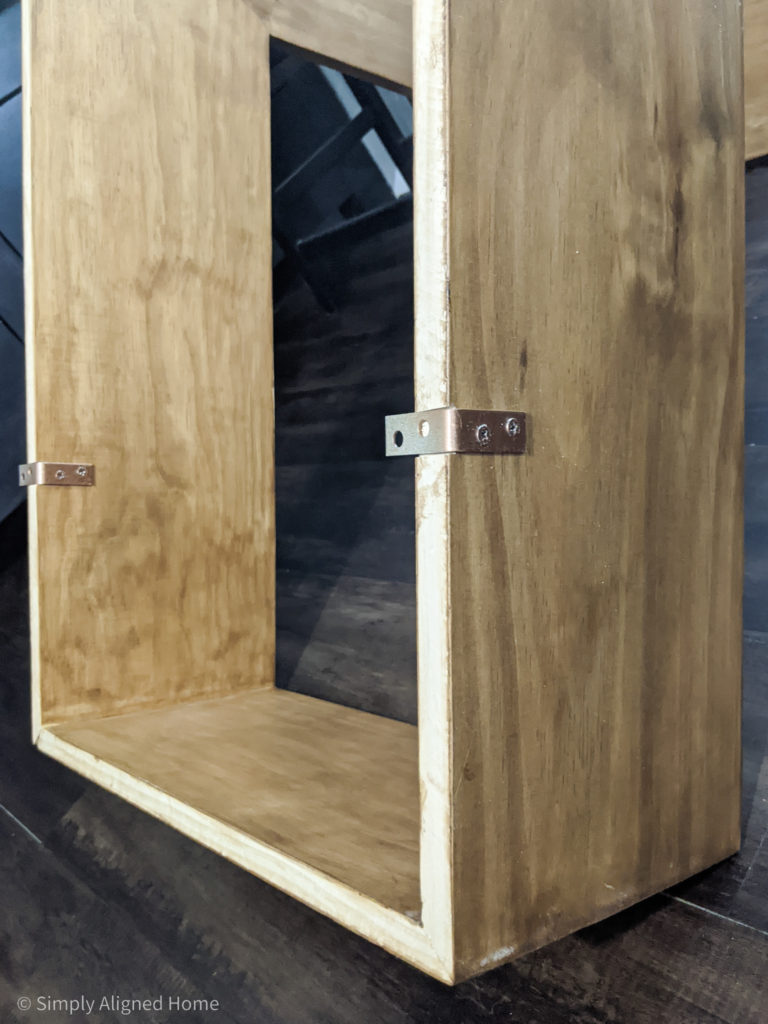
Attaching The Brackets
Start by identifying the brackets that will support the shelf. These are the backbone of your floating shelf, so choose sturdy metal brackets designed for corner shelves.
Use a drill to attach the brackets to the underside of the shelf board. Make sure the screws are tight but avoid over-tightening to prevent wood damage. Align the brackets evenly so the shelf will sit flat later.
Securing The Shelf To The Wall
Locate the studs in your wall using a stud finder; anchoring the shelf here adds the most strength. Mark the bracket holes on the wall, then drill pilot holes for screws or wall anchors.
Attach the shelf by screwing the brackets into the wall studs or anchors. If you’re dealing with drywall only, use heavy-duty anchors to avoid the shelf pulling loose.
Ensuring Stability And Level
Once the shelf is mounted, check its level using a carpenter’s level. A crooked shelf can ruin the look and cause items to slide off.
If the shelf isn’t perfectly level, adjust the brackets slightly or add small shims behind the shelf until it balances. Give it a gentle shake to test stability; it should feel firm without any wobble.
Finishing Touches
The finishing touches bring your corner floating shelf to life. These final steps enhance the look and protect the wood. A well-finished shelf fits perfectly in your room’s style. Small details make a big difference in appearance and durability.
Painting And Staining Options
Choose paint or stain based on your room’s color scheme. Paint offers bright, solid colors that cover wood grain. Stain enhances the natural beauty of the wood. Both protect the shelf from moisture and wear.
Use a brush or foam applicator for smooth coverage. Light sanding between coats helps the finish stick well. Apply at least two coats for a long-lasting look. Allow each coat to dry completely before adding the next.
Adding Decorative Elements
Decorative touches personalize your shelf and make it unique. Consider:
- Adding small metal brackets for a rustic feel
- Attaching trim or molding for a classic look
- Using stencils to paint patterns or designs
- Applying wallpaper or fabric to the shelf’s surface
These additions add charm and can match your room’s theme. Keep decorations simple to avoid overpowering the shelf’s purpose.
Maintaining The Shelf
Regular care keeps your shelf looking great for years. Dust it weekly with a soft cloth. Avoid using harsh chemicals that can damage the finish. For stains, use mild soap and water, then dry thoroughly.
Check the shelf’s stability now and then. Tighten screws or brackets if needed. Proper maintenance protects your investment and keeps the shelf safe to use.
Credit: simplyalignedhome.com
Creative Styling Ideas
Creative styling ideas make corner floating shelves both practical and beautiful. These shelves fit snugly into corners, saving space and adding charm. Styling them smartly can enhance any room’s look.
Use a mix of items to keep the display interesting. Balance colors, shapes, and sizes for visual appeal. Let each shelf tell a small story or serve a purpose.
Displaying Plants And Books
Place small potted plants alongside stacked books. Plants add life and color, while books bring warmth and personality. Use plants with different leaf shapes for variety.
- Succulents or small ferns work well on shelves.
- Stack books horizontally to create layers.
- Mix book colors for a playful look.
Using For Kitchen Storage
Corner shelves can hold spices, jars, and utensils. Keep frequently used items within easy reach. Use matching containers for a neat appearance.
- Arrange spice jars by color or size.
- Display decorative bowls or mugs.
- Keep cutting boards or small tools nearby.
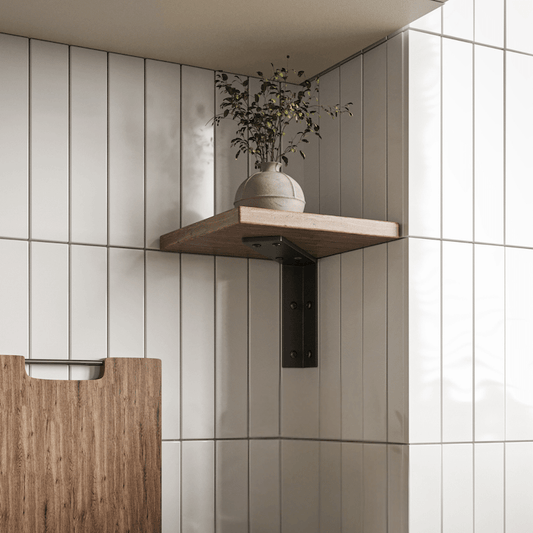
Showcasing Art And Collectibles
Highlight small art pieces, figurines, or souvenirs. Use shelf space to create mini galleries. Position items at different heights for interest.
- Place framed photos or small canvases.
- Display unique collectibles or antiques.
- Use stands to elevate certain pieces.
Credit: cascadeironco.com
Frequently Asked Questions
What Tools Are Needed To Make A Corner Floating Shelf?
You need a drill, level, measuring tape, screws, brackets, and a saw. Optional tools include a stud finder and sandpaper. These tools ensure accurate measurements and secure installation.
How Do You Find Studs For A Corner Floating Shelf?
Use a stud finder to locate studs behind the drywall. Mark their positions with a pencil. Securing the shelf to studs ensures it holds weight safely and stays sturdy.
What Wood Types Are Best For Corner Floating Shelves?
Choose sturdy woods like pine, oak, or plywood. These woods provide durability and a smooth finish. They are easy to cut and support heavier items on the shelf.
How To Ensure A Floating Shelf Is Level In The Corner?
Use a spirit level during installation to check alignment. Adjust brackets and screws as needed. A level shelf prevents items from sliding off and looks professional.
Conclusion
Making a corner floating shelf is simple and rewarding. You only need a few tools and some patience. This shelf saves space and looks neat in any room. Follow each step carefully for best results. You can add your personal touch with paint or stain.
This project boosts your home’s style and function. Try it yourself and enjoy the new shelf you built. Small changes can make a big difference.


