
Have you ever wanted to turn your favorite photo into a stunning piece of wall art? Blowing up pictures to create large, eye-catching prints can transform any room instantly.
But how do you make sure your image stays sharp and vibrant, no matter the size? You’ll discover simple steps to blow up your pictures without losing quality. Whether it’s for your living room, office, or a special gift, you’ll learn how to create wall art that grabs attention and brings your space to life.
Keep reading, and get ready to make your walls speak!

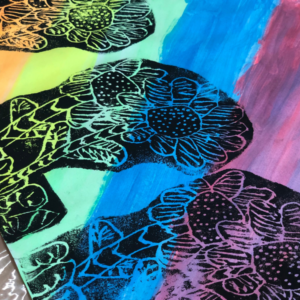
Credit: www.youtube.com
Choosing The Right Image
Choosing the right image is the foundation of creating stunning wall art. The quality and format of your photo can make a huge difference when blown up to large sizes. Picking an image that maintains clarity and detail ensures your art looks professional and impressive on any wall.
High Resolution Importance
High resolution means more pixels and sharper details. When you enlarge a picture, low-resolution images become blurry or pixelated. Always aim for images with at least 300 DPI (dots per inch) for clear prints.
Think about a vacation photo you loved but took on an old phone. When you tried to print it big, the details got fuzzy. That’s why starting with a high-resolution image saves you from disappointment.
File Formats To Use
Choosing the right file format matters for quality preservation. JPEG is common but compresses images, which can reduce quality. For wall art, formats like TIFF or PNG keep more detail intact.
TIFF files are perfect if you want lossless quality, especially for professional printing. PNG works well for images with transparent backgrounds or graphics. Avoid formats that compress too much or lose data.
Checking Image Quality
Before printing, zoom in on your image at 100% to check for blurriness or noise. Does the picture hold sharp edges, or does it look grainy? This simple step can prevent a blurry print disaster.
Try printing a small test section of the image at the intended size. If details look fuzzy, look for a better photo or choose a smaller print size. Your wall art deserves the best clarity you can provide.
Preparing Your Image
Preparing your image is a key step before blowing it up for wall art. This process ensures the final print looks sharp and vibrant. Small details in editing can make a big difference on large prints. Focus on cropping, color correction, and cleaning up imperfections.
Cropping And Composition
Cropping helps focus on the main subject of the image. Remove unnecessary parts to create a balanced look. Use the rule of thirds to place important elements off-center. Keep in mind the size and shape of your wall space. Adjust the image to fit the frame without cutting out key details.
Color Correction Basics
Colors often look different on screen than on print. Adjust brightness and contrast to avoid dull prints. Enhance saturation carefully to keep colors natural. Fix white balance to correct color tones. Use simple editing tools to improve overall image vibrancy. This step makes your art pop on the wall.
Removing Imperfections
Large prints show flaws clearly. Remove dust spots, scratches, or unwanted objects from the image. Use cloning or healing tools in editing software. Smooth out uneven areas without losing texture. Clean images look professional and attractive. This step helps your wall art stand out beautifully.
Selecting Enlargement Methods
Choosing the right enlargement method keeps your picture clear and sharp on large walls. Digital resizing and printing techniques affect quality and detail. Consider the image resolution and printing material for the best results.
Selecting the right method to enlarge pictures for wall art is crucial. It determines the final quality of your artwork. Different methods offer various benefits and challenges. Your choice depends on your budget, skills, and desired outcome. Explore the options to find what suits your needs best.Using Photo Editing Software
Photo editing software allows precise control over image size. Programs like Adobe Photoshop and GIMP are popular choices. They help adjust the image resolution without losing quality. Ensure you use the correct settings for enlargement. This prevents pixelation and maintains sharpness. Many software options offer tutorials for beginners. This makes the process easier to understand and execute.Professional Printing Services
Professional services provide high-quality enlargements. They use advanced printers and materials. You can choose from various paper types and finishes. This option saves time and ensures professional results. Many printing shops offer online services. You can upload your image and select your preferences. The finished product is then shipped to your door.Diy Printing Tips
Printing at home is cost-effective and convenient. Ensure your printer supports large format prints. Use high-quality photo paper for best results. Adjust printer settings to match your image size. Test a small section before printing the entire image. This helps avoid mistakes and wasted materials. Consider using online guides for additional help.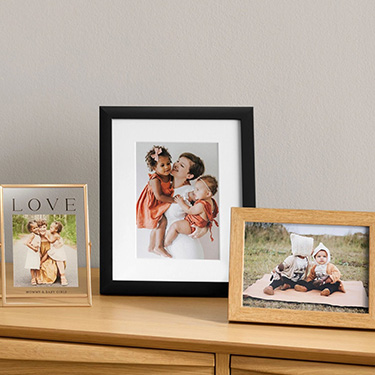
Credit: www.shutterfly.com
Maintaining Image Quality
Maintaining image quality is key when you blow up pictures for wall art. A large print can easily reveal flaws that are invisible on a screen. To keep your artwork looking sharp and vibrant, you need to understand how to avoid pixelation, use upscaling techniques wisely, and apply sharpening and smoothing effectively.
Avoiding Pixelation
Pixelation happens when the image’s resolution is too low for the size you want. You’ll notice the image looks blocky or blurry up close. To avoid this, start with the highest resolution file you have.
Check the image’s pixel dimensions before printing. For wall art, aim for at least 300 DPI (dots per inch) at the final print size. If you’re unsure about your image’s quality, zoom in to 100% on your computer—if it looks sharp there, it’s a good sign.
Upscaling Techniques
Upscaling means increasing your image’s resolution to fit a larger print without losing quality. Simple resizing often makes images blurry, but special software can help.
Tools like Adobe Photoshop’s Preserve Details 2.0 or AI-based upscalers improve quality by adding pixels intelligently. These tools analyze your image and fill in missing details, making your photo look clearer when enlarged.
Would you try a free AI upscaler before investing in professional software? Many online options offer surprisingly good results for casual projects.
Sharpening And Smoothing
After resizing, your image might look a bit soft or noisy. Sharpening helps bring back crisp edges, while smoothing reduces unwanted grain or artifacts.
Use sharpening tools carefully—too much can create harsh lines or halos. A subtle touch enhances details without making the image look unnatural.
Smoothing works well on portraits or photos with skin tones. Balance these two adjustments to keep your print both clear and pleasant to the eye.
Choosing The Right Materials
Choosing the right materials is crucial when blowing up pictures for wall art. The materials you pick affect how your image looks, feels, and lasts on your wall. Whether you want a vibrant splash of color or a subtle matte finish, understanding your options helps you get the best result.
Paper Types For Wall Art
Not all papers are created equal. Glossy paper makes colors pop and gives your image a shiny finish, but it can reflect light and show fingerprints easily. Matte paper, on the other hand, offers a smooth, glare-free look that works well in bright rooms.
Consider heavyweight papers if you want durability and a professional feel. Fine art papers, like cotton or textured options, add a tactile quality that can elevate simple photos into gallery-worthy pieces. What kind of texture or finish do you want your wall art to have?
Canvas Vs. Photo Paper
Canvas prints bring a classic, artistic vibe. They add depth and texture, making your photo feel more like a painting. Canvas also tends to be more durable and resistant to fading over time.
Photo paper offers sharper details and brighter colors, especially with high-resolution images. It’s perfect if you want crisp lines and a polished look. Think about whether you prefer a smooth, modern finish or the textured richness of canvas for your space.
Framing Options
Framing can make or break your wall art’s impact. Simple frames highlight the image without distraction, while ornate frames add personality and style. Floating frames or frameless options give a modern, sleek appearance.
Don’t forget about the glass or acrylic cover. UV-protective glass keeps colors vibrant and protects from dust. Ask yourself: do you want your art behind glass, or would you rather have the texture of canvas exposed?
Placement And Display Tips
Choosing the right spot and display style for your blown-up pictures can make all the difference in how they impact a room. Placement is not just about filling a wall; it’s about creating a focal point that enhances your space and reflects your taste. Let’s look at some practical tips to help you showcase your wall art perfectly.
Optimal Wall Selection
Pick a wall that naturally draws attention without overcrowding your space. Large, empty walls in living rooms, hallways, or above sofas work well. Avoid walls cluttered with shelves or busy patterns that compete with your art.
Think about the wall’s color and texture. A plain, light-colored wall often makes the colors in your picture pop more vividly. But if your art is minimalist, a darker or textured wall can add interesting contrast.
Lighting Considerations
Good lighting can elevate your wall art from ordinary to stunning. Natural daylight is ideal, but avoid direct sunlight that can fade prints over time. Instead, position your picture where it gets soft, indirect light.
If natural light isn’t an option, use adjustable spotlights or picture lights. These highlight details and create depth. Consider the angle too—lighting from above or the side often works best.
Arranging Multiple Prints
When you have several blown-up pictures, arrangement matters more than size. Try grouping prints by theme, color, or style to create harmony. Leave equal space between each piece to keep the display neat and balanced.
Use a layout on the floor first to see how different configurations look. You could go for a grid, a linear row, or a more eclectic gallery wall style. Which arrangement makes you want to stop and look longer?

Credit: www.youtube.com
Frequently Asked Questions
What Is The Best Resolution For Blowing Up Pictures?
For large prints, use images with at least 300 DPI at final size. Higher resolution ensures sharp, clear wall art without pixelation.
How Do I Choose The Right Size For Wall Art?
Measure your wall space first. Select a picture size that complements the room and maintains image quality when enlarged.
Which File Formats Work Best For Large Prints?
Use high-quality formats like TIFF, PNG, or high-res JPEGs. These preserve image details and colors during enlargement.
Can I Blow Up Smartphone Photos For Wall Art?
Yes, if the photo is high resolution and well-lit. Otherwise, image quality may degrade when enlarged.
Conclusion
Blowing up pictures for wall art can brighten any room. Choose good quality images for the best results. Use the right tools to keep your pictures clear and sharp. Always check the size and resolution before printing. Enjoy your personalized wall art that tells your story.
Simple steps make your space unique and inviting. Try different styles and sizes to find what fits best. Your walls deserve art that stands out and feels special.


