
Wiring a motion sensor light might sound tricky, but with the right steps, you can do it yourself and boost your home’s safety and convenience. Imagine never fumbling in the dark again or saving energy by having lights that only turn on when you need them.
In this guide, you’ll learn exactly how to wire your motion sensor light quickly and safely, even if you’ve never done electrical work before. Keep reading, and by the end, you’ll feel confident to tackle this simple project on your own.

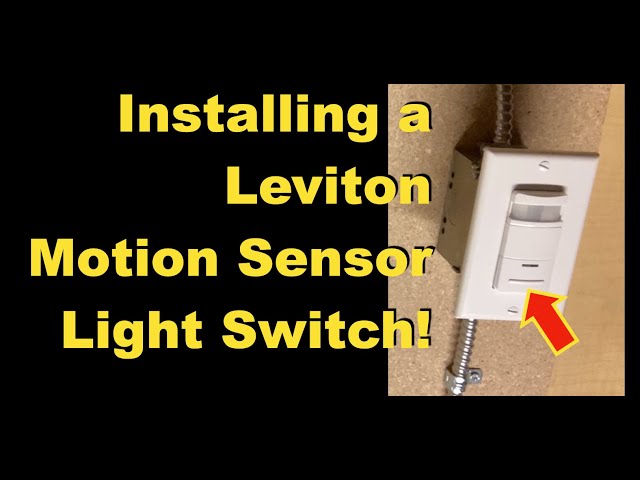
Credit: www.hardwareresources.com
Tools And Materials Needed
Wiring a motion sensor light requires specific tools and materials. Having everything ready helps the process go smoothly and safely. This section lists the essential items for the task.
Essential Tools
- Screwdriver set – both flathead and Phillips
- Wire stripper and cutter
- Voltage tester or multimeter
- Electrical tape
- Drill with bits (if mounting holes are needed)
- Wire connectors or wire nuts
- Ladder or step stool
Required Materials
- Motion sensor light fixture
- Electrical wires (matching your home’s wiring type)
- Mounting bracket or hardware (usually included with the light)
- Outdoor-rated electrical box (for outdoor installations)
- Weatherproof sealant (for outdoor use)
Safety Gear
- Insulated gloves
- Safety glasses
- Protective clothing
Choosing The Right Motion Sensor Light
Choosing the right motion sensor light depends on understanding basic wiring steps. Connecting wires correctly ensures the light works safely and efficiently. Simple tools and clear instructions make the wiring process easier for beginners.
Choosing the right motion sensor light can make a significant difference in both security and energy efficiency. When selecting a light, consider factors like the location where it will be installed, the type of motion sensor it uses, and the power source. Your choice will impact not only the effectiveness of the light but also how easy it is to maintain.Types Of Motion Sensors
Motion sensor lights come with various sensor types, each with unique benefits. – Passive Infrared (PIR) Sensors: These detect heat changes in a specific area. Ideal for outdoor use to avoid false alarms from wind or small animals. – Microwave Sensors: Emit microwave pulses and measure their reflection. They cover larger areas and are less prone to false alarms but might be more expensive. – Ultrasonic Sensors: Use sound waves to detect motion. They are effective indoors but can be triggered by fans or other moving objects. Understanding your specific needs will help you select the best sensor type for your situation.Power Source Options
Consider the power source when choosing a motion sensor light, as it impacts both installation and operation. – Hardwired: Connects directly to your home’s electrical system. This option provides a constant power supply but requires professional installation. – Battery-Powered: Offers flexibility in placement without the need for wiring. However, they require regular battery replacement. – Solar-Powered: Environmentally friendly and cost-effective in the long run. Best for areas with ample sunlight but may require a backup power source during cloudy days. Each power source has its pros and cons. Which one aligns best with your installation site and maintenance capabilities?Safety Precautions
Working with electrical wiring demands strict attention to safety. Motion sensor lights involve connections to your home’s power supply. Taking safety precautions helps prevent accidents and damage. Simple safety steps make the process easier and safer.
Always prepare before starting any wiring task. Understanding safety ensures a smooth and secure installation.
Turn Off The Power
Switch off the circuit breaker connected to the light fixture. Double-check with a voltage tester to confirm no electricity flows. Never work on live wires; it risks electric shock or injury.
Use Proper Tools And Equipment
Select insulated tools designed for electrical work. Use wire strippers, screwdrivers, and pliers safely. Wearing rubber-soled shoes and gloves adds extra protection.
Read The Manufacturer’s Instructions
Follow the motion sensor light’s manual carefully. Each model has unique wiring requirements and safety notes. Ignoring instructions can cause malfunction or hazards.
Check Local Electrical Codes
Know your area’s electrical rules before wiring. Compliance ensures safety and legal installation. Consult a professional if unsure about code details.
Work In A Dry Environment
Avoid wiring in wet or damp places. Water increases the risk of electrical shock. Choose a dry day or wait for suitable conditions.
Secure All Connections
Tightly connect wires using wire nuts or connectors. Loose connections can cause sparks or short circuits. Inspect each connection before turning power back on.
Test The Installation Safely
After wiring, turn power on carefully. Observe the motion sensor light’s response. If issues arise, turn off power immediately and check wiring again.

Credit: www.youtube.com
Preparing The Wiring Area
Preparing the wiring area is a crucial step before installing your motion sensor light. It ensures safety and makes the installation process smoother. Taking time here can save you from potential hazards and headaches later on.
Turning Off The Power
Safety should be your top priority. Before you touch any wires, locate your home’s circuit breaker panel and switch off the power to the area where you will be working.
Double-check by flipping the light switch to confirm the power is off. If the light doesn’t turn on, you’re good to proceed.
Have you ever underestimated this step? Skipping it can lead to serious injury or damage, so don’t rush.
Locating The Wiring Box
The wiring box is where you’ll connect the motion sensor light. It’s often found where your current outdoor light or fixture is installed.
Look for a metal or plastic box mounted to the wall or ceiling with visible wiring inside. If you can’t find it, try following the wiring path from inside your home to the outside.
Sometimes, these boxes are hidden behind covers or paint. Take your time to identify the correct spot to avoid confusion during installation.
Connecting The Wires
Connecting the wires of your motion sensor light is a critical step that ensures it functions safely and effectively. Getting familiar with the different wire colors and their roles can save you from common wiring mistakes. Let’s break down how to identify and connect each wire properly.
Identifying Wire Colors
Most motion sensor lights come with three main wires: live, neutral, and ground. The live wire usually appears blackor red, carrying the current to the light. The neutral wire is typically white, completing the circuit by carrying current back.
The ground wire is either greenor bare copper and provides safety by directing excess electricity away. If your wires look different, check the product manual or use a voltage tester to be sure. Have you ever been confused by wiring colors? Taking a moment to identify them correctly can prevent serious issues.
Connecting Live, Neutral, And Ground Wires
Once you’ve identified the wires, twist the ends of the matching wires together. Connect the live wire from your sensor to the live wire in your house. Do the same with the neutral wires, linking your sensor’s neutral to your home’s neutral.
For grounding, attach the sensor’s ground wire to the ground wire in your electrical box or the grounding screw. Use wire nuts to secure all connections firmly and wrap them with electrical tape for extra safety. Loose connections can cause flickering or failure, so double-check each link before moving on.
Remember, power should be off during this process. Have you tested your connections with a multimeter before turning the power back on? It’s a small step that can save time and headaches later.
Mounting The Motion Sensor Light
Mounting the motion sensor light correctly is key to its performance. The right placement ensures the sensor detects movement accurately. It also helps the light cover the needed area effectively.
Choose a location with a clear view of the area you want to monitor. Avoid obstructions like trees or walls. Mount the sensor at an ideal height for best detection.
Choose The Best Location
Select a spot where the sensor can easily detect movement. Avoid places with direct sunlight or heavy shadows. Look for areas that need lighting, such as doorways or pathways.
Prepare The Mounting Surface
Make sure the surface is clean and dry. Use a cloth to remove dust or dirt. Check that the surface is strong enough to hold the light securely.
Attach The Mounting Bracket
Use screws or anchors suitable for the surface type. Hold the bracket steady while fixing it in place. Ensure it is level to keep the light aligned.
Secure The Motion Sensor Light
Slide or screw the light onto the mounting bracket. Double-check that it fits tightly and won’t move. Adjust the angle to cover the desired detection zone.
Test The Sensor Angle
Walk through the sensor’s field of view to check detection. Adjust the sensor’s position if it misses movement. Fine-tune the angle for maximum coverage.
Testing The Setup
Testing the setup of your motion sensor light is important. It confirms the wiring is correct and the device works well. This step helps catch any problems before final use. Take time to check all functions carefully. Observe how the sensor reacts to movement and light changes. Adjust settings for best performance. Proper testing ensures safety and saves time later.
Adjusting Sensitivity And Timer Settings
Sensitivity controls how far the sensor detects motion. Turn the dial or press buttons to change it. Low sensitivity limits detection to close movement. High sensitivity covers a wider area but may cause false alarms.
The timer setting controls how long the light stays on. Set it from a few seconds to several minutes. Choose a time that matches your needs. Short times save energy. Longer times provide more light.
Test different settings by walking in front of the sensor. Watch how the light responds. Adjust until the sensor triggers at the right distance. Set the timer to a comfortable duration.
Troubleshooting Common Issues
If the light does not turn on, check the wiring again. Make sure all connections are tight and correct. Confirm the power supply is working. Test the sensor in a dark room for best results.
False triggers happen if the sensitivity is too high. Lower the sensitivity to reduce this problem. Avoid pointing the sensor at moving branches or cars.
The light staying on constantly may mean the timer is set too long. Reduce the timer or reset the sensor. Dirt or damage on the sensor lens can affect performance. Clean the lens gently with a soft cloth.
If problems continue, consult the product manual or contact support. Proper testing and adjustments help your motion sensor light work smoothly.

Credit: www.youtube.com
Frequently Asked Questions
How Do I Connect Wires For A Motion Sensor Light?
To connect wires, turn off power first. Match black to black, white to white, and ground wires. Secure connections with wire nuts. Follow the sensor’s wiring diagram for proper setup.
Can I Install A Motion Sensor Light Myself?
Yes, you can install it yourself with basic electrical knowledge. Always turn off power before wiring. Follow manufacturer instructions carefully for safety and correct installation.
What Tools Are Needed To Wire Motion Sensor Lights?
You’ll need a screwdriver, wire stripper, voltage tester, wire nuts, and electrical tape. These tools help ensure safe, secure wiring and proper installation of your motion sensor light.
How To Test If The Motion Sensor Light Is Wired Correctly?
After wiring, restore power and trigger the sensor. The light should turn on immediately. If it doesn’t, recheck connections and settings. Use a voltage tester for troubleshooting.
Conclusion
Wiring a motion sensor light is simple with the right steps. Safety matters most, so always turn off power first. Connect wires carefully and follow the instructions closely. Test the light to make sure it works well. This setup helps save energy and adds security to your space.
Taking your time will make the process smooth and safe. Now, your motion sensor light is ready to use. Enjoy bright, automatic lighting whenever you need it.


