
Setting up a queen bed frame might seem tricky at first, but it doesn’t have to be. Imagine sinking into your perfectly assembled bed after a long day, knowing you built it yourself.
You’re just a few simple steps away from that comfort. This guide will walk you through everything you need to know, making the process smooth and even enjoyable. Ready to transform your bedroom with ease? Let’s get started.
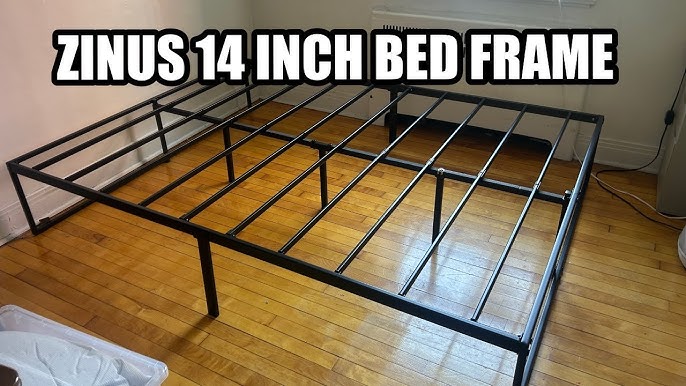
Choosing The Right Bed Frame
Choosing the right bed frame is a key step in setting up your queen bed. The right frame not only supports your mattress but also complements your bedroom style and fits your space perfectly. Think about what matters most to you: durability, design, or functionality.
Materials And Styles
Bed frames come in a variety of materials, each with its own benefits. Metal frames are sturdy and often budget-friendly, while wooden frames bring warmth and can last for years. If you prefer a modern look, consider upholstered frames that add a touch of softness and elegance.
Consider the style of your room too. A minimalist metal frame fits well in a contemporary space, while a carved wooden frame suits a traditional bedroom. What kind of atmosphere do you want to create? That will guide your choice.
Measuring Your Space
Before buying, measure your bedroom carefully. Your queen bed frame needs enough room not only for the bed but also for walking space and other furniture. Don’t forget to check the ceiling height if you’re considering a canopy or loft-style frame.
Use a tape measure and sketch a rough floor plan. This helps avoid surprises like a frame that’s too wide or too long. How much space can you realistically dedicate to your bed without crowding the room?
Weight Capacity Considerations
Your bed frame must support your mattress and anyone who uses the bed. Check the manufacturer’s weight limit to ensure safety and longevity. Solid hardwood and metal frames typically offer higher weight capacities compared to particleboard or lightweight designs.
Think about your lifestyle too. Do you sleep with pets or children? Extra weight means you need a frame built to handle it. Choosing a frame with a higher weight capacity prevents sagging and damage over time.

Credit: www.walmart.com
Tools Needed For Assembly
Setting up a queen bed frame needs a few basic tools. Having the right tools ready makes the process smooth and fast. It also helps avoid mistakes and damage to the parts. Below is a list of tools you will need. Some are essential, while others make the job easier.
Basic Tools Checklist
- Screwdriver (Phillips and flathead)
- Allen wrench (usually included)
- Hammer or rubber mallet
- Measuring tape
- Wrench or adjustable spanner
These basic tools cover most queen bed frame assemblies. They help tighten bolts, align pieces, and secure screws.
Optional Tools For Easier Setup
- Power drill with screwdriver bits
- Level tool to check evenness
- Socket wrench set
- Work gloves for hand protection
- Plastic or cloth pads to protect floors
Optional tools reduce effort and speed up assembly. A power drill saves time on screws. A level tool ensures the frame sits flat. Gloves protect hands from splinters or sharp edges.
Preparing Your Workspace
Preparing your workspace is the first crucial move when setting up a queen bed frame. It sets the tone for how smooth and efficient the entire assembly process will be. Taking a little time to get organized can save you from frustration and unnecessary trips back and forth.
Clearing The Area
Start by picking a spacious spot with enough room to move around comfortably. You don’t want to be cramped or risk scratching your new bed frame or the floor. Move any furniture, rugs, or clutter out of the way.
Think about where the bed will stand and clear that entire space plus a few feet around it. This makes it easier to lay out all the parts and tools. Have you ever tried assembling furniture in a tight corner? It’s a hassle and can slow you down significantly.
Organizing Parts And Hardware
Once the area is clear, unpack your bed frame kit carefully. Lay out every piece on a clean, flat surface where you can see them clearly. Group similar parts together—legs in one pile, side rails in another, screws and bolts sorted by size.
Use small containers or bowls for tiny screws and washers to prevent them from rolling away. Check your instruction manual against your parts to make sure nothing is missing. This step helped me avoid a last-minute hardware hunt that delayed my setup by hours.
Step-by-step Assembly Guide
Setting up a queen bed frame may seem challenging. With the right guidance, it’s simple. This step-by-step assembly guide will help. Follow these instructions to assemble your bed frame quickly.
Assembling The Side Rails
Start by connecting the side rails to the frame. Align each rail with the headboard and footboard slots. Ensure the rails fit snugly. Use bolts to secure them tightly. Check for stability before moving on.
Attaching The Headboard And Footboard
Next, attach the headboard and footboard. Position the headboard upright and align it with the frame. Insert screws through the pre-drilled holes. Tighten them using a screwdriver or wrench. Repeat the process for the footboard.
Securing The Slats
Now, place the slats across the frame. Ensure even spacing between each slat. Secure the slats using screws or clips. This will provide support for the mattress. Double-check the alignment for consistency.
Final Tightening And Checks
Finally, perform a thorough check of all connections. Tighten any loose screws or bolts. Ensure the frame feels sturdy and secure. This step ensures your bed is safe and ready for use.
Troubleshooting Common Issues
Setting up a queen bed frame can sometimes lead to small issues that slow you down. These common problems are easy to fix with a little attention. Troubleshooting saves time and keeps your bed sturdy and safe.
Dealing With Loose Screws
Loose screws cause the bed frame to wobble or make noise. Check each screw carefully after assembly. Tighten screws using the right tool, usually a screwdriver or Allen wrench. Avoid overtightening, which can strip the screw holes.
For screws that won’t stay tight, try adding a small drop of wood glue or thread locker. This helps hold screws firmly in place. Regularly inspect screws after use to keep the frame stable.
Aligning Misfit Parts
Sometimes parts do not fit perfectly. Misalignment can happen due to manufacturing differences or assembly errors. Lay out all parts first to identify where the fit is off.
Use gentle force to adjust parts into the correct position. Loosen nearby screws slightly to allow better alignment. Tighten screws only after parts fit well. Check the frame level with a spirit level for accuracy.
Handling Missing Hardware
Missing hardware can stop your setup. Check the package carefully before starting assembly. If hardware is missing, contact the seller or manufacturer for replacements.
Use temporary substitutes like screws from a local hardware store if waiting is not an option. Make sure substitutes match the size and strength needed. Keep a small hardware kit at home for quick fixes.

Credit: likimio.com
Maintaining Your Queen Bed Frame
Maintaining your queen bed frame keeps it strong and looking good. Regular care helps avoid damage and extends its life. Small efforts make a big difference in comfort and safety.
Regular Cleaning Tips
Dust your bed frame every week with a soft cloth. Use a vacuum with a brush attachment to clean hard-to-reach areas. For wood frames, a damp cloth works well to remove dirt. Avoid harsh chemicals that can damage the finish. For metal frames, wipe with a mild soap solution and dry quickly to stop rust.
Checking For Wear And Tear
Look closely at joints and screws for signs of loosening or rust. Inspect wooden parts for cracks or splinters that could cause injury. Check metal frames for bends or broken welds. Pay attention to the slats to ensure they are not cracked or warped. Catching problems early saves costly repairs later.
Tightening And Adjusting
Use the correct tools to tighten screws and bolts regularly. Do not overtighten, or you may damage the frame. Adjust any parts that feel loose to keep the bed stable. Make sure the frame sits evenly on the floor to avoid wobbling. Recheck adjustments after moving the bed or changing the mattress.

Credit: www.etsy.com
Frequently Asked Questions
How Do I Assemble A Queen Bed Frame Step-by-step?
First, unpack all parts and tools. Follow the manufacturer’s manual carefully. Attach side rails to the headboard and footboard. Secure slats evenly across the frame. Tighten all screws and bolts firmly to ensure stability.
What Tools Are Needed To Set Up A Queen Bed Frame?
You typically need a screwdriver, Allen wrench, and a hammer. Some frames include necessary tools in the package. Having a measuring tape can help with alignment. Always check the instruction manual for specific tool requirements.
How Much Space Is Required For A Queen Bed Frame?
A queen bed frame needs at least 60 inches wide and 80 inches long. Add extra space around the bed for easy movement. Ideally, leave 2-3 feet clearance on all sides for comfort and accessibility.
Can I Set Up A Queen Bed Frame Alone?
Yes, you can set it up alone if the frame is lightweight. However, having a helper makes alignment and lifting easier. Some frames are bulky or heavy, so assistance is recommended for safety.
Conclusion
Setting up a queen bed frame is simple with the right steps. Follow the instructions carefully and take your time. Make sure all parts fit well and tighten screws securely. A sturdy bed frame supports your mattress and improves sleep quality.
Enjoy your new bed and a comfortable rest every night. Small effort brings big comfort. Now, your bedroom feels complete and inviting.


