

Have you ever wanted to add a stylish mirror to your wall but felt unsure about how to do it safely? Gluing a mirror to the wall might seem tricky, but with the right steps, you can achieve a clean, secure look without drilling holes or using heavy frames.
Imagine transforming your space quickly and easily, making your room brighter and more spacious. Keep reading, and you’ll discover simple, foolproof tips that will help you stick your mirror perfectly every time—no stress, no mess. Your wall makeover starts here!
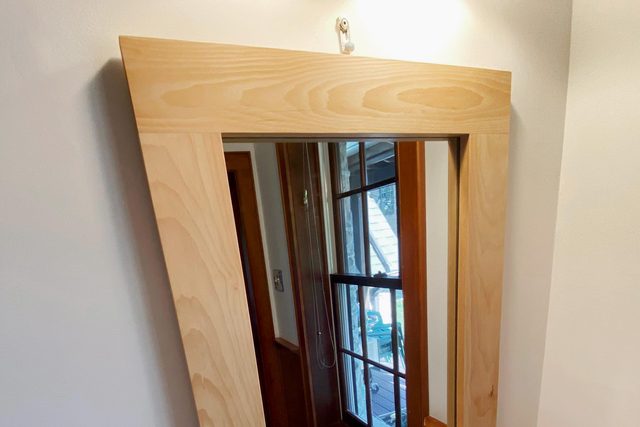
Credit: www.familyhandyman.com
Choosing The Right Adhesive
Choosing the right adhesive for gluing a mirror to the wall is crucial to ensure it stays securely in place and avoids damage. The wrong glue can cause the mirror to fall or even damage your wall. Understanding your options will help you pick the best product for your specific mirror and wall type.
Types Of Glue For Mirrors
Not all adhesives work well with mirrors. You need a glue that can handle the weight and won’t damage the reflective backing. Some popular options include:
- Mirror adhesive:Specifically designed for mirrors, it provides a strong bond without harming the reflective surface.
- Construction adhesive:Works well for heavy mirrors and is suitable for different wall materials.
- Silicone adhesive:Flexible and water-resistant, ideal for bathrooms or humid areas.
- Double-sided mounting tape:Good for lightweight mirrors and quick fixes.
Think about the size and weight of your mirror. Would a liquid adhesive provide a better hold, or is tape enough? This choice affects how secure and long-lasting your installation will be.
Safety Considerations
Working with adhesives requires caution. Some glues emit strong fumes that can irritate your eyes, nose, and throat. Always use them in a well-ventilated space to protect your health.
Wear gloves to avoid skin contact, especially with construction adhesives or silicone. These can cause allergic reactions or burns if mishandled.
Also, consider the wall surface. Certain adhesives may damage paint or wallpaper when removed. Ask yourself: will you want to take down the mirror later without leaving marks?
Preparing The Wall And Mirror
Clean the wall surface to remove dust and grease for better glue hold. Ensure the mirror is dry and free of dirt before applying adhesive. Use a level to mark the desired mirror position on the wall.
Preparing the wall and mirror is crucial for a successful installation. Proper preparation ensures the mirror adheres securely and remains in place. This process involves cleaning, measuring, and marking. These steps help achieve a professional finish.Cleaning The Surfaces
Begin by cleaning the wall. Remove dust, dirt, and grease using a damp cloth. A clean surface ensures strong adhesion. Next, clean the back of the mirror. Use a glass cleaner and a lint-free cloth. This removes any debris that might affect the glue.Measuring And Marking Placement
Measure the mirror’s dimensions carefully. Use these measurements to determine the exact placement on the wall. Mark the edges of the mirror on the wall with a pencil. This guide helps ensure the mirror is level and centered. Double-check your markings before proceeding. Proper alignment is key to a neat installation.Applying The Adhesive
Applying the adhesive is a crucial step in gluing a mirror to the wall. Proper application ensures the mirror stays securely in place. Use the right amount of adhesive to avoid mess and maintain strong bonding. Prepare the wall and mirror surface by cleaning them thoroughly before starting.
Techniques For Even Application
Spread the adhesive evenly for a firm hold. Use a caulking gun for controlled application. Apply the adhesive in vertical lines or small dots. Keep spacing consistent to avoid gaps. Too much adhesive can cause dripping. Too little may weaken the bond. Use a notched trowel if working with thick adhesive. Check the manufacturer’s instructions for specific guidelines.
Avoiding Common Mistakes
- Never apply adhesive on a dusty or oily surface.
- Avoid pressing the mirror too hard immediately after placing it.
- Do not use excessive adhesive that squeezes out from edges.
- Ensure the mirror is supported until the adhesive dries completely.
- Follow safety advice, like wearing gloves and working in a ventilated area.
Credit: www.diychatroom.com
Mounting The Mirror
Mounting a mirror securely on the wall requires careful planning and precise execution. Proper mounting ensures the mirror stays in place and looks great for years. It also prevents damage to the wall and the mirror itself. Follow simple steps to position and secure the mirror safely.
Positioning Tips
Choose a spot with good lighting and easy access. The mirror should be at eye level for most users. Measure the wall space to find the center point. Use a pencil to mark where the mirror edges will be. Ensure the wall surface is clean, dry, and smooth before mounting. Avoid areas with moisture or direct sunlight to protect the mirror.
Securing The Mirror Safely
Use a strong adhesive designed for mirrors and walls. Apply glue evenly on the back edges of the mirror. Press the mirror firmly against the wall for a few minutes. Support the mirror with tape or props until the glue dries. Check the adhesive’s drying time on the package. Avoid touching the glued area during this time to keep it secure.
Curing And Finishing Touches
After carefully applying the adhesive and positioning your mirror, the next crucial phase is curing and finishing touches. This stage ensures the mirror stays securely attached and your wall looks flawless. Handling this process with patience and attention to detail makes all the difference between a temporary fix and a long-lasting installation.
Allowing Proper Drying Time
Give the adhesive enough time to cure fully before disturbing the mirror. Most glue types require at least 24 hours to set firmly, but check the product label for exact drying times.
Keep the area free from vibrations or movement during this period. Even slight shifts can weaken the bond, so consider using temporary supports if needed.
Have you ever rushed this step and regretted it? Waiting might feel tedious, but it’s the key to a durable hold.
Cleaning Up Excess Glue
After the adhesive has dried, inspect the edges for any glue that might have squeezed out. Use a razor blade or a plastic scraper carefully to remove dried glue without scratching the mirror or wall.
If the glue is still wet, wipe it away gently with a damp cloth or a cotton swab dipped in rubbing alcohol. This avoids stains and keeps your mirror looking clean and professional.
Taking the time to clean the edges neatly shows attention to detail and makes your work stand out. How much better does a clean finish make the whole setup look to you?

Credit: www.amazon.com
Frequently Asked Questions
What Type Of Glue Is Best For Mirrors On Walls?
Use a strong, clear adhesive like mirror mastic or silicone-based glue. These adhesives provide a secure, long-lasting bond without damaging the mirror or wall surface.
How Do I Prepare The Wall Before Gluing A Mirror?
Clean the wall thoroughly to remove dust and grease. Ensure the surface is dry and smooth for better adhesive grip and mirror stability.
Can I Glue A Heavy Mirror Directly To Drywall?
For heavy mirrors, use additional support like mirror clips or anchors. Direct gluing on drywall alone may not hold the weight safely over time.
How Long Should I Wait For The Glue To Dry?
Allow the adhesive to cure for at least 24 hours. This ensures a strong, durable bond before the mirror is handled or used.
Conclusion
Gluing a mirror to the wall can be simple and safe. Choose the right glue and clean the surface well first. Measure and mark where the mirror will go. Press the mirror firmly and hold it in place. Wait the recommended time before hanging or using the mirror.
Taking these steps helps avoid damage and keeps the mirror secure. Enjoy your new wall decor with confidence. Small effort leads to great results.


