
Have you ever stood in front of your bathroom mirror and wondered how to remove it without causing damage? Whether you’re updating your bathroom or fixing a stubborn mirror, knowing the right steps can save you time, money, and frustration.
In this guide, you’ll discover simple, effective methods to safely take down your wall mirror. By the end, you’ll feel confident tackling this task yourself—no stress, no mess. Keep reading to learn how to protect your walls and get the job done right.
Tools Needed
Removing a wall mirror from a bathroom requires a few simple tools. Having the right tools makes the job easier and safer. Prepare everything before starting to avoid interruptions.
Protective Gloves
Wear gloves to protect your hands from sharp edges and broken glass. Safety is important during removal.
Utility Knife
Use a utility knife to cut through any caulk or adhesive around the mirror. This helps loosen the mirror from the wall.
Putty Knife Or Scraper
A putty knife helps gently pry the mirror away without damaging the wall. It works well to slide behind the mirror edges.
Suction Cups
Suction cups provide a firm grip on the mirror’s surface. They help carry and remove the mirror safely.
Soft Cloth Or Towel
Place a cloth or towel under the mirror area. It protects the floor and catches any falling glass.

Credit: www.angi.com
Prepare The Area
Clear the space around the mirror to avoid accidents. Lay down a drop cloth to catch debris and protect the floor. Gather necessary tools nearby for easy access.
Removing a wall mirror from your bathroom can be tricky. Proper preparation ensures a smooth and safe process. Begin with a clutter-free area. This reduces the risk of accidents. Preparing the area is crucial before removing a wall mirror. Here’s how to create a safe workspace.Clear The Surrounding Space
Remove all items around the mirror. This includes toiletries and decorative pieces. Clearing the space minimizes obstructions. It also prevents damage to your belongings.Protect The Floor And Fixtures
Lay down a drop cloth or old blanket. This protects the floor from falling debris. Use painter’s tape to secure the edges. Cover nearby fixtures to shield them from damage.Gather Necessary Tools
Assemble all required tools before starting. You might need a screwdriver, utility knife, or pry bar. Having tools ready saves time and effort. It also ensures you don’t leave the area unattended.Turn Off The Power
Ensure safety by turning off bathroom power. This is crucial if the mirror has lighting. Avoid electrical hazards by taking this precaution.Wear Safety Gear
Put on gloves and safety goggles. This protects against sharp edges and glass shards. Safety gear is essential for personal protection.Turn Off Power
Turning off the power is the first and most important step before removing a bathroom wall mirror. Many bathroom mirrors have built-in lights or electrical outlets. These features can pose a serious risk of electric shock if the power remains on.
Make sure to cut power to the mirror to protect yourself from injury. This simple safety step prevents accidents and helps you work confidently. Always treat electrical parts with caution during the removal process.
Locate The Circuit Breaker
Find your home’s main electrical panel. Look for the circuit breaker that controls the bathroom. It is often labeled with the room name or number.
Switch Off The Correct Breaker
Flip the breaker switch to the off position. This stops electricity flowing to the mirror. Double-check by turning on the mirror light or outlet.
Use A Voltage Tester
Test the mirror’s power wires with a voltage tester. This tool confirms no electricity flows. It adds an extra layer of safety before you begin work.
Inform Household Members
Tell others in your home about the power shutdown. This prevents anyone from turning it back on accidentally. Safety is a team effort.
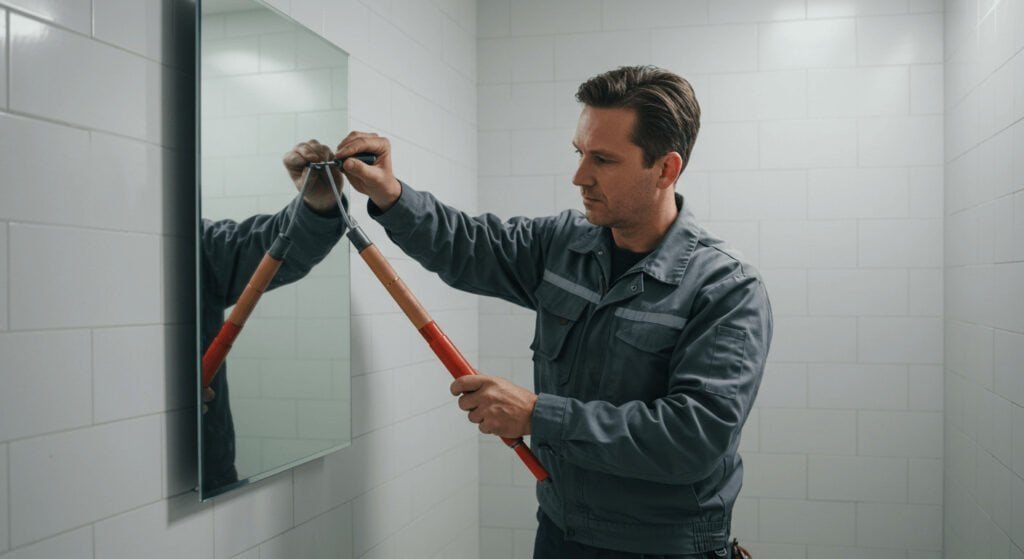
Loosen The Mirror
Loosening the mirror is the key step before removing it from your bathroom wall. The mirror might be fixed with clips, brackets, or adhesive. Identifying how it is attached helps you choose the right way to loosen it safely.
Take your time in this stage. Rushing can cause damage to the mirror or wall. Use gentle force and proper tools. Protect your hands with gloves to avoid cuts.
Check For Clips Or Brackets
Look closely around the edges of the mirror. Many bathroom mirrors are held by clips or brackets. These usually appear as small metal or plastic holders.
- Try to wiggle the mirror slightly to see if it moves.
- Use a flathead screwdriver to pry the clips gently.
- If the clips are screwed in, remove the screws first.
- Keep the clips safe for reinstallation or reuse.
Once the clips or brackets are loose or removed, the mirror should come free with careful handling.
Use Heat For Adhesive Mirrors
Some mirrors stick directly to the wall with strong adhesive. Heat helps soften the glue for easier removal. Use a hairdryer or heat gun on low heat.
- Hold the heat source about 6 inches from the mirror.
- Move the heat evenly over the edges of the mirror.
- Heat for 3 to 5 minutes to soften the glue.
- Use a plastic putty knife or dental floss to separate the mirror.
Work slowly to avoid cracking the glass. Stop if the mirror feels hot to touch. Heat loosens the adhesive, making removal safer and cleaner.
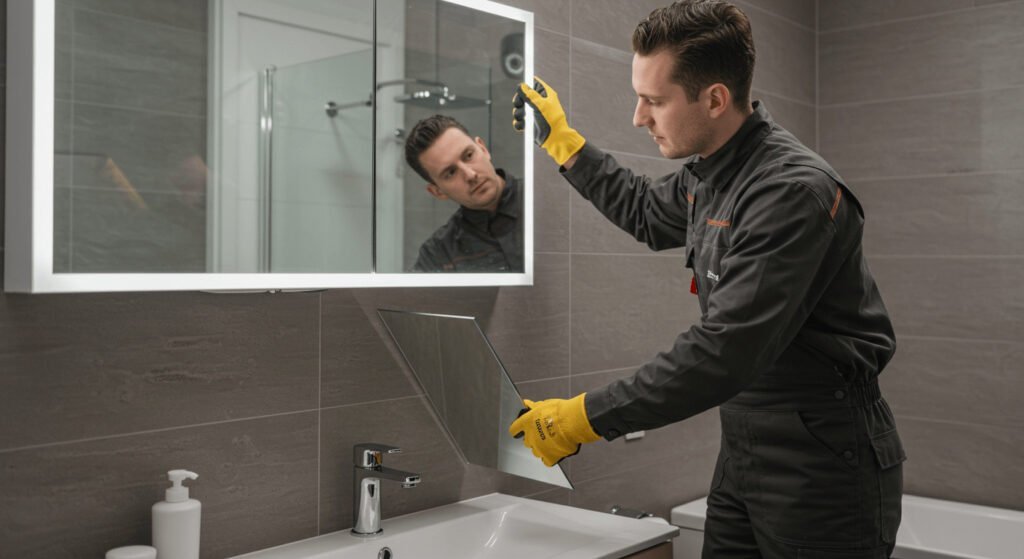
Remove The Mirror
Removing a bathroom wall mirror requires patience and care. This step focuses on lifting the mirror off the wall without causing damage. Proper technique protects both you and the mirror during removal.
Lift Safely
Start by standing close to the mirror. Place your hands firmly under the bottom edge. Use your legs to lift, not your back. Lift the mirror slowly and steadily away from the wall. Avoid sudden jerks or quick movements. Keep the mirror balanced as you lift it.
Handle With Care
Hold the mirror securely with both hands. Keep the glass facing away from you. Move slowly to a safe place for setting the mirror down. Place the mirror on a soft surface to prevent scratches. Avoid touching the glass edges to reduce the risk of cuts. Check for any loose parts before moving the mirror further.
Clean The Wall
Cleaning the wall after removing a bathroom mirror is crucial to prepare the surface for repainting or rehanging a new mirror. Leftover adhesive and damage can make your wall look messy and uneven. Taking the time to clean and smooth the area ensures your bathroom maintains a fresh, polished appearance.
Remove Residual Adhesive
Sticky glue or adhesive residue can be stubborn, but it must come off completely. Start by softening the adhesive with a hairdryer or heat gun on a low setting. The warmth loosens the glue, making it easier to scrape away with a plastic putty knife or a credit card to avoid damaging the wall.
If some adhesive remains, try using rubbing alcohol or an adhesive remover. Apply a small amount on a cloth and rub gently. Be careful not to soak the wall, especially if it’s drywall, to prevent further damage.
Patch And Paint
After removing the adhesive, inspect the wall for holes, cracks, or dents. Use spackle or wall filler to patch these spots, applying it with a putty knife in smooth, thin layers. Let it dry completely before sanding it down to a smooth finish.
Painting over the repaired area is the final step. Match your bathroom wall paint to ensure a seamless look. Have you ever noticed how even a small patch of fresh paint can completely refresh a room’s vibe?
Dispose Of Mirror Safely
Disposing of a bathroom mirror safely is essential for your safety and the environment. Mirrors are made of glass and sometimes have backing materials that require special handling. If you’re unsure about how to get rid of it properly, you might end up with broken glass hazards or environmental harm.
Prepare The Mirror For Disposal
Start by wrapping the mirror securely to prevent breakage during transport. Use thick blankets, bubble wrap, or cardboard to cover all sides.
Then, tape the wrapping tightly to keep it in place. Label the package as “Fragile” to alert anyone handling it.
Check Local Disposal Regulations
Not all places accept mirrors in regular trash. Some areas require you to take them to a special recycling center or hazardous waste facility.
Visit your city’s waste management website or call their office to find out where and how you can drop off your mirror safely.
Consider Recycling Options
Mirrors can sometimes be recycled, but they need to be separated from other glass types. Contact local recycling centers to see if they accept mirrors.
If accepted, they might have instructions on how to prepare the mirror, like removing any wooden or plastic frame parts.
Dispose Of Broken Mirrors Carefully
If the mirror breaks during removal, handle it with care to avoid cuts. Use heavy gloves and scoop the shards into a thick, puncture-resistant container.
Seal the container well and label it “Broken Glass” to protect sanitation workers.
Explore Donation Or Repurposing
Still intact mirrors can sometimes find a new home. Check if local thrift stores, schools, or community centers need them.
Even old mirrors can be repurposed creatively, like turning them into decorative trays or art projects. Have you thought about giving your mirror a second life?
Credit: bfymirror.com

Credit: www.youtube.com
Frequently Asked Questions
How Do I Safely Remove A Bathroom Wall Mirror?
Start by turning off the bathroom light for safety. Use a utility knife to cut through any caulk or adhesive. Gently pry the mirror with a putty knife or scraper. Wear gloves and protect your eyes from glass shards. Remove slowly to avoid damage.
What Tools Do I Need To Remove A Bathroom Mirror?
You will need a utility knife, putty knife or scraper, gloves, safety goggles, and possibly a pry bar. Additionally, have a drop cloth to protect surfaces and a helper if the mirror is large or heavy. These tools ensure safe and effective removal.
How To Remove Adhesive Behind A Bathroom Mirror?
After removing the mirror, scrape off adhesive with a putty knife. Use adhesive remover or rubbing alcohol to clean residue. Wipe the surface with a damp cloth. Let it dry completely before installing a new mirror or painting the wall.
Can I Reuse A Bathroom Mirror After Removal?
Reusing a mirror is possible if it remains intact and undamaged. Carefully remove it without breaking the glass or scratching the surface. Check for any adhesive or backing damage. Proper handling during removal increases chances of successful reuse.
Conclusion
Removing a bathroom wall mirror is simple with the right steps. Take your time to avoid damage to the wall or glass. Use the proper tools and stay safe throughout the process. Clean the area well after removal to prepare for new decor.
Now, you can update your bathroom with ease and confidence.


