
Have you ever faced the tricky task of removing a glued mirror from your wall without causing damage? It can feel overwhelming, especially if you’re worried about ruining your paint or drywall.
But don’t worry—this guide will walk you through simple, effective steps to safely take down that stubborn mirror. By the end, you’ll have the confidence and know-how to handle it yourself, saving time and money. Ready to learn how to remove your glued mirror the right way?
Let’s get started!

Credit: www.youtube.com
Tools Needed
Removing a glued mirror from the wall requires specific tools to ensure the process is safe and efficient. Having the right gear not only protects you but also prevents damage to your wall and the mirror itself. Let’s look at what you’ll need before you start.
Safety Gear
Safety should be your top priority. You’ll want to wear thick gloves to protect your hands from sharp edges or broken glass. Safety goggles are essential to shield your eyes from shards if the mirror cracks unexpectedly.
Consider using a long-sleeve shirt to cover your arms and reduce the risk of cuts. A dust mask can help if old adhesive or debris creates dust during removal. Are you prepared to handle potential hazards with the right protection?
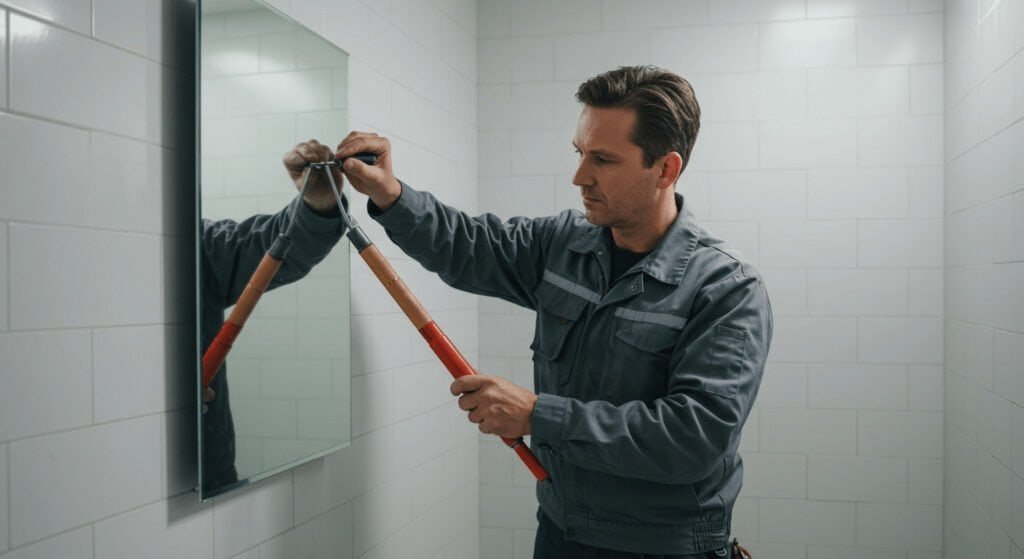
Cutting Tools
Choosing the right cutting tools makes a big difference. A utility knife with a sharp blade helps you carefully score the adhesive around the mirror’s edges. This step loosens the glue without damaging the wall.
For tougher adhesives, a thin wire or dental floss can work like a saw, sliding behind the mirror to slice through glue. If you have access, a specialized mirror removal tool or putty knife can gently pry the mirror loose. Do you have a tool that balances precision and safety?
Support Materials
Support materials keep you safe and protect your mirror during removal. Use painter’s tape to create a grid pattern on the mirror’s surface. This prevents shards from falling if the glass breaks.
Place a thick blanket or foam padding on the floor under the mirror as a cushion. Having suction cups designed for glass can also help you hold and control the mirror securely while pulling it away. What can you add to your setup to avoid accidental damage or injury?

Credit: www.angi.com
Prepare The Area
Clear the area around the mirror to avoid damage or injury. Protect the floor and nearby objects with a drop cloth or old sheets. Ensure good lighting to see the edges clearly.
Removing a glued mirror from a wall can seem daunting, but with the right preparation, it becomes much more manageable. Before you even think about prying that mirror off, it’s crucial to prepare the area properly to ensure safety and minimize damage. This preparation isn’t just a suggestion—it’s a necessity to avoid potential mishaps.Clear Surroundings
The first step in preparing your space is to clear the surroundings. Make sure there are no furniture items, decor, or personal belongings near the area where you’ll be working. This not only gives you ample space to maneuver but also prevents any accidental damage to your items. Remove any wall-mounted items like picture frames or shelves that might be affected when you remove the mirror. You don’t want a sudden shift causing anything to fall or break.Protect Floor And Walls
Protecting your floor and walls is essential. Lay down a thick drop cloth or some old towels on the floor to catch any debris or glue that might fall during the removal process. This simple step can save you a lot of cleanup time later. For the walls, you might consider using painter’s tape around the edges of the mirror. This can help you maintain a clean line and prevent any accidental scratching or damage to the paint. It’s a small precaution that can make a big difference. Have you ever thought about the mess that a few stray pieces of adhesive can cause? Preparing your area is about thinking ahead to avoid these little headaches. With a clear and protected space, you’re setting yourself up for a smoother, safer mirror removal experience.Assess The Adhesive
Before you start peeling off that glued mirror, take a moment to assess the adhesive holding it in place. Understanding what type of glue you’re dealing with helps you choose the safest and most effective removal method. This step prevents damage to your wall and the mirror itself, saving you time and frustration.
Identify Glue Type
Take a close look at the adhesive. Is it clear and sticky like silicone, or hard and brittle like construction glue? Sometimes, the glue type can be identified by touch or appearance—silicone feels rubbery, while epoxy is rigid once cured.
If the mirror was installed professionally, there’s a good chance a strong construction adhesive or mirror mastic was used. These glues are tough and need special solvents or heat to soften them. Knowing this upfront helps you avoid brute force that could crack the mirror or tear your wall paint.
Have you ever tried removing something without knowing what’s holding it? It usually ends in damage. So, take your time here, maybe even test a small hidden spot with a solvent or heat source to see how the glue reacts.
Check Mirror Attachment
Look beyond the glue—sometimes mirrors are held with clips, brackets, or a frame in addition to adhesive. Gently examine the edges to see if any hardware is securing the mirror. Removing these first can reduce stress on the glued areas.
Even if the mirror seems fully glued, tapping around the edges can reveal loose spots. These areas might be easier to pry open and can give you an entry point to weaken the adhesive layer.
Have you noticed any wobbling or slight gaps? That could be your hint to start loosening the mirror at these points. This approach often prevents sudden breaks and keeps the removal controlled.
Loosen The Mirror
Loosening a glued mirror from the wall requires patience and the right approach to avoid damage. The key is softening or breaking down the adhesive holding the mirror firmly in place. You want to make the removal process smoother and safer for both the mirror and your wall.
Use Heat Methods
Heat can soften many adhesives, making it easier to pry the mirror away. Try using a hairdryer or a heat gun set on low to warm the edges where the mirror meets the wall. Keep the heat moving to avoid overheating one spot and damaging the mirror.
Once the adhesive feels softer, gently insert a thin, flexible tool like a putty knife or a plastic card between the mirror and the wall. Slowly work the tool back and forth to create a gap. Have you noticed how heat changes the texture of glue? It becomes much more pliable, which is your chance to act.
Apply Solvents
Some adhesives respond well to solvents like rubbing alcohol, acetone, or specialized adhesive removers. Apply a small amount of solvent along the edges of the mirror using a cotton swab or cloth. Be careful not to use too much, as excess solvent can drip behind the mirror and damage the wall.
Let the solvent sit for a few minutes to break down the glue’s bond. Then, try gently prying the mirror loose again. If the mirror doesn’t budge, reapply the solvent and wait a bit longer. Have you ever tried spotting stubborn glue with a solvent? It often surprises how quickly it loosens up.
Remove The Mirror Safely
Removing a glued mirror from the wall requires care to avoid damage. The mirror glass is fragile and can break easily. The wall surface can also get damaged if you rush. Take your time and handle the mirror gently to keep everything safe. Use the right tools and techniques to protect yourself and your space.
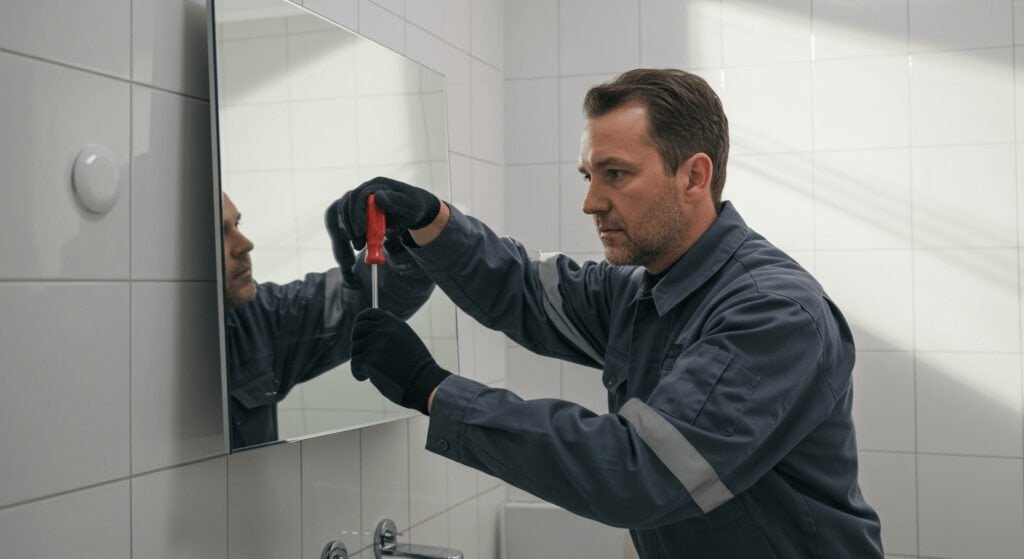
Pry Gently
Start by loosening the edges of the mirror. Use a thin, flat tool like a putty knife or a paint scraper. Slide the tool carefully between the mirror and the wall. Do not force it or push too hard. Small, slow movements work best. Work around the edges bit by bit to break the glue seal.
Support The Mirror
Hold the mirror firmly as you pry it loose. Use one hand to support the bottom while the other pries the edges. Avoid letting the mirror hang by the glue. It can crack or fall suddenly. Have a second person help if the mirror is large or heavy. Place a soft blanket or padding nearby to set the mirror down safely.
Clean Residual Adhesive
After removing a glued mirror from the wall, some adhesive usually remains. Cleaning this leftover glue is important to restore a smooth, clean surface. Properly removing adhesive helps prepare the wall for repainting or reinstallation.
Scrape Off Glue
Use a plastic scraper or a putty knife to gently remove the glue. Avoid metal tools that can damage the wall. Work slowly to lift the adhesive without tearing the wall surface.
Apply gentle pressure and scrape in small sections. This method removes most of the thick glue residue.
Use Cleaning Agents
Apply a cleaning agent to dissolve sticky glue traces. Options include rubbing alcohol, vinegar, or commercial adhesive removers.
- Soak a cloth with the agent.
- Press it on the glue for a few minutes.
- Rub gently to loosen the adhesive.
Test the agent on a hidden spot first to avoid damage. Repeat the process until the wall is clean and smooth.
Repair Wall Damage
After removing a glued mirror, you’ll often find the wall isn’t as smooth or perfect as before. Repairing the wall damage is key to restoring your space’s clean look. Taking the time to patch holes and smooth the surface can make all the difference before painting or hanging something new.
Patch Holes
Start by inspecting the wall for holes or gouges left from the mirror’s removal. Use a putty knife to apply spackle or joint compound directly into these holes. Press firmly to fill the gaps completely and avoid air pockets.
Let the compound dry fully, which usually takes a few hours. If the holes are deep, you may need to apply a second layer. Once dry, lightly sand the area to prepare for smoothing.
Smooth Surface
After patching, your goal is a flat, even surface that blends with the rest of the wall. Use fine-grit sandpaper to gently smooth the patched spots. Sand in a circular motion and check your progress by running your hand over the area.
If the surface still feels rough or uneven, apply a thin skim coat of joint compound. This extra step helps hide imperfections and creates a flawless finish. Remember, a smooth wall is easier to paint and looks more professional.
Credit: bfymirror.com
Frequently Asked Questions
How Do I Safely Remove A Glued Mirror From The Wall?
To safely remove a glued mirror, use a thin wire or dental floss to cut through the adhesive. Work slowly to avoid breaking the glass. Wear gloves and protective eyewear for safety. Use a heat gun to soften the glue if needed.
What Tools Help Remove A Glued Mirror Without Damage?
Useful tools include dental floss or wire, a heat gun, putty knife, and gloves. These help cut adhesive and loosen glue gently. Avoid metal tools that can break the mirror. A heat gun softens glue for easier removal.
Can I Reuse The Mirror After Removing It From The Wall?
Yes, if the mirror remains intact and undamaged. Handle it carefully during removal. Clean off old adhesive with a gentle solvent before reinstalling. Inspect edges for cracks or chips to ensure safety.
How To Prevent Wall Damage When Removing A Glued Mirror?
Use gentle pressure and avoid prying tools. Soften glue with heat before pulling the mirror. Work slowly to prevent paint or drywall damage. Patch any minor wall marks with spackle after removal.
Conclusion
Removing a glued mirror from the wall takes patience and care. Use gentle tools to avoid damage. Take your time to loosen the glue bit by bit. Clean the wall after removing the mirror to prepare for new decor. Safety matters—wear gloves and protect your eyes.
With the right steps, you can do this yourself. The process is simple but requires focus. Now, you are ready to change your space with confidence.


