
Looking to add a stylish and practical touch to your space? Building a hanging shelf might be just what you need.
Imagine having a neat spot to display your favorite books, plants, or keepsakes—without taking up any floor space. This simple project lets you create something unique with your own hands, even if you’re new to DIY. By the end of this guide, you’ll know exactly how to build a hanging shelf that looks great and holds strong.
Ready to transform your room and impress your friends? Let’s get started.
Materials Needed
Gathering the right materials ensures a sturdy and attractive hanging shelf. Choose quality wood and reliable hardware. Have the right tools ready for smooth assembly. This section covers everything needed to build a hanging shelf.
Types Of Wood
- Pine: Affordable, easy to work with, and light in weight.
- Oak: Strong, durable, and has a classic look.
- Maple: Hard and smooth, ideal for a polished finish.
- Walnut: Dark, rich color and very sturdy.
- Plywood: Budget-friendly and stable for painted shelves.
Hardware Essentials
- Wall anchors: Support the shelf on drywall or plaster walls.
- Screws: Choose ones that fit the wood thickness.
- Brackets or hooks: Hold the shelf securely in place.
- Rope or chains: For suspending the shelf from the ceiling or wall.
- Eye bolts or hooks: Attach the rope or chain to the shelf.
Tools Required
- Drill: For making holes and driving screws.
- Screwdriver: To tighten screws and hardware.
- Measuring tape: Ensures accurate dimensions.
- Level: Keeps the shelf straight and balanced.
- Sandpaper: Smooths the wood surface before finishing.
- Pencil: Marks measurements and drill points.
Choosing The Perfect Spot
Choosing the perfect spot for your hanging shelf is key to both its look and strength. This decision affects how well the shelf holds weight and how it fits your room’s style. Take time to think about the wall and space before you start.
Wall Material Considerations
Not all walls can hold a heavy shelf. Drywall is common but weak without support. Brick or concrete walls are strong but need special tools for drilling. Wood walls offer solid support but might limit where you place the shelf.
- Drywall: Use anchors for extra support.
- Brick or concrete: Use masonry bits and anchors.
- Wood: Screws can go directly into the surface.
Measuring Space
Measure the space carefully before installation. Check the height, width, and depth available. Allow room for items you plan to place on the shelf. Also, think about how the shelf fits with other furniture or decorations.
Finding Studs
Studs are wooden beams behind drywall that hold weight. Anchoring your shelf to studs keeps it secure. Use a stud finder to locate them. Mark the spots clearly before drilling. Avoid hanging heavy shelves only on drywall.
Cutting And Preparing Wood
Cutting and preparing wood is a key step in building a hanging shelf. It ensures the pieces fit perfectly and look great. Proper preparation also makes the shelf strong and durable. Taking time here saves trouble later.
Measuring And Marking
Measure the wood carefully before cutting. Use a tape measure for accuracy. Mark the cutting lines clearly with a pencil. Double-check measurements to avoid mistakes. Use a square tool to keep lines straight. Clear marks help guide your cuts precisely.
Safe Cutting Techniques
Use sharp saw blades for clean cuts. Keep your hands away from the blade. Wear safety goggles to protect your eyes. Cut slowly and steadily to control the wood. Support the wood firmly to prevent wobbling. Follow the marked lines closely for accuracy.
Sanding And Finishing
Sand the wood edges to remove splinters. Use medium-grit sandpaper first, then fine-grit for smoothness. Sand in the direction of the wood grain. Wipe dust off with a clean cloth. Apply a finish like paint or varnish for protection. This step enhances the wood’s appearance and lifespan.

Credit: www.youtube.com
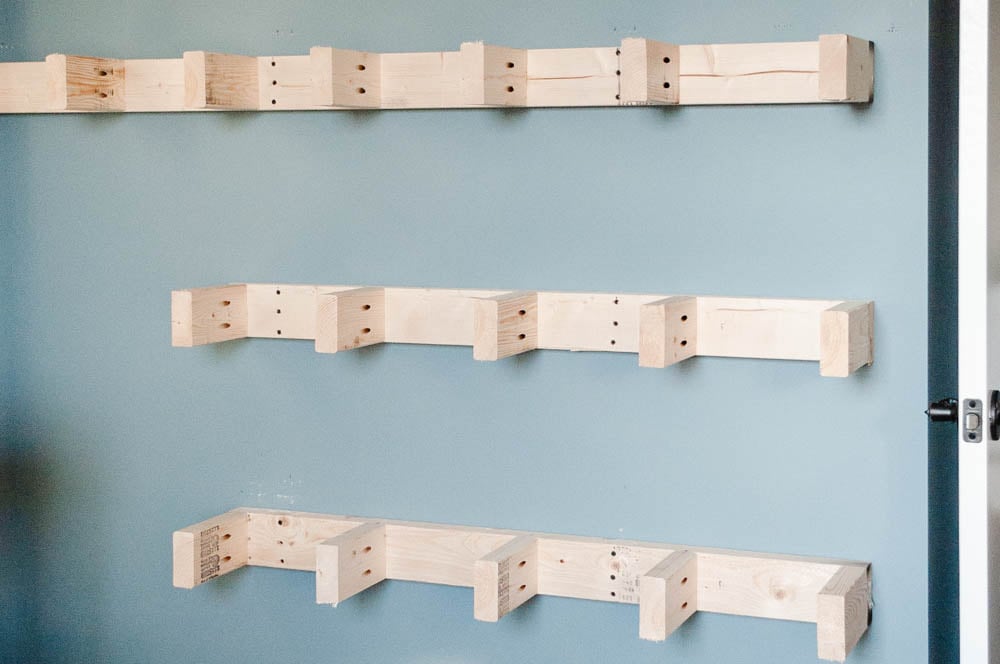
Installing The Brackets
Installing the brackets is a crucial part of building a hanging shelf. These brackets will hold the shelf securely on your wall, so accuracy and stability are key. Taking the time to mark, drill, and secure properly will save you from future headaches and ensure your shelf stays put.
Marking Bracket Placement
Start by deciding exactly where you want your shelf to hang. Use a pencil to mark the spots on the wall where the brackets will go. Double-check the height and spacing between marks with a level to ensure your shelf will be perfectly straight.
Think about what you’ll put on the shelf and how much weight it needs to hold. This can influence how far apart your brackets should be placed. Have you considered the studs behind your wall? Marking over studs gives your shelf better support.
Drilling Pilot Holes
Drilling pilot holes makes it easier to insert screws without damaging the wall or brackets. Choose a drill bit slightly smaller than the screws you’ll use. This creates a snug fit for the screws, preventing them from loosening over time.
Be cautious not to drill too deep or wide. If you hit wiring or plumbing behind the wall, stop immediately and reassess. Have you checked your wall with a stud finder? It’s a simple step that can save you from costly mistakes.
Securing Brackets
Once your pilot holes are ready, align the brackets with your marks and screw them firmly into place. Use a screwdriver or drill with a screwdriver bit to tighten the screws without stripping them. The brackets should feel solid and not wiggle when you apply pressure.
If your wall doesn’t have studs in the right spots, use wall anchors designed for your wall type. These provide extra grip and prevent the brackets from pulling out. How confident do you feel about the bracket stability? Test it gently before placing the shelf and its contents.
Mounting The Shelf
Mounting the shelf securely is crucial to ensure it holds your items safely and looks great on your wall. This stage demands attention to detail and patience to avoid any wobbling or accidents later on. Let’s break down the key steps to get your shelf perfectly mounted.
Aligning The Shelf
Start by positioning the shelf where you want it on the wall. Use a level to make sure it’s perfectly horizontal—no one wants a crooked shelf that ruins the room’s vibe.
Mark the bracket holes lightly with a pencil so you know exactly where to drill. Taking your time here saves you from unnecessary repairs later.
Attaching Shelf To Brackets
Once your brackets are fixed to the wall, it’s time to attach the shelf. Place the shelf on the brackets and check that it sits flush without any gaps.
Secure the shelf to the brackets using screws, making sure to tighten them just enough to avoid damaging the wood. If your shelf is heavy or will hold weighty objects, consider adding washers for extra support.
Checking Stability
After mounting, test the shelf’s stability by gently pressing down on different spots. It should feel firm and not shift or creak under pressure.
If you notice any movement, double-check the bracket screws and wall anchors. Stability isn’t just about safety—it also keeps your display looking sharp over time.
Credit: www.christeneholderhome.com
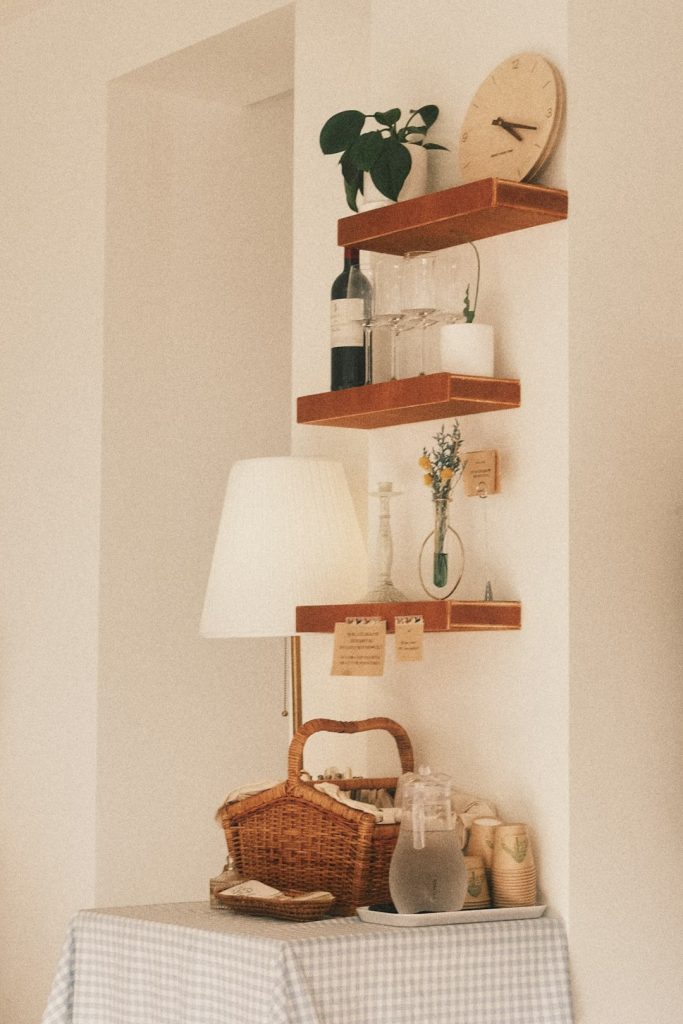
Styling Your Hanging Shelf
Choose light decorations and plants to keep your hanging shelf balanced and neat. Arrange items by size and color for a pleasing look. Using different textures adds interest without cluttering the space.
Styling your hanging shelf adds character to any room. It’s the perfect blend of functionality and design. With the right styling, a simple shelf becomes a focal point. Whether rustic or modern, styling can transform your space.Decor Ideas
Choose items that match your room’s theme. Use small plants for a touch of nature. Stack a few books for a cozy feel. Add framed photos to personalize the space. Decorative bowls or vases offer elegance. Keep it balanced with varied heights.Maintaining The Shelf
Regular dusting keeps your shelf looking fresh. Use a soft cloth to avoid scratches. Check the shelf for stability monthly. Avoid overloading to prevent sagging. Rearrange items occasionally for a new look. It keeps the space dynamic and interesting.Safety Tips
Ensure the shelf is securely mounted. Check weight limits before adding items. Use anchors for extra support if needed. Keep heavy items at the bottom. This prevents tipping. Avoid placing fragile items near the edge. Safety always comes first.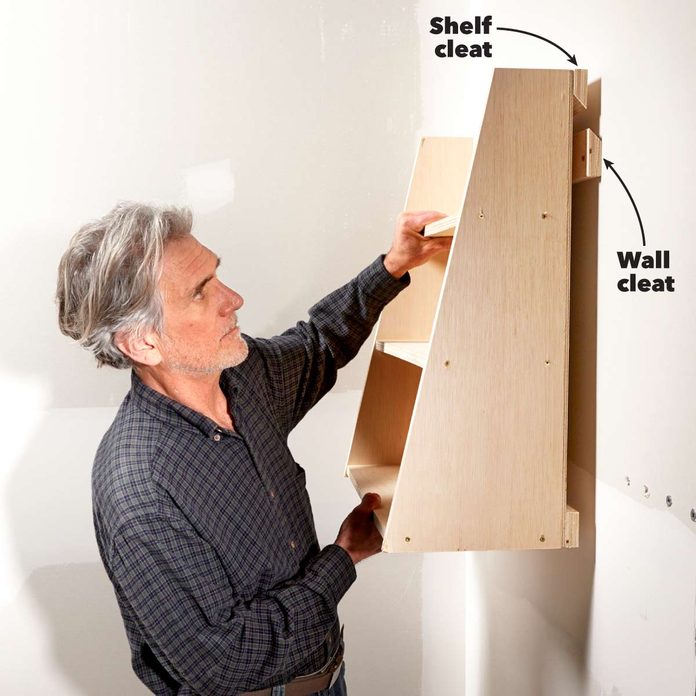
Credit: www.familyhandyman.com
Frequently Asked Questions
What Materials Are Needed To Build A Hanging Shelf?
You need wood boards, hanging brackets or ropes, screws, a drill, a level, and wall anchors. These materials ensure stability and safety.
How Do I Install A Hanging Shelf On Drywall?
Locate studs using a stud finder, mark spots, drill pilot holes, and use wall anchors. Secure brackets firmly for support.
Can I Customize The Size Of My Hanging Shelf?
Yes, customize length and width by cutting wood to your desired size. Choose appropriate hardware to support the shelf’s weight.
How Much Weight Can A Hanging Shelf Hold?
Weight capacity depends on materials, brackets, and wall type. Proper installation on studs can support up to 30-50 pounds safely.
Conclusion
Building a hanging shelf is simple and rewarding. You just need basic tools and materials. Follow the steps carefully for a strong shelf. It adds space and style to any room. Take your time and measure twice before cutting. Enjoy your new shelf and the extra storage it brings.
Try different designs to match your home. Small projects like this boost your skills. Keep practicing, and you will create even better shelves next time.


