

Are you ready to transform your space with a stunning pendant light? Hanging a pendant light from your ceiling might sound tricky, but with the right steps, you can do it yourself and add a touch of style to any room.
Imagine the warm glow highlighting your favorite spots and creating the perfect atmosphere. In this guide, you’ll discover simple, clear instructions that make the process easy and stress-free. Keep reading, and you’ll soon have a beautiful new light fixture that brightens your home and impresses your guests.

Credit: 100things2do.ca
Choose The Right Pendant Light
Choosing the right pendant light sets the tone for your room’s look and feel. The perfect fixture balances size, style, and function. It enhances lighting and complements your décor. Careful selection ensures the pendant fits well and performs as expected. Consider key factors before making your choice.
Consider Room Size And Ceiling Height
Match the pendant size to the room’s dimensions. Large rooms need bigger or multiple pendants. Small rooms benefit from smaller, simple designs. Ceiling height also matters. Low ceilings require compact fixtures. High ceilings allow longer, more dramatic pendants. Proper scale prevents overcrowding or a lost look.
Select Appropriate Style And Material
Pick a style that fits the room’s theme. Modern rooms suit sleek, minimalist pendants. Rustic spaces benefit from wood or metal finishes. Materials affect durability and light quality. Glass shades offer soft, diffused light. Metal or fabric shades create sharper, focused light. Choose materials that match your style and lighting needs.
Check Light Bulb Compatibility
Check which bulbs the pendant supports. Some use standard bulbs, others need specialty types. Consider bulb shape, size, and wattage limits. LED bulbs save energy and last longer. Ensure the bulb’s brightness suits the room. Proper bulb choice impacts light quality and fixture safety.
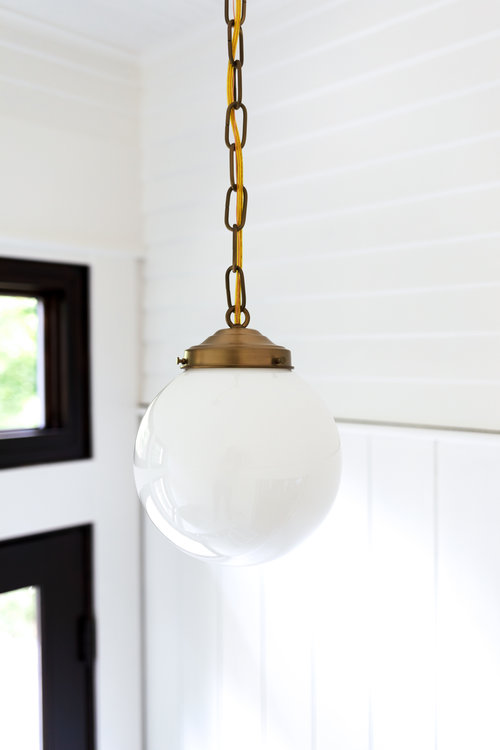
Credit: www.thegritandpolish.com
Gather Necessary Tools And Materials
Gathering the right tools and materials is the first step to hang a pendant light safely and correctly. Having everything ready saves time and avoids interruptions during installation. It also helps to prevent mistakes and ensures the pendant light fits perfectly.
Prepare a clean workspace and check the product instructions before starting. The right tools and safety gear make the job easier and safer. Below is a detailed list of what you need to get started.
List Essential Tools
- Voltage tester – to check for live wires
- Screwdriver set – both flathead and Phillips
- Wire stripper – for clean wire connections
- Drill with bits – for making holes if needed
- Measuring tape – to position the light properly
- Wire nuts – to secure electrical connections
- Adjustable wrench – for tightening bolts
- Step ladder – to reach the ceiling safely
- Electrical tape – for extra wire protection
Safety Gear To Use
- Insulated gloves – protect against electric shocks
- Safety glasses – guard your eyes from dust and debris
- Dust mask – prevent inhaling particles
- Non-slip shoes – keep your footing stable
- Hard hat – use if working in a crowded or risky area
Prepare The Ceiling
Preparing the ceiling is a crucial step before hanging your pendant light. It ensures safety and makes the installation smoother. Taking time to properly prepare will save you from headaches later on.
Turn Off Power Supply
Safety first. Always switch off the power at the circuit breaker before working on any electrical fixture. Double-check by flipping the light switch to confirm the electricity is off.
Using a voltage tester can give you extra peace of mind. Have you ever underestimated this step? It’s better to be cautious than risk an accident.
Locate Ceiling Joist Or Support
Your pendant light needs a strong anchor point. Use a stud finder to locate a ceiling joist or solid support in the installation area. This ensures the fixture won’t pull away from the ceiling over time.
If you can’t find a joist exactly where you want the light, consider using a ceiling anchor designed for drywall. Have you tried holding the fixture up without support? It can be surprisingly heavy and unsafe.
Mark Installation Spot
Once you find the joist or support, mark the exact spot for your pendant light. Use a pencil to make small, visible marks on the ceiling. This will guide you when drilling holes or attaching the mounting bracket.
Double-check the spot by holding the pendant light in place to see how it fits visually. Does the placement balance the room’s design? Taking a moment here helps avoid repositioning later.
Install The Mounting Bracket
Installing the mounting bracket is a key step to hang a pendant light safely. This bracket holds the fixture firmly to the ceiling. Proper installation ensures the light stays stable and looks neat.
Follow the instructions carefully for a secure fit. Use the right tools and check the ceiling structure before you begin. The bracket must support the weight of the pendant light without any wobble.
Attach Bracket Securely
Find the ceiling electrical box first. Align the bracket with the box holes. Use screws that fit tightly into the box. Tighten screws until the bracket feels solid. Avoid over-tightening to prevent damage.
Double-check that the bracket does not move or tilt. A loose bracket can cause the light to swing or fall. Always use screws recommended by the light manufacturer.
Ensure Proper Alignment
Check that the bracket sits flat against the ceiling. The pendant light should hang straight down. Adjust the bracket position if needed before final tightening.
Use a level tool to confirm the bracket is even. Proper alignment helps the light fixture look balanced and professional. Misalignment can cause strain on wires and hardware.
Wire The Pendant Light
Begin by turning off the power to avoid accidents. Connect the wires from the ceiling to the pendant light, matching colors carefully. Secure the fixture to the ceiling bracket and test the light before finishing.
Wiring a pendant light can seem daunting. But with careful steps, it’s manageable. Ensuring safety and functionality is key. Follow these guidelines to wire your pendant light correctly.Connect Wires Correctly
Begin by turning off the power. Safety first. Identify the wires: hot, neutral, and ground. Typically, the hot wire is black. The neutral wire is white. The ground wire is green or bare. Match the pendant wires to these colors. Connect the hot wire to the corresponding wire in the ceiling. Twist them together firmly. Do the same with the neutral wires. Connect the ground wire last. Attach it to the metal box or a grounding screw.Secure Wire Nuts And Insulation
After connecting the wires, use wire nuts. These secure the connections. Twist a wire nut over each pair of connected wires. Ensure they are tight. This prevents loose connections. Check that no bare wire is exposed. This avoids short circuits. Once secure, tuck the wires into the junction box. Be gentle to avoid damaging them. Finally, ensure the insulation is intact. This protects against electrical hazards.Attach Pendant To Ceiling
Attaching the pendant light to the ceiling is a key step in your lighting project. This process secures the fixture and ensures it hangs safely and looks great. Proper attachment prevents wobbling or falling, giving your space a polished finish.
Fix Pendant To Bracket
Start by aligning the pendant’s mounting plate with the ceiling bracket. Use the screws provided to fasten the pendant securely. Tighten each screw evenly to keep the fixture stable. Double-check that the bracket holds the pendant firmly without any movement.
Adjust Pendant Height
Set the pendant light to the desired height before final tightening. Most pendants have an adjustable cord or rod. Pull or push the cord gently to raise or lower the light. Make small adjustments until the pendant hangs at the perfect level for your room.
Test And Adjust Lighting
Testing and adjusting the lighting after hanging your pendant light is essential. It ensures the fixture works correctly and looks perfect in your space. This step helps you avoid future issues and achieves the right ambiance.
Restore Power And Test Light
Turn the circuit breaker back on to restore power. Switch on the pendant light to check if it lights up properly. Observe the brightness and any flickering or unusual behavior. Confirm the bulb is secure and the fixture is stable. Test the light from different angles to see how it illuminates the room.
Make Final Height And Position Adjustments
Adjust the pendant light’s height if needed. The light should hang at a comfortable level for the room’s use. For dining areas, aim for about 30 to 36 inches above the table. In living spaces, leave enough clearance for headroom. Move the fixture slightly if the light does not center over the intended spot. Tighten all screws and clamps after adjusting to keep the light secure.
Safety Tips And Maintenance
Keeping your pendant light safe and well-maintained is crucial for both its longevity and your peace of mind. Neglecting regular checks and cleaning can lead to electrical issues or reduced lighting quality. Let’s dive into some practical tips that help you enjoy your pendant light without worry.
Regular Cleaning
Dust and dirt quickly gather on pendant lights, especially if they hang in kitchens or dining areas. Cleaning your light regularly keeps it bright and looking fresh.
Use a soft cloth or microfiber duster to gently wipe the fixture. Avoid harsh chemicals that might damage the finish or glass. If your pendant has glass shades, removing them carefully for a thorough wash can make a big difference.
Have you noticed how a clean light fixture changes the whole room’s vibe? It’s a simple habit that pays off immediately.
Check For Loose Connections
Loose electrical connections are a common cause of flickering or malfunctioning pendant lights. Periodically inspect the wiring and connections to ensure everything stays secure.
Turn off the power before you check. Look for any signs of wear, frayed wires, or screws that might have loosened over time. Tightening these connections can prevent hazards and keep your light working smoothly.
If you’re unsure about handling electrical parts safely, calling a professional electrician is always the safest choice. Would you want to risk a small loose wire turning into a bigger problem?

Credit: cometlighting.co.uk
Frequently Asked Questions
How Do I Safely Hang A Pendant Light From Ceiling?
Turn off power before installation. Use a sturdy ceiling box and secure mounting bracket. Follow manufacturer instructions carefully to ensure safety and stability.
What Tools Are Needed To Install A Pendant Light?
You need a screwdriver, wire stripper, voltage tester, drill, and ladder. These tools help make installation safe and efficient.
How To Choose The Right Height For Pendant Lights?
Hang pendants 28-34 inches above countertops or tables. Adjust height for room size and ceiling height for best lighting effect.
Can I Install Pendant Lights On Drywall Ceilings?
Yes, if a ceiling joist or support box is available. Use proper anchors to secure the fixture firmly to drywall.
Conclusion
Hanging a pendant light from the ceiling is simple and rewarding. Follow each step carefully for safety and style. Choose the right tools and check your wiring first. Take your time to measure and install correctly. A well-hung pendant light brightens any room beautifully.
Enjoy the new look and cozy atmosphere it brings. Now, your space feels fresh and inviting. Ready to try this easy home upgrade yourself?


