
Are you ready to transform your space with a stunning new look? Installing 3D textured wall panels is one of the easiest and most effective ways to add depth, style, and personality to any room.
Imagine walking into your home and seeing walls that don’t just sit flat but come alive with eye-catching designs. In this guide, you’ll discover simple steps to install these panels yourself—no special skills needed. Keep reading, and soon you’ll have a wall that turns heads and makes your space truly unique.
Choosing The Right Wall Panels
Choosing the right 3D textured wall panels sets the foundation for your room’s new look. The panels you select must fit your style, budget, and the room’s needs. This process starts with understanding material types and texture styles. Precise measurements ensure the panels fit perfectly and look professional.
Material Options
Wall panels come in different materials, each with unique benefits. Common materials include:
- MDF (Medium-Density Fiberboard):Affordable and easy to paint. Durable for indoor use.
- PVC (Polyvinyl Chloride):Water-resistant and lightweight. Good for humid areas.
- Bamboo or Wood:Natural look with warm tones. Adds texture and depth.
- Gypsum:Fire-resistant and solid. Ideal for a classic appearance.
- Polystyrene:Lightweight and easy to install. Often used for decorative designs.
Choose a material that suits the room’s environment and your maintenance preferences.
Texture Styles
Texture plays a key role in wall panel design. It influences the room’s mood and style. Popular textures include:
- Geometric:Sharp lines and shapes create a modern feel.
- Floral or Organic:Soft curves and natural patterns add warmth.
- Abstract:Unique designs offer a bold statement.
- Brick or Stone Look:Adds rustic charm and depth.
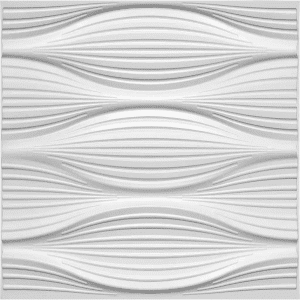
- Wave Patterns:Smooth, flowing lines bring calmness.
Select a texture that complements your furniture and decor style.
Measuring Your Space
Accurate measurements prevent wasted material and extra costs. Follow these tips:
- Measure the height and width of the wall precisely.
- Note any doors, windows, or outlets on the wall.
- Calculate total square footage to estimate panel quantity.
- Allow extra material for cuts and mistakes.
Record measurements twice to avoid errors. Proper planning makes installation smooth.
Tools And Materials Needed
Getting your hands on the right tools and materials sets you up for a smooth installation of 3D textured wall panels. Missing just one essential item can slow you down or even damage your panels. Being prepared means less frustration and a better-looking wall.
Essential Tools
Start with a reliable measuring tape to ensure precise panel placement. A level helps keep everything straight, which is crucial for a professional finish. You’ll also need a utility knife or a fine-tooth saw to trim panels to fit edges or corners perfectly.
Don’t forget a pencil for marking, and a stud finder if you plan to anchor panels to your wall studs. A sanding block can smooth any rough edges after cutting. Having a clean, damp cloth nearby helps wipe away dust before applying adhesive.
Adhesives And Fasteners
Choosing the right adhesive depends on your wall type and panel material. Construction adhesive designed for wall panels works well for most surfaces and ensures a strong bond. Some panels may also require finishing nails or screws, especially if they are heavier or installed on uneven walls.
Consider using a combination of adhesive and fasteners for extra security. If you’re unsure which adhesive suits your project, check the panel manufacturer’s recommendations. Would you want your panels to fall off a week after installation? Picking the right adhesive prevents that risk.
Safety Gear
Protecting yourself is non-negotiable. Safety goggles shield your eyes from dust and accidental splinters during cutting. Gloves protect your hands from sharp edges and adhesives that can irritate your skin.
Wear a dust mask, especially if sanding or cutting panels made from materials that produce fine dust. A simple safety precaution can save you from coughing fits and long-term respiratory issues. Do you have your safety gear ready? It’s worth the few extra minutes to put it on before you start.
Preparing The Wall Surface
Ensure the wall is clean, dry, and smooth before installation. Remove any dirt, dust, or loose paint for better panel adhesion. Filling holes and sanding rough spots creates an even surface for the panels.
Preparing the wall surface is crucial for installing 3D textured wall panels. A smooth, clean wall ensures the panels adhere properly. Follow these steps to get your wall ready.Cleaning And Repairing
Start with a thorough cleaning of the wall. Remove dust, dirt, and grease. Use a mild detergent and water solution. Rinse well and let it dry. Inspect the wall for cracks or holes. Use a patching compound to fill them. Sand the patched areas until smooth.Priming The Wall
After cleaning, apply a primer to the wall. Choose a primer suitable for your wall type. This step helps the adhesive bond better. Apply the primer evenly with a roller or brush. Allow it to dry completely before proceeding.Marking Layout Lines
Use a measuring tape and level to mark layout lines. Start at the center of the wall for a balanced look. Draw horizontal and vertical lines as guides. These lines ensure even panel placement. Double-check your measurements for accuracy.Cutting And Fitting Panels
Cutting and fitting 3D textured wall panels is a crucial part of the installation process. It ensures the panels fit perfectly on your walls and create a seamless look. Proper cutting and fitting help avoid gaps and uneven edges. This step requires careful measurement and precise cutting techniques.
Measuring And Marking Panels
Start by measuring the wall space where the panels will go. Use a tape measure to get accurate dimensions. Mark the panels with a pencil to guide your cuts. Double-check measurements before cutting. Mark clearly to avoid mistakes during cutting.
Cutting Techniques
Use a fine-toothed saw or utility knife for cutting panels. Cut slowly and steadily along the marked lines. For curved or irregular edges, a jigsaw works well. Always wear safety goggles and gloves. Smooth rough edges with sandpaper for a clean finish.
Test Fitting
Place the cut panels on the wall without fixing them. Check for gaps or uneven edges. Adjust the panels by trimming if needed. Ensure the panels align well with each other. Test fitting saves time and prevents installation errors.
Installing The Panels
Installing 3D textured wall panels can transform your space quickly and with minimal hassle. The key lies in careful handling during each stage of the installation to ensure the panels stick well and look flawless. Let’s break down how you can get those panels securely on your wall with confidence and ease.
Applying Adhesive
Choose an adhesive that works well with your panel material and the wall surface. Most manufacturers recommend a strong construction adhesive or panel adhesive specifically designed for 3D wall panels.
Apply the adhesive evenly on the back of the panel in a zigzag or dot pattern. Avoid smearing it too thin or too thick; you want enough to hold but not so much that it seeps out when pressed.
Have a damp cloth ready to quickly wipe off any excess adhesive that squeezes out. This keeps the edges clean and your final look sharp.
Positioning Panels
Before sticking the panel, hold it against the wall to double-check alignment and spacing. This practice helps avoid mistakes that are hard to fix later.
Mark light pencil lines on your wall for guidance—straight lines make a huge difference in how professional the final installation looks.
Think about the direction of light and how shadows will play on the textured surface. Position panels to maximize the 3D effect and enhance your room’s character.
Securing Panels In Place
Press the panel firmly against the wall, starting from the center and moving toward the edges. This prevents air pockets and ensures good contact with the adhesive.
Use painter’s tape to hold panels in place while the adhesive sets. It’s a simple trick that keeps everything steady without damaging the surface.
If your panels come with additional fastening options like nails or clips, use them for extra security—especially on ceilings or high-traffic areas.
Have you noticed how a few minutes of extra care during installation can save hours of fixing errors later? Taking your time here pays off in a stunning final result.

Credit: dundeedeco.com
Finishing Touches
Finishing touches bring your 3D textured wall panels to life. They hide imperfections and protect the surface. These final steps make your wall look neat and complete. Careful attention here boosts the panel’s durability and beauty.
Filling Gaps And Seams
Check for small gaps between panels. Use a paintable caulk or filler to seal them. Smooth the filler with a putty knife for a clean look. Let it dry fully before moving on. Filling gaps stops dust and moisture from entering.
Painting Or Sealing
Choose a paint or sealer that fits your panel material. Use a brush or roller for even coverage. Apply thin coats to avoid drips and uneven surfaces. Allow each coat to dry before adding another. Painting enhances color and protects against wear.
Cleaning Up
Remove any dust or debris from the installation area. Use a soft cloth to wipe the panels gently. Clean tools and dispose of leftover materials properly. Keep the area tidy to highlight your new wall design. A clean finish shows off your work best.
Maintenance Tips
Maintaining your 3D textured wall panels ensures they stay vibrant and intact for years. Simple care routines can prevent damage and keep the panels looking fresh. Let’s dive into some practical tips you can use to protect your investment.
Regular Cleaning
Dust and dirt can easily settle into the grooves of textured panels, dulling their appearance. Use a soft microfiber cloth or a vacuum cleaner with a brush attachment to gently remove dust weekly.
If you spot stains, a mild soap solution with a damp cloth works well. Avoid harsh chemicals that might damage the panel’s surface or alter its color.
Repairing Damage
Accidental bumps can cause chips or cracks. Keep some matching filler or putty handy to quickly fix minor damages before they worsen.
For larger cracks, sanding the edges smooth and repainting the area can blend the repair seamlessly. Have you ever ignored a small crack only to find it expanded? Acting fast saves you time and money.
Longevity Tips
Protect your panels from direct sunlight to prevent fading over time. Using curtains or UV-protective window films can help manage exposure.
Control indoor humidity to avoid warping or swelling. A humidifier or dehumidifier keeps conditions stable, especially in areas prone to moisture.
Consider applying a clear sealant designed for your panel material. This extra layer shields against stains and wear without altering the look.

Credit: dundeedeco.com

Credit: dundeedeco.com
Frequently Asked Questions
What Tools Do I Need To Install 3d Wall Panels?
You need a measuring tape, level, adhesive, utility knife, and a saw. Optional tools include a pencil and safety gear. These tools help ensure precise and safe installation of 3D textured wall panels.
How Do I Prepare The Wall Before Panel Installation?
Clean the wall surface thoroughly to remove dust and grease. Ensure the wall is dry and smooth. Fill any holes or cracks to create an even base for panel adhesion.
Can I Install 3d Panels On Any Wall Type?
Yes, 3D panels work on drywall, concrete, brick, and wood surfaces. However, ensure the surface is clean and structurally sound. Some walls may need extra preparation for better adhesion.
How Long Does It Take To Install 3d Wall Panels?
Installation time varies with wall size and panel type. Typically, a small room takes 2 to 4 hours. Proper planning and tool readiness can speed up the process.
Conclusion
Installing 3D textured wall panels adds depth to any room. Follow each step carefully for the best results. Use the right tools and materials to avoid mistakes. Take your time to measure and align panels correctly. Cleaning the surface well helps panels stick better.
Enjoy the fresh look that these panels create. Now, your walls have a unique, stylish touch. Simple changes can make a big difference in your space. Give your room a new feel with this easy project.


